Homemade Eggnog: the very words conjure up images of crackling fireplaces, twinkling lights, and the warm embrace of the holiday season. Forget the store-bought stuff we’re diving headfirst into a creamy, dreamy concoction that will redefine your festive celebrations. Have you ever tasted eggnog so rich and decadent, it felt like a liquid hug? That’s precisely what we’re aiming for!
Eggnog, with its roots tracing back to medieval Britain, was originally a drink enjoyed by the aristocracy, featuring ingredients like sherry and spices that were symbols of wealth. Over time, it evolved, making its way across the Atlantic and becoming a beloved Christmas tradition in North America. The addition of rum or bourbon further cemented its place as a celebratory beverage.
But what is it about homemade eggnog that makes it so irresistible? It’s the velvety smooth texture, the intoxicating blend of spices like nutmeg and cinnamon, and the sheer indulgence of a drink that’s both comforting and celebratory. People adore it because it’s a taste of nostalgia, a reminder of cherished memories, and a guaranteed crowd-pleaser at any holiday gathering. Plus, when you make it from scratch, you control the quality of ingredients, ensuring a truly exceptional and unforgettable experience. So, let’s get started and create some holiday magic!
Ingredients:
- 6 large eggs, separated
- ¾ cup granulated sugar, divided in half
- 3 cups whole milk
- 1 cup heavy cream
- 3 ounces bourbon (or rum, or brandy, or a combination your preference!)
- 1 teaspoon freshly grated nutmeg, plus more for garnish
- ½ teaspoon vanilla extract
- Pinch of salt
Preparing the Egg Yolk Base:
Alright, let’s get started! The first step is creating the rich and creamy base for our eggnog. This involves separating the eggs and working with the yolks first. Don’t worry, it’s easier than it sounds!
- Separate the Eggs: Carefully separate the egg yolks from the whites. Place the yolks in a large mixing bowl and the whites in a separate, clean bowl. Make sure absolutely no yolk gets into the whites, as this will prevent them from whipping properly later on. I usually crack each egg individually into a small bowl first, then transfer the yolk to the large bowl and the white to the other. This way, if I accidentally break a yolk, I don’t ruin the whole batch of whites.
- Whisk Yolks and Sugar: Add half of the granulated sugar (that’s ? cup) to the egg yolks. Using an electric mixer (a stand mixer is great if you have one, but a hand mixer works just as well), beat the yolks and sugar together on medium-high speed until the mixture becomes pale yellow and thick. This usually takes about 3-5 minutes. You’ll notice the mixture will ribbon when you lift the beaters that’s how you know it’s ready. This step is crucial because it incorporates air into the yolks, creating a light and airy base for the eggnog.
- Temper the Milk: In a medium saucepan, combine the whole milk and the heavy cream. Heat the mixture over medium heat, stirring occasionally, until it just begins to simmer. You’ll see small bubbles forming around the edges of the pan. Be careful not to let it boil! Boiling the milk can cause it to scald and ruin the flavor.
- Temper the Egg Yolks: This is a very important step to prevent the egg yolks from curdling. Slowly drizzle about ½ cup of the hot milk mixture into the egg yolk mixture while continuously whisking. This gradually raises the temperature of the yolks, preventing them from cooking too quickly and scrambling.
- Combine and Cook: Pour the tempered egg yolk mixture back into the saucepan with the remaining milk mixture. Cook over low heat, stirring constantly with a wooden spoon or heat-resistant spatula, until the mixture thickens enough to coat the back of the spoon. This usually takes about 5-7 minutes. To test for doneness, dip the back of a spoon into the mixture and run your finger across the coated spoon. If the line remains distinct and doesn’t run back together, the mixture is ready. Again, be careful not to let it boil! If you see any signs of curdling, immediately remove the pan from the heat and whisk vigorously.
- Strain the Mixture: Pour the cooked egg yolk mixture through a fine-mesh sieve into a clean bowl. This will remove any lumps or cooked egg particles, resulting in a perfectly smooth and creamy eggnog base.
- Cool the Base: Cover the bowl with plastic wrap, pressing it directly onto the surface of the eggnog base to prevent a skin from forming. Refrigerate for at least 4 hours, or preferably overnight, to allow the flavors to meld and the mixture to cool completely. This chilling time is essential for achieving the best flavor and texture.
Preparing the Meringue:
Now, let’s move on to the meringue! This adds lightness and airiness to the eggnog, making it extra special. Don’t be intimidated with a few tips, you’ll be whipping up perfect meringue in no time.
- Whip the Egg Whites: In the bowl with the egg whites (make sure it’s clean and grease-free!), add a pinch of salt. Using an electric mixer, beat the egg whites on medium speed until soft peaks form. Soft peaks are when the whites hold their shape but the tips droop slightly when you lift the beaters.
- Gradually Add Sugar: Gradually add the remaining granulated sugar (the other ? cup) to the egg whites, about a tablespoon at a time, while continuing to beat on medium-high speed. Beat until stiff, glossy peaks form. Stiff peaks are when the whites hold their shape firmly and the tips stand straight up when you lift the beaters. Be careful not to overbeat, as this can cause the meringue to become dry and grainy.
Combining and Finishing:
We’re almost there! Now it’s time to combine the egg yolk base and the meringue, and add the final touches that make this eggnog truly irresistible.
- Fold in the Meringue: Gently fold the meringue into the chilled egg yolk base. Use a rubber spatula and fold in a figure-eight motion, being careful not to deflate the meringue. This step is crucial for maintaining the light and airy texture of the eggnog.
- Add the Alcohol: Stir in the bourbon (or rum, or brandy, or your preferred combination of spirits). Start with the recommended amount and adjust to your taste. Remember, you can always add more, but you can’t take it away!
- Add Vanilla and Nutmeg: Stir in the vanilla extract and freshly grated nutmeg. The nutmeg adds a warm and festive flavor that is essential to eggnog.
- Chill Again: Cover the eggnog and refrigerate for at least another hour to allow the flavors to fully meld. This final chilling period will also help the eggnog thicken slightly.
Serving and Enjoying:
Finally, the moment we’ve all been waiting for! It’s time to serve and enjoy your homemade eggnog. Here are a few tips for serving:
- Serve Cold: Eggnog is best served ice cold. You can chill your serving glasses in the freezer for a few minutes before serving to keep the eggnog extra cold.
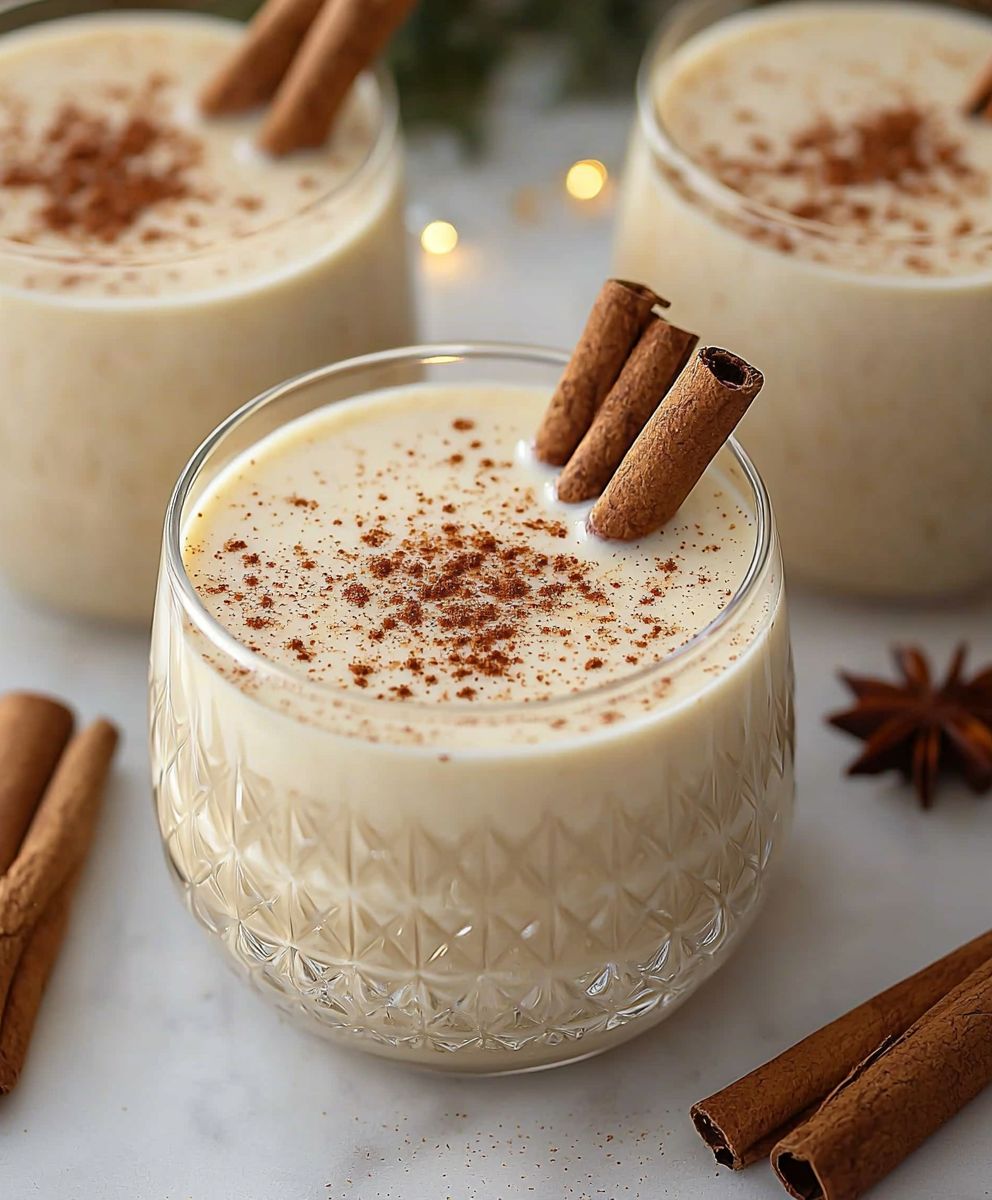
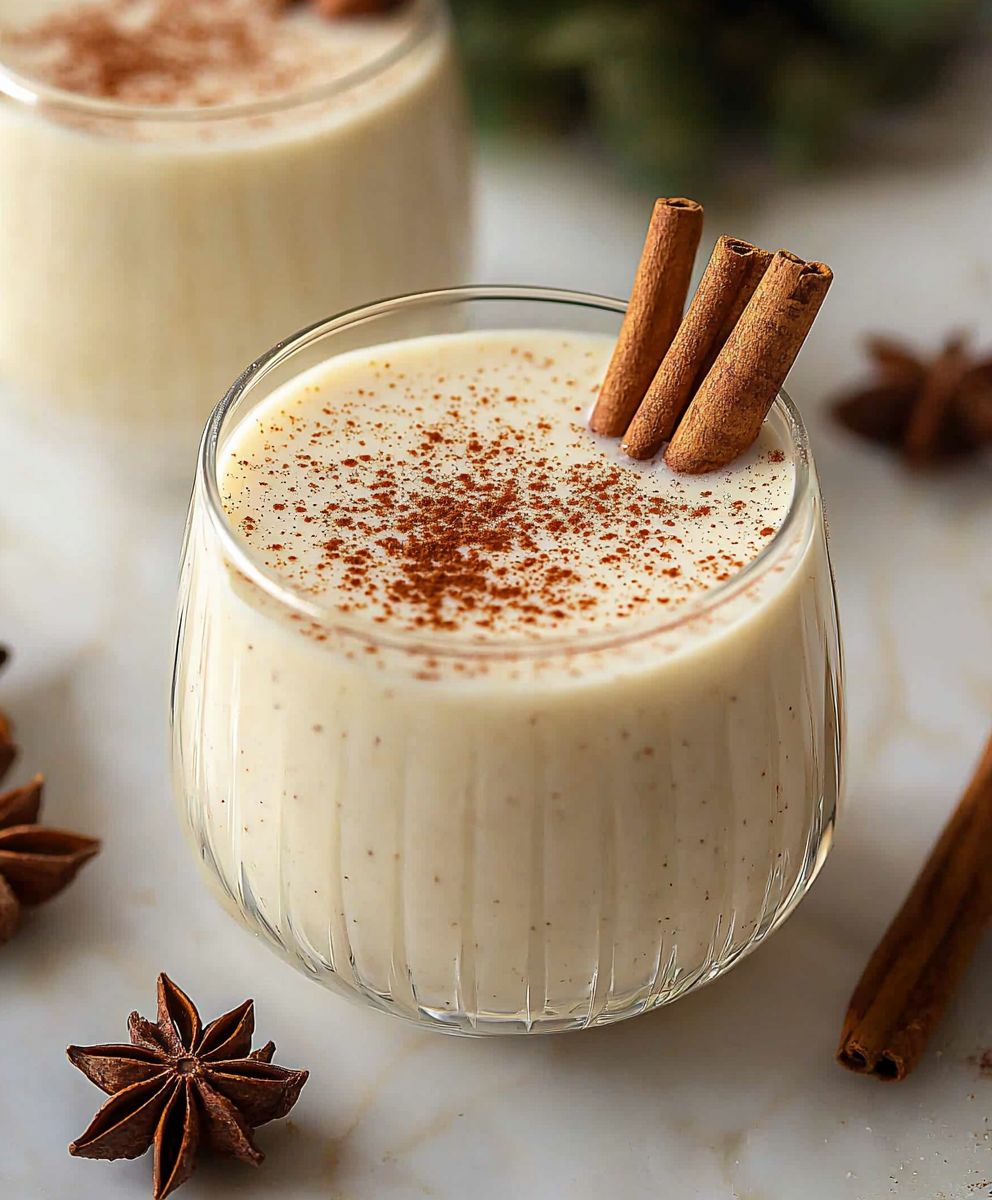
- Garnish: Garnish each serving with a sprinkle of freshly grated nutmeg. You can also add a cinnamon stick or a star anise for an extra touch of festive flair.
- Optional Toppings: Some people like to add a dollop of whipped cream or a sprinkle of chocolate shavings to their eggnog. Feel free to experiment and find your favorite toppings!
- Storage: Homemade eggnog will keep in the refrigerator for up to 3 days. Be sure to store it in an airtight container to prevent it from absorbing any odors from the refrigerator.
Important Notes:
Food Safety: This recipe contains raw eggs. While the alcohol helps to inhibit bacterial growth, it’s important to use fresh, high-quality eggs and to chill the eggnog properly. If you are concerned about using raw eggs, you can pasteurize them by heating the egg yolk mixture to 160°F (71°C) before chilling. Use a thermometer to ensure accurate temperature. However, be very careful not to overheat the mixture, as this will cause the eggs to curdle.
Alcohol Content: The amount of alcohol in this recipe can be adjusted to your preference. If you prefer a non-alcoholic version, simply omit the alcohol. You can also substitute the alcohol with a non-alcoholic extract, such as rum extract or brandy extract.
Variations: There are many variations of eggnog. Some people like to add spices like cinnamon, cloves, or allspice. Others like to use different types of milk, such as almond milk or coconut milk. Feel free to experiment and create your own unique version of eggnog!
Enjoy responsibly!
Conclusion:
So, there you have it! This homemade eggnog recipe isn’t just another holiday drink; it’s a creamy, dreamy experience that will transport you straight to a cozy winter wonderland. I truly believe that once you taste the difference between this and the store-bought stuff, you’ll never go back. The richness, the spice, the sheer indulgence it’s all just on another level. But why is this recipe a must-try? Well, beyond the superior flavor, it’s about creating something special. It’s about taking the time to craft a drink that’s made with love and care, a drink that you can proudly share with your family and friends. It’s about embracing the spirit of the season and savoring every single sip. Plus, let’s be honest, knowing exactly what goes into your eggnog is a huge bonus! No weird preservatives or artificial flavors here, just pure, wholesome goodness. And the best part? This recipe is incredibly versatile! While I personally love it served chilled in a fancy glass with a sprinkle of nutmeg, there are so many ways to customize it to your liking. For a non-alcoholic version, simply omit the rum and bourbon. You can also experiment with different spices a pinch of cardamom or a dash of allspice can add a unique twist. If you’re feeling adventurous, try infusing your milk with vanilla beans or citrus zest for an extra layer of flavor. Serving suggestions? Oh, the possibilities are endless! This homemade eggnog is fantastic on its own, but it also pairs beautifully with holiday desserts. Imagine sipping it alongside a slice of warm apple pie or a plate of gingerbread cookies. You could even use it as a base for a festive cocktail a splash of coffee liqueur or a swirl of chocolate syrup would be divine. And for a truly decadent treat, try drizzling it over French toast or pancakes. Trust me, you won’t regret it! Don’t be intimidated by the thought of making your own eggnog. This recipe is surprisingly easy to follow, and the results are well worth the effort. Just gather your ingredients, follow the instructions carefully, and get ready to impress everyone with your newfound bartending skills. I’m so excited for you to try this recipe and experience the magic of homemade eggnog for yourself. It’s a tradition that I cherish, and I hope it becomes one that you and your loved ones will enjoy for years to come. So, what are you waiting for? Head to the kitchen, put on some holiday music, and get ready to create something truly special. And please, don’t forget to share your experience with me! I’d love to hear how it turned out, what variations you tried, and what your family and friends thought. You can leave a comment below, tag me on social media, or even send me an email. I can’t wait to see your creations! Happy eggnog-making! I am sure that this homemade eggnog will become a staple in your household. Print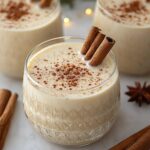
Homemade Eggnog: The Ultimate Holiday Recipe
- Total Time: 285 minutes
- Yield: 8 servings 1x
Description
Rich, creamy, and festive homemade eggnog made with fresh eggs, milk, cream, bourbon, and a hint of nutmeg. A classic holiday treat!
Ingredients
- 6 large eggs, separated
- ¾ cup granulated sugar, divided in half (3/8 cup for yolks, 3/8 cup for whites)
- 3 cups whole milk
- 1 cup heavy cream
- 3 ounces bourbon (or rum, or brandy, or a combination your preference!)
- 1 teaspoon freshly grated nutmeg, plus more for garnish
- ½ teaspoon vanilla extract
- Pinch of salt
Instructions
- Carefully separate the egg yolks from the whites. Place the yolks in a large mixing bowl and the whites in a separate, clean bowl.
- Add half of the granulated sugar (3/8 cup) to the egg yolks. Using an electric mixer, beat the yolks and sugar together on medium-high speed until the mixture becomes pale yellow and thick (3-5 minutes).
- In a medium saucepan, combine the whole milk and the heavy cream. Heat the mixture over medium heat, stirring occasionally, until it just begins to simmer. Be careful not to let it boil!
- Slowly drizzle about ½ cup of the hot milk mixture into the egg yolk mixture while continuously whisking.
- Pour the tempered egg yolk mixture back into the saucepan with the remaining milk mixture. Cook over low heat, stirring constantly with a wooden spoon or heat-resistant spatula, until the mixture thickens enough to coat the back of the spoon (5-7 minutes). Be careful not to let it boil!
- Pour the cooked egg yolk mixture through a fine-mesh sieve into a clean bowl.
- Cover the bowl with plastic wrap, pressing it directly onto the surface of the eggnog base to prevent a skin from forming. Refrigerate for at least 4 hours, or preferably overnight, to allow the flavors to meld and the mixture to cool completely.
- In the bowl with the egg whites (make sure it’s clean and grease-free!), add a pinch of salt. Using an electric mixer, beat the egg whites on medium speed until soft peaks form.
- Gradually add the remaining granulated sugar (3/8 cup) to the egg whites, about a tablespoon at a time, while continuing to beat on medium-high speed. Beat until stiff, glossy peaks form. Be careful not to overbeat.
- Gently fold the meringue into the chilled egg yolk base. Use a rubber spatula and fold in a figure-eight motion, being careful not to deflate the meringue.
- Stir in the bourbon (or rum, or brandy, or your preferred combination of spirits). Start with the recommended amount and adjust to your taste.
- Stir in the vanilla extract and freshly grated nutmeg.
- Cover the eggnog and refrigerate for at least another hour to allow the flavors to fully meld.
- Eggnog is best served ice cold.
- Garnish each serving with a sprinkle of freshly grated nutmeg.
- Some people like to add a dollop of whipped cream or a sprinkle of chocolate shavings to their eggnog.
- Homemade eggnog will keep in the refrigerator for up to 3 days. Be sure to store it in an airtight container.
Notes
- Food Safety: This recipe contains raw eggs. Use fresh, high-quality eggs and chill the eggnog properly. If concerned, pasteurize the egg yolk mixture by heating to 160°F (71°C) before chilling.
- Alcohol Content: Adjust the amount of alcohol to your preference. Omit for a non-alcoholic version or substitute with non-alcoholic extracts.
- Variations: Experiment with spices like cinnamon, cloves, or allspice. Use different types of milk like almond or coconut milk.
- Prep Time: 30 minutes
- Cook Time: 15 minutes