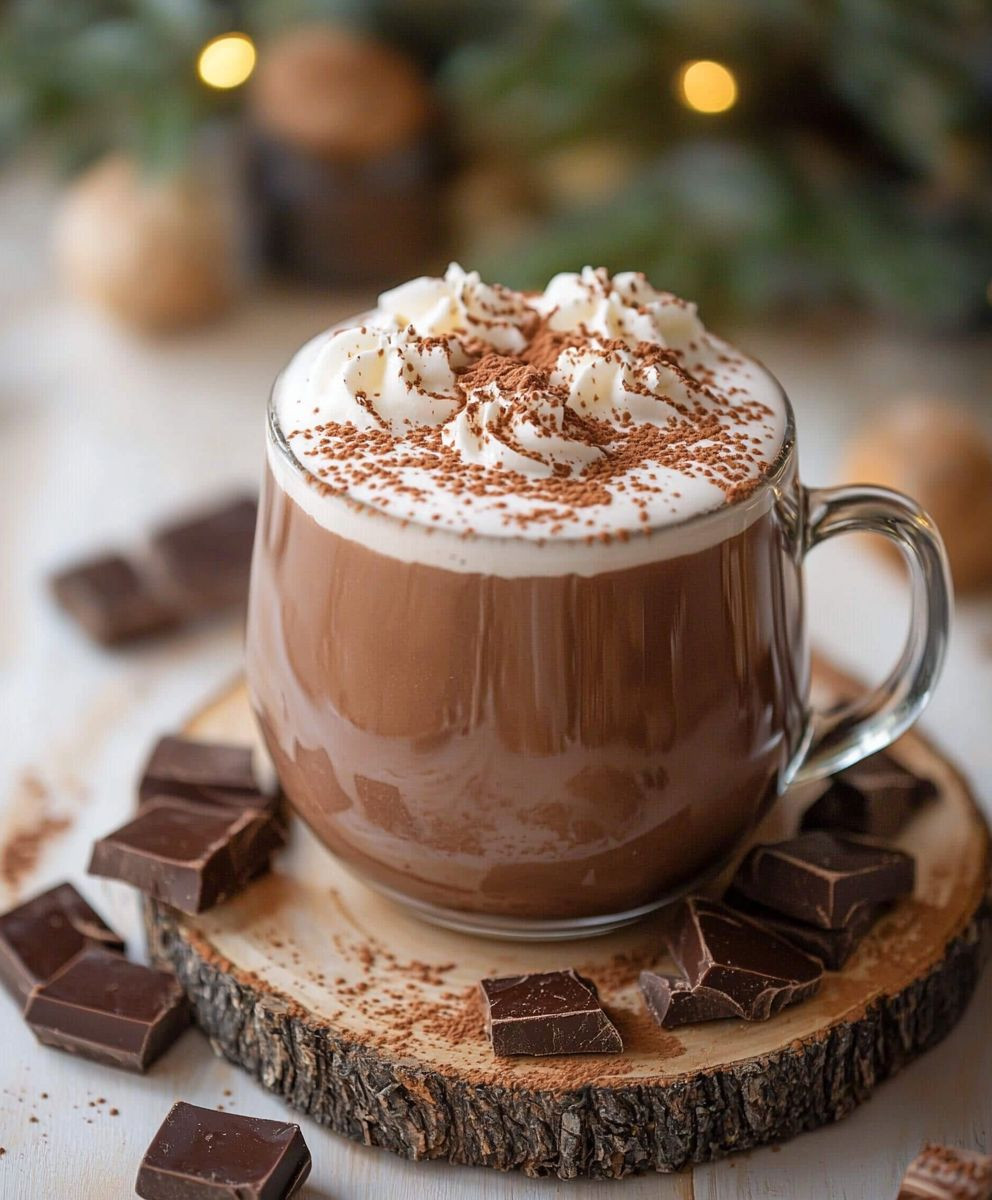
Hot Chocolate Homemade, is there anything that evokes a sense of cozy comfort quite like it? Imagine this: a chilly evening, a crackling fireplace, and a steaming mug of rich, decadent hot chocolate warming your hands and soul. Forget the powdered mixes we’re talking about the real deal, a velvety smooth, intensely chocolatey experience that will redefine your definition of the perfect winter beverage.
The history of hot chocolate stretches back centuries, originating with the ancient Mayans and Aztecs who revered cacao beans as a sacred and valuable commodity. They consumed it as a bitter, spiced drink, a far cry from the sweet treat we know today. Over time, it evolved, making its way to Europe and eventually becoming the beloved beverage enjoyed worldwide.
But why do we love it so much? It’s more than just a drink; it’s an experience. The luxurious texture, the intense chocolate flavor, and the comforting warmth all combine to create a sensory delight. And the best part? Making Hot Chocolate Homemade is surprisingly easy! It’s a simple pleasure that brings joy to both young and old, perfect for a quiet night in or a festive gathering. So, ditch the instant packets and let’s embark on a journey to create the ultimate homemade hot chocolate that will warm you from the inside out.
Ingredients:
- 6 cups whole milk (for a richer flavor, you can use half-and-half or a combination of milk and cream)
- 1 cup heavy cream (optional, but highly recommended for extra creaminess)
- 8 ounces bittersweet chocolate, finely chopped (aim for 60-70% cacao for a balanced flavor)
- 4 ounces milk chocolate, finely chopped (this adds sweetness and a smoother texture)
- 1/4 cup unsweetened cocoa powder (Dutch-processed cocoa powder will give a deeper, richer chocolate flavor)
- 1/4 cup granulated sugar (adjust to your preference, depending on the sweetness of your chocolate)
- 1 teaspoon vanilla extract (enhances the chocolate flavor)
- 1/4 teaspoon salt (balances the sweetness and brings out the chocolate flavor)
- Optional toppings: whipped cream, marshmallows, chocolate shavings, a sprinkle of cinnamon, peppermint sticks
Preparing the Chocolate Base:
- Combine the Dry Ingredients: In a medium-sized saucepan, whisk together the unsweetened cocoa powder, granulated sugar, and salt. This ensures that the cocoa powder is evenly distributed and prevents clumps from forming later on.
- Add a Splash of Milk: Pour in about 1/2 cup of the whole milk into the saucepan with the dry ingredients. Whisk vigorously until you form a smooth, dark paste. This step is crucial because it helps to bloom the cocoa powder, intensifying its flavor and preventing it from clumping when you add the remaining milk.
- Melt the Chocolate: Add the finely chopped bittersweet and milk chocolate to the cocoa paste. The finer you chop the chocolate, the faster and more evenly it will melt.
- Gentle Heat is Key: Place the saucepan over low heat. Stir constantly with a whisk or a spatula, making sure to scrape the bottom and sides of the pan to prevent the chocolate from scorching. Continue stirring until the chocolate is completely melted and the mixture is smooth and glossy. This process might take a few minutes, so be patient and don’t rush it.
Heating and Combining the Ingredients:
- Add the Remaining Milk and Cream: Gradually pour in the remaining whole milk and the heavy cream (if using) into the saucepan. Continue whisking constantly to incorporate the liquids into the chocolate mixture.
- Heat Gently: Increase the heat to medium-low. You want to heat the hot chocolate gently, allowing the flavors to meld together without scalding the milk. Avoid bringing the mixture to a boil, as this can cause the milk to curdle and affect the texture of the hot chocolate.
- Stir Frequently: Stir the hot chocolate frequently, especially as it heats up. This prevents a skin from forming on the surface and ensures that the chocolate is evenly distributed throughout the milk.
- Reach the Perfect Temperature: Continue heating and stirring until the hot chocolate is heated through and reaches your desired temperature. It should be steaming hot but not boiling. A good target temperature is around 150-160°F (65-70°C).
- Incorporate the Vanilla Extract: Once the hot chocolate is heated through, remove the saucepan from the heat and stir in the vanilla extract. The vanilla extract enhances the chocolate flavor and adds a touch of warmth to the drink.
Serving and Enjoying Your Homemade Hot Chocolate:
- Whisk for Extra Smoothness: For an extra smooth and frothy hot chocolate, you can use an immersion blender or a regular blender to briefly blend the mixture. Be careful when blending hot liquids, as they can create pressure and cause splattering. If using a regular blender, remove the center piece of the lid and cover the opening with a towel to allow steam to escape.
- Pour and Garnish: Pour the hot chocolate into mugs. Now comes the fun part: adding your favorite toppings!
- Add Your Favorite Toppings: Top with whipped cream, marshmallows, chocolate shavings, a sprinkle of cinnamon, or a peppermint stick. Get creative and customize your hot chocolate to your liking!
- Serve Immediately: Serve your homemade hot chocolate immediately and enjoy! It’s the perfect cozy drink for a cold day.
Tips and Variations:
- Adjust the Sweetness: Taste the hot chocolate before serving and adjust the amount of sugar to your preference. If you prefer a less sweet hot chocolate, you can reduce the amount of sugar or use a darker chocolate with a higher cacao percentage.
- Spice it Up: For a spicy kick, add a pinch of cayenne pepper or a cinnamon stick to the hot chocolate while it’s heating.
- Peppermint Hot Chocolate: Add a few drops of peppermint extract or crush a candy cane and stir it into the hot chocolate for a festive peppermint flavor.
- Salted Caramel Hot Chocolate: Drizzle caramel sauce and a sprinkle of sea salt over the whipped cream for a decadent salted caramel hot chocolate.
- Mexican Hot Chocolate: Add a pinch of cinnamon and a pinch of chili powder to the hot chocolate for a warm and spicy Mexican-inspired flavor.
- Vegan Hot Chocolate: Use plant-based milk, such as almond milk, soy milk, or oat milk, and vegan chocolate to make a vegan version of this recipe.
- Make it Ahead: You can prepare the chocolate base ahead of time and store it in the refrigerator for up to 3 days. When ready to serve, simply heat the base with the milk and cream.
- Slow Cooker Hot Chocolate: For a large batch of hot chocolate, you can make it in a slow cooker. Combine all of the ingredients in the slow cooker and cook on low for 2-3 hours, stirring occasionally, until the chocolate is melted and the mixture is heated through.
Choosing the Right Chocolate:
The type of chocolate you use will greatly impact the flavor of your hot chocolate. I recommend using a combination of bittersweet and milk chocolate for a balanced flavor. Bittersweet chocolate provides a rich, intense chocolate flavor, while milk chocolate adds sweetness and creaminess. Aim for a bittersweet chocolate with a cacao percentage of 60-70% for the best results. You can also experiment with different types of chocolate, such as dark chocolate, semi-sweet chocolate, or even white chocolate, to create your own unique hot chocolate flavor.
The Importance of Quality Ingredients:
Using high-quality ingredients will make a big difference in the taste of your homemade hot chocolate. Choose good-quality chocolate, fresh milk, and pure vanilla extract for the best results. While it might be tempting to use cheaper ingredients, the difference in flavor will be noticeable. Investing in quality ingredients is worth it for a truly delicious and satisfying cup of hot chocolate.
Troubleshooting Tips:
- Lumpy Hot Chocolate: If your hot chocolate is lumpy, it’s likely due to the cocoa powder not being properly bloomed. Make sure to whisk the cocoa powder with a small amount of milk to form a smooth paste before adding the remaining milk. You can also try using an immersion blender to smooth out any lumps.
- Thin Hot Chocolate: If your hot chocolate is too thin, you can thicken it by adding a cornstarch slurry (1 tablespoon cornstarch mixed with 2 tablespoons cold water) to the saucepan while it’s heating. Stir constantly until the hot chocolate thickens.
- Hot Chocolate is Too Sweet: If your hot chocolate is too sweet, you can balance the sweetness by adding a pinch of salt or a squeeze of lemon juice.
- Hot Chocolate is Not Sweet Enough: If your hot chocolate is not sweet enough, you can add more sugar or a drizzle of honey or maple syrup.
Storage Instructions:
If you have leftover hot chocolate, you can store it in an airtight container in the refrigerator for up to 3 days. Reheat gently on the stovetop or in the microwave before serving. You may need to whisk the hot chocolate to recombine the ingredients after it has been refrigerated.
Why Homemade Hot Chocolate is Better:
While store-bought hot chocolate mixes are convenient, nothing beats the taste of homemade hot chocolate. When you make hot chocolate from scratch, you have complete control over the ingredients and can customize the flavor to your liking. Homemade hot chocolate is also richer, creamier, and more flavorful than store-bought mixes. Plus, it’s a fun and rewarding experience to make your own

Conclusion:
This isn’t just any hot chocolate; it’s an experience. It’s a warm hug on a chilly day, a sweet reward after a long week, and a delightful treat to share with loved ones. I truly believe this homemade hot chocolate recipe is a must-try for anyone who appreciates the simple pleasures in life. The rich, velvety texture and the deep, satisfying chocolate flavor are simply unmatched by anything you can buy in a store. It’s the kind of drink that makes you close your eyes and savor every single sip. But the best part? It’s incredibly versatile! While it’s absolutely divine as is, there are so many ways to customize it to your own personal preferences.Serving Suggestions and Variations:
* For the Peppermint Lover: Add a few drops of peppermint extract or crush some candy canes and sprinkle them on top. A peppermint stick makes a great stirrer, too! * Spice it Up: A pinch of cinnamon, nutmeg, or even a tiny dash of cayenne pepper can add a wonderful warmth and complexity to the flavor. * Make it Mocha: Stir in a shot of espresso for a caffeinated kick and a delicious mocha flavor. * Go Vegan: Easily adapt this recipe by using your favorite plant-based milk (almond, oat, or soy all work well) and vegan chocolate chips. * Adults Only: A splash of your favorite liqueur, like Baileys Irish Cream, Kahlua, or even a dark rum, can transform this into a sophisticated after-dinner drink. * Toppings Galore: Don’t be shy with the toppings! Marshmallows (mini or jumbo!), whipped cream, chocolate shavings, a drizzle of caramel sauce, or even a sprinkle of sea salt can elevate your hot chocolate to the next level. * Hot Chocolate Floats: For a truly decadent treat, add a scoop of vanilla ice cream to your hot chocolate. It’s like a dessert and a drink all in one! * Hot Chocolate Spoons: Make a batch of this recipe and pour it into ice cube trays. Once frozen, dip the cubes into melted chocolate and add sprinkles. Place a spoon into the cube before the chocolate hardens. Now you have hot chocolate on a spoon! * Hot Chocolate Bark: Pour the hot chocolate into a baking pan and add your favorite toppings. Freeze until solid and break into pieces for a delicious hot chocolate bark. I’ve poured my heart into perfecting this recipe, and I’m so excited for you to try it. I’m confident that it will become a new favorite in your household, just as it has in mine. It’s the perfect way to create cozy memories and share a little bit of happiness with the people you love. So, go ahead, gather your ingredients, and get ready to indulge in the most delicious homemade hot chocolate you’ve ever tasted. I can’t wait to hear what you think! Please, come back and leave a comment below to let me know how it turned out and what variations you tried. Did you add a special ingredient? Did you create a unique topping combination? I’m always looking for new ideas and inspiration, and I’d love to hear about your hot chocolate adventures! Happy sipping! Print
Hot Chocolate Homemade: The Ultimate Guide to Rich, Creamy Perfection
- Total Time: 20 minutes
- Yield: 6 servings 1x
Description
Rich and creamy homemade hot chocolate made with real chocolate, milk, and a touch of vanilla. The perfect treat for a cold day.
Ingredients
- 6 cups whole milk (for a richer flavor, you can use half-and-half or a combination of milk and cream)
- 1 cup heavy cream (optional, but highly recommended for extra creaminess)
- 8 ounces bittersweet chocolate, finely chopped (aim for 60-70% cacao for a balanced flavor)
- 4 ounces milk chocolate, finely chopped (this adds sweetness and a smoother texture)
- 1/4 cup unsweetened cocoa powder (Dutch-processed cocoa powder will give a deeper, richer chocolate flavor)
- 1/4 cup granulated sugar (adjust to your preference, depending on the sweetness of your chocolate)
- 1 teaspoon vanilla extract (enhances the chocolate flavor)
- 1/4 teaspoon salt (balances the sweetness and brings out the chocolate flavor)
- Optional toppings: whipped cream, marshmallows, chocolate shavings, a sprinkle of cinnamon, peppermint sticks
Instructions
- Combine Dry Ingredients: In a medium saucepan, whisk together cocoa powder, sugar, and salt.
- Add Milk Splash: Pour in about 1/2 cup milk and whisk vigorously until a smooth, dark paste forms.
- Melt Chocolate: Add chopped bittersweet and milk chocolate to the cocoa paste.
- Gentle Heat: Place saucepan over low heat. Stir constantly until chocolate is completely melted and smooth.
- Add Remaining Milk and Cream: Gradually pour in remaining milk and heavy cream (if using), whisking constantly.
- Heat Gently: Increase heat to medium-low. Heat gently, stirring frequently, until steaming hot (around 150-160°F/65-70°C) but not boiling.
- Incorporate Vanilla: Remove from heat and stir in vanilla extract.
- Whisk for Smoothness (Optional): For extra smoothness, use an immersion blender or regular blender briefly (be careful with hot liquids!).
- Pour and Garnish: Pour into mugs and top with your favorite toppings.
- Serve Immediately: Enjoy!
Notes
- Adjust Sweetness: Taste and adjust sugar to your preference.
- Spice it Up: Add a pinch of cayenne pepper or a cinnamon stick while heating.
- Peppermint Hot Chocolate: Add peppermint extract or crushed candy cane.
- Salted Caramel Hot Chocolate: Drizzle caramel sauce and sea salt over whipped cream.
- Mexican Hot Chocolate: Add cinnamon and chili powder.
- Vegan Hot Chocolate: Use plant-based milk and vegan chocolate.
- Make Ahead: Prepare chocolate base ahead and store in refrigerator for up to 3 days.
- Slow Cooker Hot Chocolate: Combine all ingredients in slow cooker and cook on low for 2-3 hours, stirring occasionally.
- Lumpy Hot Chocolate: Whisk cocoa powder with milk to form a smooth paste before adding the remaining milk.
- Thin Hot Chocolate: Thicken by adding a cornstarch slurry (1 tablespoon cornstarch mixed with 2 tablespoons cold water) to the saucepan while it’s heating.
- Hot Chocolate is Too Sweet: Balance the sweetness by adding a pinch of salt or a squeeze of lemon juice.
- Hot Chocolate is Not Sweet Enough: Add more sugar or a drizzle of honey or maple syrup.
- Storage Instructions: Store leftover hot chocolate in an airtight container in the refrigerator for up to 3 days. Reheat gently on the stovetop or in the microwave before serving.
- Prep Time: 5 minutes
- Cook Time: 15 minutes


