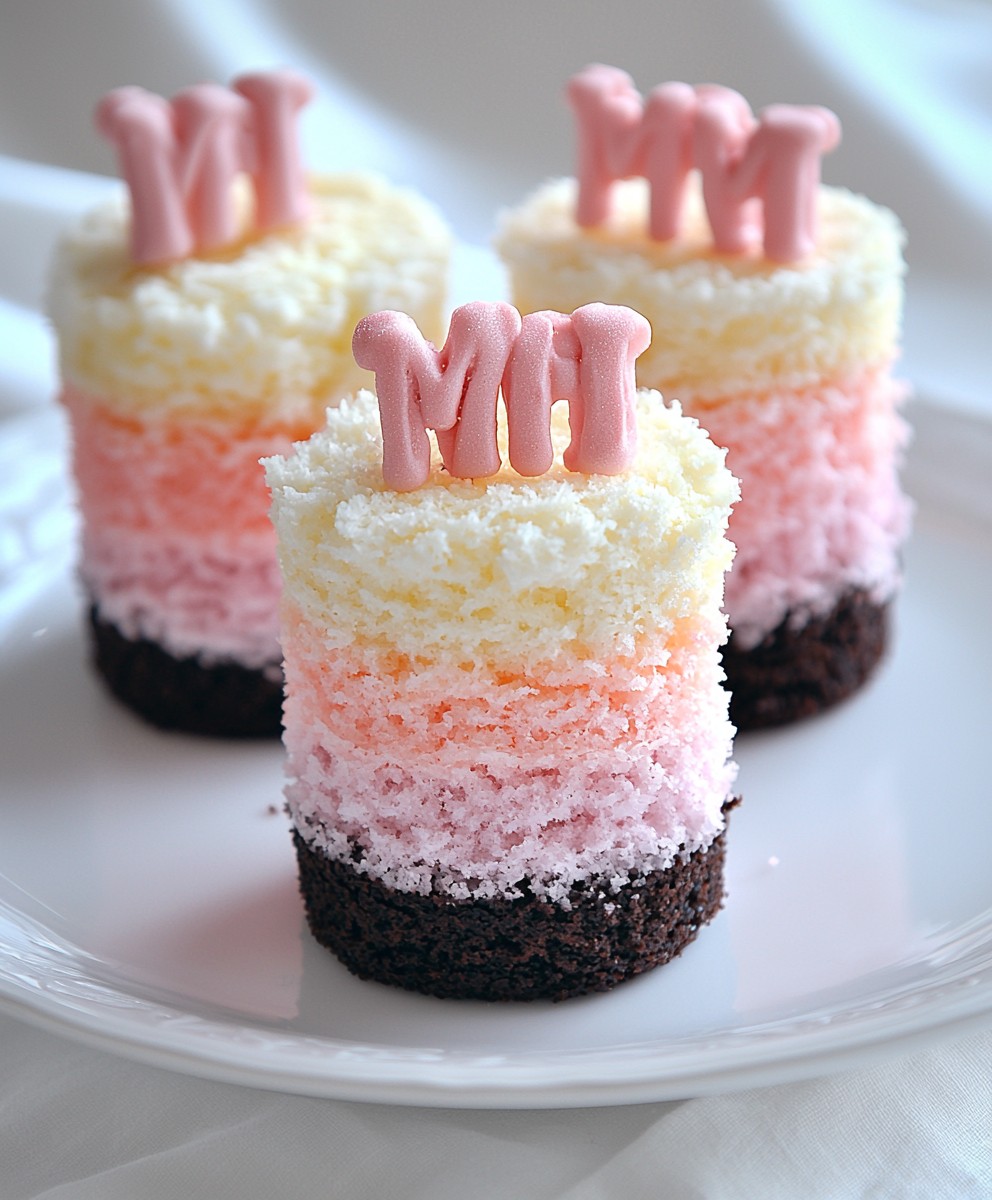
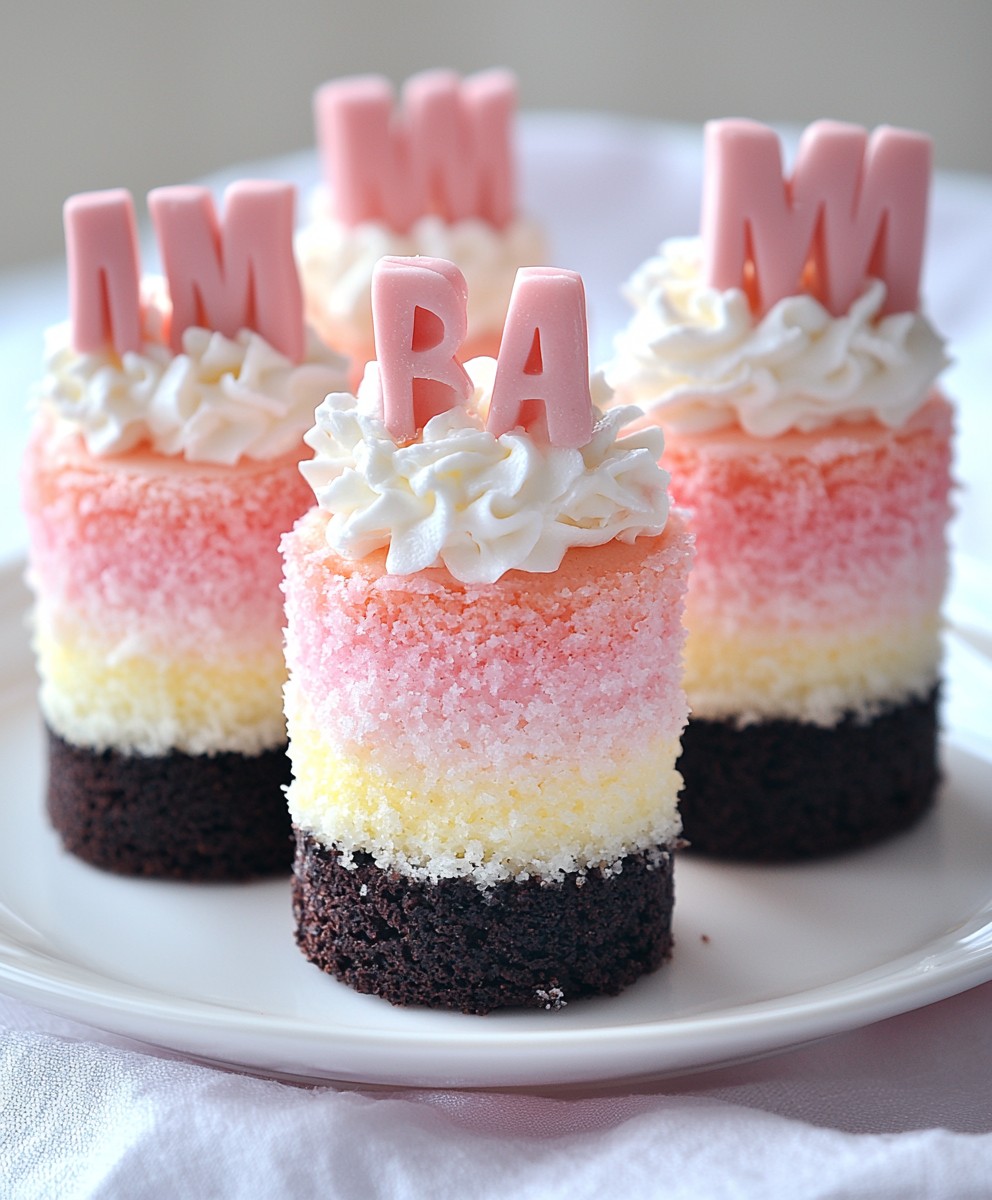
Ombre Mini Cakes: Prepare to be captivated by these delightful, bite-sized beauties! Imagine a dessert that’s as visually stunning as it is delicious that’s precisely what you get with these charming treats. These aren’t just cakes; they’re edible works of art, perfect for impressing guests or simply indulging in a little self-care.
While the ombre effect itself is a relatively modern trend in baking, the concept of small, individual cakes has a rich history. Think of the elegant petit fours of French patisseries or the delicate cupcakes that have graced American tables for generations. Ombre Mini Cakes take that tradition and elevate it with a contemporary twist, creating a dessert that feels both familiar and refreshingly new.
What makes these mini cakes so irresistible? It’s a combination of factors. First, there’s the visual appeal the gradual shading of color is simply mesmerizing. Then, there’s the perfect portion size. Each cake is just enough to satisfy your sweet craving without being overwhelming. And, of course, there’s the taste! The moist, tender crumb and the sweet, creamy frosting create a symphony of flavors and textures that will leave you wanting more. Plus, they are incredibly versatile. You can customize the colors and flavors to match any occasion, making them the perfect dessert for birthdays, holidays, or any special celebration. Let’s get baking!
Ingredients:
- For the Vanilla Cake Layers:
- 2 1/4 cups (281g) all-purpose flour
- 2 1/2 teaspoons baking powder
- 1/2 teaspoon baking soda
- 1/2 teaspoon salt
- 1 cup (2 sticks or 226g) unsalted butter, softened
- 1 3/4 cups (350g) granulated sugar
- 2 large eggs
- 1 teaspoon vanilla extract
- 1 1/4 cups (300ml) buttermilk
- For the Swiss Meringue Buttercream:
- 6 large egg whites
- 1 1/4 cups (250g) granulated sugar
- 1 1/2 cups (3 sticks or 340g) unsalted butter, softened
- 1 teaspoon vanilla extract
- Pinch of salt
- For the Ombre Effect:
- Gel food coloring (various shades of your chosen color – I’m using pink!)
- Equipment:
- 6-inch cake pans (3 or 4, depending on how many layers you want)
- Piping bags
- Round piping tip (optional)
- Offset spatula
- Cake turntable (optional, but helpful)
Preparing the Vanilla Cake Layers:
- Preheat and Prep: First things first, preheat your oven to 350°F (175°C). Grease and flour your 6-inch cake pans. I like to use baking spray with flour already in it for extra insurance against sticking. You can also line the bottoms with parchment paper rounds.
- Dry Ingredients: In a medium bowl, whisk together the flour, baking powder, baking soda, and salt. This ensures everything is evenly distributed.
- Cream Butter and Sugar: In a large bowl (or the bowl of your stand mixer), cream together the softened butter and granulated sugar until light and fluffy. This usually takes about 3-5 minutes. Don’t rush this step it’s crucial for a tender cake!
- Add Eggs and Vanilla: Beat in the eggs one at a time, then stir in the vanilla extract. Make sure each egg is fully incorporated before adding the next.
- Alternate Wet and Dry: Gradually add the dry ingredients to the wet ingredients, alternating with the buttermilk. Begin and end with the dry ingredients. So, it’s dry-wet-dry. Mix until just combined. Be careful not to overmix, as this can lead to a tough cake.
- Divide and Bake: Divide the batter evenly among your prepared cake pans. I use a kitchen scale to ensure each pan gets the same amount of batter, which helps with even baking. Bake for 25-30 minutes, or until a toothpick inserted into the center comes out clean.
- Cool Completely: Let the cakes cool in the pans for 10 minutes before inverting them onto a wire rack to cool completely. Make sure they are completely cool before frosting!
Making the Swiss Meringue Buttercream:
- Combine Egg Whites and Sugar: In a heatproof bowl (like stainless steel or glass) set over a saucepan of simmering water (double boiler), combine the egg whites and sugar. Make sure the bottom of the bowl doesn’t touch the water.
- Whisk Until Dissolved: Whisk constantly until the sugar is completely dissolved and the mixture is hot to the touch. You should not feel any sugar granules when you rub a bit of the mixture between your fingers. This usually takes about 5-7 minutes.
- Whip to Stiff Peaks: Remove the bowl from the heat and transfer the mixture to the bowl of your stand mixer fitted with the whisk attachment. Whip on high speed until stiff, glossy peaks form and the bowl is cool to the touch. This can take 8-10 minutes. Be patient! The meringue needs to be completely cool before adding the butter.
- Add Butter Gradually: With the mixer on medium speed, add the softened butter a few tablespoons at a time, waiting until each addition is fully incorporated before adding the next. The mixture may look curdled at first, but don’t worry! Just keep mixing, and it will eventually come together.
- Add Vanilla and Salt: Once all the butter is added and the buttercream is smooth and creamy, stir in the vanilla extract and a pinch of salt.
Creating the Ombre Effect:
- Divide the Buttercream: Divide the Swiss meringue buttercream into several bowls (I usually use 3-4, depending on how many shades I want).
- Color the Buttercream: Add a tiny amount of gel food coloring to each bowl, creating different shades of your chosen color. Start with a very small amount of coloring, as you can always add more, but you can’t take it away! Mix well after each addition to ensure even color distribution. I like to start with the lightest shade and gradually add more coloring to each bowl to create a gradient.
Assembling the Ombre Mini Cakes:
- Level the Cakes: If your cake layers are uneven, use a serrated knife to level them. This will ensure your cakes are stable and look professional.
- First Layer: Place one cake layer on a cake board or serving plate.
- Frosting: Pipe or spread a layer of the darkest shade of buttercream on top of the first cake layer.
- Second Layer: Place the second cake layer on top of the frosting.
- More Frosting: Pipe or spread a layer of the next shade of buttercream on top of the second cake layer.
- Repeat: Repeat steps 4 and 5 with the remaining cake layers and buttercream shades, working your way up to the lightest shade on top.
- Crumb Coat: Apply a thin layer of buttercream (using any of the shades) all over the cake to seal in any crumbs. This is called a crumb coat. Chill the cake in the refrigerator for at least 30 minutes to allow the crumb coat to set.
- Final Frosting: Apply a final, thicker layer of buttercream to the cake, creating a smooth and even finish. You can use an offset spatula or a cake scraper to achieve a professional look.
- Ombre Swirls (Optional): For an extra touch of ombre, you can pipe swirls of the different shades of buttercream on top of the cake. I like to use a piping bag fitted with a round tip for this. Start with the darkest shade at the bottom and gradually work your way up to the lightest shade.
- Chill and Serve: Chill the cake in the refrigerator for at least 30 minutes before serving. This will help the buttercream set and make the cake easier to slice.
Tips and Tricks for Perfect Ombre Mini Cakes:
- Use Gel Food Coloring: Gel food coloring is more concentrated than liquid food coloring, so you’ll need less of it to achieve vibrant colors. It also won’t thin out your buttercream as much as liquid food coloring.
- Start with a Small Amount of Coloring: It’s always easier to add more coloring than to take it away, so start with a very small amount and gradually add more until you achieve the desired shade.
- Use a Kitchen Scale: Using a kitchen scale to measure your ingredients will ensure accuracy and consistency. This is especially important when baking.
- Don’t Overmix the Batter: Overmixing the batter can lead to a tough cake. Mix until just combined.
- Cool the Cakes Completely: Make sure the cakes are completely cool before frosting them. Otherwise, the buttercream will melt.
- Chill the Cake: Chilling the cake in the refrigerator will help the buttercream set and make the cake easier to slice.
- Practice Makes Perfect: Don’t be discouraged if your first attempt isn’t perfect. Just keep practicing, and you’ll get better with each try!
- Flavor Variations: Feel free to experiment with different flavors! You can add lemon zest, almond extract, or even a hint of coffee to the cake batter. You can also use different extracts in the buttercream.
- Buttercream Consistency: The consistency of your buttercream is crucial. If it’s too soft, it will be difficult to work with. If it’s too stiff, it will be hard to spread. If your buttercream is too soft, chill it in the refrigerator for a few minutes. If it’s too stiff, add a
Conclusion:
And there you have it! These Ombre Mini Cakes are more than just a pretty dessert; they’re a delightful experience from start to finish. The moist, tender crumb, the subtly sweet buttercream, and the stunning visual gradient all combine to create a treat that’s sure to impress. But beyond the aesthetics, it’s the sheer joy of creating something beautiful and delicious that makes this recipe a true must-try. I promise, the effort is absolutely worth the reward! Why are these Ombre Mini Cakes a must-try? Because they’re the perfect balance of elegance and approachability. They’re sophisticated enough for a special occasion, yet simple enough for a weekend baking project. Plus, who can resist a mini cake? They’re inherently adorable and portion-controlled (or so we tell ourselves!). The ombre effect adds a touch of artistry that will make you feel like a professional baker, even if you’re just starting out. And the best part? You can customize the colors to match any theme or holiday! Looking for serving suggestions or variations? The possibilities are endless! For a summer gathering, try using pastel shades of pink, yellow, and blue for a whimsical, summery vibe. For a fall celebration, opt for warm tones of orange, brown, and gold. You could even incorporate seasonal flavors into the buttercream, like pumpkin spice or apple cider. Serving Suggestions: * Serve these mini cakes with a scoop of vanilla ice cream or a dollop of whipped cream for an extra indulgent treat. * Arrange them on a tiered cake stand for a stunning centerpiece at your next party. * Package them individually in small boxes or cellophane bags for a thoughtful homemade gift. * Pair them with a glass of sparkling wine or a cup of coffee for a delightful afternoon treat. Variations: * Experiment with different cake flavors, such as chocolate, lemon, or red velvet. * Use a different type of frosting, such as cream cheese frosting or ganache. * Add a filling to the cakes, such as raspberry jam or chocolate ganache. * Decorate the cakes with sprinkles, edible glitter, or fresh berries. * For a vegan version, substitute the eggs and dairy with plant-based alternatives. There are many great vegan buttercreams out there that hold their color beautifully! I truly believe that anyone can make these Ombre Mini Cakes, regardless of their baking experience. The recipe is straightforward, and the instructions are easy to follow. Don’t be intimidated by the ombre effect it’s much easier than it looks! Just take your time, have fun, and enjoy the process. So, what are you waiting for? Grab your mixing bowls, preheat your oven, and get ready to create some magic in the kitchen! I’m confident that you’ll love these Ombre Mini Cakes as much as I do. And finally, I’d absolutely love to hear about your experience making these mini cakes! Did you try any variations? Did you encounter any challenges? What was your favorite part of the process? Please share your photos and stories in the comments below. Your feedback is invaluable, and it helps me to create even better recipes in the future. Happy baking! Print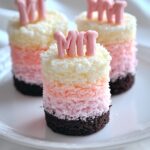
Ombre Mini Cakes: The Ultimate Guide to Baking and Decorating
- Total Time: 180 minutes
- Yield: 6–8 servings 1x
Description
Delicate vanilla mini cakes with a stunning ombre Swiss meringue buttercream frosting. Perfect for celebrations or a special treat!
Ingredients
- 2 1/4 cups (281g) all-purpose flour
- 2 1/2 teaspoons baking powder
- 1/2 teaspoon baking soda
- 1/2 teaspoon salt
- 1 cup (2 sticks or 226g) unsalted butter, softened
- 1 3/4 cups (350g) granulated sugar
- 2 large eggs
- 1 teaspoon vanilla extract
- 1 1/4 cups (300ml) buttermilk
- 6 large egg whites
- 1 1/4 cups (250g) granulated sugar
- 1 1/2 cups (3 sticks or 340g) unsalted butter, softened
- 1 teaspoon vanilla extract
- Pinch of salt
- Gel food coloring (various shades of your chosen color)
Instructions
- Preheat and Prep: Preheat oven to 350°F (175°C). Grease and flour 6-inch cake pans (3 or 4). Line bottoms with parchment paper rounds.
- Dry Ingredients: Whisk together flour, baking powder, baking soda, and salt in a medium bowl.
- Cream Butter and Sugar: Cream together softened butter and granulated sugar in a large bowl until light and fluffy (3-5 minutes).
- Add Eggs and Vanilla: Beat in eggs one at a time, then stir in vanilla extract.
- Alternate Wet and Dry: Gradually add dry ingredients to wet ingredients, alternating with buttermilk. Begin and end with dry ingredients. Mix until just combined.
- Divide and Bake: Divide batter evenly among prepared cake pans. Bake for 25-30 minutes, or until a toothpick inserted into the center comes out clean.
- Cool Completely: Let cakes cool in pans for 10 minutes before inverting them onto a wire rack to cool completely.
- Combine Egg Whites and Sugar: In a heatproof bowl set over a saucepan of simmering water, combine egg whites and sugar.
- Whisk Until Dissolved: Whisk constantly until sugar is completely dissolved and mixture is hot to the touch (5-7 minutes).
- Whip to Stiff Peaks: Remove bowl from heat and transfer to stand mixer. Whip on high speed until stiff, glossy peaks form and bowl is cool to the touch (8-10 minutes).
- Add Butter Gradually: With mixer on medium speed, add softened butter a few tablespoons at a time, waiting until each addition is fully incorporated.
- Add Vanilla and Salt: Once all butter is added and buttercream is smooth and creamy, stir in vanilla extract and salt.
- Divide the Buttercream: Divide Swiss meringue buttercream into several bowls (3-4).
- Color the Buttercream: Add a tiny amount of gel food coloring to each bowl, creating different shades of your chosen color. Mix well after each addition.
- Level the Cakes: If cake layers are uneven, use a serrated knife to level them.
- First Layer: Place one cake layer on a cake board or serving plate.
- Frosting: Pipe or spread a layer of the darkest shade of buttercream on top of the first cake layer.
- Second Layer: Place the second cake layer on top of the frosting.
- More Frosting: Pipe or spread a layer of the next shade of buttercream on top of the second cake layer.
- Repeat: Repeat steps 4 and 5 with the remaining cake layers and buttercream shades, working your way up to the lightest shade on top.
- Crumb Coat: Apply a thin layer of buttercream all over the cake to seal in any crumbs. Chill in the refrigerator for at least 30 minutes.
- Final Frosting: Apply a final, thicker layer of buttercream to the cake, creating a smooth and even finish.
- Ombre Swirls (Optional): Pipe swirls of the different shades of buttercream on top of the cake.
- Chill and Serve: Chill the cake in the refrigerator for at least 30 minutes before serving.
Notes
- Use gel food coloring for vibrant colors.
- Start with a small amount of coloring and add more gradually.
- Use a kitchen scale for accurate measurements.
- Don’t overmix the batter.
- Cool the cakes completely before frosting.
- Chill the cake to help the buttercream set.
- Buttercream Consistency: If it’s too soft, chill it in the refrigerator for a few minutes. If it’s too stiff, add a
- Prep Time: 45 minutes
- Cook Time: 30 minutes