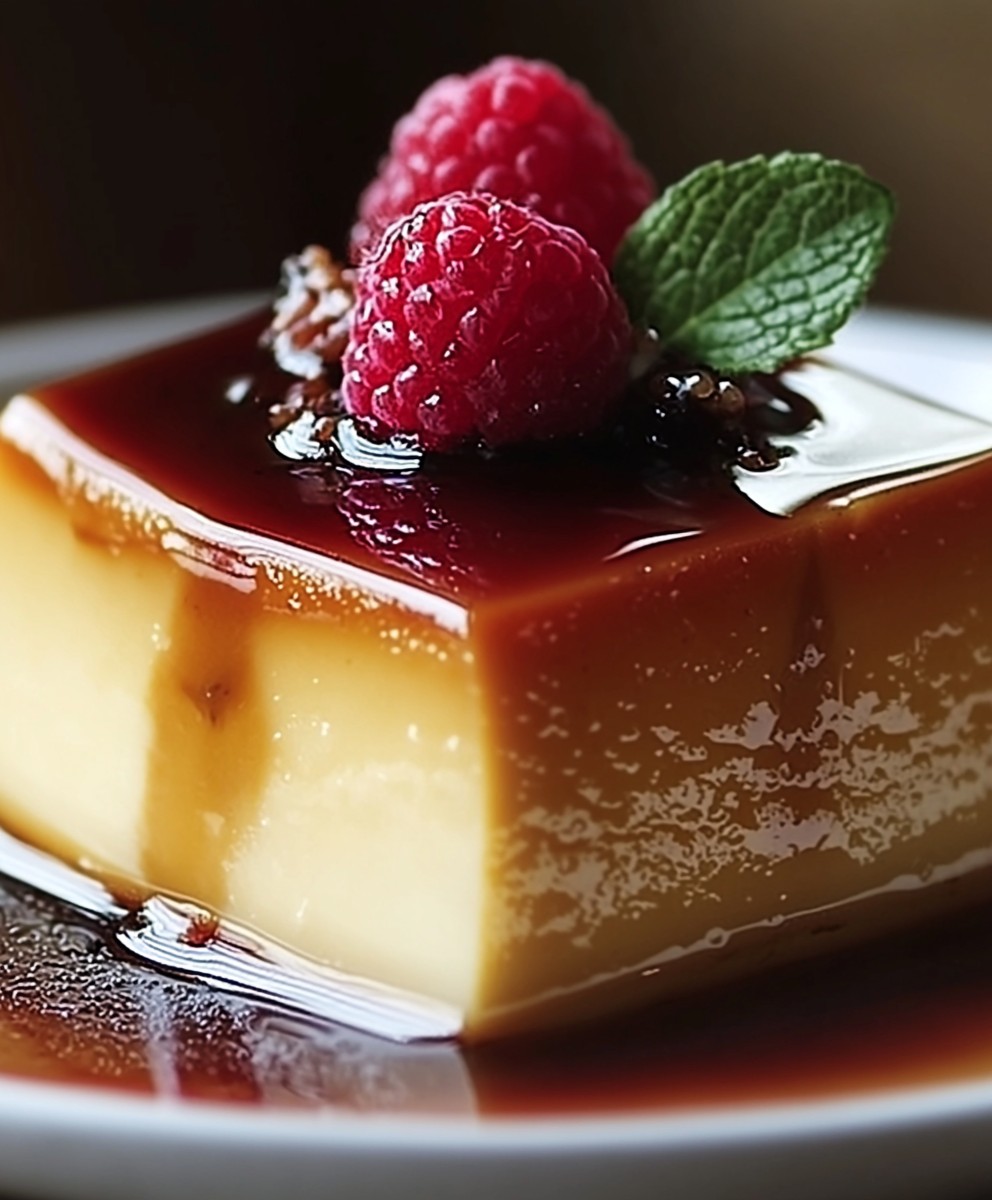
Japanese Flan, also known as Purin, is a dessert that will transport you to the bustling streets of Tokyo with every creamy, caramel-coated bite. Have you ever craved a dessert that’s both comforting and sophisticated? Something that whispers of tradition yet feels utterly modern? Then look no further! This delightful custard, with its silky smooth texture and rich, caramelized top, is a culinary experience unlike any other.
Purin’s history in Japan is intertwined with the country’s embrace of Western influences during the Meiji era. Inspired by European custard desserts, Japanese chefs meticulously adapted the recipe to suit local tastes, resulting in a lighter, more delicate version. It quickly became a staple in cafes and homes across Japan, a testament to its universal appeal.
What makes Japanese Flan so irresistible? It’s the perfect balance of textures the velvety custard yielding to the crisp, slightly bitter caramel. The subtle sweetness is incredibly satisfying without being overwhelming. Plus, it’s surprisingly easy to make at home! Whether you’re a seasoned baker or a kitchen novice, this recipe is your gateway to creating a truly memorable dessert that will impress your friends and family. Get ready to embark on a sweet adventure!

Ingredients:
- For the Caramel:
- 1/2 cup (100g) granulated sugar
- 2 tablespoons water
- For the Flan:
- 1 1/2 cups (360ml) whole milk
- 1/2 cup (120ml) heavy cream
- 1/2 cup (100g) granulated sugar
- 1 teaspoon vanilla extract
- 4 large eggs
- 2 large egg yolks
- Pinch of salt
- Equipment:
- 6 ramekins (approximately 4-6 oz capacity)
- Baking dish large enough to hold the ramekins
- Aluminum foil
Making the Caramel
Okay, let’s start with the caramel. Don’t be intimidated! It’s easier than you think, but you do need to pay attention.
- Combine Sugar and Water: In a small, heavy-bottomed saucepan, combine the granulated sugar and water. Stir gently to moisten the sugar.
- Cook Over Medium Heat: Place the saucepan over medium heat. Do not stir after the sugar has dissolved. Stirring can cause the sugar to crystallize, and we don’t want that!
- Watch for Color Change: As the sugar heats, it will start to bubble and turn clear. Keep a close eye on it. It will gradually turn golden, then amber. The color change happens quickly towards the end, so be ready to remove it from the heat.
- Achieve Amber Color: Cook until the caramel is a deep amber color. This usually takes about 5-7 minutes, but it depends on your stove. The darker the color, the richer the caramel flavor, but be careful not to burn it! Burnt caramel tastes bitter.
- Remove from Heat: Once the caramel reaches the desired color, immediately remove the saucepan from the heat. The residual heat will continue to cook the caramel, so don’t wait too long.
- Pour into Ramekins: Working quickly, pour the caramel evenly into the bottom of each ramekin. You’ll want a thin, even layer. Swirl the ramekins gently to coat the bottom. The caramel will harden quickly, so don’t worry if it sets before you’re finished.
- Set Aside: Set the ramekins aside while you prepare the flan mixture.
Preparing the Flan Mixture
Now for the creamy, dreamy flan! This part is super simple.
- Heat Milk and Cream: In a medium saucepan, combine the whole milk and heavy cream. Heat over medium heat until it’s just simmering. You’ll see small bubbles forming around the edges. Do not boil!
- Infuse with Vanilla: Remove the saucepan from the heat and stir in the vanilla extract. This will infuse the milk and cream with a lovely vanilla aroma.
- Whisk Eggs and Sugar: In a separate bowl, whisk together the eggs, egg yolks, granulated sugar, and salt until light and slightly frothy. This usually takes about 2-3 minutes. Don’t over-whisk, as this can incorporate too much air into the mixture.
- Temper the Eggs: This is a crucial step to prevent the eggs from scrambling. Slowly pour a small amount of the warm milk and cream mixture into the egg mixture, whisking constantly. This will gradually raise the temperature of the eggs.
- Combine Mixtures: Continue to slowly pour the remaining warm milk and cream mixture into the egg mixture, whisking constantly until everything is well combined.
- Strain the Mixture: Strain the flan mixture through a fine-mesh sieve into a pitcher or measuring cup with a spout. This will remove any lumps or cooked egg bits, resulting in a smoother, silkier flan.
- Pour into Ramekins: Carefully pour the flan mixture into the ramekins, on top of the hardened caramel. Fill each ramekin almost to the top, leaving a little bit of space.
Baking the Flan
The water bath is key to a perfectly smooth and creamy flan. It helps to regulate the temperature and prevent the flan from curdling.
- Prepare Water Bath: Preheat your oven to 325°F (160°C). Place the ramekins in a baking dish.
- Add Hot Water: Carefully pour hot water into the baking dish until it reaches about halfway up the sides of the ramekins. Be careful not to splash any water into the flan mixture.
- Cover with Foil: Cover the baking dish loosely with aluminum foil. This will help to prevent the tops of the flans from browning too quickly.
- Bake: Bake for 50-60 minutes, or until the flans are set around the edges but still slightly jiggly in the center. The internal temperature should reach about 175-180°F (80-82°C).
- Check for Doneness: To check for doneness, gently shake the baking dish. The flans should be set around the edges but still have a slight wobble in the center. You can also insert a toothpick into the center of one of the flans. It should come out with moist crumbs attached.
- Remove from Oven: Carefully remove the baking dish from the oven. Remove the ramekins from the water bath and let them cool slightly at room temperature.
- Chill: Cover the ramekins with plastic wrap and refrigerate for at least 4 hours, or preferably overnight. This allows the flan to fully set and the flavors to meld together.
Unmolding and Serving
The moment of truth! Unmolding the flan is the most satisfying part. The caramel will drizzle down the sides, creating a beautiful and delicious presentation.
- Loosen the Edges: Run a thin knife or spatula around the edges of each flan to loosen it from the ramekin.
- Invert onto Plate: Place a serving plate over the top of the ramekin. Holding the plate and ramekin firmly together, quickly invert them.
- Tap Gently: Gently tap the bottom of the ramekin to help release the flan. If it doesn’t release immediately, let it sit for a few seconds and try again.
- Remove Ramekin: Carefully lift the ramekin away from the flan. The caramel should drizzle down the sides.
- Serve: Serve the flan immediately. You can garnish it with fresh berries, whipped cream, or a dusting of cocoa powder, if desired. But honestly, it’s perfect just as it is!
Tips for Success
- Don’t overcook the caramel: Burnt caramel is bitter and will ruin the flavor of the flan.
- Temper the eggs carefully: This is essential to prevent the eggs from scrambling.
- Use a water bath: The water bath helps to regulate the temperature and prevent the flan from curdling.
- Chill the flan thoroughly: This allows the flan to fully set and the flavors to meld together.
- Be patient when unmolding: If the flan doesn’t release immediately, let it sit for a few seconds and try again.
Variations
- Coffee Flan: Add 1-2 tablespoons of instant coffee granules to the milk and cream mixture for a coffee-flavored flan.
- Chocolate Flan: Add 2-3 tablespoons of cocoa powder to the egg mixture for a chocolate flan.
- Coconut Flan: Substitute some of the milk with coconut milk for a coconut-flavored flan.
- Citrus Flan: Add the zest of an orange or lemon to the milk and cream mixture for a citrus-flavored flan.
Enjoy your homemade Japanese Flan! I hope you love it as much as I do. It’s a truly special dessert that’s perfect for any occasion.
Conclusion:
This Japanese Flan isn’t just another dessert; it’s a culinary adventure waiting to happen! The silky smooth texture, the delicate balance of sweet and subtly bitter caramel, and the overall simplicity of the recipe make it an absolute must-try for anyone looking to impress or simply treat themselves. I promise, once you experience the unique melt-in-your-mouth sensation, you’ll be hooked. It’s a far cry from your average custard, offering a refined and elegant sweetness that’s both comforting and exciting. But the best part? It’s incredibly versatile! While I personally adore it served chilled straight from the fridge, allowing the flavors to fully develop, there are so many ways to elevate your Japanese Flan experience. Consider adding a dollop of freshly whipped cream and a sprinkle of matcha powder for an extra layer of visual appeal and earthy flavor. Or, for a more decadent twist, drizzle a rich chocolate sauce over the top. The possibilities are truly endless! For a lighter, more refreshing take, try infusing the milk with a hint of citrus zest, like lemon or orange, before heating. This will add a bright and zesty note that complements the sweetness beautifully. Alternatively, if you’re feeling adventurous, you could experiment with different flavor extracts, such as almond or vanilla bean paste, to create your own signature variation. Serving suggestions are just as flexible. This Japanese Flan makes a stunning centerpiece for a dinner party, but it’s equally perfect for a cozy night in. Pair it with a cup of green tea or a glass of dessert wine for the ultimate indulgence. You can even prepare individual ramekins for easy serving and portion control. And don’t be intimidated by the caramel! While it might seem tricky at first, with a little patience and attention, you’ll master the art of creating that perfect golden-brown hue. Remember to keep a close eye on it and remove it from the heat as soon as it reaches the desired color to prevent burning. I truly believe that this recipe for Japanese Flan is a winner. It’s a delightful combination of simplicity and sophistication, guaranteed to impress your friends and family. It’s also a fantastic way to explore the world of Japanese desserts and discover new flavors and textures. So, what are you waiting for? Gather your ingredients, preheat your oven, and get ready to embark on a delicious journey. I’m confident that you’ll love this recipe as much as I do. And most importantly, I’d love to hear about your experience! Once you’ve tried this recipe, please share your photos and comments. Let me know what variations you tried, what you loved, and what you might do differently next time. Your feedback is invaluable and helps me to continue creating and sharing recipes that you’ll enjoy. Happy baking! I can’t wait to see your creations! Print
Japanese Flan: A Deliciously Smooth and Creamy Dessert Recipe
- Total Time: 255 minutes
- Yield: 6 servings 1x
Description
Silky smooth Japanese Flan with a rich caramel base. This classic dessert is surprisingly easy to make at home and is guaranteed to impress!
Ingredients
- 1/2 cup (100g) granulated sugar
- 2 tablespoons water
- 1 1/2 cups (360ml) whole milk
- 1/2 cup (120ml) heavy cream
- 1/2 cup (100g) granulated sugar
- 1 teaspoon vanilla extract
- 4 large eggs
- 2 large egg yolks
- Pinch of salt
Instructions
- In a small, heavy-bottomed saucepan, combine the granulated sugar and water. Stir gently to moisten the sugar.
- Place the saucepan over medium heat. Do not stir after the sugar has dissolved.
- Cook until the caramel is a deep amber color (about 5-7 minutes). Remove from heat immediately.
- Working quickly, pour the caramel evenly into the bottom of each of the 6 ramekins. Swirl to coat. Set aside.
- In a medium saucepan, combine the whole milk and heavy cream. Heat over medium heat until just simmering. Do not boil!
- Remove from heat and stir in the vanilla extract.
- In a separate bowl, whisk together the eggs, egg yolks, granulated sugar, and salt until light and slightly frothy (2-3 minutes).
- Slowly pour a small amount of the warm milk and cream mixture into the egg mixture, whisking constantly.
- Continue to slowly pour the remaining warm milk and cream mixture into the egg mixture, whisking constantly until well combined.
- Strain the flan mixture through a fine-mesh sieve into a pitcher or measuring cup with a spout.
- Carefully pour the flan mixture into the ramekins, on top of the hardened caramel. Fill almost to the top.
- Preheat oven to 325°F (160°C). Place the ramekins in a baking dish.
- Carefully pour hot water into the baking dish until it reaches about halfway up the sides of the ramekins.
- Cover the baking dish loosely with aluminum foil.
- Bake for 50-60 minutes, or until the flans are set around the edges but still slightly jiggly in the center.
- Remove the ramekins from the water bath and let them cool slightly at room temperature.
- Cover the ramekins with plastic wrap and refrigerate for at least 4 hours, or preferably overnight.
- Run a thin knife or spatula around the edges of each flan to loosen it from the ramekin.
- Place a serving plate over the top of the ramekin. Holding the plate and ramekin firmly together, quickly invert them.
- Gently tap the bottom of the ramekin to help release the flan.
- Carefully lift the ramekin away from the flan. Serve immediately.
Notes
- Don’t overcook the caramel: Burnt caramel is bitter.
- Temper the eggs carefully to prevent scrambling.
- Use a water bath to regulate temperature and prevent curdling.
- Chill the flan thoroughly for best results.
- Be patient when unmolding.
- Prep Time: 20 minutes
- Cook Time: 55 minutes