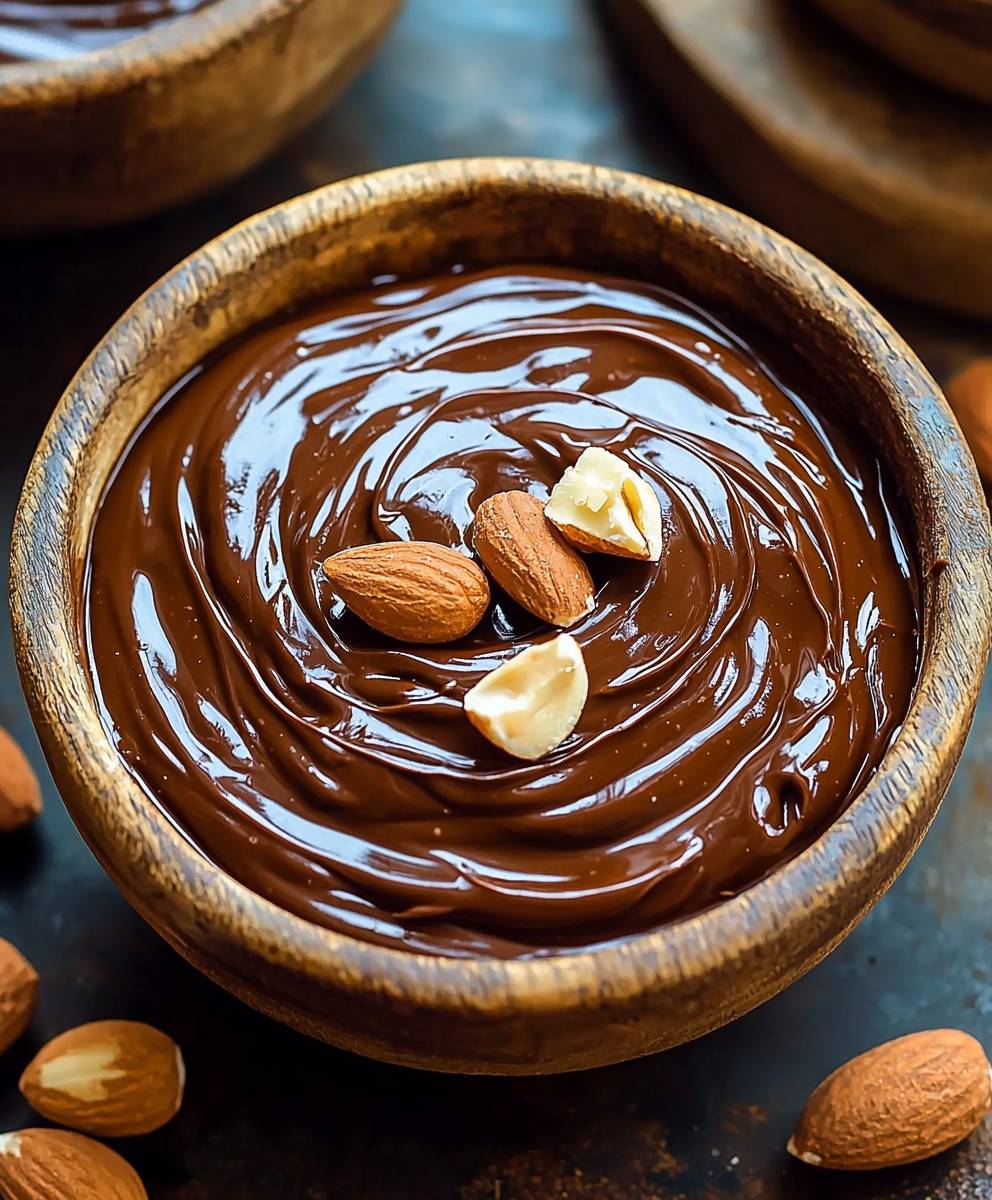
Homemade Nutella: just the name conjures up images of creamy, chocolatey-hazelnut goodness, doesn’t it? Forget those store-bought spreads packed with questionable ingredients! I’m about to share a recipe that will revolutionize your breakfast routine and elevate your dessert game. Imagine a rich, decadent spread, bursting with the authentic flavors of roasted hazelnuts and dark chocolate, all made with ingredients you can actually pronounce.
While the commercially produced Nutella has become a global phenomenon, its roots can be traced back to post-World War II Italy. Cocoa was scarce, so resourceful Italian pastry chefs began incorporating hazelnuts to extend their chocolate supply. This ingenious solution not only stretched resources but also created a uniquely delicious flavor profile that the world quickly fell in love with.
What’s not to love? The irresistible combination of chocolate and hazelnuts is a symphony of flavors and textures. The smooth, velvety texture melts in your mouth, while the nutty aroma fills your senses. Plus, this homemade Nutella recipe is surprisingly easy to make! You’ll be amazed at how simple it is to create a gourmet spread that’s far superior to anything you can buy in a jar. Get ready to experience the ultimate chocolate-hazelnut indulgence you’ll never go back to the store-bought version again!

Ingredients:
- 1 cup (150g) hazelnuts, roasted and skinned
- 1/2 cup (100g) granulated sugar
- 1/4 cup (25g) unsweetened cocoa powder
- 2 tablespoons (30ml) hazelnut oil (or vegetable oil if hazelnut oil is unavailable)
- 1 teaspoon vanilla extract
- 1/4 teaspoon salt
- 2-4 tablespoons milk (dairy or non-dairy), to adjust consistency
- Optional: 2 tablespoons powdered sugar, for extra sweetness
Roasting and Skinning the Hazelnuts
Okay, let’s start with the most crucial part: the hazelnuts! Roasting them properly is key to that intense, nutty flavor we all crave in Nutella. And getting those pesky skins off is essential for a smooth, creamy texture. Trust me, you don’t want any bitter bits ruining your homemade masterpiece.
- Preheat your oven to 350°F (175°C). Spread the hazelnuts in a single layer on a baking sheet. Make sure they’re not overcrowded; this will ensure even roasting.
- Roast for 12-15 minutes. Keep a close eye on them! You’ll know they’re ready when the skins start to crack and the nuts become fragrant. Don’t let them burn, or they’ll taste bitter.
- Let the hazelnuts cool slightly. Once they’re cool enough to handle, transfer them to a clean kitchen towel.
- Rub the hazelnuts vigorously in the towel. This will loosen and remove the skins. It’s okay if you don’t get every single bit of skin off; just try to remove as much as possible. Some people use a colander and shake the hazelnuts around to help remove the skins, but I find the towel method works best.
Making the Nutella
Now for the fun part! This is where the magic happens. We’re going to transform those roasted hazelnuts into a luscious, chocolatey spread that will rival anything you can buy in a store. Get your food processor ready, because it’s about to get a workout!
- Combine the roasted and skinned hazelnuts, granulated sugar, cocoa powder, hazelnut oil, vanilla extract, and salt in a food processor. Make sure your food processor is clean and dry.
- Process for several minutes, scraping down the sides as needed. This is where patience comes in. At first, the mixture will look like coarse crumbs. Keep processing, and eventually, the oils from the hazelnuts will release, and it will start to form a paste. This can take anywhere from 5 to 10 minutes, or even longer depending on your food processor. Don’t give up!
- Continue processing until the mixture is smooth and creamy. The consistency should be similar to store-bought Nutella. If it’s too thick, add milk, one tablespoon at a time, until you reach your desired consistency.
- Taste and adjust sweetness. If you prefer a sweeter Nutella, add powdered sugar, one tablespoon at a time, until it’s to your liking. You can also add a pinch more salt if you think it needs it.
Adjusting the Consistency
Getting the perfect consistency is key to a truly satisfying Nutella experience. Too thick, and it’s hard to spread. Too thin, and it’s runny and messy. Here’s how to fine-tune your homemade Nutella to perfection.
- If the Nutella is too thick: Add milk, one tablespoon at a time, processing after each addition until you reach your desired consistency. Be careful not to add too much milk, or it will become too thin.
- If the Nutella is too thin: This is less common, but if it happens, you can try adding a little more cocoa powder or even a small amount of melted chocolate (cooled slightly) to thicken it up. You can also refrigerate it for a while, as it will thicken slightly as it cools.
Tips and Tricks for the Best Homemade Nutella
Over the years, I’ve learned a few tricks that can take your homemade Nutella to the next level. Here are some of my favorite tips:
- Use high-quality ingredients. The better the ingredients, the better the final product. Use good quality hazelnuts, cocoa powder, and vanilla extract.
- Don’t skip the roasting step. Roasting the hazelnuts is essential for developing their flavor. It also makes them easier to skin.
- Be patient when processing. It takes time for the hazelnuts to release their oils and form a smooth paste. Don’t rush the process.
- Adjust the sweetness to your liking. Some people prefer a sweeter Nutella, while others prefer a less sweet version. Adjust the amount of sugar to your taste.
- Add a pinch of salt. Salt enhances the flavor of the other ingredients and helps to balance the sweetness.
- Store your Nutella properly. Store your homemade Nutella in an airtight container at room temperature for up to two weeks. If you live in a warm climate, you may want to store it in the refrigerator.
- Experiment with flavors. Once you’ve mastered the basic recipe, you can experiment with different flavors. Try adding a pinch of cinnamon, a dash of espresso powder, or even a little bit of chili powder for a spicy kick.
- Use a good food processor. A high-powered food processor will make the process much easier and faster. If you don’t have a food processor, you can use a high-speed blender, but it may take longer to achieve a smooth consistency.
- Don’t be afraid to get creative. Homemade Nutella is a blank canvas. Feel free to experiment with different ingredients and flavors to create your own unique version.
Serving Suggestions
Now that you’ve made your delicious homemade Nutella, it’s time to enjoy it! Here are some of my favorite ways to serve it:
- Spread it on toast or croissants. This is the classic way to enjoy Nutella.
- Use it as a dip for fruit. Strawberries, bananas, and apples are all delicious dipped in Nutella.
- Add it to your oatmeal or yogurt. A spoonful of Nutella adds a touch of sweetness and nuttiness to your breakfast.
- Use it as a filling for crepes or pancakes. Nutella-filled crepes are a decadent treat.
- Make Nutella sandwiches. Nutella and peanut butter sandwiches are a childhood favorite.
- Use it in baking. Nutella can be used in a variety of baked goods, such as cookies, brownies, and cakes.
- Eat it straight from the jar! Let’s be honest, sometimes the best way to enjoy Nutella is straight from the jar with a spoon.
Troubleshooting
Sometimes, things don’t go exactly as planned. Here are some common problems you might encounter when making homemade Nutella, and how to fix them:
- Hazelnuts are not roasting evenly: Make sure the hazelnuts are spread in a single layer on the baking sheet. If they’re overcrowded, they won’t roast evenly. You may also need to rotate the baking sheet halfway through the roasting time.
- Hazelnuts are burning: Keep a close eye on the hazelnuts while they’re roasting. If they start to burn, remove them from the oven immediately.
- Skins are difficult to remove: Make sure the hazelnuts are cool enough to handle before trying to remove the skins. If the skins are still difficult to remove, you can try blanching the hazelnuts in boiling water for a minute or two before roasting them.
- Nutella is too thick: Add milk, one tablespoon at a time, until you reach your desired consistency.
- Nutella is too thin: Add a little more cocoa powder or melted chocolate (cooled slightly) to thicken it up. You can also refrigerate it for a while, as it will thicken slightly as it cools.
- Nutella is not smooth: Continue processing until the mixture is smooth and creamy. This can take some time, so be patient. If your food processor is struggling, you can try adding a little bit of oil to help it along.
- Nutella tastes bitter: This is usually caused by the skins of the hazelnuts. Make sure you remove as much of the skin as possible before processing the hazelnuts.
Variations
Once you’ve mastered the basic recipe, you can experiment with different variations to create your own unique Nutella. Here are a few ideas:
- Dark Chocolate Nutella: Use dark cocoa powder instead of regular cocoa powder for a richer, more intense chocolate flavor.
- White Chocolate Nutella
Conclusion:
And there you have it! This Homemade Nutella recipe is so much more than just a chocolate hazelnut spread; it’s an experience. From the intoxicating aroma of roasting hazelnuts to the velvety smooth texture that melts in your mouth, every step of this process is a delight. I truly believe that once you’ve tasted homemade, you’ll never go back to the store-bought version. The depth of flavor and the control you have over the ingredients make all the difference.
Why is this a must-try? Well, beyond the superior taste, you know exactly what’s going into your spread. No artificial flavors, no preservatives, just pure, wholesome goodness. It’s a fantastic way to treat yourself and your loved ones to something special, and it’s surprisingly easy to make! Plus, imagine the bragging rights you’ll have when you tell everyone you made your own Nutella!
But the fun doesn’t stop there! This recipe is incredibly versatile. Spread it on toast, croissants, or pancakes for a classic breakfast treat. Use it as a filling for crepes or pastries for a decadent dessert. Swirl it into your morning oatmeal or yogurt for a boost of flavor. Or, simply grab a spoon and enjoy it straight from the jar I won’t judge!
Looking for variations? Try adding a pinch of sea salt to enhance the sweetness and nuttiness. For a richer flavor, use dark chocolate instead of milk chocolate. If you’re feeling adventurous, experiment with different nuts like almonds or walnuts. You can even add a touch of espresso powder for a mocha-flavored spread. The possibilities are endless!
Here are a few of my favorite serving suggestions:
Serving Suggestions:
- Nutella & Banana Crepes: Spread a generous layer of homemade Nutella on a warm crepe and top with sliced bananas.
- Nutella Stuffed French Toast: Make a Nutella sandwich with two slices of bread, dip in egg batter, and fry until golden brown.
- Nutella Hot Chocolate: Stir a spoonful of Nutella into a mug of hot milk for a rich and decadent hot chocolate.
- Nutella Brownies: Add a swirl of Nutella to your favorite brownie batter for an extra fudgy and flavorful treat.
- Nutella Fruit Dip: Serve Nutella with sliced apples, strawberries, and bananas for a fun and delicious snack.
I’m so excited for you to try this recipe and experience the magic of homemade Nutella for yourself. It’s a labor of love, but the results are well worth the effort. I promise you won’t be disappointed.
So, what are you waiting for? Gather your ingredients, preheat your oven, and get ready to embark on a delicious adventure. Once you’ve made your own batch of this incredible Homemade Nutella, I’d love to hear about your experience! Share your photos, tips, and variations in the comments below. Let’s spread the Nutella love! I can’t wait to see what you create! Happy cooking (and eating)!
Homemade Nutella: The Ultimate Guide to Making Your Own
Rich, creamy homemade Nutella that rivals store-bought versions. Roasting hazelnuts unlocks intense flavor.
Ingredients
- 1 cup (150g) hazelnuts, roasted and skinned
- 1/2 cup (100g) granulated sugar
- 1/4 cup (25g) unsweetened cocoa powder
- 2 tablespoons (30ml) hazelnut oil (or vegetable oil)
- 1 teaspoon vanilla extract
- 1/4 teaspoon salt
- 2-4 tablespoons milk (dairy or non-dairy), to adjust consistency
- Optional: 2 tablespoons powdered sugar, for extra sweetness
Instructions
- Roast Hazelnuts: Preheat oven to 350°F (175°C). Spread hazelnuts in a single layer on a baking sheet. Roast for 12-15 minutes, until skins crack and nuts are fragrant.
- Cool and Skin: Let hazelnuts cool slightly. Transfer to a clean kitchen towel and rub vigorously to remove skins.
- Combine Ingredients: In a food processor, combine roasted hazelnuts, granulated sugar, cocoa powder, hazelnut oil, vanilla extract, and salt.
- Process: Process for several minutes, scraping down the sides as needed. Continue processing until the mixture is smooth and creamy. This may take 5-10 minutes or longer.
- Adjust Consistency: If too thick, add milk, one tablespoon at a time, until desired consistency is reached.
- Taste and Adjust: Taste and add powdered sugar (optional), one tablespoon at a time, for extra sweetness. Add a pinch more salt if needed.
- Store: Store in an airtight container at room temperature for up to two weeks.
Notes
- Roasting the hazelnuts is crucial for flavor. Don’t skip this step!
- Be patient when processing. It takes time for the hazelnuts to release their oils.
- Use high-quality ingredients for the best flavor.
- Adjust sweetness and consistency to your preference.
- If the Nutella is too thin, add a little more cocoa powder or melted chocolate (cooled slightly) to thicken it up. You can also refrigerate it for a while, as it will thicken slightly as it cools.
- Experiment with flavors! Try adding cinnamon, espresso powder, or chili powder.