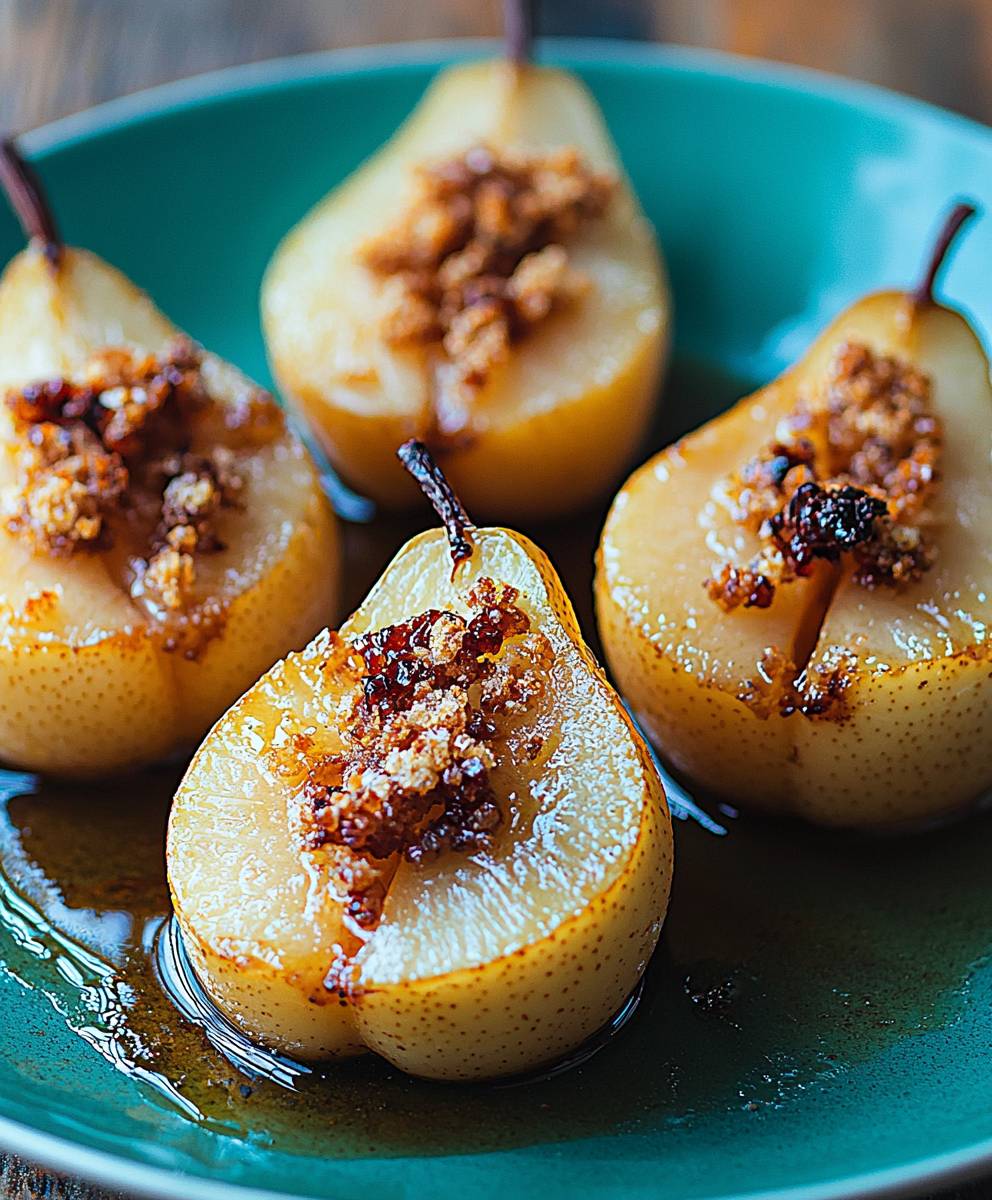
Baked Pears: Is there anything that screams autumn comfort more than the warm, spiced aroma of fruit gently baking in the oven? I think not! Imagine sinking your teeth into a tender, caramelized pear, its sweetness intensified by a hint of cinnamon and a touch of buttery goodness. This isn’t just dessert; it’s a hug in a bowl.
Pears, enjoyed for centuries, have a rich history, gracing the tables of Roman emperors and finding their way into the art and literature of various cultures. While simple pear preparations have always been popular, baking them elevates the fruit to a whole new level of deliciousness. The gentle heat coaxes out their natural sugars, creating a luscious, melt-in-your-mouth texture that’s simply irresistible.
People adore baked pears for their simplicity and elegance. They require minimal effort, making them perfect for a weeknight treat or an impressive dessert for a dinner party. The combination of the pear’s delicate flavor, the warm spices, and the optional addition of nuts or a drizzle of honey creates a symphony of tastes and textures that’s both comforting and sophisticated. Plus, they are naturally gluten-free and can easily be made vegan, making them a crowd-pleasing option for almost any dietary need. So, are you ready to discover the magic of perfectly baked pears? Let’s get started!

Ingredients:
- 6 ripe but firm pears (Bosc, Anjou, or Bartlett work well)
- 1/2 cup all-purpose flour
- 1/2 cup rolled oats
- 1/2 cup packed brown sugar
- 1/4 teaspoon ground cinnamon
- 1/4 teaspoon ground nutmeg
- 1/4 cup cold unsalted butter, cut into small cubes
- 1/4 cup chopped pecans or walnuts (optional)
- 1/4 cup maple syrup or honey
- 1/4 cup apple cider or pear juice
- 1 tablespoon lemon juice
- Vanilla ice cream or whipped cream, for serving (optional)
Preparing the Pears:
- Preheat your oven to 375°F (190°C). This is crucial for even cooking. Make sure your oven is properly calibrated for the best results.
- Prepare the pears. Wash the pears thoroughly. Using a sharp paring knife, carefully peel the pears, leaving the stems intact if desired. Peeling helps the pears soften nicely during baking.
- Core the pears. Cut each pear in half lengthwise. Use a melon baller or a small spoon to carefully remove the core from each half. Be gentle to avoid damaging the pear flesh.
- Lemon juice bath. Brush the cut surfaces of the pears with lemon juice. This prevents browning and adds a touch of brightness to the flavor.
Making the Crumble Topping:
- Combine dry ingredients. In a medium bowl, whisk together the flour, rolled oats, brown sugar, cinnamon, and nutmeg. Make sure everything is evenly distributed. This ensures a consistent flavor throughout the crumble.
- Cut in the butter. Add the cold, cubed butter to the dry ingredients. Using a pastry blender or your fingertips, cut the butter into the mixture until it resembles coarse crumbs. The butter should be well-incorporated but still have some small pieces visible. This creates a wonderfully crumbly texture. If your butter gets too soft, pop the bowl into the freezer for a few minutes.
- Add nuts (optional). Stir in the chopped pecans or walnuts, if using. Nuts add a delightful crunch and nutty flavor to the topping.
Assembling and Baking:
- Prepare the baking dish. Lightly grease a 9×13 inch baking dish. This prevents the pears from sticking and makes cleanup easier.
- Arrange the pears. Place the pear halves, cut-side up, in the prepared baking dish. Arrange them snugly but not overcrowded.
- Drizzle with syrup. Drizzle the maple syrup or honey evenly over the pear halves. This adds sweetness and helps to caramelize the pears during baking.
- Pour in the liquid. Pour the apple cider or pear juice into the bottom of the baking dish. This creates steam that helps to cook the pears and keeps them moist.
- Top with crumble. Sprinkle the crumble topping evenly over the pear halves, covering them completely.
- Bake. Bake in the preheated oven for 30-40 minutes, or until the pears are tender and the topping is golden brown and bubbly. The baking time may vary depending on the ripeness of the pears and your oven. Check for doneness by inserting a fork into a pear half; it should be easily pierced.
- Cool slightly. Let the baked pears cool slightly in the baking dish before serving. This allows the juices to thicken and the flavors to meld together.
Serving Suggestions:
- Serve warm. Baked pears are best served warm.
- Add a scoop of ice cream. Top each serving with a scoop of vanilla ice cream or a dollop of whipped cream. The cold creaminess complements the warm, spiced pears perfectly.
- Garnish (optional). Garnish with a sprinkle of cinnamon or a drizzle of extra maple syrup.
Tips and Variations:
- Pear Variety: Bosc pears hold their shape well during baking, while Anjou and Bartlett pears become softer and more tender. Choose your favorite based on your desired texture.
- Spice it up: Experiment with different spices, such as ginger, cardamom, or allspice. A pinch of ground cloves can also add a warm, festive flavor.
- Add dried fruit: Stir in some dried cranberries, raisins, or chopped dates to the crumble topping for added sweetness and texture.
- Nut-free option: Omit the nuts from the crumble topping for a nut-free version. You can also substitute sunflower seeds or pumpkin seeds for a similar crunch.
- Gluten-free option: Use a gluten-free all-purpose flour blend in the crumble topping. Make sure to choose a blend that is designed for baking.
- Vegan option: Use vegan butter in the crumble topping and substitute maple syrup or agave nectar for honey. Serve with vegan ice cream or whipped cream.
- Individual servings: Bake the pears in individual ramekins for a more elegant presentation. Adjust the baking time accordingly.
- Make ahead: You can assemble the baked pears ahead of time and store them in the refrigerator for up to 24 hours. Bake them just before serving.
- Storage: Leftover baked pears can be stored in an airtight container in the refrigerator for up to 3 days. Reheat them in the oven or microwave before serving.
- Wine Pairing: A slightly sweet dessert wine, such as Moscato or Riesling, pairs beautifully with baked pears.
Troubleshooting:
- Pears are too hard: If the pears are not tender after 40 minutes of baking, cover the baking dish with foil and continue baking for another 10-15 minutes, or until they are easily pierced with a fork.
- Topping is browning too quickly: If the topping is browning too quickly, cover the baking dish with foil for the last 10-15 minutes of baking.
- Too much liquid: If there is too much liquid in the baking dish after baking, drain some of it off before serving.
- Not sweet enough: If the baked pears are not sweet enough for your taste, drizzle them with extra maple syrup or honey before serving.
Nutritional Information (approximate, per serving):
- Calories: 300-400
- Fat: 15-20g
- Saturated Fat: 8-12g
- Cholesterol: 30-40mg
- Sodium: 50-100mg
- Carbohydrates: 40-50g
- Fiber: 5-7g
- Sugar: 25-35g
- Protein: 3-5g
Note: Nutritional information is an estimate and may vary depending on the specific ingredients used.
Conclusion:
And there you have it! These Baked Pears are more than just a dessert; they’re an experience. From the tantalizing aroma that fills your kitchen to the melt-in-your-mouth texture and the symphony of flavors, this recipe is a guaranteed crowd-pleaser. I truly believe this is a must-try recipe, especially as the weather cools down and we crave something warm and comforting.
Why is it a must-try? Well, beyond the sheer deliciousness, it’s incredibly versatile and surprisingly simple to make. You don’t need to be a seasoned baker to achieve pear perfection. The recipe is forgiving, allowing for slight variations based on your personal preferences and what you have on hand. Plus, it’s a fantastic way to showcase seasonal pears at their peak ripeness.
But the best part? The possibilities are endless! Serve these warm, fragrant pears with a scoop of vanilla ice cream or a dollop of freshly whipped cream for a classic and elegant dessert. A sprinkle of chopped walnuts or pecans adds a delightful crunch. For a more decadent treat, drizzle with warm caramel sauce or a rich chocolate ganache.
If you’re feeling adventurous, try these variations:
* Spice it up: Add a pinch of ground ginger, cardamom, or nutmeg to the filling for a warmer, more complex flavor profile.
* Boozy boost: A splash of brandy, rum, or even a dessert wine like Sauternes can elevate the pears to a whole new level of sophistication.
* Cheesy delight: Crumble some blue cheese or goat cheese over the baked pears for a sweet and savory combination that’s surprisingly addictive.
* Breakfast treat: Serve sliced baked pears over yogurt or oatmeal for a healthy and delicious breakfast.
* Savory side: Pair baked pears with roasted pork or chicken for a unique and flavorful side dish. The sweetness of the pears complements the savory flavors beautifully.
I’ve made these Baked Pears countless times, and each time I tweak the recipe slightly to suit my mood and the ingredients I have available. That’s the beauty of this recipe it’s a blank canvas for your culinary creativity!
I’m so excited for you to try this recipe and experience the magic of baked pears for yourself. Don’t be afraid to experiment with different flavors and toppings to create your own signature version.
Once you’ve made these delectable Baked Pears, I would absolutely love to hear about your experience! Share your photos and comments on social media using [Your Hashtag] or leave a review on the recipe page. Let me know what variations you tried and what you thought of the final result. Your feedback is invaluable and helps me continue to create recipes that you’ll love.
So, go ahead, preheat your oven, gather your ingredients, and prepare to be amazed. I promise you, these Baked Pears will become a new favorite in your household. Happy baking! I can’t wait to hear all about your pear-fect creations!
Baked Pears: A Delicious & Easy Dessert Recipe
Warm, spiced pears baked with a buttery oat crumble. A comforting dessert perfect for any occasion.
Ingredients
- 6 ripe but firm pears (Bosc, Anjou, or Bartlett)
- 1/2 cup all-purpose flour
- 1/2 cup rolled oats
- 1/2 cup packed brown sugar
- 1/4 teaspoon ground cinnamon
- 1/4 teaspoon ground nutmeg
- 1/4 cup cold unsalted butter, cut into small cubes
- 1/4 cup chopped pecans or walnuts (optional)
- 1/4 cup maple syrup or honey
- 1/4 cup apple cider or pear juice
- 1 tablespoon lemon juice
- Vanilla ice cream or whipped cream, for serving (optional)
Instructions
- Preheat oven to 375°F (190°C).
- Prepare the pears: Wash, peel (optional), and halve the pears lengthwise. Core each half using a melon baller or spoon.
- Lemon Juice: Brush the cut surfaces with lemon juice to prevent browning.
- Make the Crumble Topping: In a medium bowl, whisk together flour, rolled oats, brown sugar, cinnamon, and nutmeg.
- Cut in Butter: Cut in the cold butter using a pastry blender or fingertips until the mixture resembles coarse crumbs.
- Add Nuts (Optional): Stir in chopped pecans or walnuts, if using.
- Prepare Baking Dish: Lightly grease a 9×13 inch baking dish.
- Arrange Pears: Place pear halves, cut-side up, in the prepared dish.
- Drizzle with Syrup: Drizzle maple syrup or honey evenly over the pears.
- Pour in Liquid: Pour apple cider or pear juice into the bottom of the dish.
- Top with Crumble: Sprinkle the crumble topping evenly over the pear halves.
- Bake: Bake for 30-40 minutes, or until the pears are tender and the topping is golden brown and bubbly.
- Cool Slightly: Let cool slightly before serving.
- Serve: Serve warm, topped with vanilla ice cream or whipped cream, if desired.
Notes
- Pear Variety: Bosc pears hold their shape well during baking, while Anjou and Bartlett pears become softer and more tender.
- Spice it up: Experiment with different spices, such as ginger, cardamom, or allspice.
- Add dried fruit: Stir in some dried cranberries, raisins, or chopped dates to the crumble topping for added sweetness and texture.
- Nut-free option: Omit the nuts from the crumble topping for a nut-free version. You can also substitute sunflower seeds or pumpkin seeds for a similar crunch.
- Gluten-free option: Use a gluten-free all-purpose flour blend in the crumble topping. Make sure to choose a blend that is designed for baking.
- Vegan option: Use vegan butter in the crumble topping and substitute maple syrup or agave nectar for honey. Serve with vegan ice cream or whipped cream.
- Individual servings: Bake the pears in individual ramekins for a more elegant presentation. Adjust the baking time accordingly.
- Make ahead: You can assemble the baked pears ahead of time and store them in the refrigerator for up to 24 hours. Bake them just before serving.
- Storage: Leftover baked pears can be stored in an airtight container in the refrigerator for up to 3 days. Reheat them in the oven or microwave before serving.
- Wine Pairing: A slightly sweet dessert wine, such as Moscato or Riesling, pairs beautifully with baked pears.