No bake Nutella tart just the name alone conjures up images of decadent, chocolatey bliss, doesn’t it? Imagine sinking your fork into a creamy, rich filling nestled in a crisp, buttery crust, all without ever turning on your oven. Sounds like a dream, right? Well, it’s a dream that’s about to come true!
While the exact origins of the Nutella tart are a bit hazy, the love for Nutella itself is anything but. This hazelnut and chocolate spread, born in post-World War II Italy, quickly became a global phenomenon. Its creamy texture and irresistible flavor have made it a beloved ingredient in countless desserts, from simple toast toppings to elaborate pastries. The no-bake tart variation is a modern adaptation, catering to our desire for quick, easy, and utterly satisfying treats.
What makes this no bake Nutella tart so incredibly popular? It’s the perfect combination of textures and flavors. The crunchy, crumbly crust provides a delightful contrast to the smooth, velvety Nutella filling. The intense hazelnut and chocolate notes are a symphony for your taste buds. And, perhaps most importantly, it’s incredibly convenient. With minimal effort and readily available ingredients, you can whip up a show-stopping dessert that’s sure to impress. So, are you ready to indulge in a slice of pure happiness? Let’s get started!

Ingredients:
- For the Crust:
- 250g Digestive Biscuits (or Graham Crackers)
- 100g Unsalted Butter, melted
- 2 tablespoons Granulated Sugar
- 1/4 teaspoon Salt
- For the Nutella Filling:
- 400g Nutella
- 250g Mascarpone Cheese (or Cream Cheese), softened
- 100ml Heavy Cream
- 1 teaspoon Vanilla Extract
- For the Garnish (Optional):
- Chopped Hazelnuts
- Chocolate Shavings
- Fresh Berries (Strawberries, Raspberries)
- Powdered Sugar
Preparing the Crust:
- Crush the Biscuits: The first thing we need to do is turn those digestive biscuits into fine crumbs. You can do this in a couple of ways. My preferred method is to use a food processor just pulse them until they’re finely ground. If you don’t have a food processor, you can put the biscuits in a large zip-lock bag and crush them with a rolling pin. Make sure to get them as fine as possible for a smooth crust.
- Melt the Butter: Now, let’s melt the butter. You can do this in the microwave in 30-second intervals, stirring in between, or in a small saucepan over low heat. Just make sure it’s completely melted but not boiling.
- Combine the Ingredients: In a medium-sized bowl, combine the crushed biscuit crumbs, melted butter, sugar, and salt. Mix everything together really well until all the crumbs are evenly moistened with the butter. The mixture should resemble wet sand.
- Press into the Tart Pan: Now for the fun part! Grab your tart pan (a 9-inch tart pan with a removable bottom works best). Pour the crumb mixture into the pan and use the bottom of a measuring cup or your fingers to press the crumbs evenly across the bottom and up the sides of the pan. Make sure the crust is firmly packed and uniform in thickness. This will give you a nice, sturdy base for the filling.
- Chill the Crust: Once the crust is pressed into the pan, cover it with plastic wrap and place it in the refrigerator to chill for at least 30 minutes. This will help the crust set and become firm, so it doesn’t crumble when you add the filling. You can even chill it for longer, up to a couple of hours, if you have the time.
Preparing the Nutella Filling:
- Soften the Mascarpone: Make sure your mascarpone cheese (or cream cheese) is softened to room temperature before you start. This will ensure that it mixes smoothly with the other ingredients and doesn’t leave any lumps in your filling. If you forgot to take it out of the fridge ahead of time, you can microwave it for a few seconds, but be careful not to melt it.
- Combine Nutella and Mascarpone: In a large bowl, add the softened mascarpone cheese and the Nutella. Using an electric mixer (either a stand mixer or a hand mixer), beat the two together until they are completely combined and the mixture is smooth and creamy. Be careful not to overmix, as this can cause the mascarpone to become runny.
- Add Heavy Cream and Vanilla: Pour in the heavy cream and add the vanilla extract to the Nutella and mascarpone mixture. Continue to beat with the electric mixer until the cream is fully incorporated and the filling is light and fluffy. Again, be careful not to overmix. The filling should be thick enough to hold its shape but still be easily spreadable.
Assembling the Tart:
- Pour in the Filling: Take the chilled crust out of the refrigerator. Pour the Nutella filling into the crust, spreading it evenly with a spatula. Make sure the filling reaches all the way to the edges of the crust for a beautiful presentation.
- Smooth the Surface: Use the spatula to smooth the surface of the filling, creating a nice, even layer. This will make the tart look more professional and appealing.
- Chill the Tart: Cover the tart with plastic wrap and place it back in the refrigerator to chill for at least 4 hours, or preferably overnight. This will allow the filling to set completely and become firm, making it easier to slice and serve. The longer it chills, the better the texture will be.
Garnishing and Serving:
- Garnish (Optional): Once the tart is fully chilled and set, you can garnish it as desired. Some popular options include sprinkling chopped hazelnuts over the top, adding chocolate shavings, arranging fresh berries (such as strawberries or raspberries) on top, or dusting it with powdered sugar. Get creative and have fun with it!
- Remove from Tart Pan: Carefully remove the tart from the tart pan by gently lifting it out using the removable bottom. Place the tart on a serving plate or platter.
- Slice and Serve: Use a sharp knife to slice the tart into wedges. Serve immediately and enjoy! The tart can be stored in the refrigerator for up to 3 days.
Conclusion:
This No-Bake Nutella Tart isn’t just a dessert; it’s a decadent experience waiting to happen! Seriously, if you’re looking for a show-stopping treat that requires minimal effort and maximum flavor, you absolutely must give this recipe a try. The creamy, rich Nutella filling nestled in that buttery, crumbly crust is a match made in dessert heaven. It’s the perfect balance of textures and tastes that will leave everyone wanting more.
But why is this particular recipe a must-try? Beyond the sheer deliciousness, it’s the simplicity. No oven required! That’s right, you can whip up this impressive tart without breaking a sweat, making it ideal for those hot summer days or when you’re short on time but still craving something special. It’s also incredibly versatile. You can easily adapt it to your own preferences and dietary needs.
Serving Suggestions and Variations:
Think of this recipe as a blank canvas for your culinary creativity! Want to elevate it even further? Consider these serving suggestions and variations:
* Fresh Berries: A scattering of fresh raspberries, strawberries, or blueberries on top adds a burst of freshness and a beautiful pop of color. The tartness of the berries perfectly complements the sweetness of the Nutella.
* Whipped Cream: A dollop of freshly whipped cream (or even a store-bought variety) adds a light and airy element to the richness of the tart.
* Chocolate Shavings: For an extra dose of chocolatey goodness, sprinkle some dark or milk chocolate shavings over the top.
* Chopped Nuts: Add some crunch by sprinkling chopped hazelnuts, almonds, or pecans over the tart.
* Salted Caramel Drizzle: A drizzle of salted caramel sauce adds a salty-sweet dimension that’s simply irresistible.
* Espresso Powder: For a mocha-inspired twist, add a teaspoon of espresso powder to the Nutella filling.
* Different Crusts: While the graham cracker crust is classic, you could experiment with other crusts, such as Oreo crumbs or shortbread cookies.
* Vegan Option: Use vegan graham crackers and a vegan Nutella alternative to make this tart suitable for vegans. You can also use coconut cream instead of heavy cream for the filling.
The possibilities are truly endless! Don’t be afraid to experiment and create your own signature version of this No-Bake Nutella Tart.
Your Turn to Bake (or Rather, Chill!):
I’m so confident that you’ll love this recipe. It’s a guaranteed crowd-pleaser that’s perfect for any occasion, from casual weeknight desserts to elegant dinner parties. So, what are you waiting for? Gather your ingredients, follow the simple steps, and prepare to be amazed by the ease and deliciousness of this No-Bake Nutella Tart.
I can’t wait to hear about your experience! Once you’ve made it, please share your photos and feedback in the comments below. Let me know what variations you tried and how much everyone loved it. Happy baking (or rather, chilling!), and enjoy every single bite of this decadent treat! I’m sure you’ll agree that this No-Bake Nutella Tart is a winner!
No Bake Nutella Tart: The Easiest Dessert Recipe
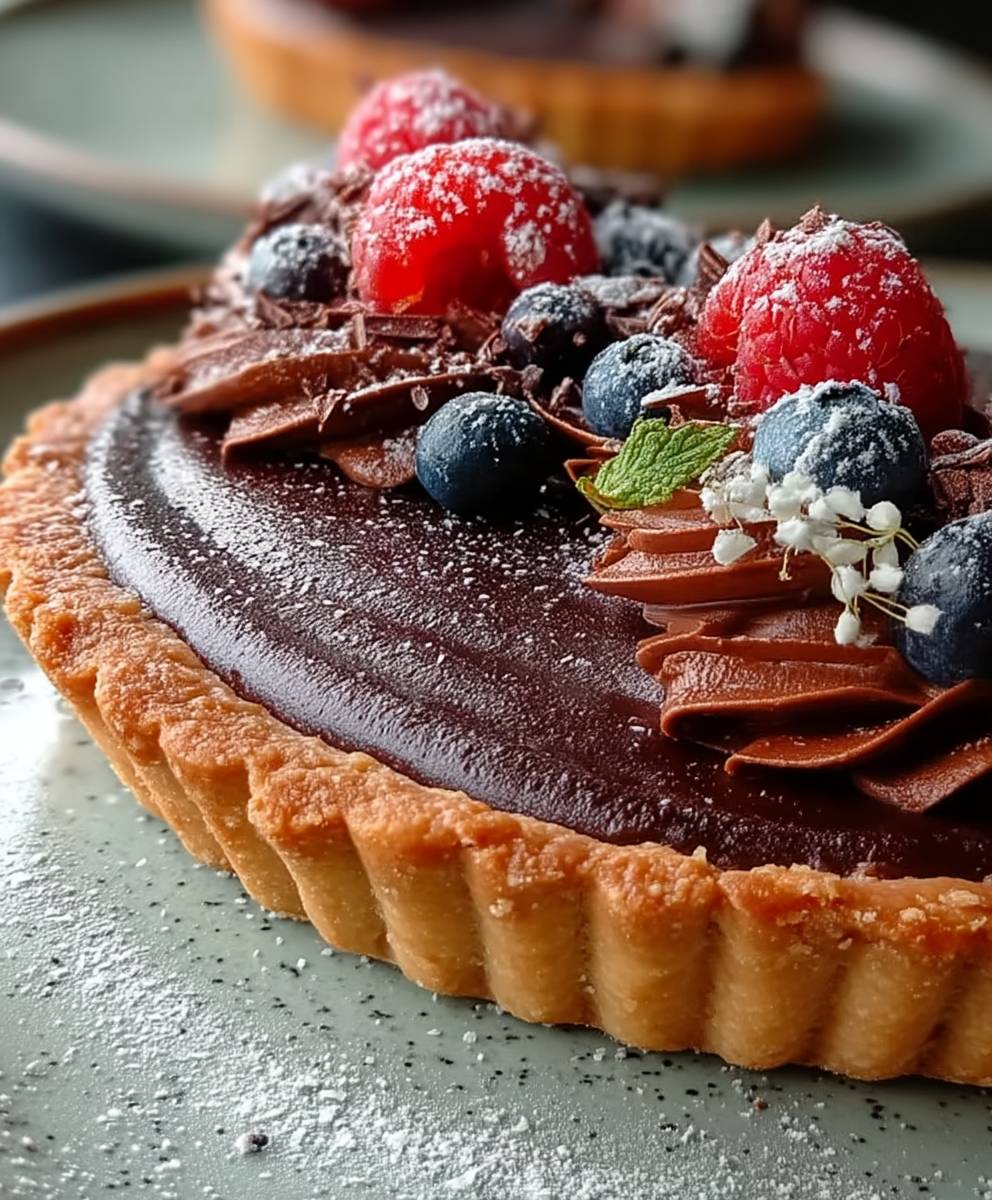
Buttery biscuit crust filled with creamy Nutella mascarpone. Optional garnishes: hazelnuts, chocolate shavings, and fresh berries.
Ingredients
- 250g Digestive Biscuits (or Graham Crackers)
- 100g Unsalted Butter, melted
- 2 tablespoons Granulated Sugar
- 1/4 teaspoon Salt
- 400g Nutella
- 250g Mascarpone Cheese (or Cream Cheese), softened
- 100ml Heavy Cream
- 1 teaspoon Vanilla Extract
- Chopped Hazelnuts
- Chocolate Shavings
- Fresh Berries (Strawberries, Raspberries)
- Powdered Sugar
Instructions
- Pulse digestive biscuits in a food processor until finely ground. Alternatively, place in a zip-lock bag and crush with a rolling pin.
- Melt butter in the microwave in 30-second intervals, stirring in between, or in a small saucepan over low heat.
- In a medium bowl, combine crushed biscuit crumbs, melted butter, sugar, and salt. Mix well until evenly moistened.
- Press the crumb mixture evenly across the bottom and up the sides of a 9-inch tart pan with a removable bottom.
- Cover with plastic wrap and chill in the refrigerator for at least 30 minutes (or up to 2 hours).
- Ensure mascarpone cheese (or cream cheese) is softened to room temperature.
- In a large bowl, beat softened mascarpone cheese and Nutella with an electric mixer until smooth and creamy.
- Pour in heavy cream and add vanilla extract. Beat until fully incorporated and the filling is light and fluffy.
- Take the chilled crust out of the refrigerator. Pour the Nutella filling into the crust, spreading it evenly with a spatula.
- Use the spatula to smooth the surface of the filling, creating a nice, even layer.
- Cover with plastic wrap and chill in the refrigerator for at least 4 hours, or preferably overnight.
- Garnish with chopped hazelnuts, chocolate shavings, fresh berries, or powdered sugar.
- Carefully remove the tart from the tart pan.
- Slice into wedges and serve immediately. Store in the refrigerator for up to 3 days.
Notes
- For a smoother crust, ensure the biscuit crumbs are as fine as possible.
- Be careful not to overmix the mascarpone cheese, as it can become runny.
- Chilling the tart overnight is recommended for the best texture.
- Get creative with your garnishes!