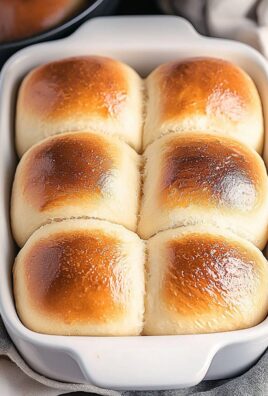
No Knead Bread: the very words conjure images of rustic loaves, crusty exteriors, and that unmistakable aroma filling your kitchen. But what if I told you that achieving this artisanal perfection requires almost zero effort? Forget complicated kneading techniques and hours of proofing. This recipe is about to revolutionize your bread-baking game!
The beauty of no knead bread lies in its simplicity, a concept that has been around for centuries in various forms. While the modern resurgence of this technique is often attributed to Jim Lahey of Sullivan Street Bakery, the underlying principle of long fermentation has been used by bakers for generations to develop complex flavors and textures. It’s a testament to the idea that sometimes, less is truly more.
Why is this bread so beloved? Well, for starters, the taste is incredible. The extended fermentation process allows the dough to develop a depth of flavor that rivals even the most meticulously kneaded loaves. The crust is shatteringly crisp, giving way to a soft, airy interior with those coveted irregular holes. But beyond the taste, it’s the sheer convenience that makes this recipe a winner. With just a few minutes of active time, you can have a bakery-worthy loaf ready to enjoy. So, ditch the store-bought bread and let’s embark on this effortless baking adventure together!

Ingredients:
- 3 cups (384 grams) all-purpose flour, plus more for dusting
- 1 3/4 teaspoons salt
- 1/2 teaspoon instant or rapid-rise yeast
- 1 1/2 cups (350 ml) lukewarm water (not hot!)
- Optional: 1 tablespoon olive oil (for greasing the bowl)
Preparing the Dough: The Easiest Part!
Okay, let’s get started! This no-knead bread is seriously the easiest bread you’ll ever make. The beauty of it is in the long, slow fermentation, which develops incredible flavor without any strenuous kneading. Trust me, you’ll be amazed.
- Combine the dry ingredients: In a large bowl, whisk together the flour, salt, and yeast. Make sure the yeast is evenly distributed throughout the flour. This helps it activate properly. I like to use a whisk for this, but a spoon works just fine too.
- Add the water: Pour the lukewarm water into the bowl with the dry ingredients. The water temperature is important too hot, and you’ll kill the yeast; too cold, and it won’t activate properly. Lukewarm is the key!
- Mix until just combined: Using a wooden spoon or a spatula, stir the mixture until just combined. You’re not looking for a smooth dough here; it will be shaggy and sticky. Don’t overmix! Overmixing can develop the gluten too much, resulting in a tougher bread.
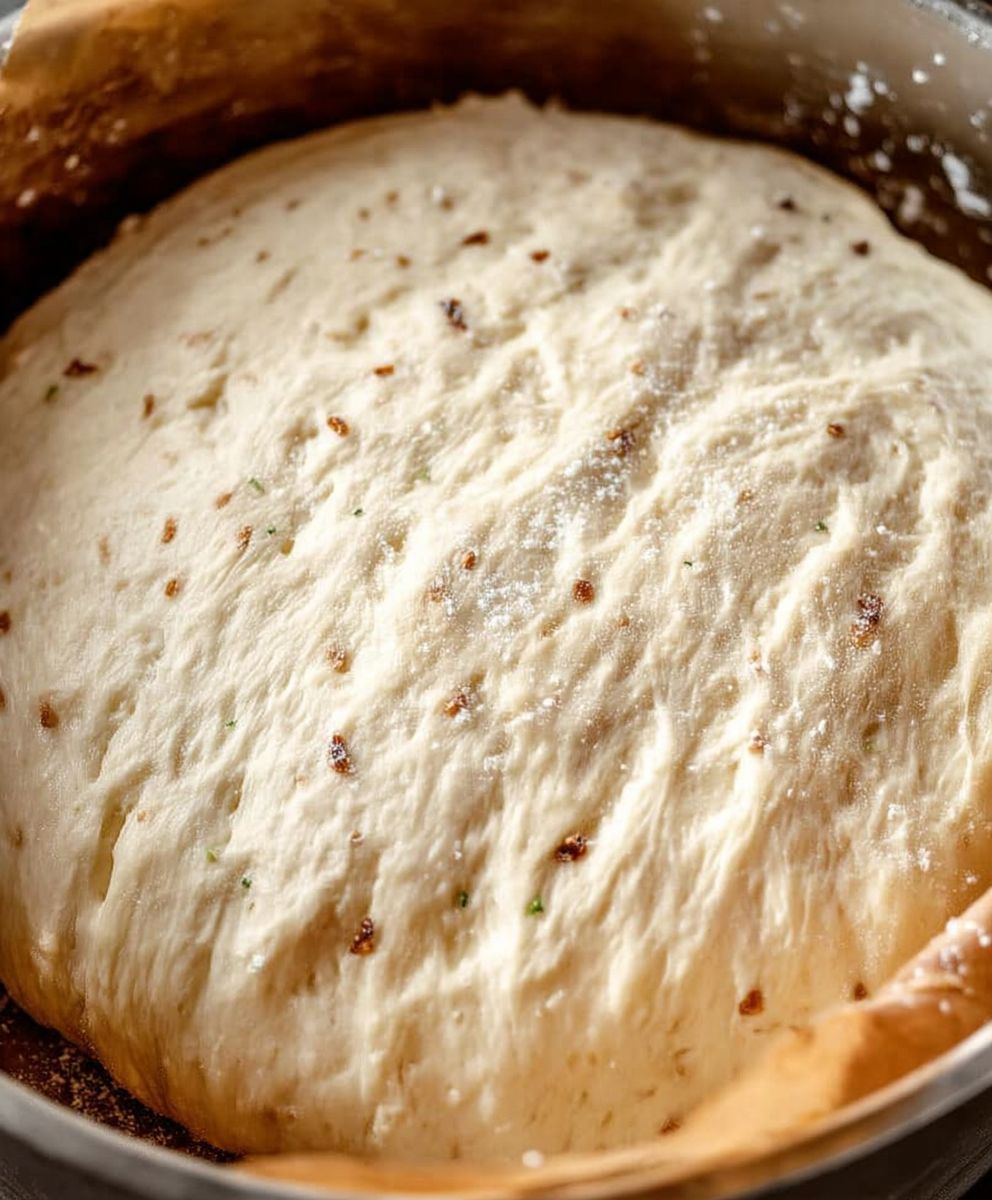
- First Rise (The Long Nap): Cover the bowl tightly with plastic wrap or a lid. Let it rise at room temperature for at least 12 hours, or even up to 18 hours. The longer it rises, the more flavorful the bread will be. You’ll see bubbles forming on the surface of the dough, which is a good sign that the yeast is working its magic. I usually let mine rise overnight.
Shaping and Second Rise: Almost There!
After the first rise, the dough will be bubbly and almost doubled in size. Now it’s time to shape it and let it rise again.
- Prepare your surface: Generously flour a clean work surface. This is crucial because the dough will be very sticky. Don’t be shy with the flour!
- Turn out the dough: Gently turn the dough out onto the floured surface. It will be a bit of a blob, and that’s perfectly fine.
- Shape the dough: Using floured hands, gently shape the dough into a round or oval. You can do this by folding the edges of the dough towards the center, creating a tight ball. Be careful not to deflate the dough too much.
- Second Rise (The Short Nap): Place the shaped dough on a piece of parchment paper. This will make it easier to transfer to the hot Dutch oven later. Dust the top of the dough with more flour. Cover loosely with plastic wrap or a clean kitchen towel and let it rise for another 30 minutes to 1 hour. It should puff up slightly.
Baking: The Grand Finale!
Now for the exciting part baking! The key to this no-knead bread is baking it in a preheated Dutch oven. The Dutch oven creates a steamy environment that helps the bread rise beautifully and develop a crispy crust.
- Preheat the oven and Dutch oven: Place a 6-8 quart Dutch oven (with lid) in the oven and preheat to 450°F (232°C) for at least 30 minutes. It’s important that the Dutch oven is very hot before you put the dough in. This helps create that signature crust. Be extremely careful when handling the hot Dutch oven!
- Carefully transfer the dough: Remove the hot Dutch oven from the oven. Carefully remove the lid. Using the parchment paper as a sling, gently lower the dough into the hot Dutch oven. Don’t worry if it deflates a little; it will rise again in the oven.
- Score the dough (Optional but Recommended): Using a sharp knife or a lame (a special bread-scoring tool), score the top of the dough with a slash or an “X”. This allows the bread to expand properly in the oven and prevents it from cracking randomly.
- Bake with the lid on: Cover the Dutch oven with the lid and bake for 30 minutes. Baking with the lid on creates steam, which helps the bread rise and develop a crispy crust.
- Bake without the lid: Remove the lid and bake for another 15-20 minutes, or until the crust is golden brown and the internal temperature reaches 200-210°F (93-99°C). Keep an eye on it, as ovens can vary. You want a nice, deep golden brown color.
- Cool completely: Carefully remove the bread from the Dutch oven and place it on a wire rack to cool completely before slicing. This is the hardest part, I know! But if you cut into it too soon, the inside will be gummy. Trust me, it’s worth the wait.
Tips and Tricks for Perfect No-Knead Bread
Here are a few extra tips to help you achieve bread-baking success:
- Use a kitchen scale: For the most accurate results, I highly recommend using a kitchen scale to measure the ingredients, especially the flour. This will ensure that you have the correct ratio of flour to water.
- Adjust the hydration: The amount of water you need may vary depending on the humidity and the type of flour you use. If the dough seems too dry, add a tablespoon or two of water at a time until it comes together. If it seems too wet, add a tablespoon or two of flour.
- Experiment with different flours: You can use different types of flour to create different flavors and textures. Try using bread flour for a chewier crust, or whole wheat flour for a nuttier flavor.
- Add inclusions: Get creative and add your favorite inclusions to the dough, such as olives, herbs, cheese, or dried fruit. Just add them after the first rise, when you’re shaping the dough.
- Don’t be afraid to experiment: This recipe is very forgiving, so don’t be afraid to experiment and make it your own. The most important thing is to have fun!
Troubleshooting: Common Issues and Solutions
Even with the simplest recipes, things can sometimes go wrong. Here are a few common issues you might encounter and how to fix them:
- Flat bread: If your bread is flat, it could be due to several factors:
- Yeast: Make sure your yeast is fresh and active. If it’s old, it may not be able to leaven the dough properly.
- Over-proofing: If you let the dough rise for too long, it can over-proof and collapse.
- Under-proofing: If you don’t let the dough rise long enough, it won’t have enough air in it.
- Gummy interior: A gummy interior is usually caused by cutting into the bread before it has cooled completely. Be patient and let it cool completely on a wire rack.
- Tough crust: A tough crust can be caused by overbaking the bread. Reduce the baking time or lower the oven temperature slightly.
- Burnt bottom: If the bottom of your bread is burning, try placing a baking sheet on the rack below the Dutch oven.
Storage: Keeping Your Bread Fresh
To keep your no-knead bread fresh for as long as possible, store it in an airtight container at room temperature. You can also freeze it for longer storage. To freeze, wrap the bread tightly in plastic wrap and then place it in a freezer bag. It will keep in the freezer for up to 3 months. To thaw, let it thaw at room temperature or in the refrigerator.
Serving Suggestions: Enjoying Your Homemade Bread
This no-knead bread is delicious on its own, but it’s also great with a variety of toppings and accompaniments. Here are a few ideas:
- Butter and jam: A classic combination that’s always a winner.
- Olive oil and balsamic vinegar: A simple and flavorful dipping sauce.
- Cheese and charcuterie: Perfect for a light lunch or snack.
- Soup or stew: A hearty and satisfying meal.
- Sandwiches: Use it to make your favorite sandwiches.
- 3 cups (384 grams) all-purpose flour, plus more for dusting
- 1 3/4 teaspoons salt
- 1/2 teaspoon instant or rapid-rise yeast
- 1 1/2 cups (350 ml) lukewarm water (not hot!)
- 1 tablespoon olive oil (for greasing the bowl)
- Combine Dry Ingredients: In a large bowl, whisk together the flour, salt, and yeast.
- Add Water: Pour the lukewarm water into the bowl with the dry ingredients.
- Mix: Stir until just combined. The dough will be shaggy and sticky.
- First Rise: Cover the bowl tightly with plastic wrap or a lid. Let it rise at room temperature for at least 12 hours, or up to 18 hours.
- Prepare Surface: Generously flour a clean work surface.
- Turn Out Dough: Gently turn the dough out onto the floured surface.
- Shape Dough: Using floured hands, gently shape the dough into a round or oval.
- Second Rise: Place the shaped dough on a piece of parchment paper. Dust the top of the dough with more flour. Cover loosely and let it rise for another 30 minutes to 1 hour.
- Preheat Oven and Dutch Oven: Place a 6-8 quart Dutch oven (with lid) in the oven and preheat to 450°F (232°C) for at least 30 minutes.
- Transfer Dough: Carefully remove the hot Dutch oven from the oven. Remove the lid. Using the parchment paper as a sling, gently lower the dough into the hot Dutch oven.
- Score Dough (Optional): Using a sharp knife or lame, score the top of the dough with a slash or an “X”.
- Bake with Lid: Cover the Dutch oven with the lid and bake for 30 minutes.
- Bake without Lid: Remove the lid and bake for another 15-20 minutes, or until the crust is golden brown and the internal temperature reaches 200-210°F (93-99°C).
- Cool Completely: Carefully remove the bread from the Dutch oven and place it on a wire rack to cool completely before slicing.
- Use a kitchen scale for best results.
- Adjust the hydration as needed.
- Experiment with different flours and inclusions.
- Don’t be afraid to experiment!
- If your bread is flat, make sure your yeast is fresh, and avoid over- or under-proofing.
- A gummy interior is usually caused by cutting into the bread before it has cooled completely.
- A tough crust can be caused by overbaking the bread.
- If the bottom of your bread is burning, try placing a baking sheet on the rack below the Dutch oven.
- Store in an airtight container at room temperature or freeze for longer storage.
Conclusion:
And there you have it! This No Knead Bread recipe is truly a game-changer, and I genuinely believe it deserves a spot in your regular baking rotation. Why? Because it delivers bakery-quality results with minimal effort. We’re talking about a crusty, golden-brown loaf with a soft, airy interior all achieved without the tedious kneading that traditional bread-making demands. It’s the perfect solution for busy weeknights, lazy weekends, or anytime you crave the comforting aroma and taste of freshly baked bread.
But the best part? It’s incredibly forgiving. Even if you’re a novice baker, you’re almost guaranteed success. The long fermentation process develops incredible flavor, and the Dutch oven creates the ideal environment for that perfect crust. Trust me, the satisfaction of pulling a beautiful loaf of this bread from your oven is unmatched.
Beyond its simplicity and deliciousness, this recipe is also incredibly versatile. While it’s fantastic on its own, there are countless ways to enjoy it. Slice it thick and slather it with butter and your favorite jam for a simple breakfast. Use it to make gourmet grilled cheese sandwiches that will elevate your lunch game. Or, cube it and toss it with olive oil, herbs, and garlic for homemade croutons that will add a delightful crunch to your salads.
For serving suggestions, consider pairing this No Knead Bread with a hearty soup or stew for a complete and satisfying meal. It’s also wonderful alongside a cheese board or charcuterie platter, providing a neutral base that complements a variety of flavors. And if you’re feeling adventurous, try using it to make bruschetta topped with fresh tomatoes, basil, and balsamic glaze.
Looking for variations? Feel free to experiment with different types of flour. Whole wheat flour will add a nutty flavor and a slightly denser texture, while rye flour will give it a distinctive tang. You can also incorporate seeds, nuts, or dried fruits into the dough for added flavor and texture. Sunflower seeds, pumpkin seeds, walnuts, and raisins are all excellent choices.
Another fun variation is to add herbs and spices to the dough. Rosemary, thyme, garlic powder, and onion powder are all great options that will enhance the savory flavor of the bread. You can also add a pinch of red pepper flakes for a subtle kick.
Don’t be afraid to get creative and customize this recipe to your liking. The possibilities are endless!
I truly hope you’ll give this No Knead Bread recipe a try. I’m confident that you’ll be amazed by how easy it is to make and how delicious it tastes. Once you’ve experienced the joy of baking your own bread, you’ll never want to go back to store-bought again.
And most importantly, I’d love to hear about your experience! Share your photos and stories on social media using [Insert your social media tag here]. Let me know what variations you tried, what you paired it with, and how much you enjoyed it. Your feedback is invaluable, and it helps me continue to create recipes that you’ll love. Happy baking!
No Knead Bread: The Easiest Recipe for Perfect Homemade Bread
Effortless no-knead bread with a crispy crust and flavorful interior. Just mix, rise, and bake!