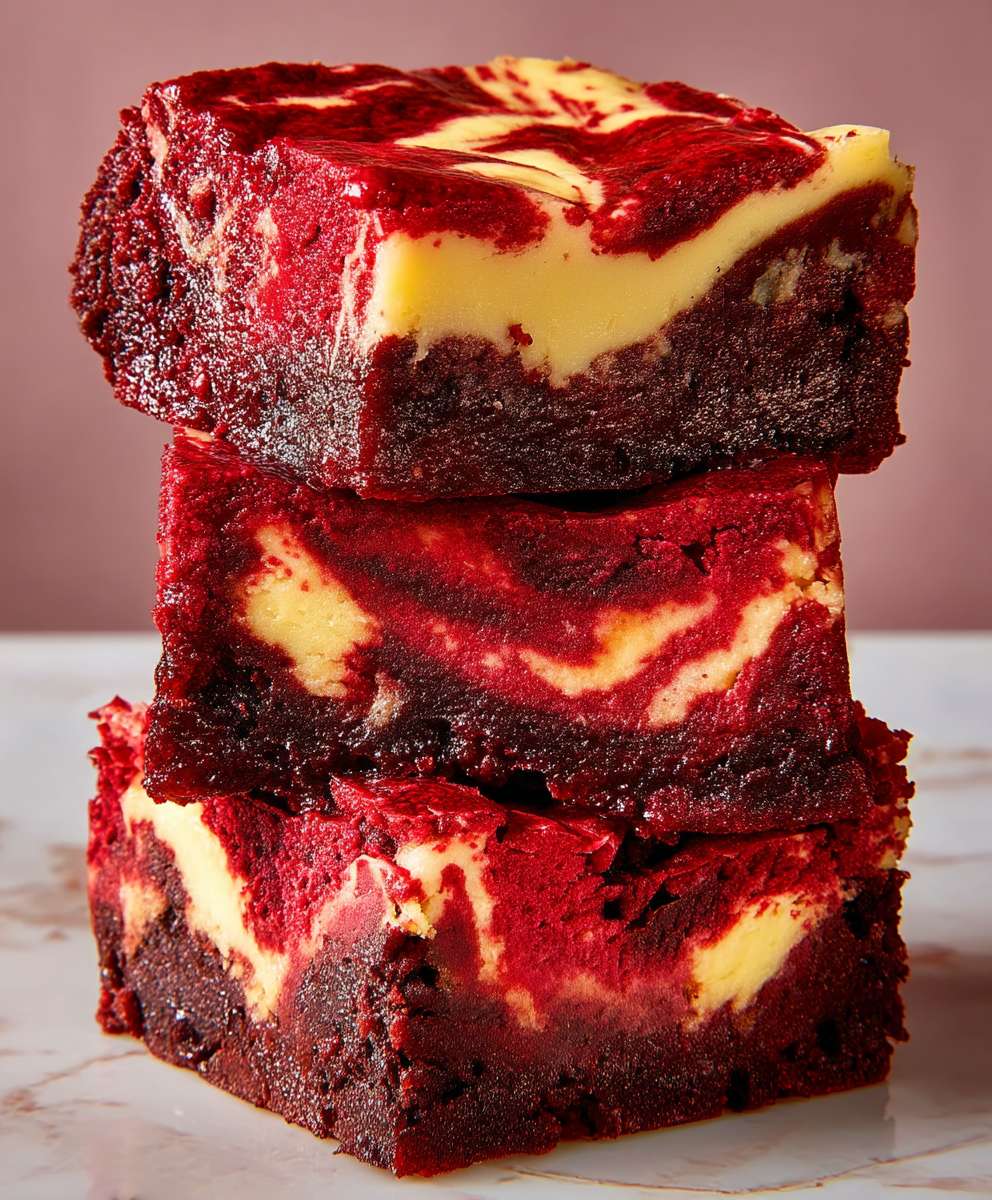
Red velvet cheesecake brownies: just the name alone conjures up images of decadent indulgence, doesn’t it? Imagine sinking your teeth into a fudgy brownie, swirled with tangy cheesecake, all boasting that signature, vibrant red hue. This isn’t just dessert; it’s an experience!
The allure of red velvet, with its subtle cocoa notes and striking color, has captivated bakers and dessert enthusiasts for decades. While its exact origins are debated, many believe it gained popularity during the Great Depression, when bakers used beet juice to enhance the color and moisture of their cakes. The addition of cream cheese frosting further elevated it to a luxurious treat, a symbol of comfort and celebration.
But what makes red velvet cheesecake brownies so irresistible? It’s the perfect marriage of textures and flavors. The rich, dense brownie base provides a satisfying chew, while the creamy cheesecake swirl adds a delightful tang and melt-in-your-mouth smoothness. It’s a symphony of sweet and slightly sour, a combination that keeps you coming back for more. Plus, these brownies are surprisingly easy to make, making them perfect for a weeknight treat or a show-stopping dessert for your next gathering. Get ready to experience brownie bliss!

Ingredients:
- For the Brownie Layer:
- 1 cup (2 sticks) unsalted butter, melted
- 2 cups granulated sugar
- 4 large eggs
- 1 tablespoon red food coloring
- 1 teaspoon vanilla extract
- 1 cup all-purpose flour
- ½ cup unsweetened cocoa powder
- ¼ teaspoon salt
- For the Cheesecake Layer:
- 16 ounces cream cheese, softened
- ½ cup granulated sugar
- 2 large eggs
- 1 teaspoon vanilla extract
- Optional Garnishes:
- Powdered sugar, for dusting
- Red velvet cake crumbs
- White chocolate shavings
Preparing the Brownie Layer:
- Melt the Butter: In a large, microwave-safe bowl, melt the butter. You can also do this in a saucepan over low heat. Be careful not to burn it! Let it cool slightly before proceeding.
- Combine Butter and Sugar: Add the granulated sugar to the melted butter and whisk until well combined. The mixture should be smooth and glossy. This step is crucial for achieving that fudgy brownie texture.
- Incorporate the Eggs: Add the eggs one at a time, whisking well after each addition. Make sure each egg is fully incorporated before adding the next. This helps create a stable emulsion and prevents the brownies from being greasy.
- Add Red Food Coloring and Vanilla: Stir in the red food coloring and vanilla extract. Mix until the batter is a uniform, vibrant red color. The amount of food coloring can be adjusted to your preference, but 1 tablespoon usually gives a good, deep red hue.
- Combine Dry Ingredients: In a separate bowl, whisk together the flour, cocoa powder, and salt. This ensures that the cocoa powder is evenly distributed throughout the flour, preventing clumps in the final batter.
- Gradually Add Dry Ingredients to Wet Ingredients: Gradually add the dry ingredients to the wet ingredients, mixing until just combined. Be careful not to overmix, as this can develop the gluten in the flour and result in tough brownies. A few streaks of flour are okay at this stage.
Preparing the Cheesecake Layer:
- Soften the Cream Cheese: Ensure the cream cheese is completely softened to room temperature. This is essential for a smooth, lump-free cheesecake layer. If you’re short on time, you can microwave it in 15-second intervals, but be careful not to melt it.
- Cream the Cream Cheese and Sugar: In a separate bowl, beat the softened cream cheese and sugar together until smooth and creamy. A hand mixer or stand mixer works best for this, but you can also do it by hand with a whisk.
- Incorporate the Eggs: Add the eggs one at a time, beating well after each addition. Again, make sure each egg is fully incorporated before adding the next.
- Add Vanilla Extract: Stir in the vanilla extract. Mix until everything is well combined and the cheesecake batter is smooth and creamy.
Assembling and Baking the Brownies:
- Prepare the Baking Pan: Preheat your oven to 350°F (175°C). Grease and flour a 9×13 inch baking pan. Alternatively, you can line the pan with parchment paper, leaving an overhang on the sides for easy removal.
- Pour the Brownie Batter: Pour the brownie batter into the prepared baking pan and spread it evenly.
- Pour the Cheesecake Batter: Gently pour the cheesecake batter over the brownie batter. Use a spoon or spatula to spread it evenly over the surface.
- Create a Swirl (Optional): For a marbled effect, use a knife or skewer to swirl the cheesecake batter into the brownie batter. Be careful not to overmix, as this can muddy the colors.
- Bake the Brownies: Bake in the preheated oven for 30-35 minutes, or until a toothpick inserted into the center comes out with moist crumbs attached. The cheesecake layer should be set, but still slightly jiggly.
- Cool Completely: Let the brownies cool completely in the pan before cutting. This is important for preventing them from crumbling. You can speed up the cooling process by placing the pan in the refrigerator for a few hours.
- Cut and Serve: Once the brownies are completely cool, cut them into squares and serve.
Tips for Perfect Red Velvet Cheesecake Brownies:
- Don’t Overbake: Overbaking is the enemy of fudgy brownies. Keep a close eye on them and remove them from the oven as soon as a toothpick inserted into the center comes out with moist crumbs.
- Use High-Quality Ingredients: The quality of your ingredients will directly impact the taste and texture of your brownies. Use good-quality butter, cream cheese, and cocoa powder for the best results.
- Adjust the Sweetness: If you prefer less sweet brownies, you can reduce the amount of sugar in both the brownie and cheesecake layers.
- Add Chocolate Chips: For an extra chocolatey treat, add chocolate chips to the brownie batter.
- Store Properly: Store leftover brownies in an airtight container at room temperature for up to 3 days, or in the refrigerator for up to a week.
- Freezing: These brownies freeze well. Wrap them individually in plastic wrap and then place them in a freezer-safe bag or container. They can be frozen for up to 2 months. Thaw them in the refrigerator overnight before serving.
Variations:
- Red Velvet Blondies: Omit the cocoa powder from the brownie layer for a red velvet blondie base.
- Chocolate Swirl: Add melted chocolate to a portion of the cheesecake batter for a chocolate swirl effect.
- Cream Cheese Frosting: Instead of a cheesecake layer, top the baked brownies with a cream cheese frosting.
- Nutty Brownies: Add chopped nuts, such as walnuts or pecans, to the brownie batter.
Troubleshooting:
- Brownies are too dry: This is usually caused by overbaking. Make sure to remove the brownies from the oven as soon as a toothpick inserted into the center comes out with moist crumbs.
- Brownies are too greasy: This can be caused by using too much butter or not incorporating the eggs properly. Make sure to measure the butter accurately and whisk the eggs well after each addition.
- Cheesecake layer is cracked: This can be caused by overbaking or baking at too high of a temperature. Make sure to bake the brownies at the recommended temperature and avoid overbaking.
- Brownies are not red enough: This can be caused by using insufficient red food coloring. Add more food coloring until you achieve the desired color. Gel food coloring is more concentrated than liquid food coloring, so you may need to use less.
Serving Suggestions:
- Dust with Powdered Sugar: A simple dusting of powdered sugar adds a touch of elegance.
- Top with Red Velvet Cake Crumbs: Crumble leftover red velvet cake over the brownies for added texture and flavor.
- Drizzle with White Chocolate: Drizzle melted white chocolate over the brownies for a beautiful and delicious garnish.
- Serve with Ice Cream: A scoop of vanilla ice cream or cream cheese ice cream complements the rich flavor of the brownies perfectly.
- Pair with Coffee or Milk: These brownies are delicious with a cup of coffee or a glass of milk.
Conclusion:
And there you have it! These red velvet cheesecake brownies are truly a must-try for anyone who loves a decadent, satisfying dessert. The fudgy brownie base, swirled with that tangy, creamy cheesecake layer, creates a symphony of textures and flavors that will leave you wanting more. It’s the perfect treat for a special occasion, a weekend baking project, or simply when you need a little something to brighten your day.
What makes these brownies so irresistible? It’s the perfect balance. The rich, chocolatey depth of the red velvet is beautifully complemented by the light, airy cheesecake. The slight tang from the cream cheese cuts through the sweetness, preventing it from becoming overwhelming. And let’s not forget that gorgeous marbled effect they look as good as they taste!
But the best part? They’re surprisingly easy to make! With just a few simple steps and readily available ingredients, you can whip up a batch of these beauties in no time. Don’t be intimidated by the cheesecake swirl; it’s much simpler than it looks. Just dollop spoonfuls of the cheesecake batter over the brownie batter and swirl with a knife or toothpick. The result is a stunning visual masterpiece that will impress your friends and family.
Now, let’s talk serving suggestions. These brownies are delicious on their own, but you can elevate them even further with a few simple additions. A scoop of vanilla ice cream is a classic pairing that never fails. Or, try a dollop of whipped cream and a sprinkle of chocolate shavings for an extra touch of elegance. For a truly indulgent experience, drizzle them with a warm chocolate sauce or a raspberry coulis.
Looking for variations? Get creative! You could add chopped nuts to the brownie batter for a bit of crunch. Pecans or walnuts would be particularly delicious. Or, try adding a swirl of white chocolate to the cheesecake layer for an even more decadent treat. For a festive twist, add a few drops of peppermint extract to the brownie batter during the holiday season. You could even use different food coloring to create a rainbow effect! The possibilities are endless.
These red velvet cheesecake brownies are also incredibly versatile. They’re perfect for potlucks, bake sales, or as a homemade gift. Wrap them individually in cellophane bags and tie them with a ribbon for a thoughtful and delicious present. They also freeze well, so you can make a batch ahead of time and enjoy them whenever you crave a sweet treat. Just be sure to wrap them tightly to prevent freezer burn.
I truly believe that this recipe will become a new favorite in your household. It’s a crowd-pleaser that’s sure to impress everyone who tries it. So, what are you waiting for? Gather your ingredients, preheat your oven, and get ready to bake up a batch of these incredible brownies.
I’m so excited for you to try this recipe! Once you do, I’d love to hear about your experience. Did you make any variations? What did your friends and family think? Share your photos and comments in the comments section below. I can’t wait to see your creations! Happy baking! And remember, the secret ingredient is always love! Let me know if you have any questions, and I’ll do my best to help. Enjoy your delicious red velvet cheesecake brownies!
Red Velvet Cheesecake Brownies: The Ultimate Dessert Recipe
Decadent red velvet brownies with a creamy cheesecake swirl. These fudgy treats are a perfect combination of rich chocolate and tangy cheesecake.
Ingredients
- 1 cup (2 sticks) unsalted butter, melted
- 2 cups granulated sugar
- 4 large eggs
- 1 tablespoon red food coloring
- 1 teaspoon vanilla extract
- 1 cup all-purpose flour
- ½ cup unsweetened cocoa powder
- ¼ teaspoon salt
- 16 ounces cream cheese, softened
- ½ cup granulated sugar
- 2 large eggs
- 1 teaspoon vanilla extract
- Powdered sugar, for dusting
- Red velvet cake crumbs
- White chocolate shavings
Instructions
- Melt the butter in a large, microwave-safe bowl or saucepan over low heat. Let it cool slightly.
- Add the granulated sugar to the melted butter and whisk until well combined.
- Add the eggs one at a time, whisking well after each addition.
- Stir in the red food coloring and vanilla extract. Mix until the batter is a uniform, vibrant red color.
- In a separate bowl, whisk together the flour, cocoa powder, and salt.
- Gradually add the dry ingredients to the wet ingredients, mixing until just combined. Be careful not to overmix.
- Ensure the cream cheese is completely softened to room temperature.
- In a separate bowl, beat the softened cream cheese and sugar together until smooth and creamy.
- Add the eggs one at a time, beating well after each addition.
- Stir in the vanilla extract. Mix until everything is well combined and the cheesecake batter is smooth and creamy.
- Preheat your oven to 350°F (175°C). Grease and flour a 9×13 inch baking pan or line with parchment paper.
- Pour the brownie batter into the prepared baking pan and spread it evenly.
- Gently pour the cheesecake batter over the brownie batter. Use a spoon or spatula to spread it evenly over the surface.
- For a marbled effect, use a knife or skewer to swirl the cheesecake batter into the brownie batter. Be careful not to overmix.
- Bake in the preheated oven for 30-35 minutes, or until a toothpick inserted into the center comes out with moist crumbs attached. The cheesecake layer should be set, but still slightly jiggly.
- Let the brownies cool completely in the pan before cutting. You can speed up the cooling process by placing the pan in the refrigerator for a few hours.
- Once the brownies are completely cool, cut them into squares and serve.
Notes
- Don’t Overbake: Overbaking is the enemy of fudgy brownies. Keep a close eye on them and remove them from the oven as soon as a toothpick inserted into the center comes out with moist crumbs.
- Use High-Quality Ingredients: The quality of your ingredients will directly impact the taste and texture of your brownies. Use good-quality butter, cream cheese, and cocoa powder for the best results.
- Adjust the Sweetness: If you prefer less sweet brownies, you can reduce the amount of sugar in both the brownie and cheesecake layers.
- Add Chocolate Chips: For an extra chocolatey treat, add chocolate chips to the brownie batter.
- Store Properly: Store leftover brownies in an airtight container at room temperature for up to 3 days, or in the refrigerator for up to a week.
- Freezing: These brownies freeze well. Wrap them individually in plastic wrap and then place them in a freezer-safe bag or container. They can be frozen for up to 2 months. Thaw them in the refrigerator overnight before serving.