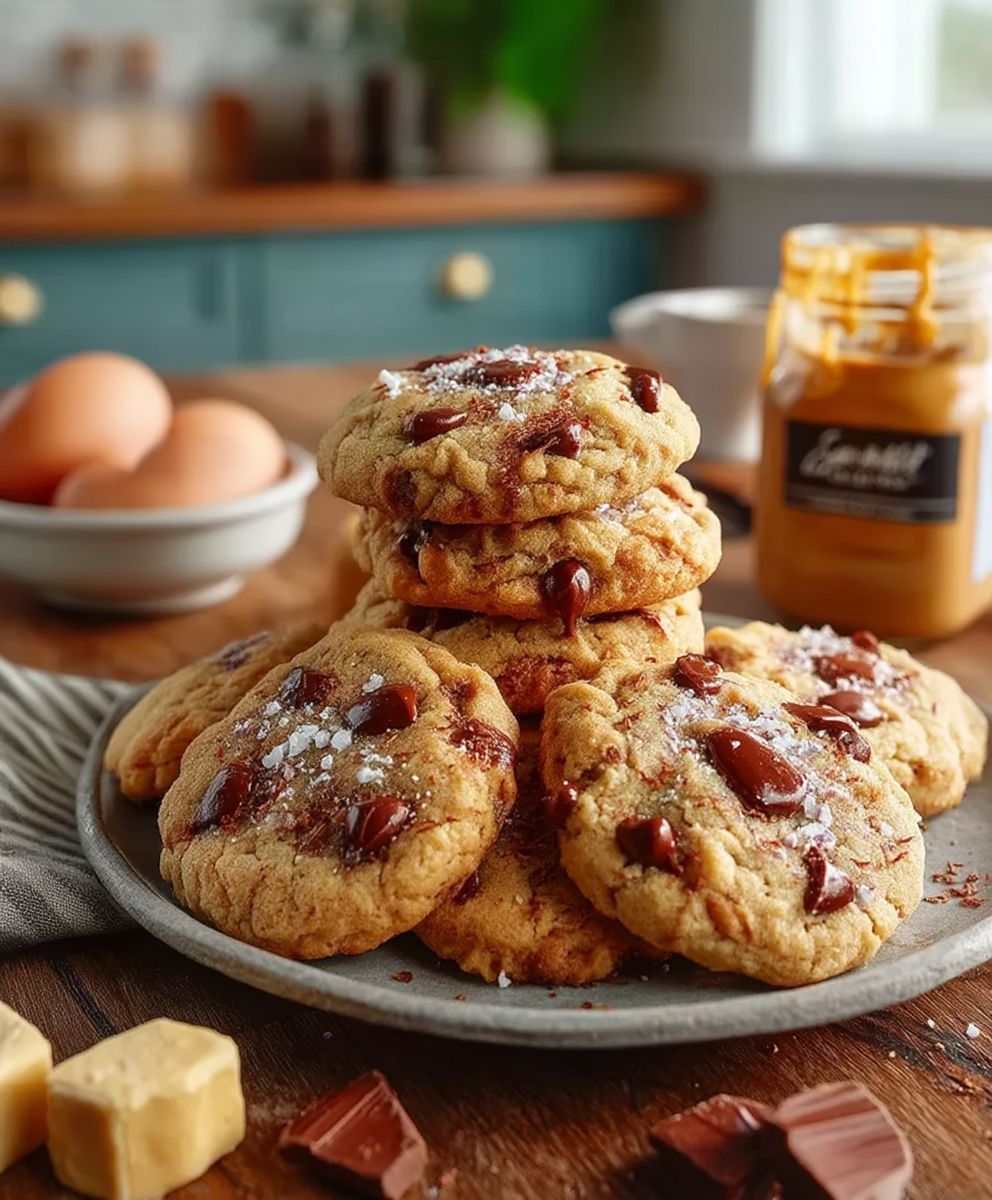
Peanut Butter Egg Cookies: Prepare to be amazed! Imagine sinking your teeth into a cookie that’s unbelievably soft, intensely peanut buttery, and surprisingly simple to make. These aren’t your average cookies; they’re a delightful twist on a classic, perfect for satisfying your sweet tooth with minimal effort.
While the exact origins of Peanut Butter Egg Cookies are a bit of a mystery, their popularity likely stems from the resourceful nature of home bakers. During times when ingredients were scarce or expensive, recipes like this, which rely on pantry staples, became incredibly valuable. The humble peanut, readily available and packed with protein, combined with the binding power of eggs, created a delicious and satisfying treat.
What makes these cookies so irresistible? It’s the perfect combination of textures and flavors. The peanut butter lends a rich, nutty depth, while the eggs contribute to a wonderfully soft and chewy interior. They’re also incredibly convenient to make, requiring just a handful of ingredients and minimal baking time. Whether you’re a seasoned baker or a novice in the kitchen, these cookies are guaranteed to be a success. Get ready to experience a peanut butter cookie like no other!

Ingredients:
- 1 cup (2 sticks) unsalted butter, softened
- 1 cup creamy peanut butter
- 1 cup granulated sugar
- 1 cup packed brown sugar
- 2 large eggs
- 1 teaspoon vanilla extract
- 2 1/2 cups all-purpose flour
- 1 teaspoon baking soda
- 1 teaspoon baking powder
- 1/2 teaspoon salt
- 1 cup milk chocolate egg candies (like Cadbury Mini Eggs), roughly chopped
- Optional: Coarse sea salt, for sprinkling
Preparing the Dough:
- Cream Together the Butter and Sugars: In a large bowl (or the bowl of your stand mixer), cream together the softened butter, peanut butter, granulated sugar, and brown sugar until light and fluffy. This usually takes about 3-5 minutes. Make sure to scrape down the sides of the bowl occasionally to ensure everything is evenly mixed. I like to use my stand mixer for this, but a hand mixer works just as well!
- Incorporate the Eggs and Vanilla: Beat in the eggs one at a time, mixing well after each addition. Then, stir in the vanilla extract. The mixture should be smooth and creamy at this point. Don’t overmix, just combine until everything is incorporated.
- Combine Dry Ingredients: In a separate medium bowl, whisk together the all-purpose flour, baking soda, baking powder, and salt. Whisking ensures that the baking soda and baking powder are evenly distributed throughout the flour, which is crucial for a good rise.
- Gradually Add Dry Ingredients to Wet Ingredients: Gradually add the dry ingredients to the wet ingredients, mixing on low speed until just combined. Be careful not to overmix! Overmixing can lead to tough cookies. Mix until you see the flour disappear, then stop.
- Fold in the Chocolate Eggs: Gently fold in the chopped milk chocolate egg candies. Make sure they are evenly distributed throughout the dough. I like to reserve a few extra chocolate eggs to press into the tops of the cookies before baking for a prettier presentation.
- Chill the Dough (Important!): Cover the bowl with plastic wrap and chill the dough in the refrigerator for at least 30 minutes, or up to 2 hours. Chilling the dough prevents the cookies from spreading too much during baking and also helps to develop the flavors. I find that 1 hour is the sweet spot for me.
Baking the Cookies:
- Preheat the Oven: Preheat your oven to 375°F (190°C). Line baking sheets with parchment paper or silicone baking mats. Parchment paper makes cleanup a breeze and prevents the cookies from sticking.
- Scoop the Dough: Use a cookie scoop or spoon to drop rounded tablespoons of dough onto the prepared baking sheets, leaving about 2 inches between each cookie. They will spread a bit, so don’t overcrowd the baking sheet. I usually get about 12 cookies per sheet.
- Optional: Add Extra Chocolate Eggs and Sea Salt: If desired, gently press a few extra chopped chocolate eggs into the tops of the cookies before baking. This makes them look extra festive! You can also sprinkle a tiny bit of coarse sea salt on top of each cookie for a sweet and salty flavor combination.
- Bake the Cookies: Bake for 9-11 minutes, or until the edges are golden brown and the centers are set. The baking time will vary depending on your oven, so keep a close eye on them. You want them to be slightly soft in the center.
- Cool on Baking Sheets: Remove the baking sheets from the oven and let the cookies cool on the baking sheets for a few minutes before transferring them to a wire rack to cool completely. This allows them to firm up a bit and prevents them from breaking.
Tips and Variations:
- Peanut Butter: I prefer using creamy peanut butter for these cookies, but you can also use chunky peanut butter for added texture.
- Chocolate: Feel free to substitute the milk chocolate egg candies with other types of chocolate chips or chunks, such as dark chocolate, semi-sweet chocolate, or white chocolate. You could even use chopped peanut butter cups!
- Nuts: Add chopped peanuts, pecans, or walnuts to the dough for extra crunch and flavor.
- Storage: Store the cooled cookies in an airtight container at room temperature for up to 3-4 days.
- Freezing: You can freeze the cookie dough for up to 2 months. Scoop the dough into balls, place them on a baking sheet, and freeze until solid. Then, transfer the frozen dough balls to a freezer bag. When ready to bake, simply bake from frozen, adding a few extra minutes to the baking time. You can also freeze the baked cookies for up to 2 months.
- Make them Gluten-Free: Substitute the all-purpose flour with a gluten-free all-purpose flour blend. Make sure the blend contains xanthan gum for best results.
- Adjusting Sweetness: If you prefer a less sweet cookie, reduce the amount of granulated sugar or brown sugar by 1/4 cup.
- Soft vs. Crispy: For softer cookies, slightly underbake them. For crispier cookies, bake them for a minute or two longer.
- Don’t Overmix: Overmixing the dough develops the gluten in the flour, which can result in tough cookies. Mix until just combined.
- Room Temperature Ingredients: Using room temperature butter and eggs helps the ingredients to emulsify properly, resulting in a smoother and more consistent dough.
- Even Baking: Rotate the baking sheets halfway through baking to ensure even browning.
- Preventing Spreading: If your cookies are spreading too much, try chilling the dough for a longer period of time. You can also add a tablespoon or two of flour to the dough.
- High Altitude Adjustments: If you live at a high altitude, you may need to adjust the recipe slightly. Try reducing the amount of baking powder by 1/4 teaspoon and adding a tablespoon of milk to the dough.
Troubleshooting:
- Cookies are too flat: This could be due to using softened butter instead of room temperature butter, not chilling the dough long enough, or using too much sugar.
- Cookies are too dry: This could be due to overbaking or using too much flour.
- Cookies are too tough: This could be due to overmixing the dough.
- Cookies are not spreading enough: This could be due to using too much flour or not enough sugar.
Enjoy!
I hope you enjoy making and eating these delicious Peanut Butter Egg Cookies! They’re perfect for Easter, spring, or any time you’re craving a sweet treat. Let me know in the comments if you have any questions or if you try any variations! Happy baking!
Conclusion:
And there you have it! These Peanut Butter Egg Cookies are truly a must-try for anyone who loves a simple, satisfying, and utterly delicious treat. They’re incredibly easy to make, requiring minimal ingredients and effort, making them perfect for a quick baking session on a busy weeknight or a fun activity with the kids. But don’t let the simplicity fool you the flavor is anything but basic. The rich, nutty peanut butter perfectly complements the subtle sweetness, creating a cookie that’s both comforting and irresistible.
What makes these cookies so special is their unique texture. They’re soft and chewy on the inside, with a slightly crisp edge, offering a delightful contrast in every bite. Unlike some cookies that can be overly sweet or heavy, these Peanut Butter Egg Cookies are perfectly balanced, making them a guilt-free indulgence you can enjoy any time of day.
But the best part? The possibilities are endless! While they’re fantastic on their own, you can easily customize them to suit your taste. For a richer, more decadent experience, try adding chocolate chips milk chocolate, dark chocolate, or even white chocolate would work beautifully. A sprinkle of sea salt on top before baking will enhance the peanut butter flavor and add a touch of sophistication.
If you’re feeling adventurous, consider adding a swirl of Nutella or a dollop of your favorite jam to the center of each cookie before baking. Or, for a festive twist, roll the dough in colored sprinkles before baking perfect for holidays or special occasions.
These cookies are also incredibly versatile when it comes to serving. Enjoy them warm from the oven with a glass of cold milk, or pack them in a lunchbox for a midday treat. They’re also a fantastic addition to a dessert platter or a homemade gift for friends and family. Imagine surprising your loved ones with a batch of these freshly baked Peanut Butter Egg Cookies they’re guaranteed to be a hit!
Beyond the delicious taste and ease of preparation, these cookies offer a wonderful opportunity to create lasting memories. Baking is a fantastic way to bond with loved ones, and these cookies are simple enough for even the youngest bakers to get involved. So gather your family, preheat your oven, and get ready to embark on a baking adventure that’s sure to be both fun and rewarding.
I truly believe that these Peanut Butter Egg Cookies will become a staple in your baking repertoire. They’re the perfect combination of simplicity, flavor, and versatility, making them a winner in every category.
So, what are you waiting for? Grab your ingredients, follow the recipe, and get ready to experience the magic of these incredible cookies. And most importantly, don’t forget to share your creations! I would absolutely love to hear about your experience making these Peanut Butter Egg Cookies. Share your photos, your variations, and your thoughts in the comments below. Let’s create a community of cookie lovers and inspire each other with our baking adventures! Happy baking!
Peanut Butter Egg Cookies: The Ultimate Recipe Guide
Soft, chewy peanut butter cookies with milk chocolate egg candies. Perfect for Easter or any sweet craving!
Ingredients
- 1 cup (2 sticks) unsalted butter, softened
- 1 cup creamy peanut butter
- 1 cup granulated sugar
- 1 cup packed brown sugar
- 2 large eggs
- 1 teaspoon vanilla extract
- 2 1/2 cups all-purpose flour
- 1 teaspoon baking soda
- 1 teaspoon baking powder
- 1/2 teaspoon salt
- 1 cup milk chocolate egg candies (like Cadbury Mini Eggs), roughly chopped
- Optional: Coarse sea salt, for sprinkling
Instructions
- Cream Together the Butter and Sugars: In a large bowl (or the bowl of your stand mixer), cream together the softened butter, peanut butter, granulated sugar, and brown sugar until light and fluffy. This usually takes about 3-5 minutes. Scrape down the sides of the bowl occasionally to ensure everything is evenly mixed.
- Incorporate the Eggs and Vanilla: Beat in the eggs one at a time, mixing well after each addition. Then, stir in the vanilla extract. The mixture should be smooth and creamy at this point. Don’t overmix, just combine until everything is incorporated.
- Combine Dry Ingredients: In a separate medium bowl, whisk together the all-purpose flour, baking soda, baking powder, and salt.
- Gradually Add Dry Ingredients to Wet Ingredients: Gradually add the dry ingredients to the wet ingredients, mixing on low speed until just combined. Be careful not to overmix! Mix until you see the flour disappear, then stop.
- Fold in the Chocolate Eggs: Gently fold in the chopped milk chocolate egg candies. Make sure they are evenly distributed throughout the dough. Reserve a few extra chocolate eggs to press into the tops of the cookies before baking for a prettier presentation (optional).
- Chill the Dough (Important!): Cover the bowl with plastic wrap and chill the dough in the refrigerator for at least 30 minutes, or up to 2 hours.
- Preheat the Oven: Preheat your oven to 375°F (190°C). Line baking sheets with parchment paper or silicone baking mats.
- Scoop the Dough: Use a cookie scoop or spoon to drop rounded tablespoons of dough onto the prepared baking sheets, leaving about 2 inches between each cookie.
- Optional: Add Extra Chocolate Eggs and Sea Salt: If desired, gently press a few extra chopped chocolate eggs into the tops of the cookies before baking. Sprinkle a tiny bit of coarse sea salt on top of each cookie for a sweet and salty flavor combination.
- Bake the Cookies: Bake for 9-11 minutes, or until the edges are golden brown and the centers are set.
- Cool on Baking Sheets: Remove the baking sheets from the oven and let the cookies cool on the baking sheets for a few minutes before transferring them to a wire rack to cool completely.
Notes
- Peanut Butter: Creamy peanut butter is preferred, but chunky can be used.
- Chocolate: Substitute milk chocolate eggs with other chocolate chips or chunks.
- Nuts: Add chopped nuts for extra crunch.
- Storage: Store cooled cookies in an airtight container at room temperature for up to 3-4 days.
- Freezing: Freeze cookie dough or baked cookies for up to 2 months.
- Gluten-Free: Use a gluten-free all-purpose flour blend.
- Adjusting Sweetness: Reduce granulated or brown sugar by 1/4 cup for less sweetness.
- Soft vs. Crispy: Underbake for softer cookies, bake longer for crispier cookies.
- Don’t Overmix: Overmixing leads to tough cookies.
- Room Temperature Ingredients: Use room temperature butter and eggs for a smoother dough.
- Even Baking: Rotate baking sheets halfway through baking.
- Preventing Spreading: Chill dough longer or add flour if cookies spread too much.
- High Altitude Adjustments: Reduce baking powder and add milk if at high altitude.