Apple Crisp: the quintessential comfort dessert that evokes memories of cozy autumn evenings and the warm, inviting aroma of cinnamon wafting from the kitchen. Is there anything more satisfying than a bubbling dish of sweet, tender apples topped with a golden, buttery crumble? I think not! This classic dessert has been gracing tables for generations, evolving from simple baked apples to the delightful combination of textures and flavors we know and love today.
While its exact origins are debated, similar fruit crisps and crumbles have been enjoyed in various forms across Europe for centuries. The American version, Apple Crisp, gained popularity in the early 20th century, quickly becoming a staple in homes across the country. Its enduring appeal lies in its simplicity and the way it perfectly captures the essence of fall. The tartness of the apples, balanced by the sweet, buttery crumble, creates a symphony of flavors that is simply irresistible. Plus, it’s incredibly easy to make, requiring minimal ingredients and effort, making it the perfect dessert for busy weeknights or impromptu gatherings. Who can resist a warm bowl of apple crisp topped with a scoop of vanilla ice cream? I know I can’t!

Ingredients:
- For the Apple Filling:
- 6-8 medium apples (Granny Smith, Honeycrisp, or a mix), peeled, cored, and sliced
- 1/2 cup granulated sugar
- 1/4 cup all-purpose flour
- 1 teaspoon ground cinnamon
- 1/4 teaspoon ground nutmeg
- 1 tablespoon lemon juice
- 2 tablespoons unsalted butter, cut into small pieces
- For the Crisp Topping:
- 1 cup all-purpose flour
- 1 cup rolled oats (not instant)
- 3/4 cup packed brown sugar
- 1/2 teaspoon baking powder
- 1/4 teaspoon salt
- 1/2 cup (1 stick) unsalted butter, cold and cut into small pieces
- 1/4 cup chopped pecans or walnuts (optional, but highly recommended!)
Preparing the Apple Filling:
Okay, let’s get started with the heart of our apple crisp the apple filling! This is where the magic happens, transforming simple apples into a warm, spiced delight.
- Prep the Apples: First things first, we need to get those apples ready. Peel, core, and slice your apples. I usually aim for slices that are about 1/4 inch thick. This ensures they cook evenly and aren’t too mushy or too firm in the final crisp. A mix of apple varieties, like Granny Smith for tartness and Honeycrisp for sweetness, adds a wonderful depth of flavor.
- Combine Dry Ingredients: In a large bowl, whisk together the granulated sugar, all-purpose flour, cinnamon, and nutmeg. The flour helps to thicken the apple juices as they bake, preventing a watery crisp. The cinnamon and nutmeg, well, they’re just classic apple pie spices that bring warmth and comfort to every bite. Make sure everything is well combined.
- Coat the Apples: Add the sliced apples to the bowl with the dry ingredients. Gently toss everything together until the apples are evenly coated. This ensures that each apple slice gets a good dose of that sweet and spicy goodness.
- Add Lemon Juice and Butter: Now, drizzle the lemon juice over the apples. The lemon juice not only brightens the flavor but also helps to prevent the apples from browning. Finally, dot the apple mixture with the small pieces of butter. As the crisp bakes, the butter will melt and create a rich, caramel-like sauce that coats the apples.
- Transfer to Baking Dish: Pour the apple mixture into a 9×13 inch baking dish. Make sure the apples are evenly distributed in the dish. This will ensure even cooking and a beautiful presentation.
Making the Crisp Topping:
Now for the star of the show the crisp topping! This buttery, crumbly topping is what makes this dessert so irresistible. It’s surprisingly easy to make, and the combination of oats, flour, and brown sugar creates a texture that’s both crunchy and chewy.
- Combine Dry Ingredients: In a separate bowl, whisk together the all-purpose flour, rolled oats, brown sugar, baking powder, and salt. The rolled oats provide a wonderful texture and nutty flavor, while the brown sugar adds a caramel-like sweetness. The baking powder helps to create a slightly lighter and more tender topping.
- Cut in the Butter: This is the most important step for achieving that perfect crumbly texture. Add the cold, cubed butter to the dry ingredients. Using a pastry blender or your fingertips, cut the butter into the flour mixture until it resembles coarse crumbs. The key is to work quickly and keep the butter cold. If the butter gets too warm, it will melt and the topping will be greasy instead of crumbly. You can also use a food processor for this step, pulsing until the mixture resembles coarse crumbs.
- Add Nuts (Optional): If you’re using nuts, add the chopped pecans or walnuts to the topping mixture and stir to combine. The nuts add a wonderful crunch and nutty flavor that complements the apples perfectly.
Assembling and Baking:
We’re almost there! Now it’s time to bring everything together and bake our apple crisp to golden-brown perfection. The aroma that fills your kitchen while this bakes is simply heavenly!
- Sprinkle Topping: Sprinkle the crisp topping evenly over the apple filling in the baking dish. Make sure to cover the entire surface of the apples. Don’t be afraid to use your hands to gently press the topping down slightly.
- Bake: Bake in a preheated oven at 375°F (190°C) for 30-40 minutes, or until the topping is golden brown and the apple filling is bubbly. The baking time may vary depending on your oven, so keep an eye on it. If the topping starts to brown too quickly, you can loosely cover the dish with aluminum foil for the last 10-15 minutes of baking.
- Cool Slightly: Remove the apple crisp from the oven and let it cool for at least 15 minutes before serving. This allows the filling to thicken slightly and prevents you from burning your mouth.
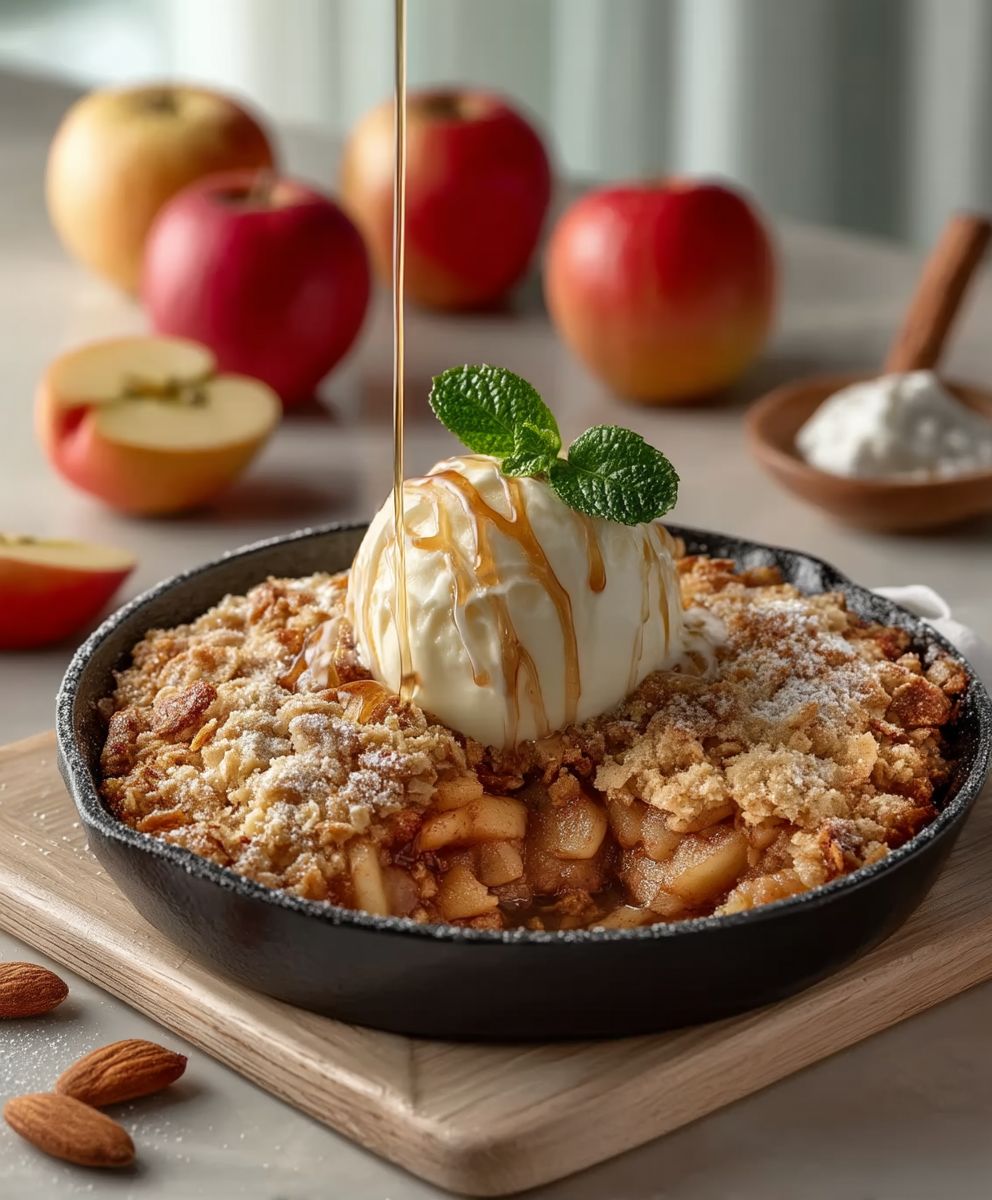
- Serve: Serve warm, plain or with a scoop of vanilla ice cream, a dollop of whipped cream, or a drizzle of caramel sauce. The combination of warm apple crisp and cold ice cream is simply divine!
Tips and Variations:
Apple crisp is a very forgiving recipe, so feel free to experiment and make it your own! Here are a few tips and variations to get you started:
- Apple Varieties: As I mentioned earlier, using a mix of apple varieties adds a wonderful depth of flavor. Some other good options include Braeburn, Fuji, and Gala.
- Spice It Up: Feel free to adjust the spices to your liking. You could add a pinch of ground ginger or allspice for a warmer flavor.
- Add Dried Fruit: For a chewy texture, add 1/2 cup of dried cranberries or raisins to the apple filling.
- Nutty Topping: Experiment with different types of nuts in the topping. Walnuts, almonds, or even macadamia nuts would be delicious.
- Gluten-Free Option: To make this recipe gluten-free, simply substitute the all-purpose flour with a gluten-free all-purpose flour blend. Make sure to use certified gluten-free oats as well.
- Vegan Option: To make this recipe vegan, use a vegan butter substitute and ensure your sugar is processed without bone char.
- Individual Crisps: For a fun presentation, bake the apple crisp in individual ramekins. Reduce the baking time by about 5-10 minutes.
- Make Ahead: You can assemble the apple crisp ahead of time and store it in the refrigerator for up to 24 hours before baking. Just add a few minutes to the baking time.
Storing Leftovers:
Leftover apple crisp can be stored in an airtight container in the refrigerator for up to 3 days. To reheat, simply microwave for a few seconds or bake in a preheated oven at 350°F (175°C) until warmed through.
Enjoy!
I hope you enjoy this recipe as much as I do! It’s the perfect dessert for any occasion, and it’s sure to be a crowd-pleaser. Happy baking!
Conclusion:
And there you have it! This Apple Crisp recipe is truly a must-try, and I’m not just saying that because I wrote it! The combination of tender, spiced apples and that perfectly crumbly, buttery topping is simply irresistible. It’s the kind of dessert that evokes feelings of warmth, comfort, and pure autumnal bliss. Seriously, imagine the aroma filling your kitchen cinnamon, nutmeg, baked apples it’s a sensory experience that’s hard to beat.
But beyond the deliciousness, what makes this recipe so special is its simplicity. It requires minimal effort and uses ingredients you likely already have in your pantry. No fancy techniques or complicated steps here, just straightforward baking that delivers exceptional results every single time. It’s the perfect dessert for a weeknight treat or a crowd-pleasing finale to a weekend gathering.
Why is this Apple Crisp a must-try? Because it’s:
* Incredibly delicious and comforting.
* Easy to make with readily available ingredients.
* Perfect for any occasion, from casual to celebratory.
* A guaranteed crowd-pleaser.
* A fantastic way to use up those extra apples!
Now, let’s talk serving suggestions and variations because the possibilities are endless! My personal favorite is to serve it warm with a generous scoop of vanilla ice cream. The contrast between the warm crisp and the cold ice cream is heavenly. But you could also try it with a dollop of whipped cream, a drizzle of caramel sauce, or even a sprinkle of chopped nuts.
For variations, consider adding other fruits to the mix. A combination of apples and pears would be delicious, or you could throw in some cranberries for a tart and festive twist. You could also experiment with different spices. A pinch of cardamom or ginger would add a unique flavor dimension. If you’re feeling adventurous, try using different types of apples. A mix of sweet and tart varieties will create a more complex flavor profile. Honeycrisp, Granny Smith, and Fuji apples are all excellent choices.
Another fun variation is to add a layer of streusel topping. This will create an even more decadent and crumbly texture. Simply mix together flour, butter, sugar, and oats, and sprinkle it over the apples before baking. You can also add nuts to the streusel for extra crunch.
Don’t be afraid to get creative and experiment with different ingredients and flavors. That’s the beauty of baking it’s all about having fun and creating something delicious that you and your loved ones will enjoy.
I truly believe that this Apple Crisp recipe will become a staple in your kitchen. It’s a classic dessert that’s perfect for any occasion, and it’s so easy to make that even beginner bakers can master it.
So, what are you waiting for? Preheat your oven, gather your ingredients, and get ready to bake up a batch of this amazing Apple Crisp. I promise you won’t be disappointed!
And most importantly, I’d love to hear about your experience! Once you’ve tried the recipe, please come back and leave a comment below. Let me know what you thought, what variations you tried, and any tips or tricks you discovered along the way. Sharing your feedback helps me improve the recipe and also inspires other bakers to give it a try. Happy baking!
Apple Crisp: The Ultimate Guide to Baking the Perfect Dessert
Warm and comforting apple crisp with a buttery, crumbly oat topping. A perfect dessert for any occasion!
Ingredients
- 6-8 medium apples (Granny Smith, Honeycrisp, or a mix), peeled, cored, and sliced
- 1/2 cup granulated sugar
- 1/4 cup all-purpose flour
- 1 teaspoon ground cinnamon
- 1/4 teaspoon ground nutmeg
- 1 tablespoon lemon juice
- 2 tablespoons unsalted butter, cut into small pieces
- 1 cup all-purpose flour
- 1 cup rolled oats (not instant)
- 3/4 cup packed brown sugar
- 1/2 teaspoon baking powder
- 1/4 teaspoon salt
- 1/2 cup (1 stick) unsalted butter, cold and cut into small pieces
- 1/4 cup chopped pecans or walnuts (optional)
Instructions
- Prep the Apples: Peel, core, and slice the apples to about 1/4 inch thick.
- Combine Dry Ingredients (Filling): In a large bowl, whisk together the granulated sugar, all-purpose flour, cinnamon, and nutmeg.
- Coat the Apples: Add the sliced apples to the bowl with the dry ingredients. Gently toss until evenly coated.
- Add Lemon Juice and Butter: Drizzle the lemon juice over the apples. Dot the apple mixture with the small pieces of butter.
- Transfer to Baking Dish: Pour the apple mixture into a 9×13 inch baking dish, distributing evenly.
- Combine Dry Ingredients (Topping): In a separate bowl, whisk together the all-purpose flour, rolled oats, brown sugar, baking powder, and salt.
- Cut in the Butter: Add the cold, cubed butter to the dry ingredients. Using a pastry blender or your fingertips, cut the butter into the flour mixture until it resembles coarse crumbs.
- Add Nuts (Optional): If using, add the chopped pecans or walnuts to the topping mixture and stir to combine.
- Sprinkle Topping: Sprinkle the crisp topping evenly over the apple filling in the baking dish.
- Bake: Bake in a preheated oven at 375°F (190°C) for 30-40 minutes, or until the topping is golden brown and the apple filling is bubbly. If the topping browns too quickly, cover loosely with foil for the last 10-15 minutes.
- Cool Slightly: Remove from the oven and let cool for at least 15 minutes before serving.
- Serve: Serve warm, plain or with vanilla ice cream, whipped cream, or caramel sauce.
Notes
- Apple Varieties: Use a mix of apples like Granny Smith and Honeycrisp for the best flavor. Braeburn, Fuji, and Gala are also good options.
- Spice It Up: Adjust the spices to your liking. Add a pinch of ground ginger or allspice.
- Add Dried Fruit: Add 1/2 cup of dried cranberries or raisins to the apple filling.
- Nutty Topping: Experiment with different types of nuts in the topping.
- Gluten-Free Option: Substitute the all-purpose flour with a gluten-free all-purpose flour blend and use certified gluten-free oats.
- Vegan Option: Use a vegan butter substitute and ensure your sugar is processed without bone char.
- Individual Crisps: Bake in individual ramekins, reducing baking time by 5-10 minutes.
- Make Ahead: Assemble ahead of time and store in the refrigerator for up to 24 hours before baking. Add a few minutes to the baking time.
- Storing Leftovers: Store in an airtight container in the refrigerator for up to 3 days. Reheat in the microwave or oven.