Sour Cream Drop Cookies: Prepare to unlock a world of melt-in-your-mouth goodness! Imagine a cookie so tender, so moist, and so utterly delightful that it redefines your definition of the perfect sweet treat. These aren’t just cookies; they’re a nostalgic journey back to simpler times, a warm hug in every bite.
While the exact origins of sour cream drop cookies are shrouded in a bit of mystery, similar recipes have been passed down through generations, particularly in Eastern European and American kitchens. Sour cream, a staple ingredient, adds a unique tang and richness that elevates these cookies beyond the ordinary. It’s the secret ingredient that keeps them incredibly soft and prevents them from drying out, even days after baking (if they last that long!).
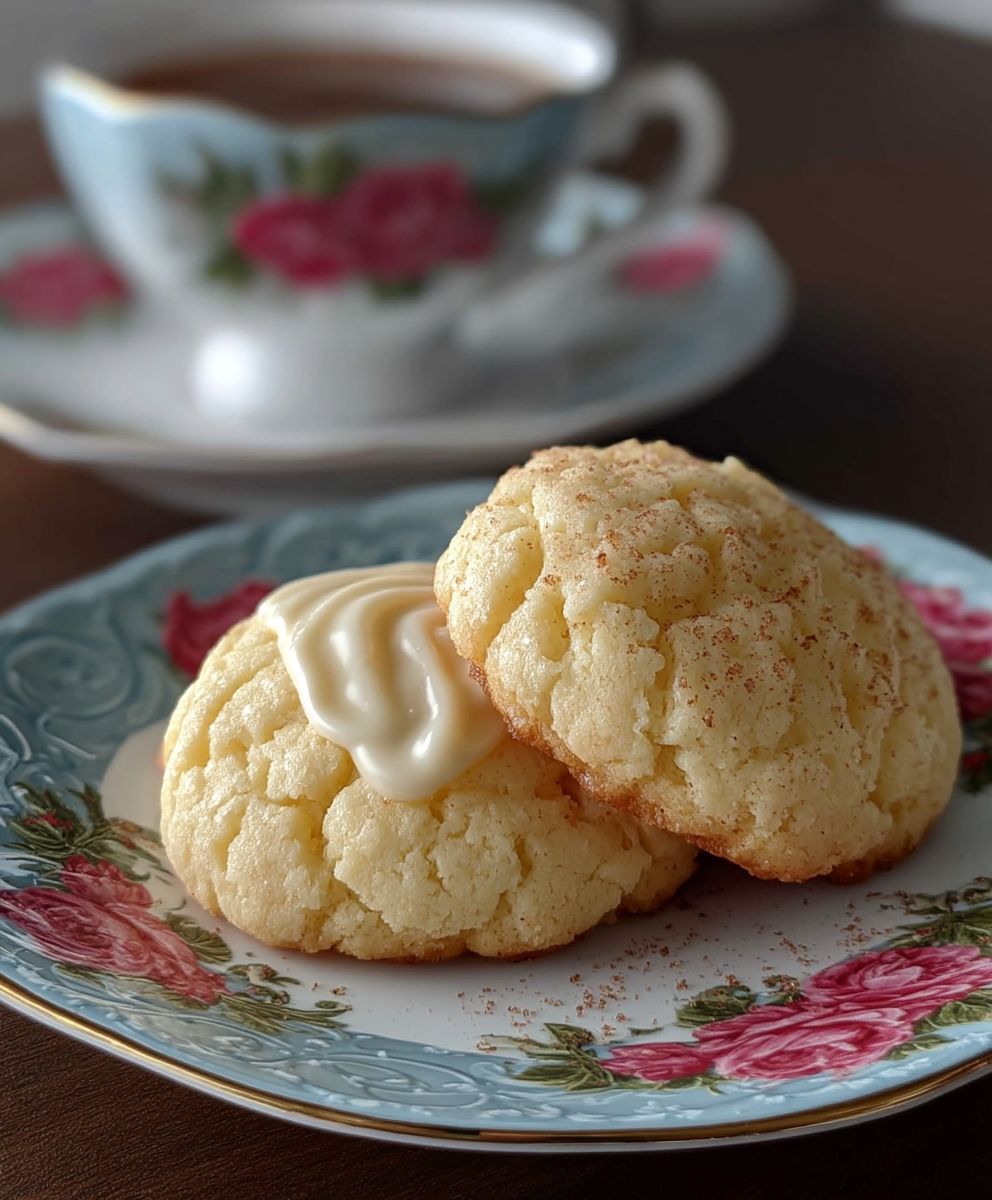
What makes these cookies so universally loved? It’s the perfect combination of simplicity and flavor. The subtle tang of the sour cream complements the sweetness beautifully, creating a balanced and addictive taste. The texture is unbelievably soft and cake-like, a welcome departure from the often-crisp texture of other cookies. Plus, they’re incredibly easy to make! No chilling required, just a quick mix, drop onto a baking sheet, and bake. Whether you’re a seasoned baker or a kitchen novice, these sour cream drop cookies are guaranteed to be a success. Get ready to experience cookie perfection!

Ingredients:
- 2 1/4 cups all-purpose flour
- 1 teaspoon baking soda
- 1/2 teaspoon baking powder
- 1/4 teaspoon salt
- 1/2 cup (1 stick) unsalted butter, softened
- 1 1/2 cups granulated sugar
- 2 large eggs
- 1 teaspoon vanilla extract
- 1 cup sour cream
- Optional: 1/2 cup chopped nuts (walnuts, pecans, or almonds)
- Optional: Sprinkles or sanding sugar for topping
Preparing the Dough:
Alright, let’s get started with these incredibly soft and delicious Sour Cream Drop Cookies! First things first, we need to get all our dry ingredients ready. This helps ensure everything is evenly distributed throughout the dough, giving us that perfect texture and flavor in every bite.
- Combine the Dry Ingredients: In a medium-sized bowl, whisk together the flour, baking soda, baking powder, and salt. Whisking is key here it helps to aerate the flour and ensures the baking soda and baking powder are evenly distributed. This step is crucial for achieving that light and fluffy texture we’re aiming for. Set this bowl aside for now.
- Cream the Butter and Sugar: In a large bowl (or the bowl of your stand mixer), cream together the softened butter and granulated sugar until light and fluffy. This usually takes about 3-5 minutes on medium speed. The mixture should become noticeably lighter in color and have a smooth, almost whipped texture. This creaming process is essential because it incorporates air into the butter and sugar, which contributes to the cookies’ tenderness. If you’re using a hand mixer, make sure to scrape down the sides of the bowl occasionally to ensure everything is evenly mixed.
- Incorporate the Eggs and Vanilla: Beat in the eggs one at a time, making sure each egg is fully incorporated before adding the next. After the eggs are mixed in, stir in the vanilla extract. The vanilla adds a lovely warmth and depth of flavor to the cookies, so don’t skip it!
- Add the Sour Cream: Now, it’s time for the star ingredient the sour cream! Stir in the sour cream until just combined. Don’t overmix at this stage, as overmixing can lead to tough cookies. The sour cream adds moisture and a subtle tang that makes these cookies incredibly soft and flavorful.
- Gradually Add the Dry Ingredients: Gradually add the dry ingredients to the wet ingredients, mixing on low speed until just combined. Be careful not to overmix! Overmixing develops the gluten in the flour, which can result in tough cookies. Mix until the flour is just incorporated, and then stop. A few streaks of flour are okay at this point.
- Optional: Add Nuts: If you’re using nuts, gently fold them into the dough. Chopped walnuts, pecans, or almonds work beautifully in these cookies, adding a nice crunch and nutty flavor.
Chilling and Shaping the Dough:
Chilling the dough is a crucial step for preventing the cookies from spreading too much during baking. It also allows the flavors to meld together, resulting in a more flavorful cookie.
- Chill the Dough: Cover the bowl with plastic wrap and refrigerate the dough for at least 30 minutes, or up to 2 hours. The longer you chill the dough, the less the cookies will spread. I usually aim for about an hour.
- Preheat the Oven: While the dough is chilling, preheat your oven to 375°F (190°C). Line a baking sheet with parchment paper or a silicone baking mat. Parchment paper is my go-to because it prevents the cookies from sticking and makes cleanup a breeze.
- Drop the Dough: Once the dough is chilled, use a spoon or a cookie scoop to drop rounded tablespoons of dough onto the prepared baking sheet, leaving about 2 inches between each cookie. This spacing is important because the cookies will spread slightly during baking.
- Optional: Add Toppings: If you’re using sprinkles or sanding sugar, sprinkle them over the tops of the cookies before baking. This adds a festive touch and a bit of extra sweetness.
Baking the Cookies:
Now for the fun part baking these little beauties! Keep a close eye on them, as baking times can vary depending on your oven.
- Bake the Cookies: Bake for 8-10 minutes, or until the edges are lightly golden brown and the centers are set. The cookies should be soft and slightly puffy. Don’t overbake them, as they will continue to firm up as they cool.
- Cool the Cookies: Remove the baking sheet from the oven and let the cookies cool on the baking sheet for a few minutes before transferring them to a wire rack to cool completely. This prevents them from breaking apart while they’re still warm and soft.
Serving and Storing:
These Sour Cream Drop Cookies are best enjoyed fresh, but they can also be stored for later. Here’s how to keep them at their best:
- Serving: Serve the cookies warm or at room temperature. They’re delicious on their own, but they also pair well with a glass of milk, a cup of coffee, or a scoop of ice cream.
- Storing: Store the cooled cookies in an airtight container at room temperature for up to 3 days. To keep them extra soft, you can add a slice of bread to the container. The bread will absorb any excess moisture, keeping the cookies from drying out.
- Freezing: For longer storage, you can freeze the cookies. Place them in a single layer on a baking sheet and freeze until solid. Then, transfer them to a freezer-safe bag or container. They can be frozen for up to 2 months. When you’re ready to eat them, thaw them at room temperature for a few hours.
Tips and Variations:
Want to customize these cookies to your liking? Here are a few ideas:
- Lemon Zest: Add 1-2 teaspoons of lemon zest to the dough for a bright, citrusy flavor.
- Chocolate Chips: Fold in 1/2 cup of chocolate chips (milk chocolate, dark chocolate, or white chocolate) for a chocolatey twist.
- Spices: Add 1/2 teaspoon of ground cinnamon or nutmeg to the dough for a warm, spiced flavor.
- Glaze: Drizzle the cooled cookies with a simple glaze made from powdered sugar and milk or lemon juice.
- Frosting: Frost the cooled cookies with your favorite frosting, such as vanilla buttercream or cream cheese frosting.
Enjoy baking these Sour Cream Drop Cookies! They’re sure to become a family favorite.
Conclusion:
This isn’t just another cookie recipe; it’s a gateway to pure, unadulterated comfort. These Sour Cream Drop Cookies are a must-try because they deliver that perfect balance of tangy sweetness and melt-in-your-mouth texture that’s simply irresistible. Seriously, from the moment the aroma fills your kitchen to the last crumb disappears from your plate, you’ll understand why I’m so enthusiastic about them. They’re incredibly easy to make, require minimal ingredients you probably already have on hand, and are endlessly adaptable to your personal preferences. What’s not to love?
But the real magic lies in the sour cream. It’s the secret ingredient that gives these cookies their signature tenderness and subtle tang, setting them apart from your average drop cookie. The result is a cookie that’s both satisfyingly rich and surprisingly light. They’re perfect for an afternoon treat, a lunchbox surprise, or a simple dessert after dinner.
And speaking of versatility, let’s talk about serving suggestions and variations! While these cookies are absolutely divine on their own, warm from the oven, a simple dusting of powdered sugar elevates them to elegant status. For a more decadent experience, try drizzling them with a homemade glaze a classic vanilla glaze, a tangy lemon glaze, or even a rich chocolate glaze would be fantastic.
If you’re feeling adventurous, consider adding mix-ins to the batter. Chocolate chips (milk, dark, or white the choice is yours!), chopped nuts (walnuts, pecans, or almonds would be lovely), dried cranberries, or even a sprinkle of cinnamon or nutmeg can transform these cookies into something truly special. For a festive touch, add sprinkles before baking. You could even fold in some lemon zest for a bright, citrusy flavor. Get creative and experiment with different combinations to find your perfect Sour Cream Drop Cookies creation!
Another fun idea is to use these cookies as the base for mini ice cream sandwiches. Simply sandwich a scoop of your favorite ice cream between two cookies and you’ve got a delightful and refreshing treat. Or, crumble them over yogurt or granola for a touch of sweetness and texture.
I truly believe that everyone should have a reliable drop cookie recipe in their repertoire, and this one is definitely a winner. It’s simple enough for beginner bakers, yet yields results that are impressive enough to share with even the most discerning cookie connoisseurs.
So, what are you waiting for? Gather your ingredients, preheat your oven, and get ready to experience the joy of baking these incredible Sour Cream Drop Cookies. I’m confident that you’ll love them as much as I do.
And most importantly, I want to hear about your baking adventures! Once you’ve tried the recipe, please come back and share your experience in the comments below. Let me know what variations you tried, what your family and friends thought, and any tips or tricks you discovered along the way. Happy baking! I can’t wait to hear all about your delicious creations. Don’t forget to rate the recipe too!
Sour Cream Drop Cookies: The Ultimate Recipe for Soft & Delicious Treats
Soft, delicious, and easy-to-make Sour Cream Drop Cookies perfect for any occasion. They have a subtle tang and melt-in-your-mouth texture.
Ingredients
- 2 1/4 cups all-purpose flour
- 1 teaspoon baking soda
- 1/2 teaspoon baking powder
- 1/4 teaspoon salt
- 1/2 cup (1 stick) unsalted butter, softened
- 1 1/2 cups granulated sugar
- 2 large eggs
- 1 teaspoon vanilla extract
- 1 cup sour cream
- Optional: 1/2 cup chopped nuts (walnuts, pecans, or almonds)
- Optional: Sprinkles or sanding sugar for topping
Instructions
- Combine Dry Ingredients: In a medium bowl, whisk together the flour, baking soda, baking powder, and salt. Set aside.
- Cream Butter and Sugar: In a large bowl (or stand mixer), cream together the softened butter and granulated sugar until light and fluffy (3-5 minutes).
- Incorporate Eggs and Vanilla: Beat in the eggs one at a time, then stir in the vanilla extract.
- Add Sour Cream: Stir in the sour cream until just combined. Do not overmix.
- Gradually Add Dry Ingredients: Gradually add the dry ingredients to the wet ingredients, mixing on low speed until just combined. Be careful not to overmix.
- Optional: Add Nuts: If using nuts, gently fold them into the dough.
- Chill the Dough: Cover the bowl with plastic wrap and refrigerate the dough for at least 30 minutes, or up to 2 hours.
- Preheat Oven: Preheat oven to 375°F (190°C). Line a baking sheet with parchment paper or a silicone baking mat.
- Drop the Dough: Use a spoon or cookie scoop to drop rounded tablespoons of dough onto the prepared baking sheet, leaving about 2 inches between each cookie.
- Optional: Add Toppings: If using sprinkles or sanding sugar, sprinkle them over the tops of the cookies before baking.
- Bake the Cookies: Bake for 8-10 minutes, or until the edges are lightly golden brown and the centers are set.
- Cool the Cookies: Remove the baking sheet from the oven and let the cookies cool on the baking sheet for a few minutes before transferring them to a wire rack to cool completely.
- Serving: Serve the cookies warm or at room temperature.
- Storing: Store the cooled cookies in an airtight container at room temperature for up to 3 days.
- Freezing: For longer storage, you can freeze the cookies. Place them in a single layer on a baking sheet and freeze until solid. Then, transfer them to a freezer-safe bag or container. They can be frozen for up to 2 months. When you’re ready to eat them, thaw them at room temperature for a few hours.
Notes
- Chilling the dough is crucial to prevent excessive spreading.
- Don’t overmix the dough, as this can lead to tough cookies.
- Baking times may vary depending on your oven, so keep a close eye on the cookies.
- For extra soft cookies, store them with a slice of bread in an airtight container.