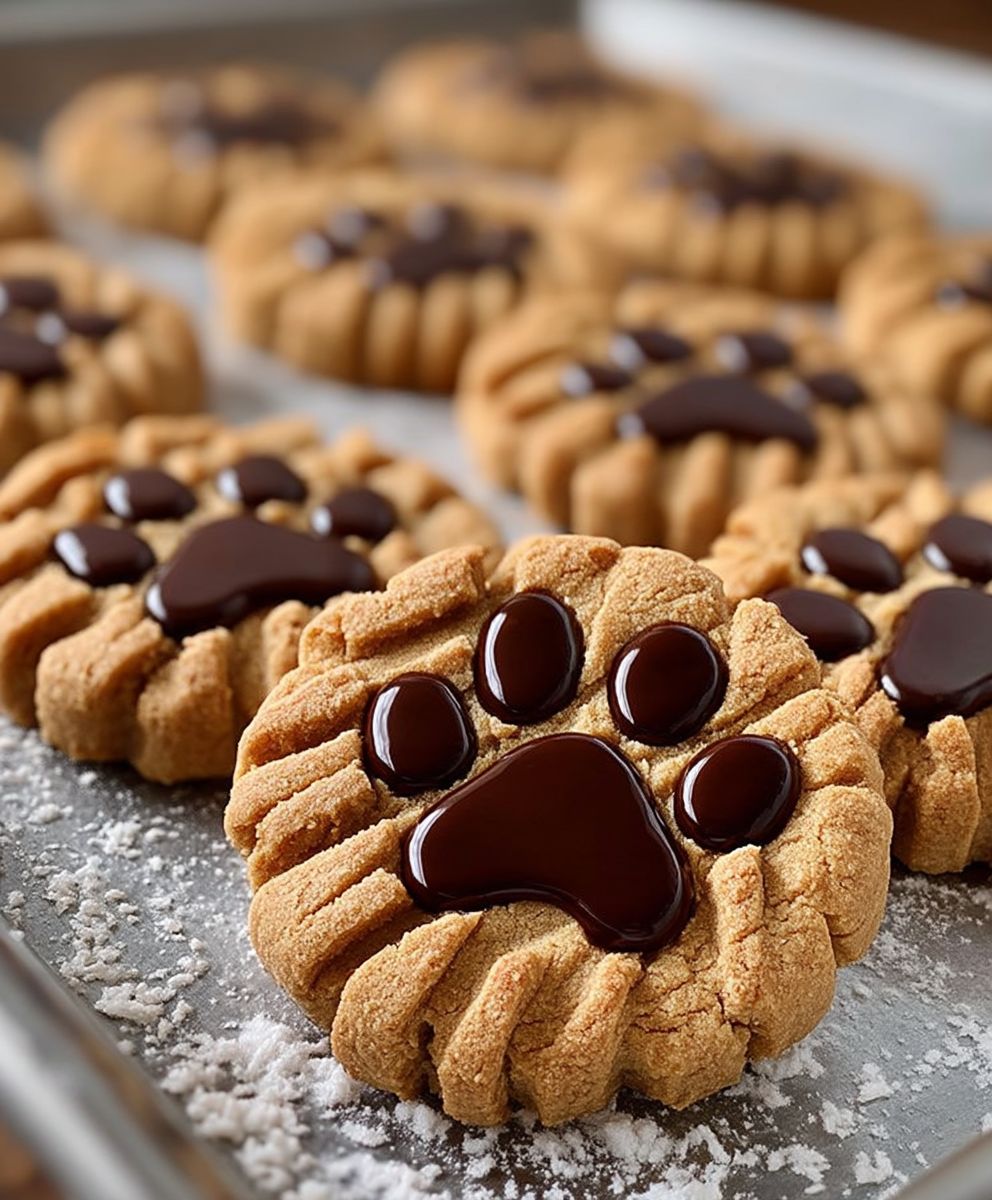
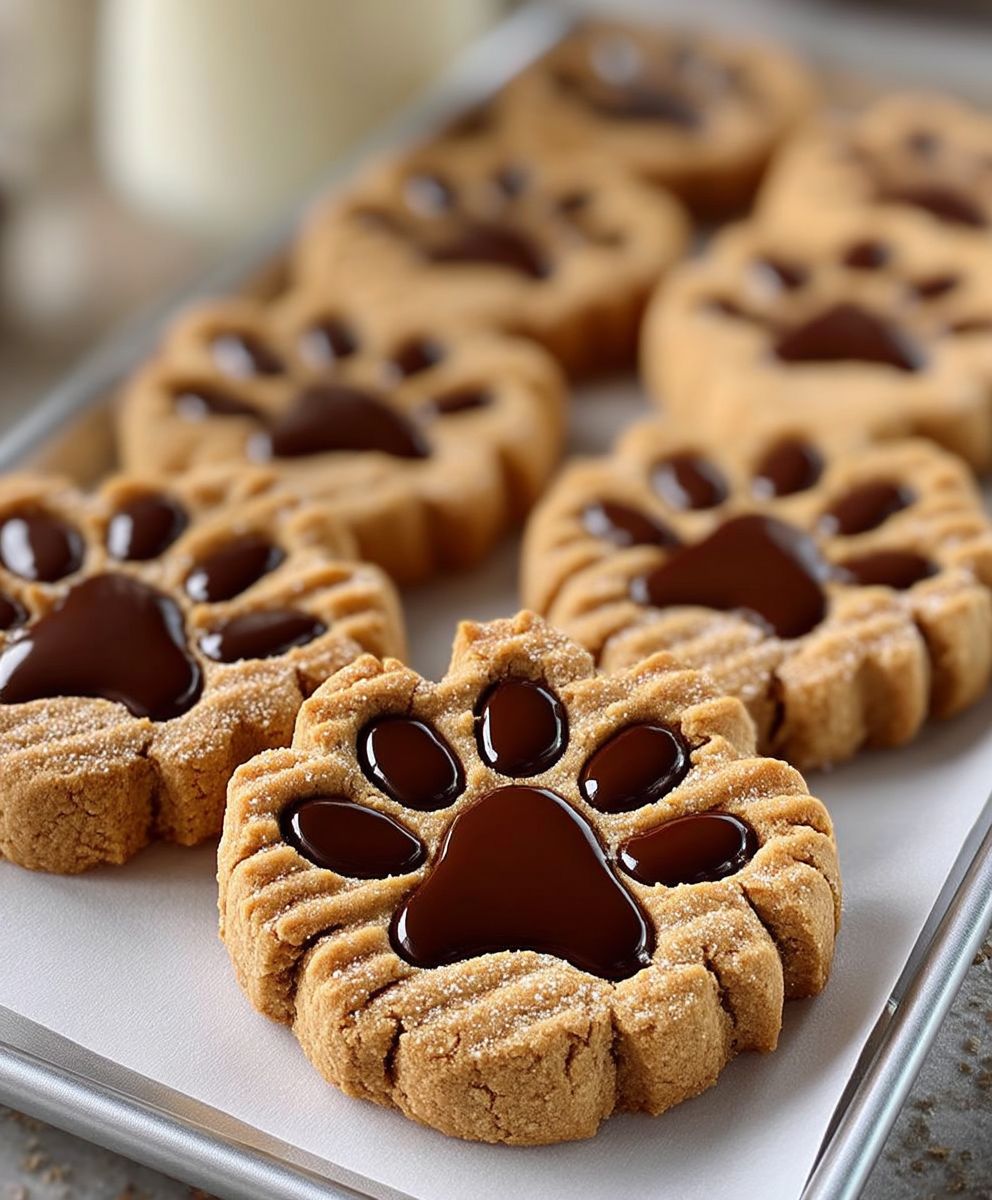
Peanut Butter Paw Print Cookies: Get ready to unleash your inner baker and create adorable, melt-in-your-mouth treats that are as fun to make as they are to eat! These aren’t just any cookies; they’re a delightful combination of classic peanut butter flavor and playful design, perfect for dog lovers of all ages. Imagine the smiles you’ll get when you present a plate of these charming cookies, each bearing a perfect little paw print.
While the exact origin of paw print cookies is a bit of a mystery, the concept of using cookie stamps and molds to create decorative treats has been around for centuries. From gingerbread men to intricately designed shortbread, cookies have always been a canvas for creativity. These Peanut Butter Paw Print Cookies take that tradition and add a modern, whimsical twist.
So, why are these cookies so irresistible? It’s a combination of factors! First, the taste: the rich, nutty flavor of peanut butter is a universally loved classic. Then, there’s the texture: a soft, chewy center with slightly crisp edges. And let’s not forget the visual appeal! The paw print design adds a touch of cuteness that makes these cookies perfect for parties, gifts, or simply a fun afternoon baking project. Plus, they are relatively easy to make, even for beginner bakers. Get ready to bake up a batch of happiness!
Ingredients:
- 1 cup (2 sticks) unsalted butter, softened
- 1 cup granulated sugar
- 1 cup packed brown sugar
- 2 large eggs
- 1 teaspoon vanilla extract
- 1 cup creamy peanut butter
- 3 cups all-purpose flour
- 1 teaspoon baking soda
- 1/2 teaspoon baking powder
- 1/2 teaspoon salt
- 1/2 cup milk chocolate chips, for paw prints
Preparing the Dough:
- First, let’s cream together the butter and sugars. In a large bowl, or the bowl of your stand mixer, beat the softened butter, granulated sugar, and brown sugar until light and fluffy. This usually takes about 3-5 minutes. Don’t rush this step; it’s crucial for a tender cookie!
- Next, beat in the eggs one at a time, making sure each egg is fully incorporated before adding the next. Then, stir in the vanilla extract and peanut butter. Mix until everything is well combined and the mixture is smooth.
- In a separate bowl, whisk together the flour, baking soda, baking powder, and salt. This ensures that the leavening agents are evenly distributed throughout the dough.
- Gradually add the dry ingredients to the wet ingredients, mixing on low speed until just combined. Be careful not to overmix the dough, as this can result in tough cookies. Overmixing develops the gluten in the flour, which we want to avoid.
- Once the dough comes together, wrap it tightly in plastic wrap and refrigerate for at least 30 minutes. This chilling time allows the gluten to relax and prevents the cookies from spreading too much during baking. You can even chill it for longer, up to 24 hours, if you need to prepare the dough in advance.
Shaping the Paw Prints:
- Preheat your oven to 375°F (190°C). Line baking sheets with parchment paper or silicone baking mats. This will prevent the cookies from sticking and make cleanup a breeze.
- Remove the chilled dough from the refrigerator. If it’s too firm to work with, let it sit at room temperature for a few minutes until it softens slightly.
- Roll the dough into 1-inch balls. Place the balls of dough onto the prepared baking sheets, leaving about 2 inches between each cookie to allow for spreading.
- Now for the fun part creating the paw prints! Gently press the tines of a fork into each cookie twice, forming a cross shape. Then, use your thumb or a small spoon to make four indentations around the center of the cross, creating the “toes” of the paw print.
- Bake for 8-10 minutes, or until the edges are lightly golden brown. Keep a close eye on them, as baking times can vary depending on your oven.
Adding the Chocolate Chips:
- While the cookies are still warm from the oven, gently press 3-4 milk chocolate chips into each of the “toe” indentations to create the paw print effect. The warmth of the cookies will help the chocolate chips adhere.
- Let the cookies cool on the baking sheets for a few minutes before transferring them to a wire rack to cool completely. This prevents them from breaking apart while they’re still soft.
Tips and Variations:
- Peanut Butter Variety: For a richer peanut butter flavor, use natural peanut butter. Just be sure to stir it well before measuring.
- Chocolate Chip Options: Feel free to experiment with different types of chocolate chips. Dark chocolate or semi-sweet chocolate chips would also be delicious. You could even use peanut butter chips for an extra peanut butter boost!
- Nut-Free Option: If you have a peanut allergy, you can substitute the peanut butter with sunflower seed butter or another nut-free alternative.
- Storage: Store the cooled cookies in an airtight container at room temperature for up to 5 days. They can also be frozen for longer storage.
- Make Ahead: The dough can be made ahead of time and stored in the refrigerator for up to 2 days. Just be sure to wrap it tightly in plastic wrap to prevent it from drying out.
- Cookie Size: Adjust the size of the dough balls to create larger or smaller cookies. Keep in mind that the baking time will need to be adjusted accordingly.
- Adding Sprinkles: For a festive touch, sprinkle the cookies with colored sprinkles before baking.
- Gluten-Free Option: To make these cookies gluten-free, substitute the all-purpose flour with a gluten-free all-purpose flour blend. Be sure to choose a blend that contains xanthan gum, as this will help to bind the ingredients together.
- Vegan Option: To make these cookies vegan, substitute the butter with a vegan butter alternative, the eggs with flax eggs (1 tablespoon of ground flaxseed mixed with 3 tablespoons of water per egg), and ensure the chocolate chips are dairy-free.
Troubleshooting:
- Cookies Spreading Too Much: If your cookies are spreading too much during baking, it could be due to a few factors. First, make sure your oven is properly preheated. Second, ensure that you’re using the correct amount of flour. Third, try chilling the dough for a longer period of time. Finally, avoid using softened butter that is too warm or melted.
- Cookies Too Dry: If your cookies are coming out dry, it could be due to overbaking. Reduce the baking time by a minute or two and check the cookies frequently. Also, make sure you’re not using too much flour.
- Cookies Too Hard: Overmixing the dough can lead to tough cookies. Be sure to mix the dry ingredients into the wet ingredients until just combined. Also, avoid overbaking the cookies.
- Chocolate Chips Not Sticking: If the chocolate chips are not sticking to the cookies, try pressing them in more firmly while the cookies are still warm. You can also melt a small amount of chocolate and use it as “glue” to adhere the chocolate chips to the cookies.
Serving Suggestions:
- Enjoy these Peanut Butter Paw Print Cookies with a glass of cold milk or a cup of hot coffee.
- Pack them in lunchboxes for a sweet treat.
- Serve them at parties or gatherings.
- Give them as gifts to friends and family.
- Use them as a base for ice cream sandwiches.
- Crumble them over yogurt or oatmeal.
Nutritional Information (approximate, per cookie):
- Calories: 150-200
- Fat: 8-12g
- Saturated Fat: 4-6g
- Cholesterol: 20-30mg
- Sodium: 50-70mg
- Carbohydrates: 18-22g
- Sugar: 10-14g
- Protein: 2-3g
Note: Nutritional information is an estimate and may vary depending on the specific ingredients used.
Conclusion:
And there you have it! These Peanut Butter Paw Print Cookies are more than just a sweet treat; they’re a delightful experience from start to finish. From the irresistible aroma that fills your kitchen as they bake to the adorable paw print design that brings a smile to everyone’s face, these cookies are guaranteed to be a hit. I truly believe this recipe is a must-try for any baking enthusiast, whether you’re a seasoned pro or just starting out. The simplicity of the ingredients and the straightforward instructions make it incredibly accessible, while the end result is a cookie that rivals anything you’d find in a bakery.
But what truly sets these cookies apart is their versatility. While the classic peanut butter flavor is undeniably delicious, don’t be afraid to experiment and put your own spin on things! For a richer, more decadent experience, try using dark chocolate chips instead of milk chocolate. Or, if you’re feeling adventurous, add a sprinkle of sea salt on top before baking to create a delightful sweet and salty contrast.
Serving Suggestions and Variations:
* Ice Cream Sandwiches: Use these cookies to make the most adorable ice cream sandwiches! Vanilla, chocolate, or even peanut butter ice cream would be perfect.
* Cookie Crumble Topping: Crumble these cookies over yogurt, ice cream, or even a bowl of oatmeal for a delicious and crunchy topping.
* Gift Giving: Package these cookies in a cute box or tin for a thoughtful and homemade gift. They’re perfect for birthdays, holidays, or just because!
* Different Nut Butters: Experiment with almond butter, cashew butter, or even sunflower seed butter for a unique flavor profile. Just be sure to adjust the baking time slightly as needed.
* Add-Ins: Get creative with your add-ins! Try chopped nuts, dried cranberries, or even a swirl of jam.
These Peanut Butter Paw Print Cookies are also fantastic served with a cold glass of milk, a warm cup of coffee, or even a scoop of vanilla ice cream. They’re the perfect afternoon snack, a delightful dessert after dinner, or a fun treat to bring to a party. No matter how you choose to enjoy them, I’m confident that you’ll love these cookies as much as I do.
I poured my heart into perfecting this recipe, and I’m so excited for you to try it. I truly believe that baking is a form of love, and sharing homemade treats with friends and family is one of the most rewarding experiences. So, gather your ingredients, preheat your oven, and get ready to create some magic in the kitchen.
I’m incredibly eager to hear about your baking adventures! Did you try any variations? Did you make them for a special occasion? What did your friends and family think? Please, please, please share your experience in the comments below. Your feedback is invaluable, and I love seeing how you make this recipe your own. Don’t forget to snap a picture of your finished cookies and tag me on social media I can’t wait to see your creations! Happy baking, and I hope these Peanut Butter Paw Print Cookies bring a little bit of joy to your day! I am sure you will love this recipe as much as I do!
Peanut Butter Paw Print Cookies: A Delicious & Easy Recipe
Soft, chewy peanut butter cookies shaped like paw prints, topped with melted milk chocolate chips. A fun and delicious treat!
Ingredients
- 1 cup (2 sticks) unsalted butter, softened
- 1 cup granulated sugar
- 1 cup packed brown sugar
- 2 large eggs
- 1 teaspoon vanilla extract
- 1 cup creamy peanut butter
- 3 cups all-purpose flour
- 1 teaspoon baking soda
- 1/2 teaspoon baking powder
- 1/2 teaspoon salt
- 1/2 cup milk chocolate chips, for paw prints
Instructions
- Cream Butter and Sugars: In a large bowl or stand mixer, beat softened butter, granulated sugar, and brown sugar until light and fluffy (3-5 minutes).
- Add Eggs and Peanut Butter: Beat in eggs one at a time, then stir in vanilla extract and peanut butter until smooth.
- Combine Dry Ingredients: In a separate bowl, whisk together flour, baking soda, baking powder, and salt.
- Combine Wet and Dry: Gradually add dry ingredients to wet ingredients, mixing on low speed until just combined. Do not overmix.
- Chill Dough: Wrap dough tightly in plastic wrap and refrigerate for at least 30 minutes (up to 24 hours).
- Preheat Oven: Preheat oven to 375°F (190°C). Line baking sheets with parchment paper or silicone baking mats.
- Shape Cookies: Roll dough into 1-inch balls. Place on baking sheets, leaving 2 inches between each.
- Create Paw Prints: Gently press the tines of a fork into each cookie twice, forming a cross shape. Then, use your thumb or a small spoon to make four indentations around the center of the cross, creating the “toes” of the paw print.
- Bake: Bake for 8-10 minutes, or until edges are lightly golden brown.
- Add Chocolate Chips: While cookies are still warm, gently press 3-4 milk chocolate chips into each “toe” indentation.
- Cool: Let cookies cool on baking sheets for a few minutes, then transfer to a wire rack to cool completely.
Notes
- For a richer peanut butter flavor, use natural peanut butter.
- Experiment with different types of chocolate chips (dark, semi-sweet, or peanut butter chips).
- For a nut-free option, substitute peanut butter with sunflower seed butter.
- Store cooled cookies in an airtight container at room temperature for up to 5 days or freeze for longer storage.
- Dough can be made ahead and stored in the refrigerator for up to 2 days.
- Adjust the size of the dough balls to create larger or smaller cookies.
- For a festive touch, sprinkle the cookies with colored sprinkles before baking.
- To make these cookies gluten-free, substitute the all-purpose flour with a gluten-free all-purpose flour blend.
- To make these cookies vegan, substitute the butter with a vegan butter alternative, the eggs with flax eggs (1 tablespoon of ground flaxseed mixed with 3 tablespoons of water per egg), and ensure the chocolate chips are dairy-free.

