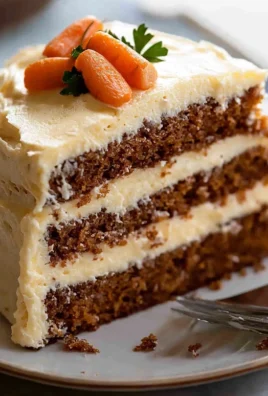
Lemon pie cookie sheet recipes are about to become your new best friend! Imagine sinking your teeth into a bright, tangy, and utterly irresistible lemon pie, but without the fuss of individual pies or intricate crust designs. That’s the magic we’re unlocking today. This isn’t just a dessert; it’s a shortcut to happiness, a slice of sunshine on a cloudy day, and a guaranteed crowd-pleaser for any gathering.
While the exact origins of lemon pie are debated, its popularity soared in the United States during the late 19th and early 20th centuries. It quickly became a staple in American households, celebrated for its refreshing flavor and relatively simple preparation. Our lemon pie cookie sheet version takes that simplicity to a whole new level, making it even more accessible for busy bakers and those new to the world of pastry.
Why do people adore lemon pie? It’s the perfect balance of sweet and tart, the creamy filling contrasting beautifully with the buttery, crumbly crust. And let’s be honest, who can resist that vibrant, citrusy aroma that fills the kitchen as it bakes? This cookie sheet adaptation retains all the beloved qualities of a traditional lemon pie, but offers the convenience of a single, large format that’s easy to slice and serve. Get ready to experience lemon pie bliss like never before!
Ingredients:
- For the Crust:
- 2 ½ cups all-purpose flour, plus more for dusting
- 1 teaspoon salt
- 1 cup (2 sticks) unsalted butter, very cold and cut into ½-inch cubes
- ½ cup vegetable shortening, very cold
- 6-8 tablespoons ice water
- For the Lemon Filling:
- 1 ½ cups granulated sugar
- 6 tablespoons cornstarch
- ¼ teaspoon salt
- 1 ½ cups water
- ½ cup fresh lemon juice (from about 3-4 lemons)
- 2 tablespoons unsalted butter
- 4 large egg yolks, lightly beaten
- 1 tablespoon lemon zest
- Yellow food coloring (optional, for a more vibrant color)
- For the Meringue Topping:
- 4 large egg whites
- ¼ teaspoon cream of tartar
- ½ cup granulated sugar
- 1 teaspoon vanilla extract
Preparing the Crust:
- Combine Dry Ingredients: In a large bowl, whisk together the flour and salt. This ensures the salt is evenly distributed throughout the crust, which is crucial for flavor.
- Cut in the Fat: Add the cold butter and shortening to the flour mixture. Using a pastry blender or your fingertips (work quickly to keep the fat cold!), cut the fat into the flour until the mixture resembles coarse crumbs. You should still see small pieces of butter and shortening these are what create flaky layers.
- Add Ice Water: Gradually add the ice water, one tablespoon at a time, mixing gently after each addition. Be careful not to overmix. You want just enough water to bring the dough together. The dough should be slightly shaggy but not sticky.
- Form Dough Disks: Divide the dough in half. Gently flatten each half into a disk. Wrap each disk tightly in plastic wrap and refrigerate for at least 30 minutes, or up to 2 days. This chilling time is essential for relaxing the gluten and preventing the crust from shrinking during baking.
- Roll Out the Dough: On a lightly floured surface, roll out one of the dough disks into a circle slightly larger than your cookie sheet (approximately 13×18 inches). I like to use a rolling pin with measurement markings to ensure even thickness.
- Transfer to Cookie Sheet: Carefully transfer the rolled-out dough to the cookie sheet. You can do this by gently rolling the dough around the rolling pin and then unrolling it onto the sheet. Press the dough into the corners and up the sides of the cookie sheet.
- Trim and Crimp the Edges: Trim any excess dough from the edges of the cookie sheet. Crimp the edges using a fork or your fingers to create a decorative border. This helps to seal the edges and prevent the filling from leaking.
- Dock the Crust: Use a fork to prick the bottom of the crust all over. This prevents the crust from puffing up during baking.
- Pre-bake the Crust: Preheat your oven to 375°F (190°C). Bake the crust for 15-20 minutes, or until lightly golden brown. You may need to use pie weights or dried beans to prevent the crust from puffing up too much. If you don’t have pie weights, simply prick the crust again halfway through baking if it starts to puff.
- Cool the Crust: Remove the crust from the oven and let it cool completely before adding the filling.
Preparing the Lemon Filling:
- Combine Dry Ingredients: In a medium saucepan, whisk together the sugar, cornstarch, and salt. The cornstarch is what thickens the filling, so make sure it’s well combined with the sugar to prevent lumps.
- Add Water and Lemon Juice: Gradually whisk in the water and lemon juice until smooth. Make sure there are no lumps of cornstarch remaining.
- Cook the Filling: Cook the mixture over medium heat, stirring constantly, until it comes to a boil and thickens. This usually takes about 5-7 minutes. Be patient and keep stirring to prevent the filling from scorching.
- Temper the Egg Yolks: In a small bowl, whisk the egg yolks lightly. Slowly drizzle a small amount of the hot lemon mixture into the egg yolks, whisking constantly. This is called tempering and prevents the egg yolks from scrambling when added to the hot filling.
- Add Egg Yolks to Filling: Pour the tempered egg yolk mixture back into the saucepan with the remaining lemon mixture. Cook for 1 minute more, stirring constantly, until the filling is very thick and glossy.
- Remove from Heat: Remove the saucepan from the heat and stir in the butter, lemon zest, and yellow food coloring (if using). The butter adds richness and shine to the filling, while the lemon zest enhances the lemon flavor.
- Pour into Crust: Pour the hot lemon filling into the pre-baked crust, spreading it evenly.
Preparing the Meringue Topping:
- Beat Egg Whites: In a clean, dry glass or metal bowl (make sure there’s no trace of grease!), beat the egg whites with an electric mixer until soft peaks form. The bowl and beaters must be completely clean for the egg whites to whip properly.
- Add Cream of Tartar: Add the cream of tartar and continue beating until stiff peaks form. The cream of tartar helps to stabilize the egg whites and prevent them from collapsing.
- Gradually Add Sugar: Gradually add the sugar, one tablespoon at a time, beating well after each addition. Continue beating until the meringue is glossy and smooth. The sugar helps to create a stable and sweet meringue.
- Add Vanilla Extract: Stir in the vanilla extract.
- Spread Meringue: Immediately spread the meringue over the hot lemon filling, making sure to seal it to the edges of the crust. This prevents the meringue from shrinking and weeping. You can create swirls or peaks with a spoon or spatula for a decorative effect.
Baking the Meringue:
- Bake or Broil: You have two options for browning the meringue:
- Baking: Bake in a preheated 350°F (175°C) oven for 12-15 minutes, or until the meringue is golden brown.
- Broiling: Broil the meringue for 1-2 minutes, watching very carefully to prevent it from burning. Keep the oven door slightly ajar and stay right by the oven. This method requires constant attention!
- Cool Completely: Remove the lemon pie from the oven and let it cool completely on a wire rack before slicing and serving. This allows the filling to set and the meringue to stabilize.
Tips for Success:
- Cold Ingredients are Key: Using cold butter, shortening, and ice water is crucial for creating a flaky crust.
- Don’t Overmix the Dough: Overmixing develops the gluten in the flour, resulting in a tough crust.
- Pre-bake the Crust: Pre-baking the crust prevents it from becoming soggy when you add the filling.
- Clean Bowl for Meringue: Make sure your bowl and beaters are completely clean and grease-free for the meringue.
- Seal the Meringue: Seal the meringue to the edges of the crust to prevent it from shrinking and weeping.
- Patience is a Virtue: Allow the pie to cool completely before slicing and serving for the best results.
Storage Instructions:
Store leftover lemon pie in the refrigerator, covered, for up to 3 days. The meringue may soften slightly over time.

Conclusion:
And there you have it! This lemon pie cookie sheet recipe is truly a game-changer, transforming the classic, sometimes fussy, lemon pie into a shareable, easy-to-make delight. I know, I know, you might be thinking, “Another lemon dessert recipe?” But trust me on this one. The bright, tangy lemon curd filling, perfectly balanced with the buttery, crumbly crust, creates a symphony of flavors and textures that will have everyone reaching for seconds (and thirds!).
Why is this a must-try? Well, first and foremost, it’s incredibly simple. Forget about finicky pie crusts and worrying about soggy bottoms. This recipe utilizes a press-in crust, making it virtually foolproof. Second, it’s perfect for a crowd. Whether you’re hosting a summer barbecue, a holiday gathering, or just a casual get-together with friends, this lemon pie cookie sheet will be the star of the dessert table. It slices beautifully into neat squares, making it easy to serve and enjoy. And finally, the taste! The combination of sweet, tart, and buttery is simply irresistible.
But the fun doesn’t stop there! Feel free to get creative with your serving suggestions and variations. For a touch of elegance, dust the finished pie with powdered sugar or top each square with a dollop of whipped cream and a fresh raspberry. If you’re feeling adventurous, try adding a sprinkle of toasted coconut to the crust for a tropical twist. Or, for a more intense lemon flavor, zest an extra lemon into the curd filling. You could even experiment with different citrus fruits, such as lime or grapefruit, for a unique and refreshing variation. A little bit of lavender extract in the crust can also add a sophisticated floral note.
Here are a few more ideas to spark your creativity:
- Individual Lemon Bars: Cut the baked pie into smaller squares for individual lemon bars, perfect for lunchboxes or afternoon snacks.
- Lemon Pie Parfaits: Crumble the baked pie and layer it with whipped cream and fresh berries in parfait glasses for a stunning and delicious dessert.
- Lemon Pie Ice Cream Topping: Crumble the baked pie and use it as a topping for vanilla ice cream or frozen yogurt.
I’m absolutely confident that you’ll love this recipe as much as I do. It’s a guaranteed crowd-pleaser, and it’s so easy to make that you’ll find yourself whipping it up again and again. So, what are you waiting for? Gather your ingredients, preheat your oven, and get ready to experience the joy of this incredible lemon pie cookie sheet.
I can’t wait to hear about your experience! Once you’ve tried the recipe, please come back and leave a comment below. Let me know what you thought, what variations you tried, and any tips or tricks you discovered along the way. Sharing your feedback helps me improve the recipe and inspires other readers to give it a try. Happy baking, and enjoy every delicious bite! Don’t forget to snap a picture of your creation and share it on social media using #LemonPieCookieSheet I’d love to see your masterpieces!
Lemon Pie Cookie Sheet: Bake the Perfect Dessert
Classic Lemon Meringue Pie with a flaky homemade crust, tangy lemon filling, and sweet, fluffy meringue topping.
Ingredients
- 2 ½ cups all-purpose flour, plus more for dusting
- 1 teaspoon salt
- 1 cup (2 sticks) unsalted butter, very cold and cut into ½-inch cubes
- ½ cup vegetable shortening, very cold
- 6-8 tablespoons ice water
- 1 ½ cups granulated sugar
- 6 tablespoons cornstarch
- ¼ teaspoon salt
- 1 ½ cups water
- ½ cup fresh lemon juice (from about 3-4 lemons)
- 2 tablespoons unsalted butter
- 4 large egg yolks, lightly beaten
- 1 tablespoon lemon zest
- Yellow food coloring (optional, for a more vibrant color)
- 4 large egg whites
- ¼ teaspoon cream of tartar
- ½ cup granulated sugar
- 1 teaspoon vanilla extract
Instructions
- In a large bowl, whisk together the flour and salt.
- Add the cold butter and shortening to the flour mixture. Using a pastry blender or your fingertips (work quickly to keep the fat cold!), cut the fat into the flour until the mixture resembles coarse crumbs.
- Gradually add the ice water, one tablespoon at a time, mixing gently after each addition. Be careful not to overmix. The dough should be slightly shaggy but not sticky.
- Divide the dough in half. Gently flatten each half into a disk. Wrap each disk tightly in plastic wrap and refrigerate for at least 30 minutes, or up to 2 days.
- On a lightly floured surface, roll out one of the dough disks into a circle slightly larger than your cookie sheet (approximately 13×18 inches).
- Carefully transfer the rolled-out dough to the cookie sheet. Press the dough into the corners and up the sides of the cookie sheet.
- Trim any excess dough from the edges of the cookie sheet. Crimp the edges using a fork or your fingers to create a decorative border.
- Use a fork to prick the bottom of the crust all over.
- Preheat your oven to 375°F (190°C). Bake the crust for 15-20 minutes, or until lightly golden brown. You may need to use pie weights or dried beans to prevent the crust from puffing up too much. If you don’t have pie weights, simply prick the crust again halfway through baking if it starts to puff.
- Remove the crust from the oven and let it cool completely before adding the filling.
- In a medium saucepan, whisk together the sugar, cornstarch, and salt.
- Gradually whisk in the water and lemon juice until smooth.
- Cook the mixture over medium heat, stirring constantly, until it comes to a boil and thickens. This usually takes about 5-7 minutes.
- In a small bowl, whisk the egg yolks lightly. Slowly drizzle a small amount of the hot lemon mixture into the egg yolks, whisking constantly.
- Pour the tempered egg yolk mixture back into the saucepan with the remaining lemon mixture. Cook for 1 minute more, stirring constantly, until the filling is very thick and glossy.
- Remove the saucepan from the heat and stir in the butter, lemon zest, and yellow food coloring (if using).
- Pour the hot lemon filling into the pre-baked crust, spreading it evenly.
- In a clean, dry glass or metal bowl (make sure there’s no trace of grease!), beat the egg whites with an electric mixer until soft peaks form.
- Add the cream of tartar and continue beating until stiff peaks form.
- Gradually add the sugar, one tablespoon at a time, beating well after each addition. Continue beating until the meringue is glossy and smooth.
- Stir in the vanilla extract.
- Immediately spread the meringue over the hot lemon filling, making sure to seal it to the edges of the crust. You can create swirls or peaks with a spoon or spatula for a decorative effect.
- You have two options for browning the meringue:
- Bake in a preheated 350°F (175°C) oven for 12-15 minutes, or until the meringue is golden brown.
- Broil the meringue for 1-2 minutes, watching very carefully to prevent it from burning. Keep the oven door slightly ajar and stay right by the oven.
- Remove the lemon pie from the oven and let it cool completely on a wire rack before slicing and serving.
Notes
- Cold Ingredients are Key: Using cold butter, shortening, and ice water is crucial for creating a flaky crust.
- Don’t Overmix the Dough: Overmixing develops the gluten in the flour, resulting in a tough crust.
- Pre-bake the Crust: Pre-baking the crust prevents it from becoming soggy when you add the filling.
- Clean Bowl for Meringue: Make sure your bowl and beaters are completely clean and grease-free for the meringue.
- Seal the Meringue: Seal the meringue to the edges of the crust to prevent it from shrinking and weeping.
- Patience is a Virtue: Allow the pie to cool completely before slicing and serving for the best results.
- Storage Instructions: Store leftover lemon pie in the refrigerator, covered, for up to 3 days. The meringue may soften slightly over time.

