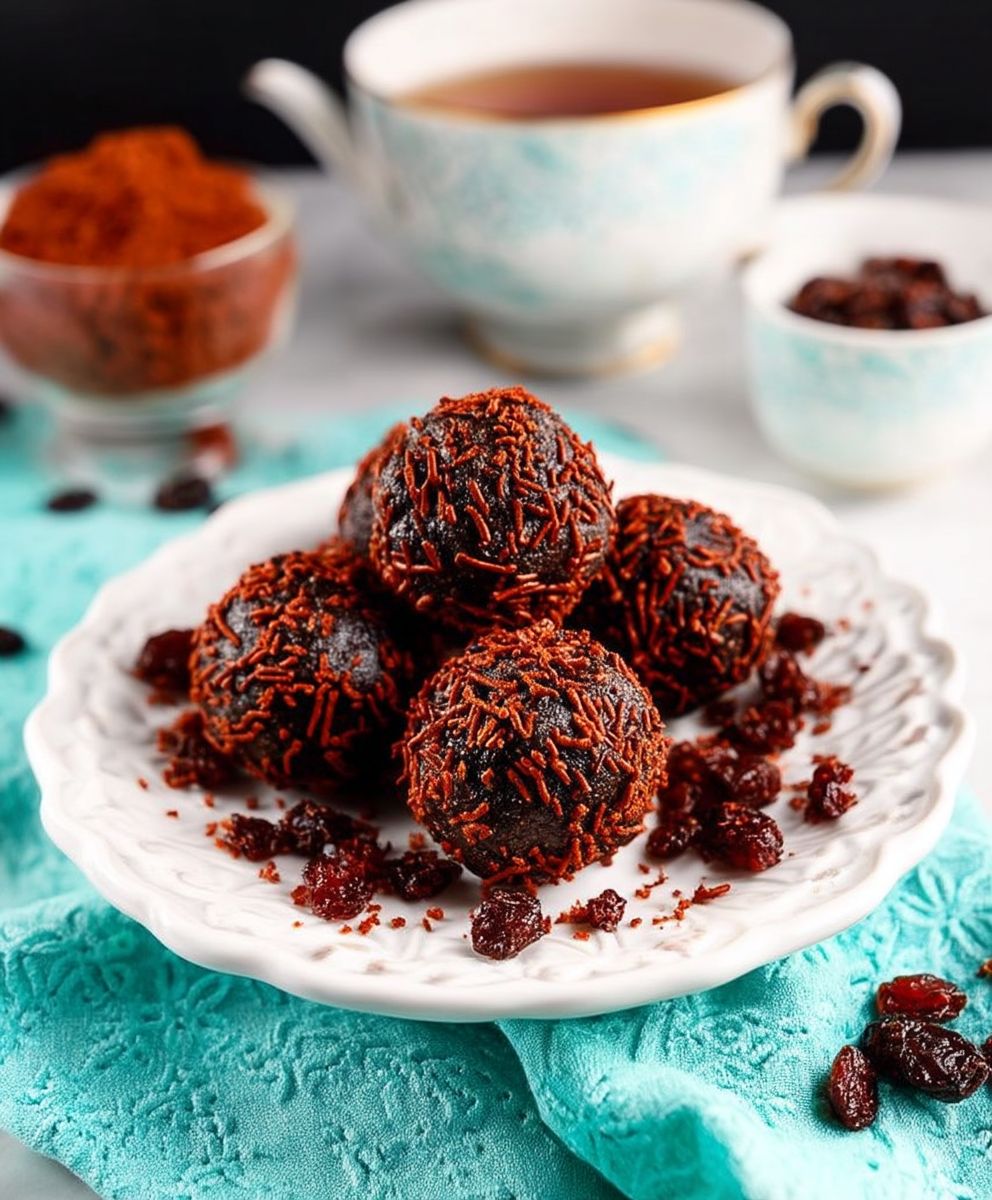
Tea Time Truffles: Prepare to elevate your afternoon tea ritual with a delightful treat that’s as elegant as it is easy to make! Imagine biting into a velvety smooth chocolate sphere, infused with the delicate aroma of your favorite tea. These aren’t your average truffles; they’re a sophisticated indulgence perfect for impressing guests or simply treating yourself to a moment of pure bliss.
While the exact origins of chocolate truffles are debated, their popularity soared in Europe, particularly in France, where they were initially crafted to resemble the prized fungus of the same name. Over time, variations emerged, incorporating different flavors and textures. Our Tea Time Truffles pay homage to this rich history while adding a modern twist, blending the classic appeal of chocolate with the comforting essence of tea.
What makes these truffles so irresistible? It’s the perfect marriage of flavors and textures. The creamy, melt-in-your-mouth chocolate ganache is beautifully complemented by the subtle, aromatic notes of your chosen tea. Whether you prefer the floral elegance of Earl Grey, the earthy depth of matcha, or the spicy warmth of chai, these truffles offer a customizable experience that caters to every palate. Plus, they’re surprisingly simple to prepare, requiring minimal ingredients and effort, making them an ideal treat for any occasion. So, gather your ingredients and let’s embark on a culinary adventure to create these exquisite Tea Time Truffles!

Ingredients:
- 1 (14 ounce) package chocolate sandwich cookies (like Oreos), finely crushed
- 1 (8 ounce) package cream cheese, softened
- 1/2 cup unsalted butter, softened
- 1 teaspoon vanilla extract
- 1/4 teaspoon salt
- 12 ounces semi-sweet chocolate chips
- 2 tablespoons vegetable shortening
- Optional toppings: Sprinkles, chopped nuts, shredded coconut, cocoa powder
Preparing the Truffle Mixture:
- First, let’s get those cookies crushed! You can use a food processor for this, pulsing until you have a fine crumb. If you don’t have a food processor, no worries! Just place the cookies in a large zip-top bag, seal it tightly, and use a rolling pin to crush them into fine crumbs. This might take a little elbow grease, but it’s a great way to relieve some stress!
- Now, in a large mixing bowl, combine the softened cream cheese, softened butter, vanilla extract, and salt. Make sure your cream cheese and butter are truly softened; otherwise, you’ll end up with lumps in your truffle mixture. Trust me, I’ve been there! Use an electric mixer (handheld or stand mixer) to beat these ingredients together until they are smooth and creamy. This usually takes about 2-3 minutes.
- Next, gradually add the crushed chocolate sandwich cookies to the cream cheese mixture. It’s best to add them in batches, mixing well after each addition. This will prevent the cookie crumbs from flying everywhere and ensure they are evenly distributed throughout the mixture. Continue mixing until everything is well combined and you have a thick, dough-like consistency.
- Once the mixture is thoroughly combined, cover the bowl with plastic wrap and refrigerate it for at least 30 minutes, or even better, for an hour. This chilling time is crucial because it allows the mixture to firm up, making it much easier to roll into truffles. If you skip this step, the truffles will be too sticky and difficult to handle.
Rolling and Shaping the Truffles:
- After the truffle mixture has chilled sufficiently, it’s time to roll them into balls. I like to use a small cookie scoop (about 1 tablespoon size) to ensure that all the truffles are uniform in size. This also makes the process much quicker and easier. If you don’t have a cookie scoop, you can use a spoon, but try to be consistent with the amount of mixture you scoop each time.
- Roll each scoop of the mixture between your palms to form a smooth, round ball. Don’t worry if they’re not perfect; they’ll still taste amazing! Place the rolled truffles on a baking sheet lined with parchment paper or wax paper. This will prevent them from sticking to the baking sheet.
- Once all the truffles have been rolled, place the baking sheet back in the refrigerator for another 15-20 minutes. This will help them firm up even further before we dip them in chocolate. Again, this step is important for achieving a professional-looking finish.
Melting the Chocolate and Dipping the Truffles:
- While the truffles are chilling for the second time, let’s prepare the chocolate coating. In a heat-safe bowl (glass or metal), combine the semi-sweet chocolate chips and vegetable shortening. The vegetable shortening helps to thin out the chocolate, making it easier to dip the truffles and giving them a smooth, glossy finish.
- There are two ways to melt the chocolate: using a double boiler or in the microwave. If using a double boiler, fill a saucepan with about an inch of water and bring it to a simmer. Place the heat-safe bowl with the chocolate and shortening over the simmering water, making sure the bottom of the bowl doesn’t touch the water. Stir the chocolate constantly until it is completely melted and smooth.
- If using the microwave, heat the chocolate and shortening in 30-second intervals, stirring well after each interval. Be careful not to overheat the chocolate, as it can burn easily. Continue heating and stirring until the chocolate is completely melted and smooth.
- Once the chocolate is melted, remove the truffles from the refrigerator. Using a fork or dipping tools, carefully dip each truffle into the melted chocolate, making sure it is completely coated. Gently tap off any excess chocolate.
- Place the dipped truffles back on the parchment-lined baking sheet. If you’re using any toppings, such as sprinkles, chopped nuts, or shredded coconut, now is the time to add them. Sprinkle the toppings over the wet chocolate before it sets.
- If you want to add a drizzle of white chocolate or another type of chocolate, melt it separately and drizzle it over the truffles using a fork or a piping bag. This adds a beautiful decorative touch.
Setting and Storing the Truffles:
- After you’ve dipped and decorated all the truffles, place the baking sheet back in the refrigerator for at least 30 minutes, or until the chocolate is completely set. This will ensure that the chocolate coating is firm and doesn’t melt when you handle the truffles.
- Once the chocolate is set, you can transfer the truffles to an airtight container. They can be stored in the refrigerator for up to a week, or in the freezer for up to a month. If freezing, be sure to thaw them in the refrigerator before serving.
Tips and Variations:
- Cookie Variations: Feel free to experiment with different types of chocolate sandwich cookies. Golden Oreos, mint Oreos, or even peanut butter Oreos would all be delicious!
- Chocolate Variations: You can also use different types of chocolate for the coating, such as milk chocolate, dark chocolate, or white chocolate. Each type of chocolate will give the truffles a slightly different flavor.
- Flavor Extracts: Add a few drops of your favorite flavor extract to the truffle mixture for an extra burst of flavor. Peppermint extract, almond extract, or coffee extract would all be great additions.
- Nut Butter: Stir in a tablespoon or two of your favorite nut butter (peanut butter, almond butter, cashew butter) to the truffle mixture for a nutty flavor.
- Liquor Infusion: For an adult twist, add a tablespoon or two of your favorite liqueur to the truffle mixture. Baileys Irish Cream, Kahlua, or Grand Marnier would all be delicious choices.
- Vegan Option: Use vegan chocolate sandwich cookies and vegan cream cheese to make these truffles vegan-friendly.
- Gluten-Free Option: Use gluten-free chocolate sandwich cookies to make these truffles gluten-free.
Troubleshooting Tips:
- Truffles are too sticky: If the truffle mixture is too sticky to roll, add a little more crushed cookies or refrigerate it for a longer period of time.
- Chocolate is too thick: If the melted chocolate is too thick to dip the truffles easily, add a little more vegetable shortening.
- Chocolate is seizing: If the chocolate seizes (becomes grainy and hard), it may have been overheated or come into contact with water. Unfortunately, there’s not much you can do to fix seized chocolate, so it’s best to start over with a fresh batch.
Enjoy your Tea Time Truffles!
Conclusion:
So there you have it! These Tea Time Truffles are more than just a sweet treat; they’re an experience. From the delicate aroma that fills your kitchen as you melt the chocolate to the satisfyingly rich flavor that melts in your mouth, every step of this recipe is a joy. I truly believe this is a must-try recipe for anyone who loves chocolate, tea, or simply enjoys creating something special in the kitchen.
Why is it a must-try? Because it’s surprisingly simple to make, incredibly delicious, and endlessly adaptable. You don’t need to be a professional chocolatier to achieve truffle perfection. The recipe is straightforward, using readily available ingredients, and the results are guaranteed to impress. Plus, the subtle tea infusion adds a unique depth of flavor that elevates these truffles beyond your average chocolate confection. They’re the perfect balance of sweet and sophisticated, making them ideal for any occasion.
But the fun doesn’t stop there! Feel free to experiment with different types of tea. Earl Grey lends a classic bergamot aroma, while a floral chamomile creates a soothing and delicate truffle. For a bolder flavor, try using a spiced chai or even a smoky lapsang souchong. The possibilities are truly endless!
And when it comes to serving, these truffles are incredibly versatile. They make a stunning addition to any dessert platter, are perfect for gifting (especially during the holidays!), or can simply be enjoyed as a personal indulgence with a cup of your favorite tea or coffee. Imagine presenting a beautifully arranged box of these homemade truffles to a friend or loved one the look on their face will be priceless!
Here are a few serving suggestions to get you started:
- Serve them chilled alongside a scoop of vanilla ice cream for an extra decadent dessert.
- Dust them with cocoa powder, powdered sugar, or finely chopped nuts for a beautiful presentation.
- Package them in small cellophane bags tied with ribbon for a charming homemade gift.
- Include them as part of a tea party spread, alongside scones, sandwiches, and other delectable treats.
- Pair them with a glass of dessert wine or a liqueur for an after-dinner indulgence.
Looking for variations? Consider these ideas:
- Add a touch of citrus zest (orange, lemon, or lime) to the chocolate mixture for a bright and refreshing twist.
- Stir in a tablespoon of your favorite liqueur (such as Grand Marnier or Frangelico) for an extra kick.
- Roll the truffles in crushed freeze-dried raspberries or strawberries for a burst of fruity flavor.
- Incorporate a pinch of sea salt into the chocolate mixture to enhance the sweetness and create a salty-sweet sensation.
- Use different types of chocolate, such as dark, milk, or white, to create a variety of flavors and textures.
I’m so excited for you to try this recipe and discover the magic of homemade Tea Time Truffles. I know you’ll love them as much as I do! Don’t be afraid to get creative and put your own personal spin on the recipe. After all, the best recipes are the ones that are made with love and tailored to your own taste.
So, what are you waiting for? Gather your ingredients, put on your apron, and get ready to embark on a truffle-making adventure! And most importantly, don’t forget to share your experience with me! I’d love to hear about your variations, your serving suggestions, and how much you enjoyed making (and eating!) these delicious treats. Leave a comment below, tag me in your photos on social media I can’t wait to see what you create! Happy truffle-making!
Tea Time Truffles: A Deliciously Decadent Recipe
Decadent Oreo truffles made with crushed cookies, cream cheese, and dipped in rich chocolate. Perfect for parties or a sweet treat!
Ingredients
- 1 (14 ounce) package chocolate sandwich cookies (like Oreos), finely crushed
- 1 (8 ounce) package cream cheese, softened
- 1/2 cup unsalted butter, softened
- 1 teaspoon vanilla extract
- 1/4 teaspoon salt
- 12 ounces semi-sweet chocolate chips
- 2 tablespoons vegetable shortening
- Optional toppings: Sprinkles, chopped nuts, shredded coconut, cocoa powder
Instructions
- Crush the Cookies: Finely crush the chocolate sandwich cookies using a food processor or by placing them in a zip-top bag and crushing them with a rolling pin.
- Prepare the Truffle Mixture: In a large mixing bowl, combine the softened cream cheese, softened butter, vanilla extract, and salt. Beat with an electric mixer until smooth and creamy.
- Combine Ingredients: Gradually add the crushed cookies to the cream cheese mixture, mixing well after each addition until everything is well combined and you have a thick, dough-like consistency.
- Chill the Mixture: Cover the bowl with plastic wrap and refrigerate for at least 30 minutes, or up to an hour, to allow the mixture to firm up.
- Roll into Truffles: Use a small cookie scoop (about 1 tablespoon size) to scoop the mixture and roll each scoop between your palms to form a smooth, round ball. Place the rolled truffles on a baking sheet lined with parchment paper or wax paper.
- Chill Again: Place the baking sheet back in the refrigerator for another 15-20 minutes to help the truffles firm up further.
- Melt the Chocolate: In a heat-safe bowl, combine the semi-sweet chocolate chips and vegetable shortening. Melt using a double boiler or in the microwave in 30-second intervals, stirring well after each interval, until completely melted and smooth.
- Dip the Truffles: Remove the truffles from the refrigerator. Using a fork or dipping tools, carefully dip each truffle into the melted chocolate, making sure it is completely coated. Gently tap off any excess chocolate.
- Add Toppings (Optional): Place the dipped truffles back on the parchment-lined baking sheet. If using any toppings, such as sprinkles, chopped nuts, or shredded coconut, sprinkle them over the wet chocolate before it sets.
- Chill to Set: Place the baking sheet back in the refrigerator for at least 30 minutes, or until the chocolate is completely set.
- Store: Transfer the truffles to an airtight container. Store in the refrigerator for up to a week, or in the freezer for up to a month. If freezing, thaw in the refrigerator before serving.
Notes
- Make sure the cream cheese and butter are fully softened for a smooth truffle mixture.
- Chilling the truffle mixture is crucial for easy rolling and dipping.
- Vegetable shortening helps thin the chocolate for a smooth, glossy finish.
- Experiment with different types of chocolate sandwich cookies, chocolate, and toppings for variations.
- For vegan truffles, use vegan chocolate sandwich cookies and vegan cream cheese.
- If the truffle mixture is too sticky, add more crushed cookies or chill for longer.
- If the chocolate is too thick, add more vegetable shortening.