Gluten Free Espresso Brownies: Prepare to have your chocolate-loving world rocked! Imagine sinking your teeth into a fudgy, intensely chocolatey brownie, infused with the rich, robust flavor of espresso, and knowing it’s completely gluten-free. Sounds too good to be true, right? Well, get ready to be amazed because this recipe delivers all that and more!
Brownies, in their various forms, have been a beloved treat in American households since the late 19th century. While the exact origin is debated, the appeal is undeniable: a dense, chocolatey square of pure indulgence. But what happens when dietary restrictions enter the picture? That’s where our Gluten Free Espresso Brownies truly shine.
People adore brownies for their comforting texture, their intense chocolate flavor, and their ease of preparation. This recipe takes all those beloved qualities and elevates them with the addition of espresso, which enhances the chocolate notes and adds a subtle depth of flavor. The gluten-free aspect ensures that everyone can enjoy this decadent treat, regardless of dietary needs. Whether you’re gluten-free by choice or necessity, these brownies are guaranteed to become a new favorite. Get ready to experience brownie perfection!

Ingredients:
- 1 cup (2 sticks) unsalted butter, melted
- 2 cups granulated sugar
- 4 large eggs
- 1 tablespoon vanilla extract
- 1 cup gluten-free all-purpose flour blend (ensure it contains xanthan gum)
- ¾ cup unsweetened cocoa powder
- 1 teaspoon instant espresso powder
- ½ teaspoon salt
- ½ teaspoon baking powder
- 1 cup semi-sweet chocolate chips
- Optional: ½ cup chopped walnuts or pecans
Preparing the Espresso Brownie Batter
Okay, let’s get started! First things first, we need to get that butter melted. I usually do this in the microwave in 30-second intervals, stirring in between, to prevent it from exploding. You can also melt it on the stovetop over low heat. Just keep a close eye on it!
- Melt the Butter: In a large microwave-safe bowl, melt the butter completely. Let it cool slightly for a few minutes. This is important because you don’t want to cook the eggs when you add them later.
- Combine Butter and Sugar: Add the granulated sugar to the melted butter and whisk vigorously until the mixture is smooth and well combined. This step is crucial for creating that shiny, crackly top we all love on brownies. Keep whisking for a good minute or two!
- Incorporate the Eggs and Vanilla: Add the eggs one at a time, whisking well after each addition. Make sure each egg is fully incorporated before adding the next. Then, stir in the vanilla extract. The mixture should be light and fluffy at this point.
- Combine Dry Ingredients: In a separate medium bowl, whisk together the gluten-free all-purpose flour, cocoa powder, instant espresso powder, salt, and baking powder. Whisking ensures that there are no lumps and that the baking powder is evenly distributed. The espresso powder really enhances the chocolate flavor, so don’t skip it!
- Gradually Add Dry Ingredients to Wet Ingredients: Gradually add the dry ingredients to the wet ingredients, mixing on low speed (if using a stand mixer) or with a spatula until just combined. Be careful not to overmix! Overmixing can lead to tough brownies. A few streaks of flour are okay at this stage.
- Fold in Chocolate Chips (and Nuts, if using): Gently fold in the chocolate chips (and chopped nuts, if using) until they are evenly distributed throughout the batter. I like to use a rubber spatula for this to avoid overmixing.
Baking the Gluten-Free Espresso Brownies
Now for the exciting part baking! Getting the baking time just right is key to achieving that perfect fudgy texture. We want the center to be slightly soft, but not completely raw.
- Prepare the Baking Pan: Preheat your oven to 350°F (175°C). Grease and flour (using gluten-free flour) an 8×8 inch baking pan. You can also line the pan with parchment paper, leaving an overhang on the sides, for easy removal. This is my preferred method!
- Pour Batter into Pan: Pour the brownie batter into the prepared baking pan and spread it evenly with a spatula.
- Bake: Bake for 25-30 minutes, or until a toothpick inserted into the center comes out with moist crumbs attached. Don’t overbake! Overbaked brownies are dry and crumbly, and we definitely don’t want that. Start checking for doneness around 25 minutes.
- Cool Completely: Remove the brownies from the oven and let them cool completely in the pan before cutting. This is the hardest part, I know! But trust me, it’s worth the wait. Cooling allows the brownies to set properly, making them easier to cut and preventing them from falling apart.
Cutting and Serving Your Delicious Brownies
Finally, the moment we’ve all been waiting for! Time to cut and enjoy those decadent gluten-free espresso brownies. Here are a few tips for getting clean, even cuts.
- Loosen the Edges: If you lined the pan with parchment paper, lift the brownies out of the pan using the overhang. If not, run a knife around the edges of the pan to loosen the brownies.
- Cut into Squares: Use a sharp knife to cut the brownies into squares. For clean cuts, wipe the knife clean with a damp cloth between each cut.
- Serve and Enjoy: Serve the brownies at room temperature or slightly warmed. They are delicious on their own, but you can also top them with a scoop of vanilla ice cream, a drizzle of chocolate sauce, or a sprinkle of powdered sugar.
Tips for Gluten-Free Baking Success
Gluten-free baking can be a little tricky, but with a few helpful tips, you can achieve amazing results every time. Here are some things I’ve learned along the way:
- Use a High-Quality Gluten-Free Flour Blend: Not all gluten-free flour blends are created equal. Look for a blend that contains xanthan gum, which acts as a binder and helps to give your baked goods structure. I’ve had good luck with Bob’s Red Mill Gluten-Free 1-to-1 Baking Flour and King Arthur Gluten-Free Measure for Measure Flour.
- Don’t Overmix: Overmixing gluten-free batter can lead to tough, dry baked goods. Mix until just combined, and don’t worry if there are a few streaks of flour remaining.
- Let the Batter Rest: Letting the batter rest for 10-15 minutes before baking can help the gluten-free flour absorb more liquid, resulting in a better texture.
- Adjust Baking Time as Needed: Gluten-free baked goods tend to bake faster than traditional baked goods, so keep a close eye on them and adjust the baking time as needed.
- Cool Completely: As mentioned earlier, cooling gluten-free baked goods completely is essential for preventing them from falling apart.
Variations and Add-Ins
Want to customize your gluten-free espresso brownies? Here are a few ideas:
- Add a Swirl: Swirl in a spoonful of peanut butter, Nutella, or raspberry jam before baking.
- Top with Frosting: Frost the cooled brownies with your favorite frosting, such as chocolate ganache, cream cheese frosting, or peanut butter frosting.
- Add Different Chocolate Chips: Use dark chocolate chips, white chocolate chips, or a combination of different types of chocolate chips.
- Add a Layer of Caramel: Pour a layer of caramel sauce over the brownies during the last few minutes of baking.
- Make them Vegan: Substitute the butter with vegan butter, the eggs with flax eggs (1 tablespoon ground flaxseed mixed with 3 tablespoons water per egg), and use vegan chocolate chips.
I hope you enjoy these gluten-free espresso brownies as much as I do! They’re the perfect treat for any occasion, and they’re sure to impress even the most discerning brownie connoisseur. Happy baking!
Conclusion:
And there you have it! These Gluten Free Espresso Brownies are more than just a dessert; they’re an experience. The rich, dark chocolate, the subtle kick of espresso, and the fudgy, melt-in-your-mouth texture all combine to create a brownie that’s truly unforgettable. I know, I know, I might be biased, but I genuinely believe this is a recipe you absolutely *must* try.
Why? Because it’s ridiculously easy to make, even if you’re not a seasoned baker. Because it’s naturally gluten-free, meaning everyone can enjoy a slice of brownie heaven. And because the combination of chocolate and coffee is simply irresistible. Seriously, what’s not to love?
But the best part? These brownies are incredibly versatile. Looking for a simple yet elegant dessert? Serve them warm with a scoop of vanilla ice cream and a dusting of cocoa powder. Want to take them to the next level? Drizzle them with a homemade chocolate ganache or a salted caramel sauce. Feeling adventurous? Add a handful of chopped walnuts or pecans for a bit of crunch.
For a truly decadent experience, try pairing these brownies with a strong cup of coffee or a creamy latte. The bitterness of the coffee perfectly complements the sweetness of the brownie, creating a symphony of flavors that will tantalize your taste buds. Or, if you’re feeling a bit more indulgent, why not serve them with a glass of chilled milk? It’s the perfect comfort food combination.
And don’t be afraid to experiment! This recipe is a great starting point, but feel free to customize it to your own liking. Try using different types of chocolate, adding different extracts, or even incorporating some spices like cinnamon or chili powder. The possibilities are endless!
I’ve personally made these Gluten Free Espresso Brownies countless times, and they’re always a hit. Whether I’m baking them for a special occasion or simply craving a sweet treat, they never fail to satisfy. They’re the perfect way to end a meal, to celebrate a milestone, or simply to brighten up a rainy day.
So, what are you waiting for? Grab your ingredients, preheat your oven, and get ready to bake the best gluten-free brownies you’ve ever tasted. I promise you won’t be disappointed.
And once you’ve tried them, I’d love to hear what you think! Share your photos, your variations, and your experiences in the comments below. Did you add any special ingredients? Did you serve them with a particular topping? I’m always looking for new ideas and inspiration, and I can’t wait to see what you come up with.
Happy baking! I’m confident that these Gluten Free Espresso Brownies will become a new favorite in your household, just as they have in mine. Enjoy!
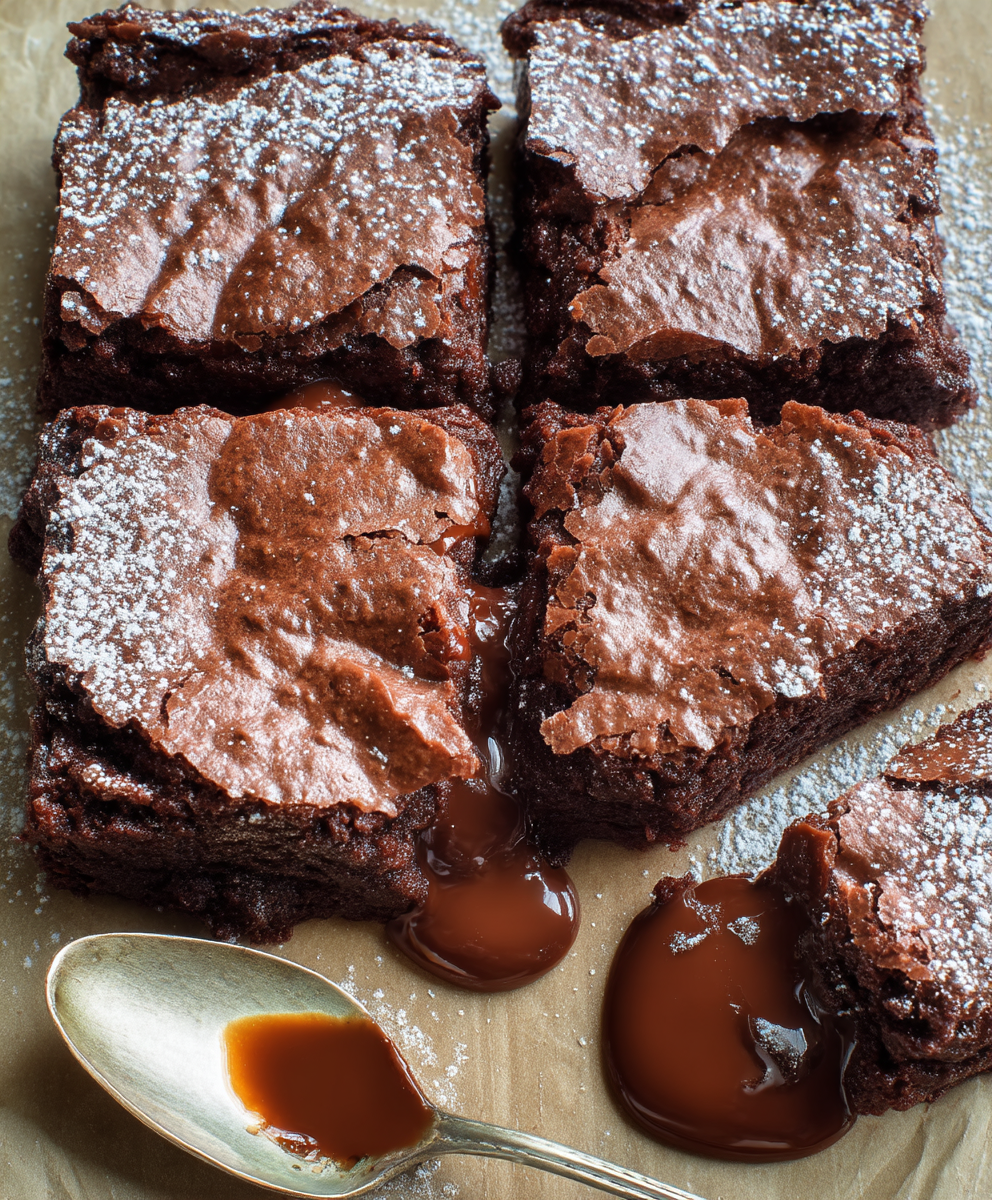
Gluten Free Espresso Brownies: The Ultimate Decadent Recipe
Decadent, fudgy, gluten-free espresso brownies with a crackly top and rich chocolate flavor. Optional walnuts or pecans.
Ingredients
- 1 cup (2 sticks) unsalted butter, melted
- 2 cups granulated sugar
- 4 large eggs
- 1 tablespoon vanilla extract
- 1 cup gluten-free all-purpose flour blend (ensure it contains xanthan gum)
- ¾ cup unsweetened cocoa powder
- 1 teaspoon instant espresso powder
- ½ teaspoon salt
- ½ teaspoon baking powder
- 1 cup semi-sweet chocolate chips
- Optional: ½ cup chopped walnuts or pecans
Instructions
- In a large microwave-safe bowl, melt the butter completely. Let it cool slightly for a few minutes.
- Add the granulated sugar to the melted butter and whisk vigorously until the mixture is smooth and well combined. Keep whisking for a good minute or two!
- Add the eggs one at a time, whisking well after each addition. Make sure each egg is fully incorporated before adding the next. Then, stir in the vanilla extract.
- In a separate medium bowl, whisk together the gluten-free all-purpose flour, cocoa powder, instant espresso powder, salt, and baking powder.
- Gradually add the dry ingredients to the wet ingredients, mixing on low speed (if using a stand mixer) or with a spatula until just combined. Be careful not to overmix! A few streaks of flour are okay at this stage.
- Gently fold in the chocolate chips (and chopped nuts, if using) until they are evenly distributed throughout the batter.
- Preheat your oven to 350°F (175°C). Grease and flour (using gluten-free flour) an 8×8 inch baking pan. You can also line the pan with parchment paper, leaving an overhang on the sides, for easy removal.
- Pour the brownie batter into the prepared baking pan and spread it evenly with a spatula.
- Bake for 25-30 minutes, or until a toothpick inserted into the center comes out with moist crumbs attached. Don’t overbake! Start checking for doneness around 25 minutes.
- Remove the brownies from the oven and let them cool completely in the pan before cutting.
- If you lined the pan with parchment paper, lift the brownies out of the pan using the overhang. If not, run a knife around the edges of the pan to loosen the brownies.
- Use a sharp knife to cut the brownies into squares. For clean cuts, wipe the knife clean with a damp cloth between each cut.
- Serve the brownies at room temperature or slightly warmed. They are delicious on their own, but you can also top them with a scoop of vanilla ice cream, a drizzle of chocolate sauce, or a sprinkle of powdered sugar.
Notes
- Use a high-quality gluten-free flour blend that contains xanthan gum.
- Don’t overmix the batter.
- Let the batter rest for 10-15 minutes before baking for better texture.
- Adjust baking time as needed, as gluten-free baked goods tend to bake faster.
- Cool completely before cutting to prevent them from falling apart.