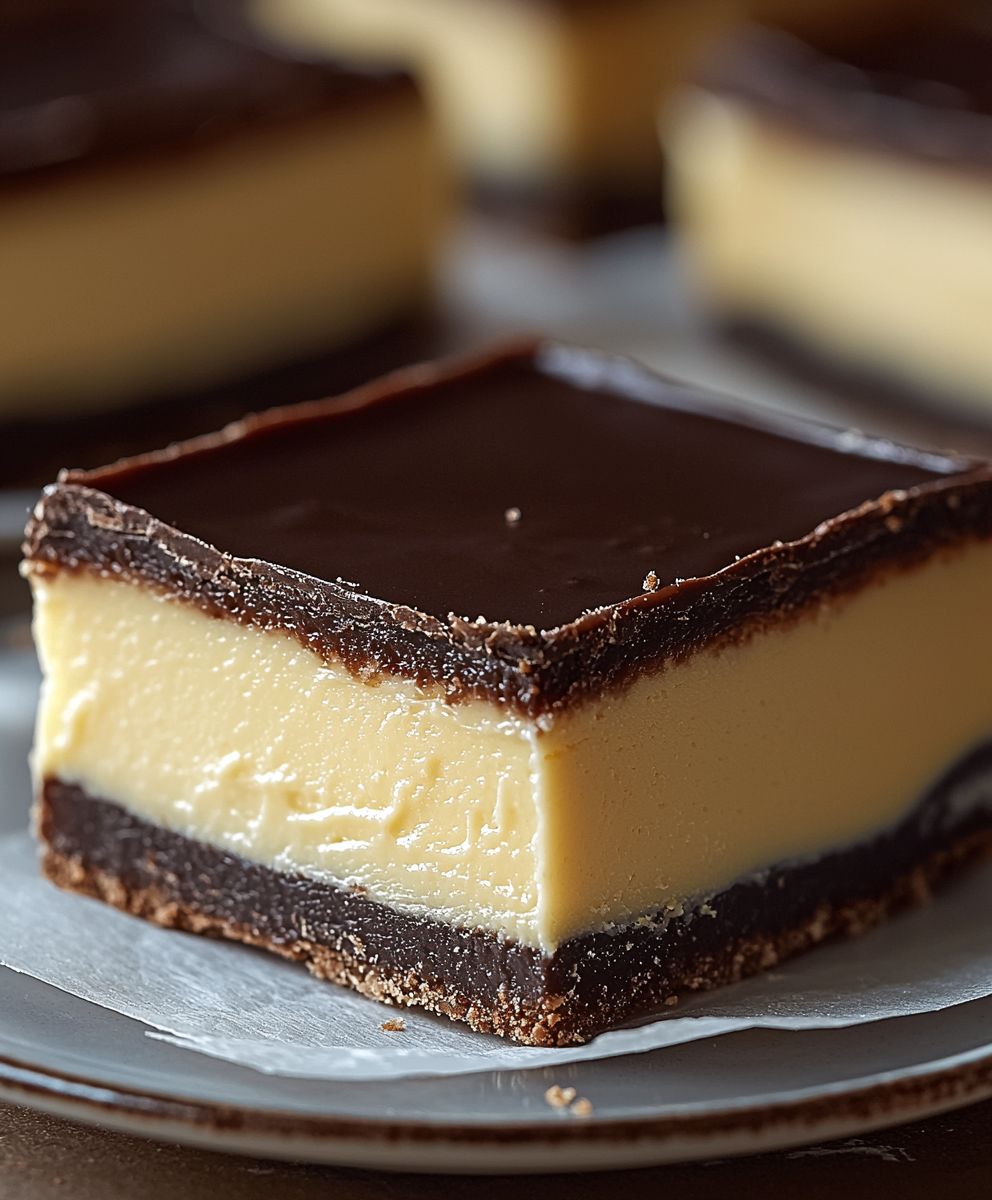
Boston Cream Pie Fudge: Prepare to be amazed! Imagine the creamy, custard-filled delight of a classic Boston Cream Pie, but in a rich, decadent fudge form. Yes, you read that right! This isn’t just any fudge; it’s a harmonious blend of smooth chocolate, a luscious vanilla custard flavor, and a melt-in-your-mouth texture that will have you reaching for seconds (and thirds!).
While the Boston Cream Pie isn’t technically a pie (it’s a cake!), its origins trace back to the Parker House Hotel in Boston in the mid-19th century. It quickly became a beloved American dessert, known for its elegant simplicity and comforting flavors. We’ve taken that same comforting essence and transformed it into an easy-to-make fudge that captures the spirit of the original.
People adore Boston Cream Pie for its perfect balance of textures and tastes. The light, airy cake, the rich custard, and the smooth chocolate glaze create a symphony of sensations. Our Boston Cream Pie Fudge aims to replicate that experience in a convenient, bite-sized treat. It’s the perfect dessert for parties, holidays, or simply satisfying a sweet craving. The creamy texture and the combination of vanilla and chocolate make this fudge irresistible. Plus, it’s surprisingly simple to make, so you can enjoy this classic flavor combination anytime you want!
Ingredients:
- For the Fudge Base:
- 1 (14 ounce) can sweetened condensed milk
- 3 cups granulated sugar
- 1 cup (2 sticks) unsalted butter, cut into cubes
- 1/2 cup evaporated milk
- 1/4 teaspoon salt
- 1 teaspoon vanilla extract
- 1/2 teaspoon almond extract (optional, but adds a nice depth)
- For the Cake Layer:
- 1 box (15.25 ounce) yellow cake mix
- 1/2 cup (1 stick) unsalted butter, melted
- 1/4 cup milk
- 1 large egg
- 1 teaspoon vanilla extract
- For the Pastry Cream Layer:
- 1 cup whole milk
- 1/2 cup heavy cream
- 1/2 cup granulated sugar
- 1/4 cup cornstarch
- 1/4 teaspoon salt
- 4 large egg yolks
- 2 tablespoons unsalted butter
- 1 teaspoon vanilla extract
- For the Chocolate Ganache Topping:
- 1 cup heavy cream
- 12 ounces semi-sweet chocolate chips
- 1 tablespoon unsalted butter
Preparing the Cake Layer:
- Preheat and Prep: First things first, preheat your oven to 350°F (175°C). Grease and flour a 9×13 inch baking pan. This will prevent the cake layer from sticking and make it easier to remove later.
- Combine Ingredients: In a large bowl, combine the yellow cake mix, melted butter, milk, egg, and vanilla extract. Use an electric mixer (handheld or stand mixer) to beat the ingredients together until well combined. Don’t overmix; just mix until everything is incorporated.
- Bake the Cake: Pour the cake batter into the prepared baking pan and spread it evenly. Bake for 18-22 minutes, or until a toothpick inserted into the center comes out clean. The cake should be golden brown and spring back slightly when touched.
- Cool Completely: Once the cake is baked, remove it from the oven and let it cool completely in the pan. This is crucial because you don’t want the heat from the cake to melt the fudge or pastry cream layers.
Making the Pastry Cream:
- Heat the Milk and Cream: In a medium saucepan, combine the whole milk and heavy cream. Heat over medium heat until it just begins to simmer. Be careful not to let it boil.
- Whisk Sugar, Cornstarch, and Salt: In a separate bowl, whisk together the granulated sugar, cornstarch, and salt. This ensures that the cornstarch is evenly distributed and won’t clump when added to the hot milk.
- Temper the Egg Yolks: In another bowl, whisk the egg yolks until they are slightly pale and frothy. Slowly drizzle a small amount of the hot milk mixture into the egg yolks while whisking constantly. This process is called tempering and prevents the egg yolks from scrambling when added to the hot milk. Continue adding the hot milk mixture gradually until the egg yolks are warmed.
- Combine and Cook: Pour the tempered egg yolk mixture back into the saucepan with the remaining milk mixture. Cook over medium heat, stirring constantly with a whisk, until the mixture thickens and comes to a boil. Continue to cook for 1-2 minutes, stirring constantly, to ensure the cornstarch is fully cooked. The pastry cream should be thick enough to coat the back of a spoon.
- Finish and Cool: Remove the saucepan from the heat and stir in the butter and vanilla extract. Pour the pastry cream into a bowl, cover the surface with plastic wrap (pressing it directly onto the cream to prevent a skin from forming), and refrigerate for at least 2 hours, or preferably overnight, to allow it to cool completely and thicken further.
Preparing the Fudge Base:
- Combine Ingredients: In a large, heavy-bottomed saucepan, combine the sweetened condensed milk, granulated sugar, butter, evaporated milk, and salt.
- Cook the Fudge: Cook over medium heat, stirring constantly with a wooden spoon, until the sugar is completely dissolved and the mixture comes to a full rolling boil. A “full rolling boil” means that the mixture continues to boil even while you are stirring.
- Continue Boiling: Once the mixture reaches a full rolling boil, continue to cook for 5 minutes, stirring constantly to prevent scorching. Use a candy thermometer to ensure the mixture reaches 235-240°F (113-116°C), which is the soft-ball stage. If you don’t have a candy thermometer, you can test the fudge by dropping a small amount into a bowl of cold water. If it forms a soft ball that you can flatten, it’s ready.
- Remove from Heat: Remove the saucepan from the heat and stir in the vanilla extract and almond extract (if using).
- Beat the Fudge: Using an electric mixer (handheld or stand mixer), beat the fudge mixture for about 5-7 minutes, or until it thickens and loses some of its gloss. The fudge should become slightly lighter in color and hold its shape when dropped from a spoon. Be careful not to overbeat, as this can make the fudge dry and crumbly.
Assembling the Boston Cream Pie Fudge:
- Spread Half the Fudge: Pour half of the prepared fudge mixture over the cooled cake layer in the baking pan. Spread it evenly to create a smooth layer.
- Add the Pastry Cream: Gently spread the chilled pastry cream evenly over the fudge layer. Make sure the pastry cream is cold and thick enough to spread without mixing into the fudge.
- Top with Remaining Fudge: Pour the remaining fudge mixture over the pastry cream layer. Spread it evenly to cover the pastry cream completely.
Making the Chocolate Ganache Topping:
- Heat the Cream: In a small saucepan, heat the heavy cream over medium heat until it just begins to simmer. Do not let it boil.
- Pour Over Chocolate: Remove the saucepan from the heat and pour the hot cream over the semi-sweet chocolate chips in a heatproof bowl.
- Let Sit: Let the mixture sit for 1-2 minutes to allow the heat from the cream to melt the chocolate.
- Stir Until Smooth: Add the butter and gently stir the mixture until the chocolate is completely melted and the ganache is smooth and glossy. If there are any unmelted chocolate chips, you can microwave the mixture in 15-second intervals, stirring in between, until the chocolate is fully melted.
- Pour Over Fudge: Pour the chocolate ganache over the fudge layer and spread it evenly to create a smooth, shiny topping.
Chilling and Cutting:
- Chill the Fudge: Cover the baking pan with plastic wrap and refrigerate the fudge for at least 4 hours, or preferably overnight, to allow it to set completely. This will make it easier to cut into clean squares.
- Cut into Squares: Once the fudge is firm, remove it from the refrigerator and cut it into squares using a sharp knife. For clean cuts, you can run the knife under hot water and wipe it dry between each cut.
- Serve and Enjoy: Serve the Boston Cream Pie Fudge and enjoy! Store any leftover fudge in an airtight container in the refrigerator to keep it fresh.
Conclusion:
This Boston Cream Pie Fudge isn’t just another fudge recipe; it’s a decadent experience, a delightful twist on a classic dessert that’s guaranteed to impress. The creamy, smooth fudge base, infused with the subtle vanilla notes of the custard, perfectly complements the rich, chocolate ganache topping. Its a symphony of textures and flavors that will have everyone begging for more. Trust me, once you taste this, you’ll understand why I’m so excited to share it with you!
Why is this a must-try? Because it’s surprisingly easy to make, even for beginner candy makers. It requires no special equipment, just a few simple ingredients and a little bit of patience. Plus, it’s a fantastic way to enjoy the flavors of Boston Cream Pie without the fuss of baking a whole cake. It’s the perfect treat for parties, holidays, or simply a sweet indulgence on a cozy night in. The combination of the creamy fudge and the decadent chocolate is simply irresistible.
But the best part? The versatility! While the recipe as written is divine, there are so many ways you can customize it to your liking.
Serving Suggestions and Variations:
* Serving Suggestions: Cut the fudge into small squares and serve it as part of a dessert platter alongside other treats like cookies, brownies, and fruit. It’s also delicious served with a scoop of vanilla ice cream or a dollop of whipped cream. For a more elegant presentation, arrange the fudge squares on a tiered serving tray. You can even crumble some of the fudge over ice cream or use it as a topping for cupcakes.
* Variations: Want to add a little extra something? Try stirring in some chopped pecans or walnuts into the fudge base for a nutty crunch. Or, for a more intense chocolate flavor, use dark chocolate for the ganache topping. You could even add a layer of vanilla wafers to the bottom of the pan before pouring in the fudge for an extra layer of texture and flavor, mimicking the cake base of a traditional Boston Cream Pie. Another fun variation is to swirl a bit of peanut butter into the fudge base before it sets. For a festive touch, sprinkle some edible gold glitter on top of the ganache. If you’re feeling adventurous, try adding a hint of coffee extract to the fudge base for a mocha-inspired flavor.
* Dietary Considerations: While this recipe is not naturally gluten-free or vegan, you can explore substitutions to make it work for your dietary needs. Look for vegan chocolate and butter alternatives, and consider using a gluten-free cookie base if you want to add that element.
I truly believe that this Boston Cream Pie Fudge will become a new favorite in your household. It’s a crowd-pleaser, a conversation starter, and a guaranteed way to satisfy your sweet tooth.
So, what are you waiting for? Gather your ingredients, put on your apron, and get ready to create some magic in the kitchen! I’m confident that you’ll love this recipe as much as I do.
And most importantly, I want to hear about your experience! Did you try any of the variations? Did you serve it at a party? What did your friends and family think? Please, come back and share your thoughts and photos in the comments below. I can’t wait to see your creations and hear your stories! Happy fudging!
Boston Cream Pie Fudge: A Decadent Dessert Recipe
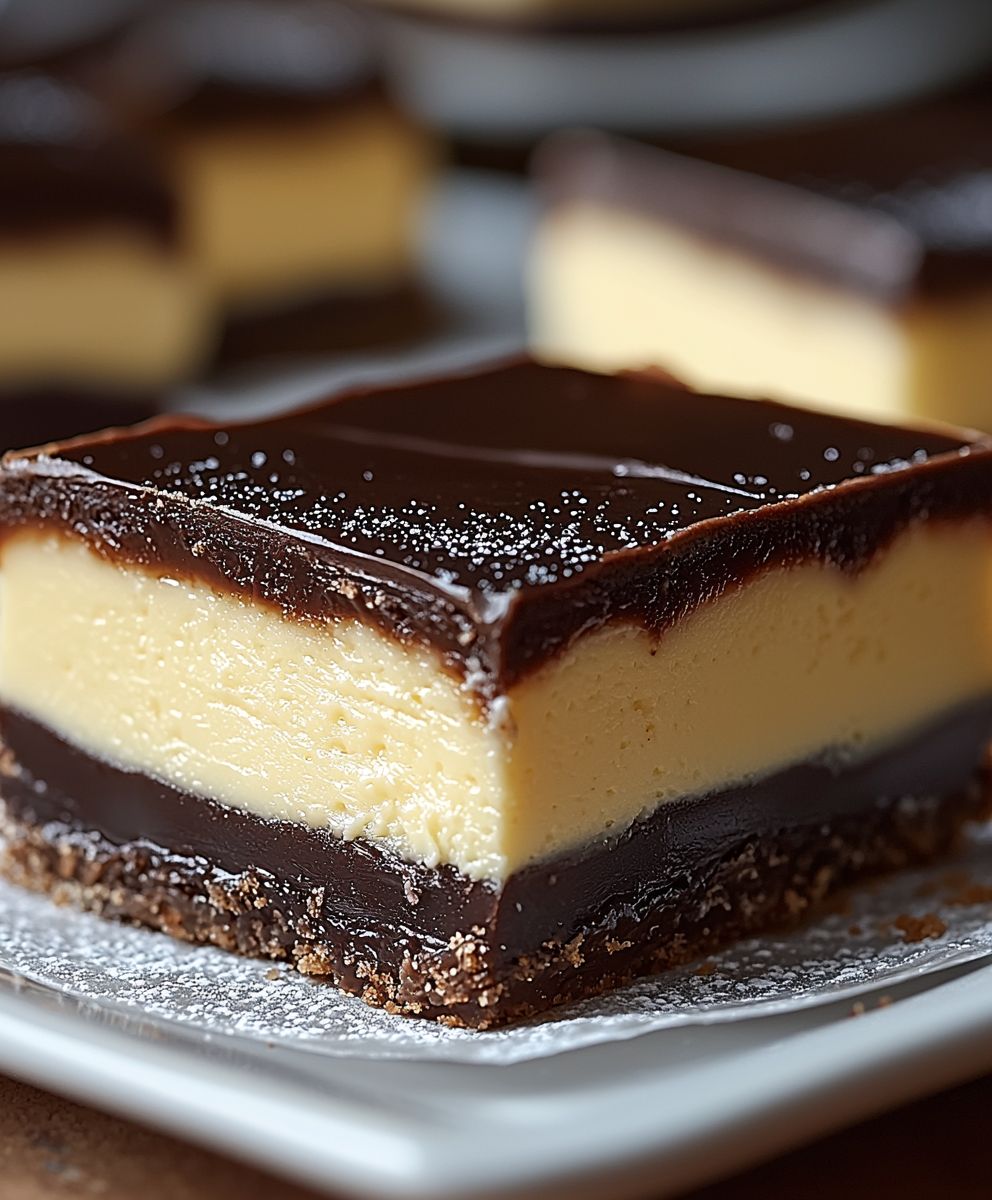
Decadent Boston Cream Pie Fudge: Layers of yellow cake, creamy pastry cream, and rich fudge, topped with a smooth chocolate ganache. A delightful twist on a classic dessert!
Ingredients
- 1 (14 ounce) can sweetened condensed milk
- 3 cups granulated sugar
- 1 cup (2 sticks) unsalted butter, cut into cubes
- 1/2 cup evaporated milk
- 1/4 teaspoon salt
- 1 teaspoon vanilla extract
- 1/2 teaspoon almond extract (optional, but adds a nice depth)
- 1 box (15.25 ounce) yellow cake mix
- 1/2 cup (1 stick) unsalted butter, melted
- 1/4 cup milk
- 1 large egg
- 1 teaspoon vanilla extract
- 1 cup whole milk
- 1/2 cup heavy cream
- 1/2 cup granulated sugar
- 1/4 cup cornstarch
- 1/4 teaspoon salt
- 4 large egg yolks
- 2 tablespoons unsalted butter
- 1 teaspoon vanilla extract
- 1 cup heavy cream
- 12 ounces semi-sweet chocolate chips
- 1 tablespoon unsalted butter
Instructions
- Prepare the Cake Layer: Preheat oven to 350°F (175°C). Grease and flour a 9×13 inch baking pan. Combine cake mix, melted butter, milk, egg, and vanilla extract in a large bowl. Beat until well combined. Pour batter into the prepared pan and bake for 18-22 minutes, or until a toothpick inserted into the center comes out clean. Cool completely in the pan.
- Make the Pastry Cream: In a medium saucepan, heat whole milk and heavy cream until just simmering. In a separate bowl, whisk together sugar, cornstarch, and salt. In another bowl, whisk egg yolks until pale and frothy. Slowly drizzle a small amount of the hot milk mixture into the egg yolks while whisking constantly (tempering). Pour the tempered egg yolk mixture back into the saucepan with the remaining milk mixture. Cook over medium heat, stirring constantly, until the mixture thickens and comes to a boil. Continue to cook for 1-2 minutes, stirring constantly. Remove from heat and stir in butter and vanilla extract. Pour into a bowl, cover the surface with plastic wrap, and refrigerate for at least 2 hours, or preferably overnight.
- Prepare the Fudge Base: In a large, heavy-bottomed saucepan, combine sweetened condensed milk, sugar, butter, evaporated milk, and salt. Cook over medium heat, stirring constantly, until sugar is dissolved and the mixture comes to a full rolling boil. Continue to cook for 5 minutes, stirring constantly. Use a candy thermometer to ensure the mixture reaches 235-240°F (113-116°C). Remove from heat and stir in vanilla extract and almond extract (if using). Beat with an electric mixer for 5-7 minutes, or until thickened and less glossy.
- Assemble the Fudge: Pour half of the fudge mixture over the cooled cake layer. Spread evenly. Gently spread the chilled pastry cream evenly over the fudge layer. Top with the remaining fudge mixture and spread evenly.
- Make the Chocolate Ganache: In a small saucepan, heat heavy cream until just simmering. Remove from heat and pour over chocolate chips in a heatproof bowl. Let sit for 1-2 minutes. Add butter and stir until smooth and glossy.
- Finish and Chill: Pour the chocolate ganache over the fudge layer and spread evenly. Cover with plastic wrap and refrigerate for at least 4 hours, or preferably overnight, to set completely.
- Serve: Cut into squares and enjoy! Store leftovers in an airtight container in the refrigerator.
Notes
- Cooling the cake completely is essential to prevent melting of the fudge and pastry cream layers.
- Tempering the egg yolks prevents them from scrambling when added to the hot milk.
- A candy thermometer is recommended for accurate fudge consistency, but the cold water test can be used as an alternative.
- Be careful not to overbeat the fudge, as it can become dry and crumbly.
- Chilling the fudge completely is necessary for clean cuts.
- For clean cuts, run the knife under hot water and wipe it dry between each cut.