Brownie Ice Cream Sandwiches: Prepare to enter a realm of pure dessert bliss! Imagine sinking your teeth into a fudgy, chewy brownie, perfectly complemented by a generous scoop of your favorite ice cream. It’s a symphony of textures and flavors that will transport you back to childhood summers and carefree indulgence.
While the exact origins of the ice cream sandwich are debated, its popularity exploded in the early 20th century, becoming a beloved treat sold from street carts and enjoyed at picnics. The combination of portable, handheld goodness with the refreshing coolness of ice cream proved irresistible. But we’re taking it up a notch by using rich, homemade brownies instead of the traditional wafers!
What makes Brownie Ice Cream Sandwiches so universally adored? It’s the perfect marriage of warm and cold, soft and firm. The intense chocolate flavor of the brownie provides a delightful contrast to the creamy, sweet ice cream. Plus, they’re incredibly easy to customize! Use different brownie recipes, experiment with various ice cream flavors, and add toppings galore. Whether you’re looking for a crowd-pleasing dessert for a party or a simple treat to satisfy your sweet tooth, these sandwiches are guaranteed to be a hit. Get ready to create some unforgettable memories, one delicious bite at a time!

Ingredients:
- For the Brownies:
- 1 cup (2 sticks) unsalted butter, melted
- 2 cups granulated sugar
- 1 cup unsweetened cocoa powder
- 1 teaspoon salt
- 1 teaspoon baking powder
- 1 tablespoon vanilla extract
- 4 large eggs
- 1 cup all-purpose flour
- 1 cup chocolate chips (optional, but highly recommended!)
- For the Ice Cream:
- 1 pint (2 cups) of your favorite ice cream, softened slightly (vanilla, chocolate, or cookies and cream are great choices!)
- Optional Toppings:
- Sprinkles
- Chopped nuts
- Mini chocolate chips
- Shredded coconut
Preparing the Brownie Batter:
- Melt the Butter: In a large, microwave-safe bowl, melt the butter. You can do this in 30-second intervals, stirring in between, until completely melted. Alternatively, you can melt the butter in a saucepan over low heat. Be careful not to burn it!
- Combine Wet Ingredients: Once the butter is melted, whisk in the granulated sugar, cocoa powder, salt, and baking powder. The mixture will be quite thick at this stage, and that’s perfectly normal.
- Add Vanilla and Eggs: Stir in the vanilla extract. Then, add the eggs one at a time, mixing well after each addition. Make sure each egg is fully incorporated into the batter before adding the next. This helps create a smooth and glossy brownie batter.
- Incorporate the Flour: Gradually add the all-purpose flour, mixing until just combined. Be careful not to overmix the batter, as this can result in tough brownies. A few streaks of flour are okay at this point.
- Add Chocolate Chips (Optional): If you’re using chocolate chips, gently fold them into the batter until evenly distributed. I always add them because, well, more chocolate is always a good idea!
Baking the Brownies:
- Prepare the Baking Pan: Preheat your oven to 350°F (175°C). Grease and flour a 9×13 inch baking pan. Alternatively, you can line the pan with parchment paper, leaving an overhang on the sides for easy removal. This is my preferred method, as it ensures the brownies won’t stick to the pan.
- Pour in the Batter: Pour the brownie batter into the prepared baking pan and spread it evenly with a spatula.
- Bake the Brownies: Bake for 25-30 minutes, or until a toothpick inserted into the center comes out with moist crumbs attached. Be careful not to overbake the brownies, as they will become dry. The baking time may vary depending on your oven, so keep a close eye on them.
- Cool Completely: Once the brownies are baked, remove them from the oven and let them cool completely in the pan before cutting. This is crucial for getting clean cuts and preventing the brownies from crumbling. I usually let them cool for at least an hour, or even longer if I have the time.
Cutting the Brownies:
- Remove from Pan: If you used parchment paper, lift the brownies out of the pan using the overhang. If not, carefully run a knife around the edges of the pan to loosen the brownies.
- Cut into Squares or Rectangles: Using a sharp knife, cut the brownies into squares or rectangles. The size of the squares will depend on how large you want your ice cream sandwiches to be. I usually cut them into approximately 2-inch squares. You should get about 24 brownies from a 9×13 inch pan.
Assembling the Ice Cream Sandwiches:
- Soften the Ice Cream: Make sure your ice cream is slightly softened, but not completely melted. It should be soft enough to spread easily, but still hold its shape. If the ice cream is too hard, it will be difficult to spread, and if it’s too soft, it will melt too quickly.
- Spread Ice Cream on Brownies: Take one brownie square and spread a generous layer of softened ice cream on top.
- Top with Another Brownie: Top the ice cream with another brownie square, creating a sandwich. Gently press down to secure the sandwich.
- Smooth the Edges (Optional): If desired, use a spatula or knife to smooth the edges of the ice cream sandwich. This will give them a more polished look.
- Add Toppings (Optional): If you’re using toppings, now is the time to add them. You can roll the edges of the ice cream sandwiches in sprinkles, chopped nuts, mini chocolate chips, or shredded coconut. Get creative and have fun with it!
Freezing and Serving:
- Wrap Individually: Wrap each ice cream sandwich individually in plastic wrap or parchment paper. This will prevent them from sticking together and help them maintain their shape in the freezer.
- Freeze: Place the wrapped ice cream sandwiches in the freezer for at least 30 minutes to allow the ice cream to firm up. This will make them easier to handle and prevent them from melting too quickly when you eat them.
- Serve and Enjoy: When you’re ready to serve, remove the ice cream sandwiches from the freezer and let them sit for a few minutes to soften slightly. Then, unwrap them and enjoy! These are best enjoyed immediately, but they can be stored in the freezer for up to a week.
Tips and Variations:
- Use Different Flavors of Ice Cream: Don’t be afraid to experiment with different flavors of ice cream. Peanut butter cup, mint chocolate chip, or even strawberry ice cream would be delicious in these sandwiches.
- Add a Layer of Caramel or Fudge: For an extra decadent treat, add a layer of caramel or fudge sauce between the brownie and the ice cream.
- Make Mini Ice Cream Sandwiches: Cut the brownies into smaller squares to make mini ice cream sandwiches. These are perfect for parties or for when you just want a small treat.
- Use Different Types of Brownies: You can also use different types of brownies, such as blondies or brownies with nuts, to create different flavor combinations.
- Get Creative with Toppings: The possibilities for toppings are endless! Try crushed Oreos, chopped candy bars, or even a drizzle of chocolate sauce.
- Make it Gluten-Free: Substitute the all-purpose flour with a gluten-free all-purpose flour blend to make these ice cream sandwiches gluten-free.
- Vegan Option: Use vegan butter, vegan chocolate chips, and a flax egg (1 tablespoon flaxseed meal mixed with 3 tablespoons water) in the brownie recipe. Use your favorite vegan ice cream to complete the sandwiches.
Storage Instructions:
Store the wrapped ice cream sandwiches in the freezer for up to a week. For longer storage, consider placing the wrapped sandwiches in a freezer-safe container or bag to prevent freezer burn.
Enjoy!
I hope you enjoy making and eating these delicious brownie ice cream sandwiches! They’re the perfect treat for any occasion, and they’re sure to be a hit with kids and adults alike. Happy baking!
Conclusion:
And there you have it! These Brownie Ice Cream Sandwiches are more than just a dessert; they’re an experience. From the fudgy, chewy brownies to the creamy, cool ice cream nestled in between, every bite is a symphony of textures and flavors that will leave you wanting more. I truly believe this recipe is a must-try for anyone who loves a good homemade treat, and especially for those who appreciate the simple joy of a perfectly balanced dessert. Why is this recipe a must-try, you ask? Well, beyond the sheer deliciousness, it’s incredibly versatile and surprisingly easy to make. You don’t need to be a master baker to whip up a batch of these beauties. The brownie recipe is straightforward, and the assembly is pure fun. Plus, the satisfaction of biting into a homemade ice cream sandwich is simply unmatched. Forget store-bought; these are on a whole other level! But the fun doesn’t stop there! Feel free to get creative with your ice cream sandwich creations. For a classic pairing, vanilla ice cream is always a winner, complementing the rich chocolate flavor of the brownies perfectly. However, don’t be afraid to experiment! Chocolate ice cream will amplify the chocolatey goodness, while mint chocolate chip adds a refreshing twist. Strawberry ice cream offers a delightful fruity contrast, and coffee ice cream creates a mocha-inspired delight. Looking for even more variations? Consider adding mix-ins to your brownie batter. Chocolate chips, nuts, or even a swirl of peanut butter can elevate your brownies to the next level. You could also sprinkle the edges of the ice cream sandwiches with chopped nuts, sprinkles, or mini chocolate chips for a festive touch. For a truly decadent treat, drizzle some hot fudge or caramel sauce over the top before serving. Serving suggestions? These Brownie Ice Cream Sandwiches are perfect for any occasion. They’re a crowd-pleasing dessert for parties, a delightful treat for family gatherings, or simply a satisfying indulgence on a warm summer evening. Serve them straight from the freezer for a firm, refreshing bite, or let them soften slightly for a softer, gooier experience. They’re also fantastic served with a glass of cold milk or a scoop of extra ice cream on the side. I’m so excited for you to try this recipe and create your own delicious variations. I know you’ll love the combination of fudgy brownies and creamy ice cream as much as I do. The best part about making these is that you can customize them to your own preferences. So, gather your ingredients, preheat your oven, and get ready to embark on a baking adventure! Once you’ve made your own batch of these irresistible Brownie Ice Cream Sandwiches, I’d love to hear about your experience! Share your photos and variations on social media using [Your Hashtag Here]. Let me know what ice cream flavors you tried, what mix-ins you added, and what your family and friends thought. I can’t wait to see your creations and hear your feedback. Happy baking, and happy sandwich-making! I hope you enjoy every single bite! Print
Brownie Ice Cream Sandwiches: The Ultimate Summer Treat
- Total Time: 105 minutes
- Yield: 24 ice cream sandwiches 1x
Description
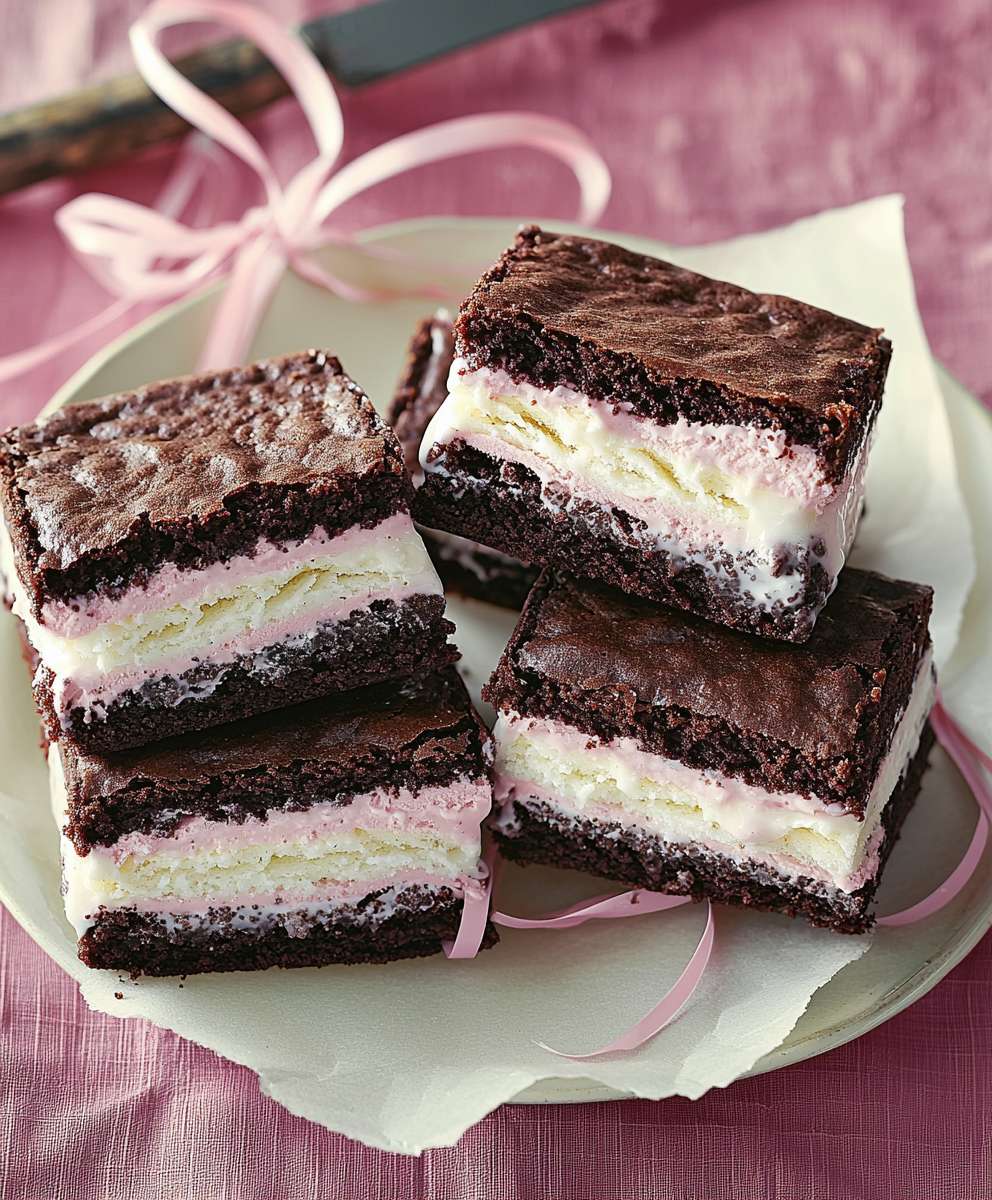
Fudgy brownies embrace your favorite ice cream, creating irresistible ice cream sandwiches. Customize with toppings for a delightful frozen treat.
Ingredients
- 1 cup (2 sticks) unsalted butter, melted
- 2 cups granulated sugar
- 1 cup unsweetened cocoa powder
- 1 teaspoon salt
- 1 teaspoon baking powder
- 1 tablespoon vanilla extract
- 4 large eggs
- 1 cup all-purpose flour
- 1 cup chocolate chips (optional)
- 1 pint (2 cups) of your favorite ice cream, softened slightly
- Sprinkles
- Chopped nuts
- Mini chocolate chips
- Shredded coconut
Instructions
- In a large, microwave-safe bowl, melt the butter in 30-second intervals, stirring in between, until completely melted. Alternatively, melt in a saucepan over low heat.
- Whisk in the granulated sugar, cocoa powder, salt, and baking powder.
- Stir in the vanilla extract. Add the eggs one at a time, mixing well after each addition.
- Gradually add the all-purpose flour, mixing until just combined. Be careful not to overmix.
- Gently fold in the chocolate chips until evenly distributed.
- Preheat oven to 350°F (175°C). Grease and flour a 9×13 inch baking pan or line with parchment paper.
- Pour the brownie batter into the prepared baking pan and spread evenly.
- Bake for 25-30 minutes, or until a toothpick inserted into the center comes out with moist crumbs attached.
- Let the brownies cool completely in the pan before cutting.
- Lift the brownies out of the pan using the parchment paper overhang (if used). Otherwise, run a knife around the edges.
- Cut the brownies into approximately 2-inch squares.
- Ensure the ice cream is slightly softened.
- Take one brownie square and spread a generous layer of softened ice cream on top.
- Top the ice cream with another brownie square, creating a sandwich. Gently press down.
- Use a spatula or knife to smooth the edges of the ice cream sandwich.
- Roll the edges of the ice cream sandwiches in sprinkles, chopped nuts, mini chocolate chips, or shredded coconut.
- Wrap each ice cream sandwich individually in plastic wrap or parchment paper.
- Place the wrapped ice cream sandwiches in the freezer for at least 30 minutes.
- Remove from the freezer, let soften slightly, unwrap, and enjoy!
Notes
- Use Different Flavors of Ice Cream: Experiment with different flavors of ice cream.
- Add a Layer of Caramel or Fudge: Add a layer of caramel or fudge sauce between the brownie and the ice cream.
- Make Mini Ice Cream Sandwiches: Cut the brownies into smaller squares to make mini ice cream sandwiches.
- Use Different Types of Brownies: You can also use different types of brownies, such as blondies or brownies with nuts, to create different flavor combinations.
- Get Creative with Toppings: The possibilities for toppings are endless! Try crushed Oreos, chopped candy bars, or even a drizzle of chocolate sauce.
- Make it Gluten-Free: Substitute the all-purpose flour with a gluten-free all-purpose flour blend to make these ice cream sandwiches gluten-free.
- Vegan Option: Use vegan butter, vegan chocolate chips, and a flax egg (1 tablespoon flaxseed meal mixed with 3 tablespoons water) in the brownie recipe. Use your favorite vegan ice cream to complete the sandwiches.
- Storage Instructions: Store the wrapped ice cream sandwiches in the freezer for up to a week. For longer storage, consider placing the wrapped sandwiches in a freezer-safe container or bag to prevent freezer burn.
- Prep Time: 20 minutes
- Cook Time: 25 minutes