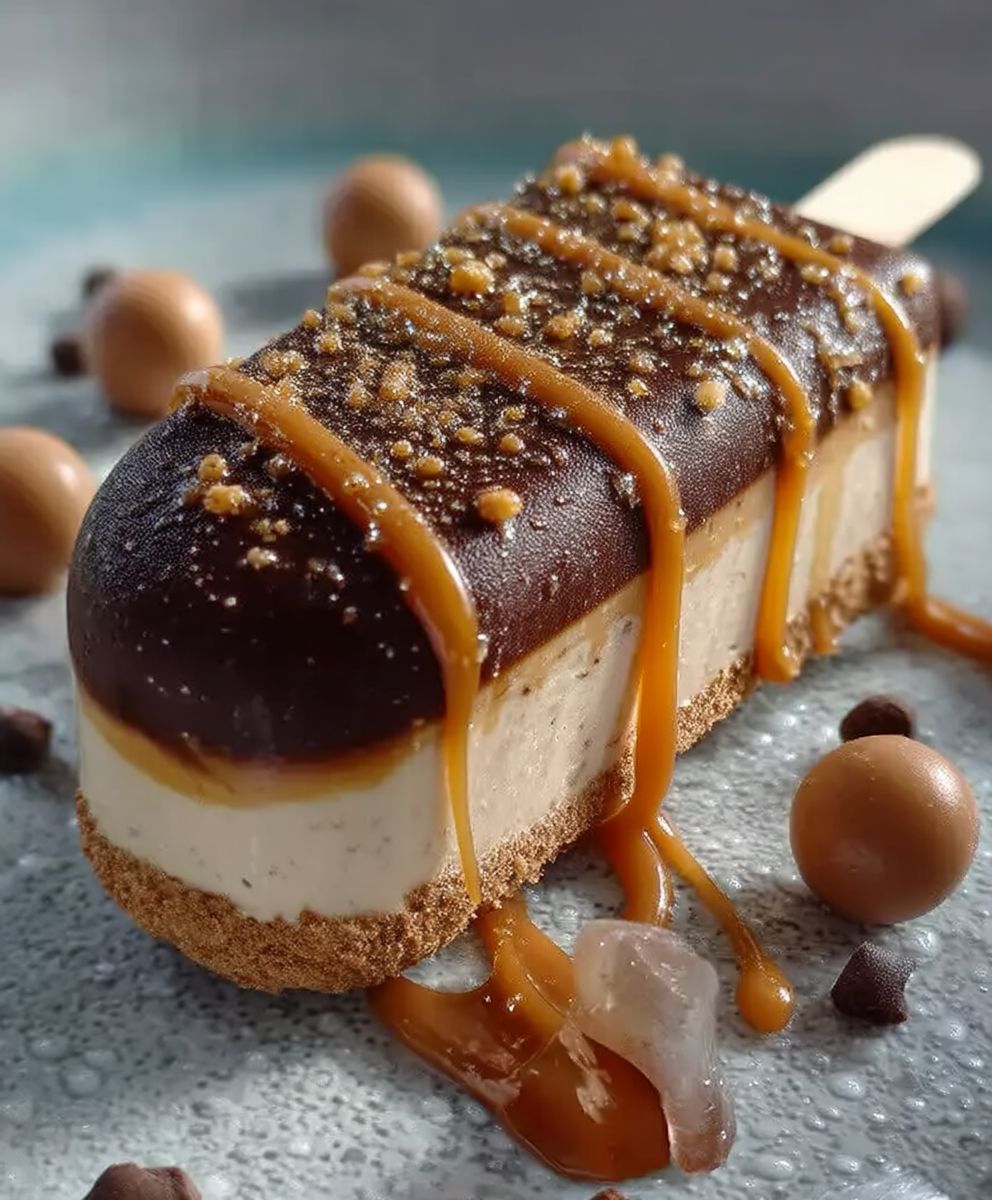
Caramel coffee ice cream bars: Prepare to meet your new favorite summer treat! Imagine this: a sweltering afternoon, the sun beating down, and you reach into the freezer for a creamy, dreamy escape. That’s exactly what these homemade ice cream bars deliver a perfect blend of rich caramel and bold coffee flavors, all frozen into a convenient and utterly irresistible package.
While the exact origins of combining caramel and coffee in frozen desserts are a bit hazy, the pairing itself is a classic. Coffee, enjoyed for centuries across countless cultures, offers a stimulating and aromatic counterpoint to the sweet, buttery notes of caramel. Think of the sophisticated coffee houses of Vienna, where caramel-infused lattes are a staple, or the bustling streets of Latin America, where café con leche is a daily ritual. This recipe takes that beloved combination and transforms it into a refreshing frozen delight.
People adore these caramel coffee ice cream bars for so many reasons. The taste is simply divine the bitterness of the coffee perfectly balances the sweetness of the caramel, creating a complex and satisfying flavor profile. The texture is equally appealing; creamy and smooth, melting in your mouth with each bite. Plus, they’re incredibly convenient! Make a batch ahead of time and you’ll have a delicious and refreshing treat ready whenever a craving strikes. Forget store-bought options loaded with artificial ingredients; these homemade bars are a healthier and tastier alternative that you can feel good about enjoying. So, are you ready to dive in and create your own batch of these irresistible frozen treats?

Ingredients:
- For the Coffee Ice Cream Base:
- 2 cups heavy cream
- 1 cup whole milk
- ¾ cup granulated sugar
- ¼ cup packed light brown sugar
- 4 large egg yolks
- 2 tablespoons instant espresso powder
- 1 teaspoon vanilla extract
- ½ teaspoon salt
- For the Salted Caramel Swirl:
- 1 cup granulated sugar
- ¼ cup water
- ½ cup heavy cream, warmed
- 4 tablespoons (½ stick) unsalted butter, cut into pieces
- 1 teaspoon sea salt, plus more for sprinkling
- For the Chocolate Coating:
- 12 ounces semi-sweet chocolate, finely chopped
- 2 tablespoons coconut oil (or other neutral oil)
Making the Salted Caramel Swirl:
- Prepare the Sugar: In a medium saucepan, combine the granulated sugar and water. Place over medium heat and cook, without stirring, until the sugar dissolves and begins to bubble.
- Watch for Color Change: Continue cooking, swirling the pan occasionally to ensure even heating, until the sugar turns a deep amber color. This will take about 8-10 minutes, so be patient and keep a close eye on it, as it can burn quickly. The color is key to the caramel flavor.
- Add the Cream: Once the sugar is a deep amber color, carefully remove the saucepan from the heat. Slowly pour in the warmed heavy cream. Be very careful, as the mixture will bubble vigorously. Stir constantly with a whisk until the cream is fully incorporated.
- Incorporate the Butter: Add the butter pieces to the saucepan and whisk until the butter is melted and the mixture is smooth and glossy.
- Add the Salt: Stir in the sea salt. Taste and add more salt if desired, depending on your preference for saltiness.
- Cool the Caramel: Pour the salted caramel into a heatproof container and let it cool completely to room temperature. It will thicken as it cools. You can speed this up by placing it in the refrigerator, but make sure to stir it occasionally to prevent it from becoming too hard.
Making the Coffee Ice Cream Base:
- Combine Cream and Milk: In a medium saucepan, combine the heavy cream and whole milk. Heat over medium heat until just simmering. Do not boil.
- Whisk Egg Yolks and Sugars: In a separate medium bowl, whisk together the egg yolks, granulated sugar, and brown sugar until light and pale yellow. This usually takes about 2-3 minutes.
- Temper the Egg Yolks: Slowly drizzle about ½ cup of the hot cream mixture into the egg yolk mixture, whisking constantly to prevent the eggs from scrambling. This process is called tempering.
- Combine Mixtures: Pour the tempered egg yolk mixture into the saucepan with the remaining cream mixture.
- Cook the Custard: Cook over low heat, stirring constantly with a wooden spoon or heat-resistant spatula, until the mixture thickens enough to coat the back of the spoon. This usually takes about 5-7 minutes. To test if it’s ready, dip the spoon into the mixture and run your finger across the back of the spoon. If the line remains distinct and doesn’t run back together, it’s ready. Be careful not to overheat the mixture, or the eggs will curdle. The ideal temperature is around 170-175°F (77-79°C).
- Add Espresso, Vanilla, and Salt: Remove the saucepan from the heat and stir in the instant espresso powder, vanilla extract, and salt. Stir until the espresso powder is completely dissolved.
- Chill the Base: Pour the ice cream base through a fine-mesh sieve into a clean bowl to remove any potential cooked egg bits. Cover the bowl with plastic wrap, pressing the plastic wrap directly onto the surface of the custard to prevent a skin from forming. Refrigerate for at least 4 hours, or preferably overnight, to allow the flavors to meld and the base to chill completely.
Churning and Assembling the Ice Cream Bars:
- Churn the Ice Cream: Pour the chilled ice cream base into your ice cream maker and churn according to the manufacturer’s instructions. This usually takes about 20-25 minutes, or until the ice cream has a soft-serve consistency.
- Layer Ice Cream and Caramel: While the ice cream is churning, prepare your ice cream bar molds. I like to use silicone molds for easy removal. Spoon a layer of the churned coffee ice cream into the molds, filling them about one-third of the way. Drizzle a generous amount of the cooled salted caramel over the ice cream.
- Repeat Layers: Add another layer of coffee ice cream, followed by more salted caramel. Repeat until the molds are almost full, leaving a little space at the top for expansion.
- Insert Sticks: Gently insert ice cream sticks into the center of each bar.
- Freeze: Cover the molds with plastic wrap or a lid and freeze for at least 4 hours, or preferably overnight, until the ice cream bars are solid.
Making the Chocolate Coating:
- Melt the Chocolate: In a heatproof bowl set over a saucepan of simmering water (make sure the bottom of the bowl doesn’t touch the water), combine the chopped semi-sweet chocolate and coconut oil.
- Stir Until Smooth: Stir constantly until the chocolate is completely melted and smooth. Remove the bowl from the heat.
- Cool Slightly: Let the chocolate cool slightly for a few minutes. This will help it adhere better to the ice cream bars.
Dipping and Finishing the Ice Cream Bars:
- Prepare Dipping Station: Line a baking sheet with parchment paper or wax paper. This will catch any drips and prevent the bars from sticking.
- Remove from Molds: Carefully remove the frozen ice cream bars from the molds. If they are difficult to remove, you can run the molds under warm water for a few seconds.
- Dip in Chocolate: One at a time, dip each ice cream bar into the melted chocolate, ensuring it is fully coated. You can use a spoon to help coat the bars evenly.
- Sprinkle with Salt (Optional): While the chocolate is still wet, sprinkle the ice cream bars with a pinch of sea salt for an extra burst of flavor.
- Set on Baking Sheet: Place the dipped ice cream bars on the prepared baking sheet.
- Freeze Again: Return the ice cream bars to the freezer for at least 30 minutes to allow the chocolate coating to harden completely.
- Enjoy!: Once the chocolate is hardened, the caramel coffee ice cream bars are ready to enjoy! Store them in an airtight container in the freezer for up to a week.
Conclusion:
And there you have it! These caramel coffee ice cream bars are truly something special, and I genuinely believe they’re a must-try for any ice cream lover, especially if you’re a coffee aficionado like myself. The rich, creamy texture, the perfect balance of sweet caramel and bold coffee, and the satisfying chill on a warm day it all comes together to create an unforgettable treat. Forget store-bought options loaded with artificial flavors; this homemade version is bursting with authentic taste and made with ingredients you can actually pronounce!
But what makes these bars so irresistible? It’s the combination of simplicity and sophistication. The recipe is straightforward enough for even beginner ice cream makers, yet the final product tastes like something you’d find in a high-end gelato shop. The deep caramel notes perfectly complement the robust coffee flavor, creating a symphony of taste that will tantalize your taste buds. Plus, the homemade aspect allows you to control the sweetness and coffee intensity to perfectly match your preferences.
Serving Suggestions and Variations:
These caramel coffee ice cream bars are fantastic on their own, but why not elevate the experience even further? For a truly decadent treat, try drizzling them with melted dark chocolate and sprinkling with chopped pecans or toasted almonds. A dollop of whipped cream and a dusting of cocoa powder also add a touch of elegance.
Looking for variations? Consider these ideas:
* Mocha Magic: Add a tablespoon of cocoa powder to the ice cream base for a mocha twist.
* Salted Caramel Sensation: Sprinkle a pinch of sea salt on top of the bars before freezing for a delightful salty-sweet contrast.
* Espresso Boost: Use espresso powder instead of instant coffee for an even more intense coffee flavor.
* Vegan Delight: Substitute the dairy milk and cream with coconut milk and coconut cream for a delicious vegan version. Just be sure to use a high-fat coconut milk for the best creamy texture.
* Cookie Crumbles: Mix in crushed chocolate cookies or biscotti pieces for added texture and flavor.
I’m confident that you’ll absolutely love these caramel coffee ice cream bars. They’re the perfect way to cool down on a hot day, satisfy your sweet tooth, and get a little caffeine boost all in one delicious package. They are also a great dessert to impress your friends and family.
Now, it’s your turn! I wholeheartedly encourage you to give this recipe a try. Don’t be intimidated by the thought of making your own ice cream bars; it’s much easier than you might think. And trust me, the reward is well worth the effort. Once you taste the difference between homemade and store-bought, you’ll never go back.
I’m so excited to hear about your experience making these bars. Did you try any of the variations I suggested? Did you add your own unique twist? Please, share your thoughts, photos, and feedback in the comments below. I can’t wait to see your creations and learn from your experiences. Let’s spread the joy of homemade caramel coffee ice cream bars together! Happy ice cream making!
Caramel Coffee Ice Cream Bars: The Ultimate Summer Treat
Rich coffee ice cream swirled with salted caramel, dipped in decadent chocolate, and sprinkled with sea salt. Homemade indulgence!
Ingredients
- 2 cups heavy cream
- 1 cup whole milk
- ¾ cup granulated sugar
- ¼ cup packed light brown sugar
- 4 large egg yolks
- 2 tablespoons instant espresso powder
- 1 teaspoon vanilla extract
- ½ teaspoon salt
- 1 cup granulated sugar
- ¼ cup water
- ½ cup heavy cream, warmed
- 4 tablespoons (½ stick) unsalted butter, cut into pieces
- 1 teaspoon sea salt, plus more for sprinkling
- 12 ounces semi-sweet chocolate, finely chopped
- 2 tablespoons coconut oil (or other neutral oil)
Instructions
- In a medium saucepan, combine the granulated sugar and water. Place over medium heat and cook, without stirring, until the sugar dissolves and begins to bubble.
- Continue cooking, swirling the pan occasionally to ensure even heating, until the sugar turns a deep amber color. This will take about 8-10 minutes, so be patient and keep a close eye on it, as it can burn quickly. The color is key to the caramel flavor.
- Once the sugar is a deep amber color, carefully remove the saucepan from the heat. Slowly pour in the warmed heavy cream. Be very careful, as the mixture will bubble vigorously. Stir constantly with a whisk until the cream is fully incorporated.
- Add the butter pieces to the saucepan and whisk until the butter is melted and the mixture is smooth and glossy.
- Stir in the sea salt. Taste and add more salt if desired, depending on your preference for saltiness.
- Pour the salted caramel into a heatproof container and let it cool completely to room temperature. It will thicken as it cools. You can speed this up by placing it in the refrigerator, but make sure to stir it occasionally to prevent it from becoming too hard.
- In a medium saucepan, combine the heavy cream and whole milk. Heat over medium heat until just simmering. Do not boil.
- In a separate medium bowl, whisk together the egg yolks, granulated sugar, and brown sugar until light and pale yellow. This usually takes about 2-3 minutes.
- Slowly drizzle about ½ cup of the hot cream mixture into the egg yolk mixture, whisking constantly to prevent the eggs from scrambling. This process is called tempering.
- Pour the tempered egg yolk mixture into the saucepan with the remaining cream mixture.
- Cook over low heat, stirring constantly with a wooden spoon or heat-resistant spatula, until the mixture thickens enough to coat the back of the spoon. This usually takes about 5-7 minutes. To test if it’s ready, dip the spoon into the mixture and run your finger across the back of the spoon. If the line remains distinct and doesn’t run back together, it’s ready. Be careful not to overheat the mixture, or the eggs will curdle. The ideal temperature is around 170-175°F (77-79°C).
- Remove the saucepan from the heat and stir in the instant espresso powder, vanilla extract, and salt. Stir until the espresso powder is completely dissolved.
- Pour the ice cream base through a fine-mesh sieve into a clean bowl to remove any potential cooked egg bits. Cover the bowl with plastic wrap, pressing the plastic wrap directly onto the surface of the custard to prevent a skin from forming. Refrigerate for at least 4 hours, or preferably overnight, to allow the flavors to meld and the base to chill completely.
- Pour the chilled ice cream base into your ice cream maker and churn according to the manufacturer’s instructions. This usually takes about 20-25 minutes, or until the ice cream has a soft-serve consistency.
- While the ice cream is churning, prepare your ice cream bar molds. I like to use silicone molds for easy removal. Spoon a layer of the churned coffee ice cream into the molds, filling them about one-third of the way. Drizzle a generous amount of the cooled salted caramel over the ice cream.
- Add another layer of coffee ice cream, followed by more salted caramel. Repeat until the molds are almost full, leaving a little space at the top for expansion.
- Gently insert ice cream sticks into the center of each bar.
- Cover the molds with plastic wrap or a lid and freeze for at least 4 hours, or preferably overnight, until the ice cream bars are solid.
- In a heatproof bowl set over a saucepan of simmering water (make sure the bottom of the bowl doesn’t touch the water), combine the chopped semi-sweet chocolate and coconut oil.
- Stir constantly until the chocolate is completely melted and smooth. Remove the bowl from the heat.
- Let the chocolate cool slightly for a few minutes. This will help it adhere better to the ice cream bars.
- Line a baking sheet with parchment paper or wax paper. This will catch any drips and prevent the bars from sticking.
- Carefully remove the frozen ice cream bars from the molds. If they are difficult to remove, you can run the molds under warm water for a few seconds.
- One at a time, dip each ice cream bar into the melted chocolate, ensuring it is fully coated. You can use a spoon to help coat the bars evenly.
- While the chocolate is still wet, sprinkle the ice cream bars with a pinch of sea salt for an extra burst of flavor.
- Place the dipped ice cream bars on the prepared baking sheet.
- Return the ice cream bars to the freezer for at least 30 minutes to allow the chocolate coating to harden completely.
- Enjoy!: Once the chocolate is hardened, the caramel coffee ice cream bars are ready to enjoy! Store them in an airtight container in the freezer for up to a week.
Notes
- For the salted caramel, watch the sugar carefully as it caramelizes, as it can burn quickly. The deep amber color is key to the flavor.
- When tempering the egg yolks, slowly drizzle the hot cream mixture while whisking constantly to prevent the eggs from scrambling.
- Chilling the ice cream base for at least 4 hours, or preferably overnight, allows the flavors to meld and the base to chill completely, resulting in a smoother ice cream.
- If the ice cream bars are difficult to remove from the molds, run the molds under warm water for a few seconds.
- Store the finished ice cream bars in an airtight container in the freezer for up to a week.