Cherry Pie, oh, the very words conjure up images of warm kitchens, sweet aromas, and pure, unadulterated comfort! Have you ever bitten into a slice of Cherry Pie and felt instantly transported back to simpler times? I know I have! This isn’t just a dessert; it’s a slice of Americana, a symbol of home baking at its finest.
The history of cherry pie stretches back centuries, with variations appearing across Europe long before it became a beloved staple in American cuisine. Cherries themselves have been cultivated since ancient times, and the art of encasing them in pastry is a tradition that has evolved and delighted generations. In America, cherry pie became particularly popular in the 19th century, often associated with celebrations and family gatherings. It’s a dish that speaks of abundance and sharing.
But what is it about cherry pie that makes it so irresistible? Is it the vibrant, tangy-sweet filling bursting with juicy cherries? Or perhaps it’s the flaky, buttery crust that provides the perfect textural contrast? I think it’s a combination of both, plus the sheer joy of eating something so lovingly homemade. It’s a dessert that’s both satisfying and nostalgic, perfect for a special occasion or simply a cozy night in. So, let’s get baking and create a cherry pie that will have everyone asking for seconds!

Ingredients:
- For the Crust:
- 2 ½ cups all-purpose flour, plus more for dusting
- 1 teaspoon salt
- 1 cup (2 sticks) unsalted butter, very cold and cut into cubes
- ½ cup vegetable shortening, very cold
- 6-8 tablespoons ice water
- For the Cherry Filling:
- 6 cups fresh or frozen pitted cherries (if frozen, thaw and drain well)
- ¾ cup granulated sugar (adjust to taste depending on cherry sweetness)
- ¼ cup cornstarch
- 2 tablespoons lemon juice
- 1 teaspoon almond extract
- ¼ teaspoon salt
- 2 tablespoons unsalted butter, cut into small pieces
- For the Egg Wash (Optional):
- 1 large egg, beaten
- 1 tablespoon milk or water
- For Sprinkling (Optional):
- Turbinado sugar or granulated sugar
Preparing the Pie Crust:
- Combine Dry Ingredients: In a large bowl, whisk together the flour and salt. This ensures the salt is evenly distributed throughout the dough, which is crucial for flavor development.
- Cut in the Fat: Add the cold butter and shortening to the flour mixture. Using a pastry blender or your fingertips (work quickly to keep the fat cold!), cut the fat into the flour until the mixture resembles coarse crumbs. You should still see small pieces of butter and shortening these are what create flaky layers. The size of the pieces should be about pea-sized. Don’t overmix! Overmixing will develop the gluten in the flour, resulting in a tough crust.
- Add Ice Water: Gradually add the ice water, one tablespoon at a time, mixing gently after each addition. Use a fork or your hands to bring the dough together. Be careful not to add too much water; you want the dough to be just moist enough to hold together. The amount of water needed can vary depending on the humidity. Stop adding water when the dough starts to clump together.
- Form Dough Disks: Divide the dough in half. Gently flatten each half into a disk about 1 inch thick. Wrap each disk tightly in plastic wrap.
- Chill the Dough: Refrigerate the dough for at least 2 hours, or preferably overnight. This allows the gluten to relax, making the dough easier to roll out and preventing it from shrinking during baking. Chilling also helps the fat solidify, which contributes to flakiness.
Making the Cherry Filling:
- Combine Filling Ingredients: In a large bowl, combine the cherries, sugar, cornstarch, lemon juice, almond extract, and salt. Gently toss to coat the cherries evenly. The cornstarch will act as a thickener, the lemon juice will brighten the flavors, and the almond extract will enhance the cherry flavor.
- Let the Filling Sit: Let the cherry mixture sit for about 15-20 minutes, allowing the juices to release. This will help the cornstarch thicken the filling properly during baking.
Assembling the Pie:
- Preheat Oven: Preheat your oven to 400°F (200°C). Place a baking sheet on the lower rack of the oven. This will catch any drips from the pie and prevent your oven from getting messy.
- Roll Out the Bottom Crust: On a lightly floured surface, roll out one of the dough disks into a 12-inch circle. The circle should be large enough to fit your pie plate with some overhang.
- Transfer to Pie Plate: Carefully transfer the rolled-out dough to a 9-inch pie plate. Gently press the dough into the bottom and up the sides of the plate. Trim any excess dough, leaving about a 1-inch overhang.
- Add the Filling: Pour the cherry filling into the prepared pie crust, spreading it evenly. Dot the top of the filling with the small pieces of butter. This will add richness and flavor to the filling.
- Roll Out the Top Crust: On a lightly floured surface, roll out the second dough disk into a 12-inch circle.
- Cut Vents (Optional): Use a sharp knife or a decorative pie crust cutter to cut vents in the top crust. This allows steam to escape during baking, preventing the crust from becoming soggy. You can create simple slits, decorative patterns, or even use cookie cutters to create shapes.
- Place Top Crust: Carefully place the top crust over the filling. Trim any excess dough, leaving about a 1-inch overhang.
- Crimp the Edges: Crimp the edges of the pie crust together to seal the top and bottom crusts. You can use a fork to press the edges together, or you can use your fingers to create a decorative crimped edge. Make sure the seal is tight to prevent the filling from leaking out during baking.
- Egg Wash (Optional): In a small bowl, whisk together the egg and milk or water. Brush the top crust with the egg wash. This will give the crust a golden-brown color and a shiny finish.
- Sprinkle with Sugar (Optional): Sprinkle the top crust with turbinado sugar or granulated sugar. This will add a touch of sweetness and a nice crunch to the crust.
Baking the Pie:
- Bake: Place the pie on the preheated baking sheet in the oven. Bake for 15 minutes at 400°F (200°C). This initial high heat helps to set the crust quickly.
- Reduce Heat: Reduce the oven temperature to 350°F (175°C) and continue baking for another 45-50 minutes, or until the crust is golden brown and the filling is bubbling. If the crust starts to brown too quickly, you can tent it with aluminum foil to prevent it from burning.
- Cool Completely: Remove the pie from the oven and let it cool completely on a wire rack before slicing and serving. This is crucial! The filling needs time to set properly. If you cut into the pie while it’s still warm, the filling will be runny. Cooling can take several hours, so be patient.
Tips for Success:
- Keep Ingredients Cold: The key to a flaky pie crust is to keep the butter and shortening as cold as possible. This prevents the fat from melting into the flour, which would result in a tough crust.
- Don’t Overmix: Overmixing the dough will develop the gluten in the flour, resulting in a tough crust. Mix the dough just until it comes together.
- Chill the Dough: Chilling the dough allows the gluten to relax and the fat to solidify, which contributes to flakiness.
- Use a Baking Sheet: Baking the pie on a baking sheet will catch any drips from the filling and prevent your oven from getting messy.
- Cool Completely: Let the pie cool completely before slicing and serving. This allows the filling to set properly.
- Adjust Sweetness: The amount of sugar in the filling can be adjusted to taste depending on the sweetness of the cherries. If your cherries are very tart, you may need to add more sugar.
- Frozen Cherries: If using frozen cherries, make sure to thaw them completely and drain them well before using them in the filling. This will prevent the filling from being too watery.
- Blind Baking: If you prefer a crispier bottom crust, you can blind bake the bottom crust before adding the filling. To do this, line the unbaked crust with parchment paper and fill it with pie weights or dried beans. Bake at 375°F (190°C) for 15-20 minutes, or until the crust is lightly golden brown. Remove the parchment paper and pie weights and continue baking for another 5-10 minutes, or until the crust is golden brown. Let the crust cool completely before adding the filling.
- Crumb Topping: For a different twist, you can replace the top crust with a crumb topping. To make a crumb topping, combine ½ cup all-purpose flour, ¼ cup granulated sugar, ¼ cup packed brown sugar, ¼ teaspoon ground cinnamon, and ¼ cup cold butter, cut into small pieces. Use a pastry blender or your fingertips to cut the butter into the flour mixture until it resembles coarse crumbs. Sprinkle the crumb topping over the cherry filling before baking.
- Decorative Crust: Get creative with your pie crust! Use cookie cutters to create shapes, braid the dough, or create a lattice top.
Troubleshooting:
- Sog
Conclusion:
This isn’t just another pie recipe; it’s an invitation to experience the pure, unadulterated joy of summer in every single bite. The vibrant, tangy-sweet flavor of perfectly ripe cherries, nestled within a flaky, golden crust, makes this cherry pie a truly unforgettable dessert. I know, I know, there are a million pie recipes out there, but trust me on this one the simplicity of the ingredients combined with the careful attention to detail in the method results in a pie that’s far greater than the sum of its parts. It’s the kind of pie that evokes memories of childhood, of warm kitchens and happy gatherings. Its the kind of pie that makes you want to slow down, savor each mouthful, and share the experience with loved ones.
But what truly elevates this cherry pie to must-try status is its versatility. While it’s absolutely divine served warm with a scoop of vanilla ice cream (a classic pairing for a reason!), don’t be afraid to experiment. A dollop of freshly whipped cream, lightly sweetened with a touch of vanilla extract, adds a luxurious touch. Or, for a more sophisticated twist, try serving it with a drizzle of balsamic glaze the tangy acidity of the balsamic beautifully complements the sweetness of the cherries.
And speaking of variations, the possibilities are endless! If you’re feeling adventurous, consider adding a hint of almond extract to the cherry filling for a subtle, nutty flavor. A sprinkle of cinnamon or nutmeg can also add warmth and depth. For a truly decadent treat, try incorporating a layer of chocolate ganache beneath the cherry filling the rich chocolate provides a delightful contrast to the tart cherries. You could even experiment with different crusts a buttery shortbread crust, a crumbly streusel topping, or even a gluten-free crust for those with dietary restrictions. The key is to have fun and make it your own!
I’ve poured my heart and soul into perfecting this recipe, and I truly believe it’s the best cherry pie you’ll ever taste. It’s a labor of love, yes, but the reward is well worth the effort. The smiles on the faces of your family and friends as they savor each bite will be all the validation you need.
So, what are you waiting for? Gather your ingredients, preheat your oven, and prepare to embark on a culinary adventure. I’m confident that you’ll be absolutely thrilled with the results. And more importantly, I’m eager to hear about your experience! Did you make any variations? What did your family think? What tips or tricks did you discover along the way?
Please, don’t hesitate to share your photos, comments, and feedback in the comments section below. I love seeing your creations and hearing your stories. Let’s build a community of pie-loving enthusiasts and spread the joy of homemade goodness! Happy baking, and I hope you enjoy every slice of this delicious cherry pie! I can’t wait to hear all about it!
Cherry Pie: The Ultimate Guide to Baking the Perfect Pie
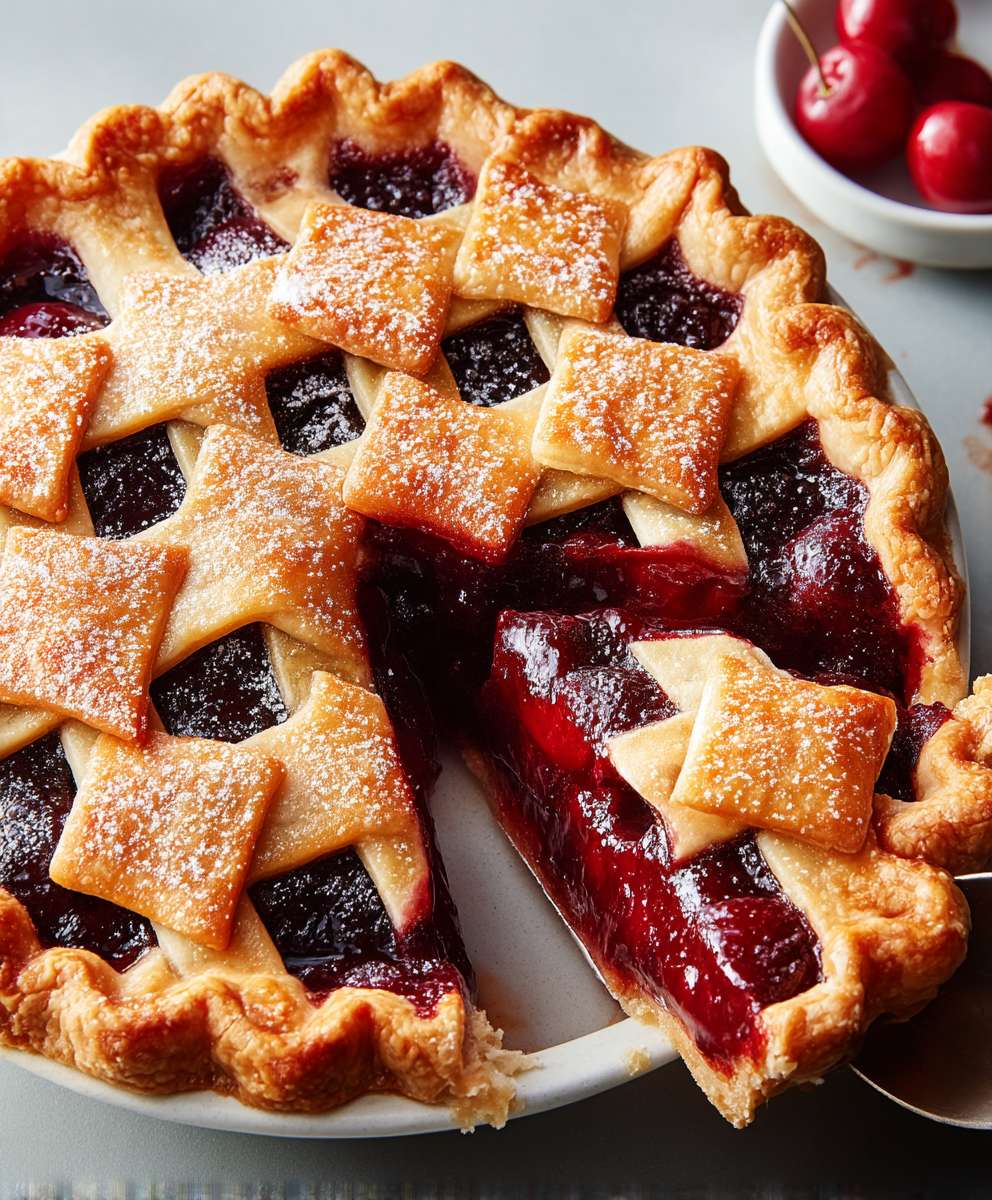
Flaky homemade cherry pie with sweet and tart filling. Perfect for any occasion.
Ingredients
- 2 ½ cups all-purpose flour, plus more for dusting
- 1 teaspoon salt
- 1 cup (2 sticks) unsalted butter, very cold and cut into cubes
- ½ cup vegetable shortening, very cold
- 6-8 tablespoons ice water
- 6 cups fresh or frozen pitted cherries (if frozen, thaw and drain well)
- ¾ cup granulated sugar (adjust to taste depending on cherry sweetness)
- ¼ cup cornstarch
- 2 tablespoons lemon juice
- 1 teaspoon almond extract
- ¼ teaspoon salt
- 2 tablespoons unsalted butter, cut into small pieces
- 1 large egg, beaten
- 1 tablespoon milk or water
- Turbinado sugar or granulated sugar
Instructions
- In a large bowl, whisk together the flour and salt.
- Add the cold butter and shortening to the flour mixture. Using a pastry blender or your fingertips (work quickly to keep the fat cold!), cut the fat into the flour until the mixture resembles coarse crumbs. You should still see small pieces of butter and shortening these are what create flaky layers. The size of the pieces should be about pea-sized. Don’t overmix! Overmixing will develop the gluten in the flour, resulting in a tough crust.
- Gradually add the ice water, one tablespoon at a time, mixing gently after each addition. Use a fork or your hands to bring the dough together. Be careful not to add too much water; you want the dough to be just moist enough to hold together. The amount of water needed can vary depending on the humidity. Stop adding water when the dough starts to clump together.
- Divide the dough in half. Gently flatten each half into a disk about 1 inch thick. Wrap each disk tightly in plastic wrap.
- Refrigerate the dough for at least 2 hours, or preferably overnight.
- In a large bowl, combine the cherries, sugar, cornstarch, lemon juice, almond extract, and salt. Gently toss to coat the cherries evenly.
- Let the cherry mixture sit for about 15-20 minutes, allowing the juices to release.
- Preheat your oven to 400°F (200°C). Place a baking sheet on the lower rack of the oven.
- On a lightly floured surface, roll out one of the dough disks into a 12-inch circle.
- Carefully transfer the rolled-out dough to a 9-inch pie plate. Gently press the dough into the bottom and up the sides of the plate. Trim any excess dough, leaving about a 1-inch overhang.
- Pour the cherry filling into the prepared pie crust, spreading it evenly. Dot the top of the filling with the small pieces of butter.
- On a lightly floured surface, roll out the second dough disk into a 12-inch circle.
- Use a sharp knife or a decorative pie crust cutter to cut vents in the top crust.
- Carefully place the top crust over the filling. Trim any excess dough, leaving about a 1-inch overhang.
- Crimp the edges of the pie crust together to seal the top and bottom crusts.
- In a small bowl, whisk together the egg and milk or water. Brush the top crust with the egg wash.
- Sprinkle the top crust with turbinado sugar or granulated sugar.
- Place the pie on the preheated baking sheet in the oven. Bake for 15 minutes at 400°F (200°C).
- Reduce the oven temperature to 350°F (175°C) and continue baking for another 45-50 minutes, or until the crust is golden brown and the filling is bubbling. If the crust starts to brown too quickly, you can tent it with aluminum foil to prevent it from burning.
- Remove the pie from the oven and let it cool completely on a wire rack before slicing and serving.
Notes
- Keep ingredients cold for a flaky crust.
- Don’t overmix the dough.
- Chill the dough for at least 2 hours.
- Use a baking sheet to catch drips.
- Cool completely before slicing.
- Adjust sugar to taste.
- Thaw and drain frozen cherries well.
- Consider blind baking the crust for extra crispness.
- Try a crumb topping for a different twist.
- Get creative with your crust design!