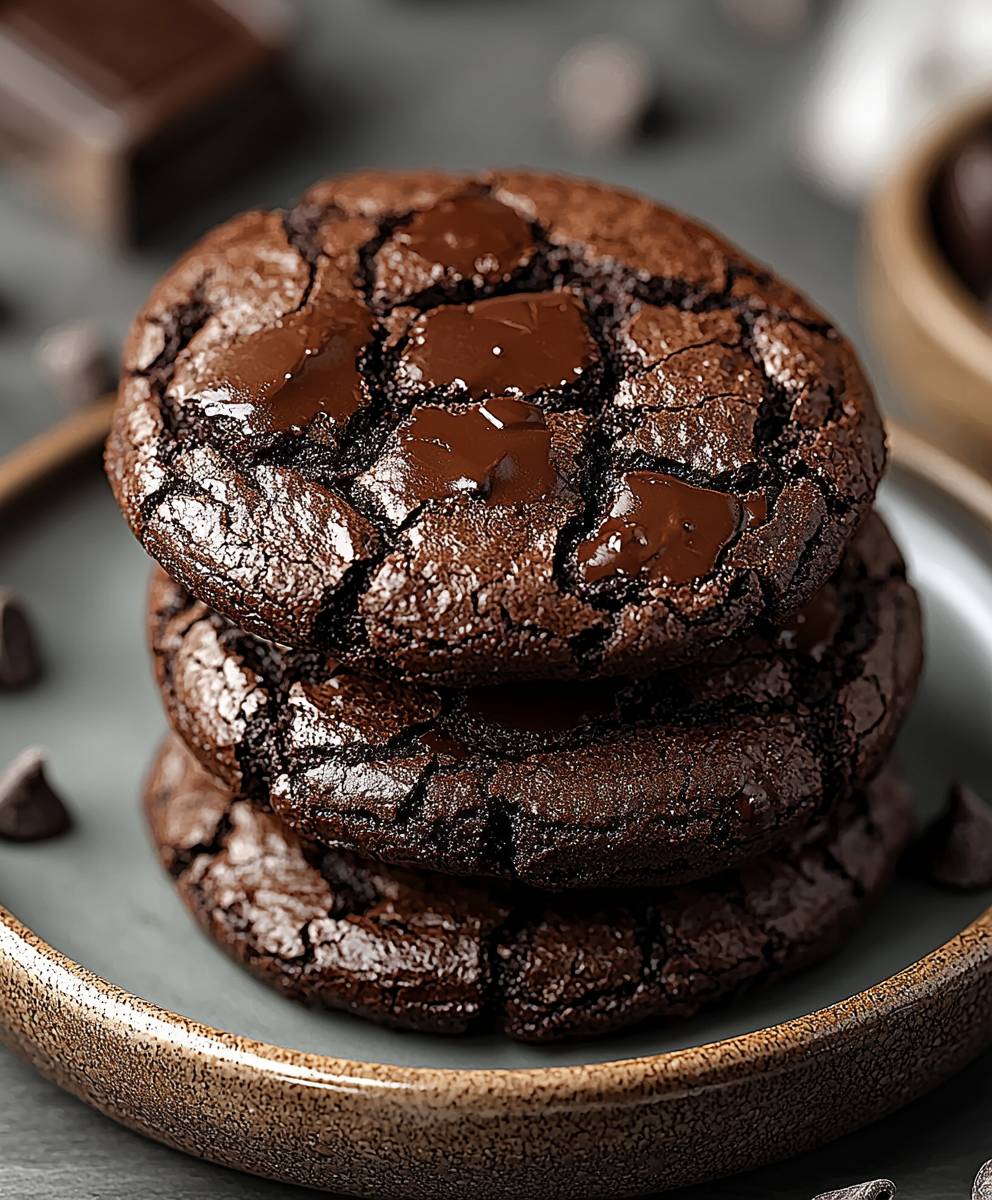
Chocolate brownie cookies: the name alone conjures images of fudgy, chewy perfection, doesn’t it? Imagine sinking your teeth into a cookie that boasts the rich, intense chocolate flavor of a brownie, but with the satisfyingly crisp edges of a classic cookie. This isn’t just a dessert; it’s a delightful collision of two beloved treats, creating a symphony of textures and tastes that will leave you craving more.
While the exact origins of the chocolate brownie cookies are somewhat shrouded in mystery (perhaps a happy accident in a busy bakery!), their popularity is undeniable. They represent a modern twist on comfort food, a playful reimagining of traditional baking. Brownies themselves have a fascinating history, evolving from simple molasses cakes to the decadent chocolate squares we know and love today. These cookies take that rich heritage and give it a fun, portable upgrade.
What makes these cookies so irresistible? It’s the best of both worlds! You get the deeply satisfying chocolate intensity and fudgy center that brownie lovers adore, combined with the convenience and satisfying snap of a cookie. They’re perfect for a quick treat, a lunchbox surprise, or a crowd-pleasing dessert at your next gathering. Get ready to experience a truly unforgettable cookie!

Ingredients:
- 1 cup (2 sticks) unsalted butter, softened
- 1 ½ cups granulated sugar
- ½ cup packed light brown sugar
- 2 large eggs
- 2 teaspoons vanilla extract
- 1 cup all-purpose flour
- ¾ cup unsweetened cocoa powder
- ½ teaspoon baking powder
- ¼ teaspoon salt
- 1 cup semi-sweet chocolate chips
- ½ cup chopped walnuts or pecans (optional)
Preparing the Dough:
- Cream the Butter and Sugars: In a large bowl, or the bowl of your stand mixer, cream together the softened butter, granulated sugar, and brown sugar until light and fluffy. This usually takes about 3-5 minutes. Make sure to scrape down the sides of the bowl occasionally to ensure everything is evenly mixed. The mixture should be pale and airy, which is key to achieving that perfect brownie cookie texture.
- Incorporate the Eggs and Vanilla: Beat in the eggs one at a time, mixing well after each addition. Then, stir in the vanilla extract. The vanilla enhances the chocolate flavor and adds a lovely aroma to the cookies. Don’t skip it!
- Combine Dry Ingredients: In a separate medium bowl, whisk together the flour, cocoa powder, baking powder, and salt. Whisking ensures that the baking powder and salt are evenly distributed throughout the flour mixture, which is crucial for proper leavening and flavor balance.
- Gradually Add Dry Ingredients to Wet Ingredients: Gradually add the dry ingredients to the wet ingredients, mixing on low speed until just combined. Be careful not to overmix! Overmixing can develop the gluten in the flour, resulting in tough cookies. Mix until you see no more streaks of flour.
- Fold in Chocolate Chips and Nuts (Optional): Gently fold in the chocolate chips and chopped nuts (if using). I love using a rubber spatula for this step to avoid overmixing. The chocolate chips add pockets of melty goodness, and the nuts provide a delightful crunch.
- Chill the Dough: Cover the bowl with plastic wrap and chill the dough in the refrigerator for at least 30 minutes, or up to 2 hours. Chilling the dough helps to prevent the cookies from spreading too much during baking and also allows the flavors to meld together. This step is important for achieving that chewy, fudgy texture we’re after.
Baking the Cookies:
- Preheat the Oven: Preheat your oven to 350°F (175°C). Line baking sheets with parchment paper or silicone baking mats. Parchment paper prevents the cookies from sticking and makes cleanup a breeze.
- Scoop the Dough: Use a cookie scoop or spoon to drop rounded tablespoons of dough onto the prepared baking sheets, leaving about 2 inches between each cookie. This spacing allows the cookies to spread without running into each other.
- Bake the Cookies: Bake for 9-11 minutes, or until the edges are set and the centers are still slightly soft. The cookies will continue to set as they cool. Keep a close eye on them, as baking time can vary depending on your oven. You want them to be slightly underbaked for that fudgy brownie texture.
- Cool the Cookies: Let the cookies cool on the baking sheets for a few minutes before transferring them to a wire rack to cool completely. This allows them to firm up slightly and prevents them from breaking when you move them.
Tips and Variations:
- For extra fudgy cookies: Slightly underbake the cookies. They should still look a little soft in the center when you take them out of the oven.
- For chewier cookies: Use bread flour instead of all-purpose flour. Bread flour has a higher protein content, which will result in a chewier texture.
- For a richer chocolate flavor: Use dark chocolate chips or add a tablespoon of instant espresso powder to the dry ingredients.
- Add-ins: Get creative with your add-ins! Try adding peanut butter chips, white chocolate chips, chopped pretzels, or even mini marshmallows.
- Sea Salt: Sprinkle a pinch of sea salt on top of the cookies before baking for a salty-sweet flavor combination.
- Storage: Store the cookies in an airtight container at room temperature for up to 3 days.
- Freezing: You can freeze the cookie dough for up to 2 months. Scoop the dough onto a baking sheet and freeze until solid, then transfer to a freezer bag. Bake from frozen, adding a few extra minutes to the baking time. You can also freeze the baked cookies for up to 2 months.
Troubleshooting:
- Cookies are spreading too much: Make sure your butter is not too soft. It should be softened but still cool to the touch. Also, chilling the dough for a longer period of time can help prevent spreading.
- Cookies are too dry: Make sure you are not overbaking the cookies. They should still be slightly soft in the center when you take them out of the oven. Also, make sure you are measuring your flour correctly. Spoon the flour into the measuring cup and level it off with a knife, rather than scooping it directly from the bag.
- Cookies are too cakey: You may have overmixed the dough. Be careful not to overmix when adding the dry ingredients to the wet ingredients.
Detailed Ingredient Explanation:
- Unsalted Butter: Using unsalted butter allows you to control the amount of salt in the recipe. Softened butter is crucial for creaming with the sugars, creating a light and airy texture. If your butter is too cold, it won’t cream properly, and if it’s too melted, the cookies will spread too much.
- Granulated Sugar: Granulated sugar adds sweetness and helps to create a crisp edge on the cookies.
- Light Brown Sugar: Brown sugar adds moisture and a chewy texture to the cookies. The molasses in brown sugar also contributes to a richer flavor.
- Large Eggs: Eggs bind the ingredients together and add moisture and richness to the cookies. Use large eggs for consistent results.
- Vanilla Extract: Vanilla extract enhances the chocolate flavor and adds a lovely aroma to the cookies. Use pure vanilla extract for the best flavor.
- All-Purpose Flour: All-purpose flour provides structure to the cookies. Make sure to measure it correctly to avoid dry cookies.
- Unsweetened Cocoa Powder: Cocoa powder gives the cookies their chocolate flavor. Use a good quality cocoa powder for the best results. Dutch-processed cocoa powder will give a darker, richer flavor.
- Baking Powder: Baking powder is a leavening agent that helps the cookies to rise.
- Salt: Salt enhances the flavors of the other ingredients and balances the sweetness.
- Semi-Sweet Chocolate Chips: Chocolate chips add pockets of melty chocolate goodness to the cookies. You can use semi-sweet, milk chocolate, or dark chocolate chips, depending on your preference.
- Walnuts or Pecans (Optional): Nuts add a delightful crunch and nutty flavor to the cookies. You can use walnuts, pecans, or any other type of nut you like.
Step-by-Step Visual Guide (Imagine Pictures Here):
- Step 1: Creaming Butter and Sugars: (Imagine a picture of butter and sugars being creamed together in a bowl, showing the light and fluffy texture.)
- Step 2: Adding Eggs and Vanilla: (Imagine a picture of eggs being added to the creamed butter and sugar mixture, with vanilla extract being poured in.)
- Step 3: Whisking Dry Ingredients: (Imagine a picture of flour, cocoa powder, baking powder, and salt being whisked together in a bowl.)
- Step 4: Combining Wet and Dry Ingredients: (Imagine a picture of the dry ingredients being gradually added to the wet ingredients, showing the mixture coming together.)
- Step 5: Folding in Chocolate Chips: (Imagine a picture of chocolate chips being gently folded into the cookie dough.)
- Step 6: Chilling the Dough: (Imagine a picture of the cookie dough covered in plastic wrap and chilling in the refrigerator.)
- Step 7: Scooping Dough onto Baking Sheet: (Imagine a picture of cookie dough being scooped onto a baking sheet lined with parchment paper.)
- Step 8: Baking the Cookies: (Imagine a picture of the cookies baking in the oven, showing the edges setting and the centers still slightly soft.)
- Step 9: Cooling the Cookies: (Imagine a picture of the cookies cooling on a wire rack.)
- Step 10: Enjoy
Conclusion:
So there you have it! These chocolate brownie cookies are truly a must-try for any dessert lover. They perfectly capture the fudgy, intense chocolate flavor of a brownie with the satisfying chewiness of a cookie. What’s not to love? I know I’ve already made several batches this week, and they disappear almost as quickly as I can bake them!
But why are these cookies so special? It’s the combination of the rich cocoa powder, the melted chocolate, and the perfect balance of wet and dry ingredients that creates that signature brownie texture. They’re not cakey, they’re not crispy they’re just perfectly fudgy and decadent. Plus, they’re incredibly easy to make, requiring minimal effort and ingredients you probably already have in your pantry. Seriously, you can whip up a batch of these in under an hour, from start to finish.
And the best part? They’re incredibly versatile! While they’re absolutely delicious on their own, warm from the oven, you can also dress them up in so many different ways. For a simple yet elegant touch, dust them with powdered sugar. Or, for a more indulgent treat, try topping them with a scoop of vanilla ice cream and a drizzle of chocolate sauce. You could even crumble them over a bowl of ice cream for a brownie cookie sundae!
If you’re feeling adventurous, consider adding some mix-ins to the batter. Chopped walnuts or pecans would add a lovely nutty crunch. Chocolate chips (milk, dark, or white) would enhance the chocolate flavor even further. Or, for a pop of color and flavor, try adding some dried cranberries or cherries. A sprinkle of sea salt on top before baking also elevates the flavor profile, creating a delightful sweet and salty combination.
Serving Suggestions:
* Warm, straight from the oven
* With a scoop of vanilla ice cream
* Dusted with powdered sugar
* Crumbled over ice cream as a sundae topping
* Served with a glass of cold milk
* As part of a dessert platterVariations:
* Add chopped walnuts or pecans
* Add chocolate chips (milk, dark, or white)
* Add dried cranberries or cherries
* Sprinkle with sea salt before baking
* Swirl in peanut butter before baking
* Add a teaspoon of instant espresso powder to the batter for a mocha flavorI truly believe that these chocolate brownie cookies will become a new favorite in your household. They’re perfect for satisfying your sweet tooth, sharing with friends and family, or bringing to a potluck or party. They’re guaranteed to be a crowd-pleaser!
So, what are you waiting for? Head to your kitchen, gather your ingredients, and get baking! I’m confident that you’ll love these cookies as much as I do. And when you do, please come back and let me know what you think! Share your photos, your variations, and your experiences in the comments below. I can’t wait to hear how they turn out for you. Happy baking! I hope you enjoy these chocolate brownie cookies as much as I do!
Chocolate Brownie Cookies: The Ultimate Recipe for Fudgy Goodness
Fudgy brownie cookies with crackled tops and chewy centers, boasting a rich chocolate flavor. Easy to make, loaded with chocolate chips and optional nuts.
Ingredients
- 1 cup (2 sticks) unsalted butter, softened
- 1 ½ cups granulated sugar
- ½ cup packed light brown sugar
- 2 large eggs
- 2 teaspoons vanilla extract
- 1 cup all-purpose flour
- ¾ cup unsweetened cocoa powder
- ½ teaspoon baking powder
- ¼ teaspoon salt
- 1 cup semi-sweet chocolate chips
- ½ cup chopped walnuts or pecans (optional)
Instructions
- Cream the Butter and Sugars: In a large bowl, or the bowl of your stand mixer, cream together the softened butter, granulated sugar, and brown sugar until light and fluffy (3-5 minutes). Scrape down the sides of the bowl occasionally.
- Incorporate the Eggs and Vanilla: Beat in the eggs one at a time, mixing well after each addition. Then, stir in the vanilla extract.
- Combine Dry Ingredients: In a separate medium bowl, whisk together the flour, cocoa powder, baking powder, and salt.
- Gradually Add Dry Ingredients to Wet Ingredients: Gradually add the dry ingredients to the wet ingredients, mixing on low speed until just combined. Be careful not to overmix.
- Fold in Chocolate Chips and Nuts (Optional): Gently fold in the chocolate chips and chopped nuts (if using).
- Chill the Dough: Cover the bowl with plastic wrap and chill the dough in the refrigerator for at least 30 minutes, or up to 2 hours.
- Preheat the Oven: Preheat your oven to 350°F (175°C). Line baking sheets with parchment paper or silicone baking mats.
- Scoop the Dough: Use a cookie scoop or spoon to drop rounded tablespoons of dough onto the prepared baking sheets, leaving about 2 inches between each cookie.
- Bake the Cookies: Bake for 9-11 minutes, or until the edges are set and the centers are still slightly soft.
- Cool the Cookies: Let the cookies cool on the baking sheets for a few minutes before transferring them to a wire rack to cool completely.
Notes
- For extra fudgy cookies: Slightly underbake the cookies. They should still look a little soft in the center when you take them out of the oven.
- For chewier cookies: Use bread flour instead of all-purpose flour. Bread flour has a higher protein content, which will result in a chewier texture.
- For a richer chocolate flavor: Use dark chocolate chips or add a tablespoon of instant espresso powder to the dry ingredients.
- Add-ins: Get creative with your add-ins! Try adding peanut butter chips, white chocolate chips, chopped pretzels, or even mini marshmallows.
- Sea Salt: Sprinkle a pinch of sea salt on top of the cookies before baking for a salty-sweet flavor combination.
- Storage: Store the cookies in an airtight container at room temperature for up to 3 days.
- Freezing: You can freeze the cookie dough for up to 2 months. Scoop the dough onto a baking sheet and freeze until solid, then transfer to a freezer bag. Bake from frozen, adding a few extra minutes to the baking time. You can also freeze the baked cookies for up to 2 months.
- Cookies are spreading too much: Make sure your butter is not too soft. It should be softened but still cool to the touch. Also, chilling the dough for a longer period of time can help prevent spreading.
- Cookies are too dry: Make sure you are not overbaking the cookies. They should still be slightly soft in the center when you take them out of the oven. Also, make sure you are measuring your flour correctly. Spoon the flour into the measuring cup and level it off with a knife, rather than scooping it directly from the bag.
- Cookies are too cakey: You may have overmixed the dough. Be careful not to overmix when adding the dry ingredients to the wet ingredients.