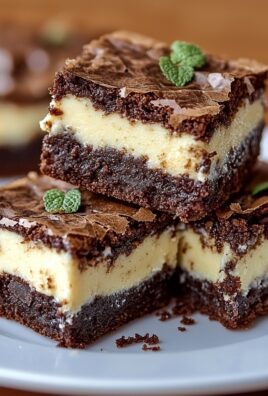
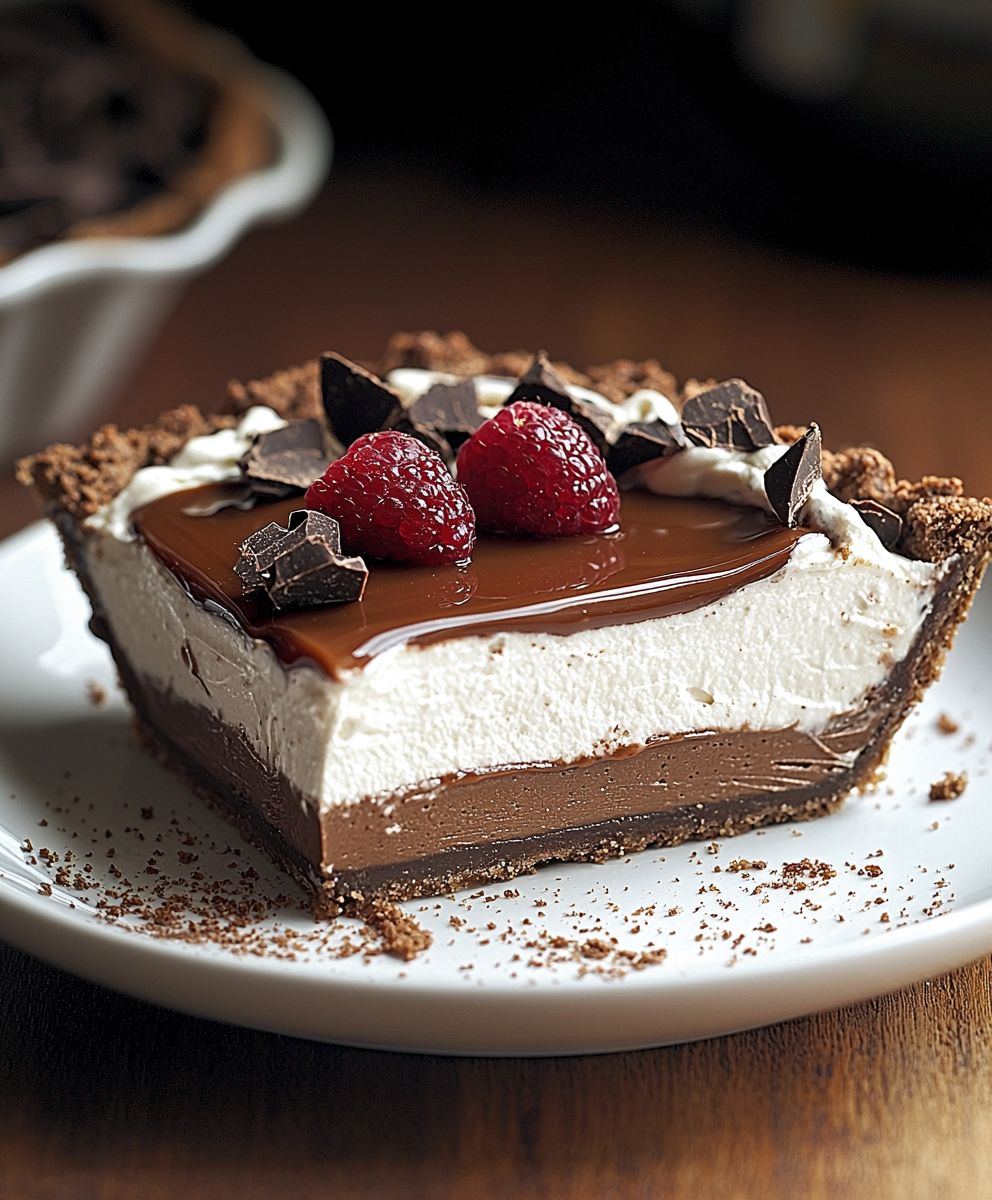
Chocolate Caramel Cream Pie, oh, where do I even begin? Imagine sinking your fork into a decadent dream a symphony of rich chocolate, gooey caramel, and velvety cream, all nestled in a buttery, flaky crust. This isn’t just dessert; it’s an experience, a journey for your taste buds that will leave you craving more.
While the exact origins of cream pies are debated, the combination of chocolate and caramel is a timeless pairing, celebrated across cultures and generations. Think of the classic salted caramels from France or the rich chocolate desserts of Belgium these influences have undoubtedly contributed to the modern marvel that is Chocolate Caramel Cream Pie. It’s a dessert that speaks to our primal love of sweetness and indulgence.
But what is it about this pie that makes it so irresistible? Is it the contrasting textures the smooth cream against the crunchy crust? Or perhaps it’s the perfect balance of sweet and salty, the deep cocoa notes playing off the buttery caramel? I think it’s a little bit of everything! Plus, while it looks impressive, this pie is surprisingly straightforward to make, making it a perfect centerpiece for any occasion, from a casual family gathering to a sophisticated dinner party. Get ready to impress your friends and family with this show-stopping dessert!

Ingredients:
- For the Chocolate Crust:
- 1 ½ cups chocolate wafer crumbs (about 36 wafers)
- 5 tablespoons unsalted butter, melted
- ¼ cup granulated sugar
- Pinch of salt
- For the Caramel Layer:
- 1 cup granulated sugar
- 6 tablespoons unsalted butter, cut into pieces
- ½ cup heavy cream
- 1 teaspoon vanilla extract
- ½ teaspoon sea salt
- For the Chocolate Cream Filling:
- 12 ounces bittersweet chocolate, finely chopped
- 1 ½ cups heavy cream
- ½ cup whole milk
- 3 large egg yolks
- ¼ cup granulated sugar
- 1 teaspoon vanilla extract
- Pinch of salt
- For the Whipped Cream Topping:
- 1 ½ cups heavy cream
- 3 tablespoons powdered sugar
- ½ teaspoon vanilla extract
- Optional Garnish:
- Chocolate shavings
- Sea salt flakes
Preparing the Chocolate Crust
- Combine the Crumbs and Sugar: In a medium bowl, combine the chocolate wafer crumbs, granulated sugar, and salt. Make sure everything is evenly distributed. I like to use a whisk to get this done quickly.
- Add the Melted Butter: Pour the melted butter over the crumb mixture. Use a fork or your hands to mix until the crumbs are evenly moistened and resemble wet sand. This is crucial for the crust to hold together.
- Press into the Pie Plate: Press the crumb mixture firmly and evenly into the bottom and up the sides of a 9-inch pie plate. I find that using the bottom of a measuring cup helps to create a smooth and even crust.
- Chill the Crust: Cover the pie plate with plastic wrap and refrigerate for at least 30 minutes, or up to 2 hours. This will help the crust set and prevent it from shrinking during baking.
- Pre-bake the Crust (Optional): For a sturdier crust, you can pre-bake it. Preheat your oven to 350°F (175°C). Prick the bottom of the crust with a fork to prevent it from puffing up. Bake for 8-10 minutes, or until the crust is set. Let it cool completely before adding the filling. I usually skip this step, but it’s a good option if you want extra insurance against a soggy crust.
Making the Caramel Layer
- Melt the Sugar: In a medium saucepan over medium heat, add the granulated sugar. Cook, without stirring, until the sugar melts and turns into a golden amber color. This will take about 5-7 minutes. Be patient and watch it carefully, as burnt sugar is not a pleasant flavor! You can gently swirl the pan occasionally to ensure even melting.
- Add the Butter: Once the sugar is melted and amber-colored, remove the saucepan from the heat and immediately add the butter. Be careful, as the mixture will bubble vigorously. Stir until the butter is completely melted and incorporated.
- Pour in the Heavy Cream: Slowly pour in the heavy cream, stirring constantly. The mixture will bubble up again, so be cautious. Continue to stir until the caramel is smooth and creamy. If the caramel seizes up or becomes grainy, don’t panic! Just keep stirring over low heat until it smooths out.
- Stir in Vanilla and Salt: Remove the saucepan from the heat and stir in the vanilla extract and sea salt. The salt is essential for balancing the sweetness of the caramel.
- Cool Slightly: Let the caramel cool slightly for about 5-10 minutes before pouring it into the prepared chocolate crust. This will prevent the crust from melting.
- Pour into Crust: Pour the slightly cooled caramel over the chilled chocolate crust, spreading it evenly.
- Chill Again: Return the pie to the refrigerator and chill for at least 1 hour, or until the caramel is firm. This is important for the caramel layer to set properly.
Preparing the Chocolate Cream Filling
- Chop the Chocolate: Finely chop the bittersweet chocolate and place it in a heatproof bowl. The finer the chocolate is chopped, the easier it will melt.
- Heat the Cream and Milk: In a medium saucepan, combine the heavy cream and whole milk. Heat over medium heat until the mixture is just simmering around the edges. Do not boil.
- Whisk Egg Yolks and Sugar: In a separate bowl, whisk together the egg yolks and granulated sugar until pale and slightly thickened. This is called “tempering” the yolks.
- Temper the Egg Yolks: Slowly drizzle a small amount of the hot cream mixture into the egg yolk mixture, whisking constantly. This will gradually raise the temperature of the yolks and prevent them from scrambling when added to the hot cream. Repeat this process a few times until the egg yolk mixture is warm to the touch.
- Combine Mixtures: Pour the tempered egg yolk mixture into the saucepan with the remaining hot cream mixture. Cook over low heat, stirring constantly with a wooden spoon or heat-resistant spatula, until the mixture thickens enough to coat the back of the spoon. This will take about 5-7 minutes. Be careful not to overheat the mixture, as it can curdle.
- Pour over Chocolate: Immediately pour the hot cream mixture over the chopped chocolate in the heatproof bowl. Let it sit for a minute or two to allow the chocolate to melt.
- Stir Until Smooth: Gently stir the mixture until the chocolate is completely melted and the filling is smooth and glossy.
- Add Vanilla and Salt: Stir in the vanilla extract and a pinch of salt.
- Cool Slightly: Let the chocolate cream filling cool slightly for about 10-15 minutes before pouring it over the caramel layer. This will prevent the caramel from melting.
- Pour into Pie: Pour the slightly cooled chocolate cream filling over the chilled caramel layer, spreading it evenly.
- Chill Completely: Cover the pie with plastic wrap and refrigerate for at least 4 hours, or preferably overnight, to allow the filling to set completely. This is the hardest part, but trust me, it’s worth the wait!
Making the Whipped Cream Topping
- Chill Bowl and Whisk: Place the mixing bowl and whisk attachment of your stand mixer (or a hand mixer) in the freezer for about 15-20 minutes. This will help the whipped cream whip up faster and hold its shape better.
- Combine Ingredients: Pour the heavy cream into the chilled bowl. Add the powdered sugar and vanilla extract.
- Whip the Cream: Beat the cream on medium speed until stiff peaks form. Be careful not to overwhip, as it can turn into butter. You want the whipped cream to be firm enough to hold its shape, but still soft and creamy.
Assembling and Garnishing the Pie
- Spread Whipped Cream: Once the chocolate cream filling is set, remove the pie from the refrigerator. Spread the whipped cream evenly over the top of the pie. You can use a spatula or a piping bag to create a decorative design.
- Garnish (Optional): If desired, garnish the pie with chocolate shavings and sea salt flakes. This adds a touch of elegance and enhances the flavor.
- Serve and Enjoy: Slice the pie and serve immediately. Store any leftovers in the refrigerator. This pie is best enjoyed cold!
Conclusion:
This Chocolate Caramel Cream Pie isn’t just a dessert; it’s an experience. From the satisfying crunch of the chocolate crust to the luscious, flowing caramel and the airy, decadent cream topping, every bite is a symphony of textures and flavors that will leave you wanting more. I know, I know, I’m biased, but trust me on this one this pie is truly special. It’s the kind of dessert that makes any occasion feel like a celebration, and it’s guaranteed to impress your family and friends.
Why is this a must-try? Because it’s surprisingly easy to make, even though it looks like it came straight from a fancy bakery. The steps are straightforward, and the reward is immense. Plus, the combination of chocolate and caramel is a classic for a reason it’s simply irresistible! The rich, dark chocolate perfectly complements the sweet, buttery caramel, creating a balance that’s both comforting and indulgent. And that whipped cream topping? It’s the perfect finishing touch, adding a light and airy counterpoint to the richness below.
But the best part? You can totally customize this pie to your liking! Feeling adventurous? Try adding a pinch of sea salt to the caramel for a salted caramel version that will blow your mind. Or, if you’re a coffee lover, a teaspoon of instant espresso powder to the chocolate crust will add a subtle mocha flavor that’s simply divine. For a festive touch, sprinkle some chopped pecans or walnuts on top of the whipped cream. And if you’re serving this pie during the holidays, a dusting of cocoa powder or a few chocolate shavings will make it look extra special.
As for serving suggestions, this Chocolate Caramel Cream Pie is perfect on its own, but it’s also amazing with a scoop of vanilla ice cream or a dollop of crème fraîche. A cup of hot coffee or a glass of cold milk are also excellent accompaniments. And if you happen to have any leftovers (which I highly doubt!), they’re just as delicious the next day, straight from the fridge.
I truly believe that this recipe is a winner, and I can’t wait for you to try it! So, gather your ingredients, preheat your oven, and get ready to create a dessert masterpiece. Don’t be intimidated by the multiple layers each step is simple and rewarding. And remember, baking is all about having fun and experimenting, so don’t be afraid to put your own spin on things.
Once you’ve made this incredible Chocolate Caramel Cream Pie, I’d absolutely love to hear about your experience! Did you make any variations? Did you serve it to rave reviews? Share your photos and stories in the comments below I can’t wait to see your creations! Happy baking, and enjoy every delicious bite! I am confident that this will become a staple in your dessert rotation. Let me know if you have any questions, and I’ll be happy to help.
Chocolate Caramel Cream Pie: A Decadent Dessert Recipe
Chocolate caramel pie featuring a chocolate wafer crust, creamy caramel, rich chocolate cream filling, and fluffy whipped cream.
Ingredients
- 1 ½ cups chocolate wafer crumbs (about 36 wafers)
- 5 tablespoons unsalted butter, melted
- ¼ cup granulated sugar
- Pinch of salt
- 1 cup granulated sugar
- 6 tablespoons unsalted butter, cut into pieces
- ½ cup heavy cream
- 1 teaspoon vanilla extract
- ½ teaspoon sea salt
- 12 ounces bittersweet chocolate, finely chopped
- 1 ½ cups heavy cream
- ½ cup whole milk
- 3 large egg yolks
- ¼ cup granulated sugar
- 1 teaspoon vanilla extract
- Pinch of salt
- 1 ½ cups heavy cream
- 3 tablespoons powdered sugar
- ½ teaspoon vanilla extract
- Chocolate shavings
- Sea salt flakes
Instructions
- Prepare the Chocolate Crust: In a medium bowl, combine chocolate wafer crumbs, sugar, and salt. Add melted butter and mix until moistened. Press firmly into a 9-inch pie plate. Chill for at least 30 minutes (or pre-bake at 350°F/175°C for 8-10 minutes for a sturdier crust).
- Make the Caramel Layer: In a saucepan, melt sugar over medium heat until golden amber. Remove from heat, add butter, and stir until melted. Slowly pour in heavy cream, stirring until smooth. Stir in vanilla and sea salt. Cool slightly, then pour over the chilled crust. Chill for at least 1 hour.
- Prepare the Chocolate Cream Filling: Finely chop chocolate and place in a heatproof bowl. Heat cream and milk until simmering. Whisk egg yolks and sugar until pale. Temper the yolks by slowly drizzling in hot cream mixture, whisking constantly. Pour tempered yolks into the remaining cream mixture and cook over low heat, stirring until thickened. Pour over chopped chocolate and stir until smooth. Add vanilla and salt. Cool slightly, then pour over the caramel layer. Chill completely for at least 4 hours, or preferably overnight.
- Make the Whipped Cream Topping: Chill bowl and whisk. Pour heavy cream into the chilled bowl, add powdered sugar and vanilla extract. Beat on medium speed until stiff peaks form.
- Assemble and Garnish: Spread whipped cream over the set chocolate cream filling. Garnish with chocolate shavings and sea salt flakes, if desired. Serve cold.
Notes
- For a sturdier crust, pre-bake it.
- Be patient when melting the sugar for the caramel; burnt sugar will ruin the flavor.
- If the caramel seizes up, keep stirring over low heat until it smooths out.
- Finely chop the chocolate for the filling to ensure it melts easily.
- Temper the egg yolks carefully to prevent them from scrambling.
- Chill each layer thoroughly to allow it to set properly.
- Chill your bowl and whisk before making whipped cream.
- This pie is best enjoyed cold.