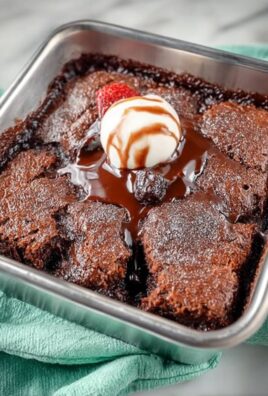
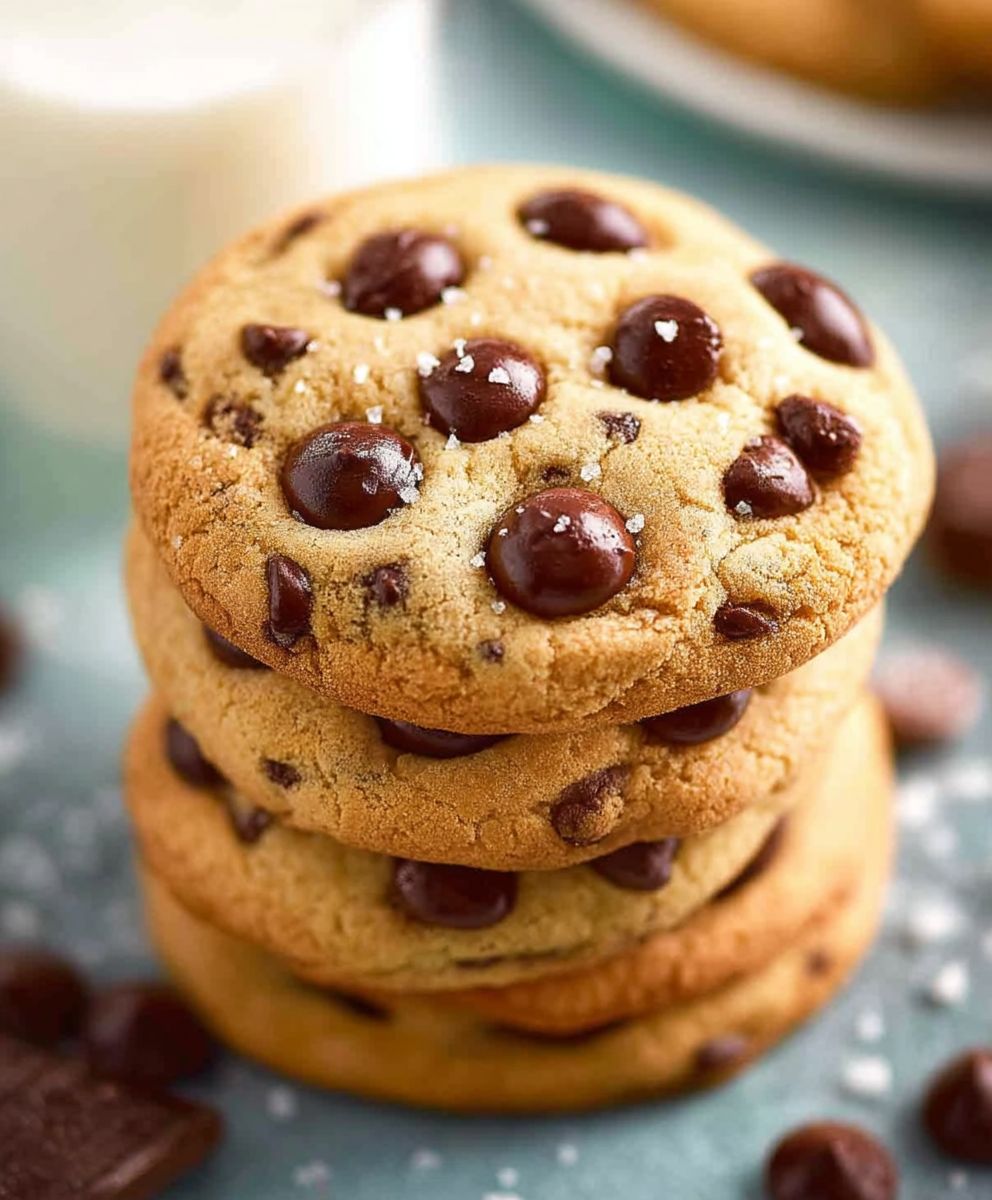
Chocolate Chip Cookies: Is there anything more comforting than the aroma of freshly baked cookies wafting through your home? I think not! Imagine sinking your teeth into a warm, gooey cookie, the perfect balance of sweet and slightly salty, with bursts of melted chocolate in every bite. It’s pure bliss, isn’t it?
The history of the chocolate chip cookie is surprisingly recent. It all started in 1938 when Ruth Graves Wakefield, of the Toll House Inn in Whitman, Massachusetts, decided to add chopped chocolate to her butter cookies. Little did she know, she was creating a culinary masterpiece that would be loved for generations to come. While the story goes that she intended for the chocolate to melt and create chocolate cookies, it didn’t, and the chocolate chip cookies were born!
But why are these cookies so universally adored? Well, for starters, they’re incredibly versatile. You can customize them with different types of chocolate, nuts, or even spices. They’re also relatively easy to make, making them a perfect baking project for beginners and seasoned bakers alike. The combination of the buttery, slightly crisp edges and the soft, chewy center is simply irresistible. Plus, let’s be honest, a warm chocolate chip cookie is the perfect pick-me-up any time of day. So, let’s get baking and create some cookie magic!

Ingredients:
- 2 1/4 cups all-purpose flour
- 1 teaspoon baking soda
- 1 teaspoon salt
- 1 cup (2 sticks) unsalted butter, softened
- 3/4 cup granulated sugar
- 3/4 cup packed brown sugar
- 1 teaspoon vanilla extract
- 2 large eggs
- 2 cups chocolate chips (semi-sweet or your favorite)
Preparing the Dough:
- Combine Dry Ingredients: In a medium bowl, whisk together the flour, baking soda, and salt. Make sure there are no lumps of baking soda! This ensures even distribution and prevents a bitter taste in your cookies. Set this bowl aside for later.
- Cream Butter and Sugars: In a large bowl (or the bowl of your stand mixer), cream together the softened butter, granulated sugar, and brown sugar until light and fluffy. This usually takes about 3-5 minutes with an electric mixer. The mixture should be noticeably lighter in color and texture. Don’t rush this step; it’s crucial for achieving the right cookie texture. Scrape down the sides of the bowl occasionally to ensure everything is evenly incorporated.
- Add Vanilla and Eggs: Beat in the vanilla extract until combined. Then, add the eggs one at a time, beating well after each addition. Again, scrape down the sides of the bowl after each egg to ensure everything is properly mixed. Overmixing at this stage can lead to tough cookies, so mix just until the eggs are incorporated.
- Gradually Add Dry Ingredients: Gradually add the dry ingredients to the wet ingredients, mixing on low speed until just combined. Be careful not to overmix! Overmixing develops the gluten in the flour, resulting in tough cookies. Mix until you see the flour disappear, then stop. A few streaks of flour are okay at this point.
- Stir in Chocolate Chips: Stir in the chocolate chips until evenly distributed throughout the dough. I like to use a rubber spatula for this step to avoid overmixing. You can also add other mix-ins at this point, such as chopped nuts, dried cranberries, or sprinkles.
- Chill the Dough (Optional but Recommended): Cover the bowl with plastic wrap and chill the dough in the refrigerator for at least 30 minutes, or up to 24 hours. Chilling the dough allows the flavors to meld together and prevents the cookies from spreading too thin during baking. If you’re short on time, you can skip this step, but the cookies will be slightly thinner and may not be as flavorful. For best results, I highly recommend chilling the dough.
Baking the Cookies:
- Preheat Oven: Preheat your oven to 375°F (190°C). Make sure your oven rack is in the center position.
- Prepare Baking Sheets: Line baking sheets with parchment paper or silicone baking mats. This prevents the cookies from sticking and makes cleanup easier. Parchment paper also helps to distribute heat evenly, resulting in more evenly baked cookies.
- Scoop Dough: Scoop rounded tablespoons of dough onto the prepared baking sheets, leaving about 2 inches between each cookie. You can use a cookie scoop for consistent sizing, or just use a spoon.
- Bake: Bake for 9-11 minutes, or until the edges are golden brown and the centers are still slightly soft. The baking time will vary depending on your oven, so keep a close eye on the cookies. Don’t overbake them, or they will be dry and crumbly.
- Cool: Remove the baking sheets from the oven and let the cookies cool on the baking sheets for a few minutes before transferring them to a wire rack to cool completely. This allows the cookies to firm up slightly and prevents them from breaking when you move them.
Tips and Tricks for Perfect Chocolate Chip Cookies:
- Use Room Temperature Butter: Softened butter is essential for creaming properly with the sugars. If your butter is too cold, it won’t cream properly, and your cookies will be dense. If your butter is too melted, your cookies will spread too thin. The butter should be soft enough to press your finger into easily, but not greasy.
- Measure Flour Accurately: Too much flour will result in dry, crumbly cookies. The best way to measure flour is to use a kitchen scale. If you don’t have a scale, spoon the flour into your measuring cup and level it off with a knife. Avoid scooping the flour directly from the bag, as this can pack the flour and result in too much flour in your cookies.
- Don’t Overmix: Overmixing develops the gluten in the flour, resulting in tough cookies. Mix the dough until just combined. A few streaks of flour are okay.
- Chill the Dough: Chilling the dough allows the flavors to meld together and prevents the cookies from spreading too thin during baking.
- Use High-Quality Chocolate Chips: The quality of your chocolate chips will affect the flavor of your cookies. Use high-quality chocolate chips for the best results. I prefer semi-sweet chocolate chips, but you can use milk chocolate, dark chocolate, or even white chocolate chips.
- Adjust Baking Time: The baking time will vary depending on your oven. Keep a close eye on the cookies and adjust the baking time as needed.
- Don’t Overbake: Overbaked cookies will be dry and crumbly. Bake the cookies until the edges are golden brown and the centers are still slightly soft.
- Cool Completely: Let the cookies cool completely on a wire rack before storing them. This prevents them from becoming soggy.
Variations:
- Add Nuts: Add 1 cup of chopped nuts, such as walnuts, pecans, or macadamia nuts, to the dough.
- Add Dried Fruit: Add 1 cup of dried fruit, such as cranberries, raisins, or cherries, to the dough.
- Add Spices: Add 1/2 teaspoon of ground cinnamon, nutmeg, or ginger to the dough.
- Make Double Chocolate Chip Cookies: Use dark chocolate cocoa powder in the dough and add white chocolate chips.
- Add Peanut Butter: Add 1/2 cup of peanut butter to the dough.
- Make Oatmeal Chocolate Chip Cookies: Add 1 cup of rolled oats to the dough. Reduce the flour by 1/2 cup.
Storage:
Store the cooled cookies in an airtight container at room temperature for up to 3 days. You can also freeze the cookies for up to 2 months. To freeze, place the cooled cookies in a single layer on a baking sheet and freeze for 30 minutes. Then, transfer the frozen cookies to a freezer bag or container. Thaw the cookies at room temperature before serving.
Troubleshooting:
- Cookies are too flat: This could be due to several factors, including using melted butter, not chilling the dough, or overmixing the dough. Make sure to use softened butter, chill the dough for at least 30 minutes, and avoid overmixing.
- Cookies are too dry: This could be due to using too much flour or overbaking the cookies. Make sure to measure the flour accurately and bake the cookies until the edges are golden brown and the centers are still slightly soft.
- Cookies are too hard: This could be due to overmixing the dough or overbaking the cookies. Make sure to avoid overmixing and bake the cookies until the edges are golden brown and the centers are still slightly soft.
- Cookies are too crumbly: This could be due to using too little butter or overbaking the cookies. Make sure to use the correct amount of butter and bake the cookies until the edges are golden brown and the centers are still slightly soft.
Enjoy!
These chocolate chip cookies are a classic for a reason. I hope you enjoy baking and eating them as much as I do!
Conclusion:
And there you have it! These aren’t just any chocolate chip cookies; they’re a warm, gooey, melt-in-your-mouth experience that will have everyone begging for more. I truly believe this recipe is a must-try because it delivers that perfect balance of crispy edges and a soft, chewy center, all while boasting an intensely rich chocolate flavor. Forget store-bought once you taste these homemade delights, you’ll never go back! The secret, as I mentioned, lies in the browned butter and the quality of the chocolate chips. Don’t skimp on those ingredients; they make all the difference.
But the best part? This recipe is incredibly versatile. While they’re absolutely divine on their own, warm from the oven, there are so many ways to elevate your cookie experience.
Serving Suggestions and Variations:
* Ice Cream Sandwich Extravaganza: Let the cookies cool slightly, then sandwich a generous scoop of your favorite ice cream between two. Vanilla bean, chocolate, or even salted caramel ice cream would be heavenly!
* Cookie Crumble Topping: Crumble a cookie or two over a bowl of yogurt, oatmeal, or even a smoothie for a touch of sweetness and texture.
* Chocolate Chip Cookie Sundae: Warm a cookie in the microwave for a few seconds, top with ice cream, hot fudge, whipped cream, and a cherry. Pure indulgence!
* Add Nuts: For a nutty twist, incorporate chopped walnuts, pecans, or macadamia nuts into the dough. About ½ cup should do the trick.
* Spice it Up: A pinch of cinnamon or nutmeg can add a warm, comforting flavor to the cookies.
* Sea Salt Sprinkle: Before baking, sprinkle a few flakes of sea salt on top of each cookie. The salty-sweet combination is irresistible.
* Dark Chocolate Decadence: Substitute semi-sweet chocolate chips with dark chocolate chips for a richer, more intense chocolate flavor.
* White Chocolate Wonders: White chocolate chips offer a sweeter, creamier alternative.
* Espresso Boost: Add a teaspoon of instant espresso powder to the dry ingredients for a subtle coffee flavor that complements the chocolate beautifully.
* Make it Gluten-Free: Experiment with gluten-free flour blends to create a delicious gluten-free version of these cookies. Just be sure to use a blend that’s designed for baking.
I’m confident that you’ll love this recipe as much as I do. It’s perfect for any occasion, from a simple weeknight treat to a special celebration. And remember, baking is all about experimenting and having fun! Don’t be afraid to tweak the recipe to suit your own preferences. Maybe you prefer a slightly thinner cookie? Flatten the dough balls a bit before baking. Want them even chewier? Add a tablespoon of molasses to the dough.
So, what are you waiting for? Preheat your oven, gather your ingredients, and get ready to bake the best chocolate chip cookies you’ve ever tasted! I can’t wait to hear about your baking adventures. Please, come back and leave a comment below to let me know how they turned out. Did you try any of the variations? What was your favorite part of the recipe? Share your tips and tricks with the rest of the baking community. Happy baking! I hope you enjoy every single bite of these delicious cookies. Let me know what you think!
Chocolate Chip Cookies: The Ultimate Guide to Baking Perfection
Classic, soft, and chewy chocolate chip cookies. A timeless favorite!
Ingredients
- 2 1/4 cups all-purpose flour
- 1 teaspoon baking soda
- 1 teaspoon salt
- 1 cup (2 sticks) unsalted butter, softened
- 3/4 cup granulated sugar
- 3/4 cup packed brown sugar
- 1 teaspoon vanilla extract
- 2 large eggs
- 2 cups chocolate chips (semi-sweet or your favorite)
Instructions
- Combine Dry Ingredients: In a medium bowl, whisk together the flour, baking soda, and salt. Set aside.
- Cream Butter and Sugars: In a large bowl, cream together the softened butter, granulated sugar, and brown sugar until light and fluffy (3-5 minutes). Scrape down the sides of the bowl occasionally.
- Add Vanilla and Eggs: Beat in the vanilla extract until combined. Then, add the eggs one at a time, beating well after each addition. Scrape down the sides of the bowl after each egg.
- Gradually Add Dry Ingredients: Gradually add the dry ingredients to the wet ingredients, mixing on low speed until just combined. Be careful not to overmix!
- Stir in Chocolate Chips: Stir in the chocolate chips until evenly distributed throughout the dough.
- Chill the Dough (Optional but Recommended): Cover the bowl with plastic wrap and chill the dough in the refrigerator for at least 30 minutes, or up to 24 hours.
- Preheat Oven: Preheat your oven to 375°F (190°C).
- Prepare Baking Sheets: Line baking sheets with parchment paper or silicone baking mats.
- Scoop Dough: Scoop rounded tablespoons of dough onto the prepared baking sheets, leaving about 2 inches between each cookie.
- Bake: Bake for 9-11 minutes, or until the edges are golden brown and the centers are still slightly soft.
- Cool: Remove the baking sheets from the oven and let the cookies cool on the baking sheets for a few minutes before transferring them to a wire rack to cool completely.
Notes
- Use room temperature butter for best results.
- Measure flour accurately (spoon and level or use a kitchen scale).
- Don’t overmix the dough.
- Chilling the dough is recommended for better flavor and less spreading.
- Use high-quality chocolate chips.
- Adjust baking time as needed for your oven.
- Don’t overbake the cookies.
- Cool completely before storing.