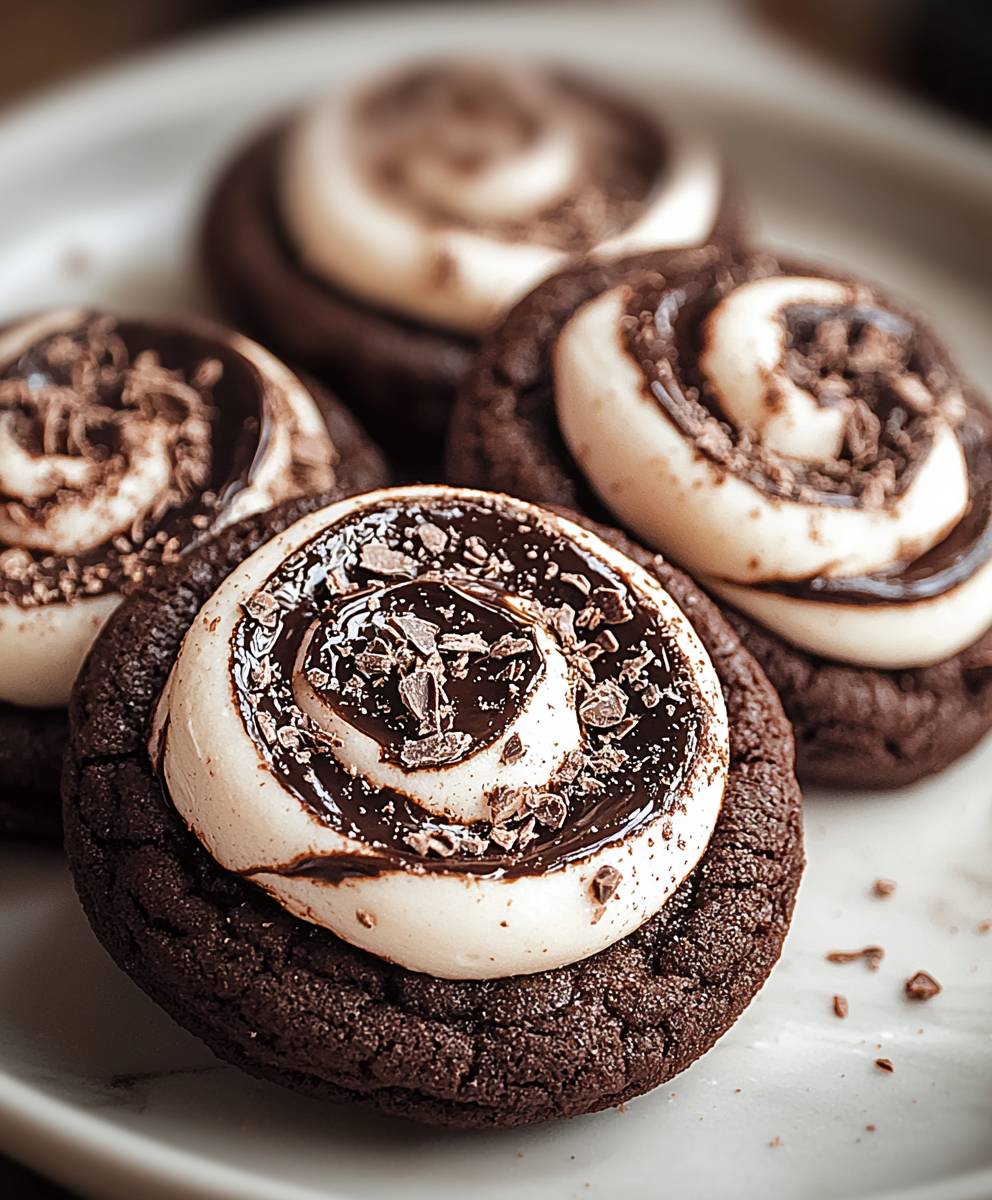
Chocolate Marshmallow Swirl Cookies: Prepare to embark on a baking adventure that will tantalize your taste buds and leave you craving more! Imagine sinking your teeth into a soft, chewy cookie, bursting with rich chocolate flavor and pockets of gooey, melted marshmallow. It’s a symphony of textures and tastes that will transport you to dessert heaven.
While the exact origins of swirling marshmallow into cookies remain a delightful mystery, the combination itself speaks to a timeless love affair between chocolate and marshmallow. Think s’mores around a campfire, hot chocolate on a snowy day these flavors evoke feelings of warmth, comfort, and pure indulgence. This recipe elevates that classic pairing to a new level of sophistication, transforming simple cookies into a decadent treat.
People adore these Chocolate Marshmallow Swirl Cookies for so many reasons. The contrast between the slightly crisp edges and the soft, gooey center is simply irresistible. The rich chocolate provides a deep, satisfying flavor, while the marshmallow adds a touch of sweetness and a delightful, almost ethereal texture. Plus, they’re surprisingly easy to make! Whether you’re a seasoned baker or just starting out, this recipe is sure to impress. Get ready to create a batch of these irresistible cookies and watch them disappear in minutes!

Ingredients:
- 1 cup (2 sticks) unsalted butter, softened
- ¾ cup granulated sugar
- ¾ cup packed light brown sugar
- 2 large eggs
- 1 teaspoon vanilla extract
- 2 ¼ cups all-purpose flour
- 1 teaspoon baking soda
- 1 teaspoon salt
- 1 cup semi-sweet chocolate chips
- 1 cup mini marshmallows
- ¼ cup unsweetened cocoa powder
- 2 tablespoons milk
Preparing the Chocolate Marshmallow Swirl Cookie Dough
Alright, let’s get started on these amazing Chocolate Marshmallow Swirl Cookies! First things first, make sure your butter is nice and soft. This is crucial for a smooth and creamy cookie dough.
- Cream the Butter and Sugars: In a large bowl (or the bowl of your stand mixer), cream together the softened butter, granulated sugar, and light brown sugar until light and fluffy. This usually takes about 3-5 minutes. Don’t rush this step! The more air you incorporate, the lighter and more tender your cookies will be. I like to use a stand mixer with the paddle attachment, but a hand mixer works just as well. Just be prepared for a little arm workout!
- Add the Eggs and Vanilla: Beat in the eggs one at a time, making sure each egg is fully incorporated before adding the next. Then, stir in the vanilla extract. The vanilla really enhances the chocolate flavor, so don’t skip it!
- Combine Dry Ingredients: In a separate medium bowl, whisk together the all-purpose flour, baking soda, and salt. Whisking helps to evenly distribute the baking soda and salt throughout the flour, which is important for proper leavening and flavor.
- Gradually Add Dry Ingredients to Wet Ingredients: Gradually add the dry ingredients to the wet ingredients, mixing on low speed until just combined. Be careful not to overmix! Overmixing can develop the gluten in the flour, resulting in tough cookies.
- Incorporate Chocolate Chips and Marshmallows: Gently fold in the chocolate chips and mini marshmallows. I like to use a rubber spatula for this step to avoid overmixing. Make sure the chocolate chips and marshmallows are evenly distributed throughout the dough.
Creating the Chocolate Swirl
Now for the fun part creating that beautiful chocolate swirl! This is what makes these cookies so visually appealing and adds an extra layer of chocolatey goodness.
- Divide the Dough: Divide the cookie dough in half. Place one half back in the mixing bowl.
- Prepare the Chocolate Dough: In a small bowl, whisk together the cocoa powder and milk until smooth. This creates a chocolate paste that will easily incorporate into the dough.
- Incorporate Chocolate Paste: Add the chocolate paste to one half of the cookie dough and mix until just combined. Be careful not to overmix! You want the chocolate dough to be evenly colored, but you don’t want to develop the gluten.
Swirling and Shaping the Cookies
This is where the magic happens! We’ll combine the plain and chocolate dough to create those gorgeous swirls.
- Scoop the Dough: Using a cookie scoop (about 1.5 tablespoons), scoop out alternating scoops of plain and chocolate dough. Place them close together on a parchment-lined baking sheet. I usually do about 6 cookies per sheet to give them enough room to spread.
- Swirl the Dough: Use a toothpick or the tip of a knife to gently swirl the two doughs together. Don’t overdo it! You want to create a marbled effect, not completely blend the two doughs together.
- Optional: Add Extra Marshmallows: If you’re feeling extra marshmallow-y, you can press a few extra mini marshmallows into the tops of the cookies before baking. This will give them a nice, gooey topping.
- Chill the Dough (Optional but Recommended): For best results, chill the cookie dough for at least 30 minutes before baking. This will help prevent the cookies from spreading too much and will also enhance the flavor. You can even chill the dough overnight for an even more intense flavor.
Baking the Cookies
Almost there! Now it’s time to bake these beauties to golden-brown perfection.
- Preheat Oven: Preheat your oven to 375°F (190°C). Make sure your oven is properly preheated before baking the cookies. An accurate oven temperature is crucial for even baking.
- Bake the Cookies: Bake for 9-11 minutes, or until the edges are golden brown and the centers are set. Keep a close eye on the cookies while they’re baking, as baking times can vary depending on your oven.
- Cool the Cookies: Remove the cookies from the oven and let them cool on the baking sheet for a few minutes before transferring them to a wire rack to cool completely. This will prevent them from sticking to the baking sheet and will also allow them to firm up a bit.
Tips and Tricks for Perfect Chocolate Marshmallow Swirl Cookies
Here are a few extra tips to ensure your cookies turn out perfectly every time:
- Use Room Temperature Ingredients: Using room temperature butter and eggs is essential for creating a smooth and creamy cookie dough. Room temperature ingredients emulsify better, resulting in a more even texture.
- Don’t Overmix the Dough: Overmixing can develop the gluten in the flour, resulting in tough cookies. Mix the dough until just combined.
- Chill the Dough: Chilling the dough helps prevent the cookies from spreading too much and also enhances the flavor.
- Use Parchment Paper: Lining your baking sheets with parchment paper will prevent the cookies from sticking and will also make cleanup a breeze.
- Don’t Overbake the Cookies: Overbaked cookies will be dry and crumbly. Bake the cookies until the edges are golden brown and the centers are set.
- Store the Cookies Properly: Store the cookies in an airtight container at room temperature for up to 3 days.
Variations and Substitutions
Want to customize these cookies to your liking? Here are a few ideas:
- Add Nuts: Add chopped walnuts, pecans, or almonds to the dough for extra crunch and flavor.
- Use Different Chocolate Chips: Experiment with different types of chocolate chips, such as dark chocolate, milk chocolate, or white chocolate.
- Add Sprinkles: Add sprinkles to the tops of the cookies before baking for a festive touch.
- Use Different Extracts: Try using almond extract, peppermint extract, or orange extract instead of vanilla extract.
- Make Them Gluten-Free: Substitute the all-purpose flour with a gluten-free all-purpose flour blend.
Troubleshooting
Encountering problems? Here are some common issues and how to fix them:
- Cookies are Spreading Too Much: This could be due to using too much butter, not chilling the dough, or baking the cookies on a warm baking sheet. Make sure to use the correct amount of butter, chill the dough, and bake the cookies on a cool baking sheet.
- Cookies are Too Dry: This could be due to overbaking the cookies or using too much flour. Bake the cookies until the edges are golden brown and the centers are set, and make sure to measure the flour accurately.
- Cookies are Too Tough: This could be due to overmixing the dough. Mix the dough until just combined.
- Cookies are Not Swirling Properly: Make sure to use alternating scoops of plain and chocolate dough and gently swirl them together with a toothpick or knife.
Enjoy!
I hope you enjoy these Chocolate Marshmallow Swirl Cookies as much as I do! They’re perfect for any occasion, from a casual afternoon snack to a special holiday treat. Happy baking!
Conclusion:
And there you have it! These Chocolate Marshmallow Swirl Cookies are more than just a treat; they’re an experience. From the rich, decadent chocolate dough to the gooey, toasted marshmallow swirls, every bite is a symphony of textures and flavors that will leave you craving more. I truly believe this recipe is a must-try for any baking enthusiast, whether you’re a seasoned pro or just starting your culinary journey. The combination of familiar comfort and exciting innovation makes these cookies a guaranteed crowd-pleaser. Why are these cookies a must-try? Well, beyond the obvious deliciousness, they’re surprisingly easy to make. The recipe is straightforward, and even the swirling technique is simpler than it looks. Plus, the visual appeal is undeniable. These cookies are gorgeous! They’re perfect for impressing guests, gifting to friends, or simply indulging in a little self-care. The aroma alone, as they bake, is enough to lift your spirits and fill your home with warmth and happiness. And let’s be honest, who can resist the allure of perfectly melted marshmallows nestled in a chocolatey embrace? But the fun doesn’t stop there! Feel free to get creative with serving suggestions and variations. Imagine serving these warm cookies with a scoop of vanilla ice cream and a drizzle of hot fudge sauce pure bliss! Or, for a more sophisticated touch, pair them with a glass of chilled milk or a cup of strong coffee. They’re also fantastic crumbled over yogurt or used as a base for mini ice cream sandwiches. Looking for variations? Consider adding chopped nuts, like pecans or walnuts, to the dough for extra crunch and flavor. A sprinkle of sea salt on top before baking will enhance the sweetness and create a delightful salty-sweet contrast. You could even experiment with different types of chocolate, such as dark chocolate or white chocolate, to customize the flavor profile to your liking. For a festive twist, add a dash of peppermint extract during the holiday season. And if you’re feeling adventurous, try using different flavored marshmallows, like strawberry or caramel, to create unique and exciting swirls. I’m so excited for you to try this recipe and experience the magic of these Chocolate Marshmallow Swirl Cookies for yourself. I poured my heart into perfecting this recipe, and I truly believe you’ll love it as much as I do. Don’t be intimidated by the swirling it’s all part of the fun! Remember to take your time, enjoy the process, and most importantly, have fun! Once you’ve baked your batch of these delightful cookies, I’d absolutely love to hear about your experience. Did you make any modifications? What did your family and friends think? Share your photos and stories in the comments below! Your feedback is invaluable, and it helps me continue to create and share recipes that you’ll love. So go ahead, preheat your oven, gather your ingredients, and get ready to bake some seriously delicious Chocolate Marshmallow Swirl Cookies. Happy baking! I can’t wait to hear all about your baking adventures! Print
Chocolate Marshmallow Swirl Cookies: The Ultimate Recipe
- Total Time: 30 minutes
- Yield: 24 cookies 1x
Description
Soft, chewy chocolate chip cookies with mini marshmallows and a beautiful chocolate swirl. Perfect for satisfying your sweet tooth!
Ingredients
- 1 cup (2 sticks) unsalted butter, softened
- ¾ cup granulated sugar
- ¾ cup packed light brown sugar
- 2 large eggs
- 1 teaspoon vanilla extract
- 2 ¼ cups all-purpose flour
- 1 teaspoon baking soda
- 1 teaspoon salt
- 1 cup semi-sweet chocolate chips
- 1 cup mini marshmallows
- ¼ cup unsweetened cocoa powder
- 2 tablespoons milk
Instructions
- Cream the Butter and Sugars: In a large bowl (or the bowl of your stand mixer), cream together the softened butter, granulated sugar, and light brown sugar until light and fluffy (3-5 minutes).
- Add the Eggs and Vanilla: Beat in the eggs one at a time, fully incorporating each before adding the next. Stir in the vanilla extract.
- Combine Dry Ingredients: In a separate medium bowl, whisk together the all-purpose flour, baking soda, and salt.
- Gradually Add Dry Ingredients to Wet Ingredients: Gradually add the dry ingredients to the wet ingredients, mixing on low speed until just combined. Be careful not to overmix.
- Incorporate Chocolate Chips and Marshmallows: Gently fold in the chocolate chips and mini marshmallows.
- Divide the Dough: Divide the cookie dough in half. Place one half back in the mixing bowl.
- Prepare the Chocolate Dough: In a small bowl, whisk together the cocoa powder and milk until smooth.
- Incorporate Chocolate Paste: Add the chocolate paste to one half of the cookie dough and mix until just combined. Be careful not to overmix.
- Scoop the Dough: Using a cookie scoop (about 1.5 tablespoons), scoop out alternating scoops of plain and chocolate dough. Place them close together on a parchment-lined baking sheet.
- Swirl the Dough: Use a toothpick or the tip of a knife to gently swirl the two doughs together. Don’t overdo it!
- Optional: Add Extra Marshmallows: If you’re feeling extra marshmallow-y, you can press a few extra mini marshmallows into the tops of the cookies before baking.
- Chill the Dough (Optional but Recommended): For best results, chill the cookie dough for at least 30 minutes before baking.
- Preheat Oven: Preheat your oven to 375°F (190°C).
- Bake the Cookies: Bake for 9-11 minutes, or until the edges are golden brown and the centers are set.
- Cool the Cookies: Remove the cookies from the oven and let them cool on the baking sheet for a few minutes before transferring them to a wire rack to cool completely.
Notes
- Use room temperature butter and eggs for a smooth dough.
- Don’t overmix the dough to avoid tough cookies.
- Chilling the dough helps prevent spreading and enhances flavor.
- Use parchment paper for easy cleanup.
- Don’t overbake the cookies.
- Store in an airtight container at room temperature for up to 3 days.
- Variations: Add nuts, use different chocolate chips, add sprinkles, use different extracts, or make them gluten-free.
- Troubleshooting: If cookies spread too much, chill the dough. If they’re too dry, don’t overbake. If they’re too tough, don’t overmix.
- Prep Time: 20 minutes
- Cook Time: 9 minutes