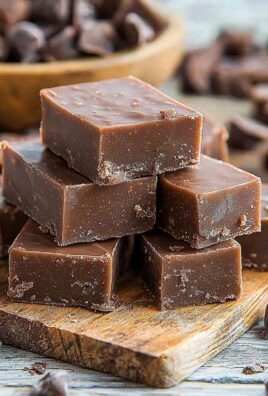
Creamsicle orange cookies, a delightful twist on a classic frozen treat, are about to become your new favorite bake! Imagine biting into a soft, chewy cookie that bursts with the bright, tangy flavor of orange, followed by a smooth, creamy vanilla finish. It’s like sunshine in every bite, and trust me, once you try them, you’ll be hooked.
While not steeped in centuries of tradition, the creamsicle itself holds a special place in American culinary nostalgia. Invented in 1905 by Frank Epperson (who also accidentally invented the popsicle!), the creamsicle quickly became a symbol of summertime joy. These creamsicle orange cookies capture that same carefree spirit, transforming a beloved frozen dessert into a warm, comforting treat perfect for any time of year.
People adore these cookies for their unique flavor profile. The combination of citrusy orange and sweet vanilla is simply irresistible. The soft, almost cake-like texture adds another layer of appeal, making them incredibly satisfying to eat. Plus, they’re surprisingly easy to make, requiring minimal ingredients and effort. Whether you’re looking for a fun baking project with the kids or a quick and delicious dessert to impress your friends, these cookies are guaranteed to be a hit!

Ingredients:
- For the Cookies:
- 2 1/4 cups all-purpose flour
- 1 teaspoon baking soda
- 1/2 teaspoon baking powder
- 1/4 teaspoon salt
- 1 cup (2 sticks) unsalted butter, softened
- 3/4 cup granulated sugar
- 3/4 cup packed light brown sugar
- 1 large egg
- 1 large egg yolk
- 1 tablespoon orange zest, finely grated
- 2 teaspoons orange extract
- 1 teaspoon vanilla extract
- 1/2 cup white chocolate chips
- For the Creamsicle Filling:
- 1 cup (2 sticks) unsalted butter, softened
- 4 cups powdered sugar
- 1/4 cup heavy cream
- 1 teaspoon orange extract
- 1/2 teaspoon vanilla extract
- Orange food coloring (gel is preferred)
Preparing the Cookie Dough:
- Combine Dry Ingredients: In a medium bowl, whisk together the flour, baking soda, baking powder, and salt. Make sure everything is evenly distributed. This ensures a consistent rise and texture in your cookies.
- Cream Butter and Sugars: In a large bowl (or the bowl of a stand mixer fitted with the paddle attachment), cream together the softened butter, granulated sugar, and brown sugar until light and fluffy. This usually takes about 3-5 minutes. Scrape down the sides of the bowl occasionally to ensure everything is evenly incorporated. The creaming process is crucial for creating air pockets, which contribute to the cookies’ soft texture.
- Add Eggs and Extracts: Beat in the egg and egg yolk one at a time, mixing well after each addition. Then, stir in the orange zest, orange extract, and vanilla extract. The egg yolk adds richness and chewiness to the cookies, while the extracts enhance the orange creamsicle flavor. Don’t skip the zest; it provides a bright, fresh orange aroma.
- Gradually Add Dry Ingredients: Gradually add the dry ingredients to the wet ingredients, mixing on low speed until just combined. Be careful not to overmix, as this can develop the gluten in the flour and result in tough cookies. Mix until you no longer see streaks of flour.
- Stir in White Chocolate Chips: Gently fold in the white chocolate chips. Distribute them evenly throughout the dough. The white chocolate adds a touch of sweetness and complements the orange flavor beautifully.
- Chill the Dough: Cover the bowl with plastic wrap and chill the dough in the refrigerator for at least 1 hour, or preferably 2-3 hours. Chilling the dough prevents the cookies from spreading too much during baking and allows the flavors to meld together. You can even chill it overnight for an even better result.
Baking the Cookies:
- Preheat Oven: Preheat your oven to 350°F (175°C). Line baking sheets with parchment paper or silicone baking mats. This prevents the cookies from sticking and makes cleanup easier.
- Scoop and Arrange Dough: Use a cookie scoop or spoon to drop rounded tablespoons of dough onto the prepared baking sheets, leaving about 2 inches between each cookie. This allows for spreading during baking.
- Bake: Bake for 10-12 minutes, or until the edges are lightly golden brown and the centers are set. Keep a close eye on them, as baking times may vary depending on your oven. You want them to be slightly underbaked for a soft and chewy texture.
- Cool: Let the cookies cool on the baking sheets for a few minutes before transferring them to a wire rack to cool completely. This prevents them from breaking apart while they are still soft.
Preparing the Creamsicle Filling:
- Cream Butter: In a large bowl (or the bowl of a stand mixer fitted with the paddle attachment), cream the softened butter until smooth and fluffy. This usually takes about 2-3 minutes.
- Gradually Add Powdered Sugar: Gradually add the powdered sugar, one cup at a time, mixing on low speed until combined. Scrape down the sides of the bowl frequently to ensure everything is evenly incorporated.
- Add Heavy Cream and Extracts: Add the heavy cream, orange extract, and vanilla extract. Beat on medium speed until light and fluffy. The heavy cream adds moisture and richness to the frosting.
- Add Food Coloring: Add a few drops of orange food coloring (gel is preferred) and mix until you achieve your desired shade of orange. Start with a small amount and add more gradually until you reach the perfect creamsicle color.
- Whip: Whip the frosting for an additional minute or two until it is light and airy.
Assembling the Creamsicle Cookies:
- Pair Cookies: Once the cookies are completely cooled, pair them up by size and shape. This will ensure that each sandwich cookie looks uniform.
- Frost Cookies: Spread a generous amount of the creamsicle filling onto the flat side of one cookie.
- Sandwich: Top with the flat side of another cookie, gently pressing down to create a sandwich. Be careful not to press too hard, or the filling will squish out the sides.
- Chill (Optional): For best results, chill the assembled cookies in the refrigerator for at least 30 minutes before serving. This will help the filling to firm up and make the cookies easier to handle.
- Serve: Serve and enjoy your delicious Creamsicle Orange Cookies! These are best enjoyed within a few days, but they rarely last that long!

Conclusion:
So there you have it! These creamsicle orange cookies are more than just a sweet treat; they’re a burst of sunshine in every bite, a nostalgic trip back to childhood summers, and a guaranteed crowd-pleaser for any occasion. I truly believe this recipe is a must-try, and here’s why: the perfect balance of tangy orange and creamy vanilla creates an irresistible flavor profile that’s both refreshing and comforting. The soft, chewy texture is simply divine, and the vibrant color makes them visually appealing, too. Forget those bland, store-bought cookies these homemade delights are in a league of their own!
But the best part? They’re incredibly easy to make! Even if you’re a beginner baker, you’ll find this recipe straightforward and rewarding. The simple ingredients are readily available, and the instructions are clear and concise. Plus, the aroma that fills your kitchen while they’re baking is absolutely heavenly!
Now, let’s talk serving suggestions and variations. These cookies are fantastic on their own, of course, but why not elevate the experience? Imagine serving them with a scoop of vanilla ice cream for an extra creamy indulgence. Or, crumble them over a bowl of yogurt for a delightful breakfast treat. For a more sophisticated touch, pair them with a cup of Earl Grey tea or a glass of chilled Moscato.
Looking for variations? Get creative! Add a handful of white chocolate chips to the dough for an extra layer of sweetness. Or, sprinkle the tops with orange zest before baking for a more intense citrus flavor. You could even dip them in melted white chocolate and drizzle with orange-colored candy melts for a truly decadent treat. If you’re feeling adventurous, try adding a pinch of cardamom or ginger to the dough for a warm, spicy twist. The possibilities are endless!
Serving Suggestions:
- Enjoy them fresh out of the oven with a glass of cold milk.
- Serve them at your next party or gathering they’re always a hit!
- Pack them in lunchboxes for a sweet surprise.
- Gift them to friends and family homemade treats are always appreciated.
- Crumble them over ice cream or yogurt for a delicious topping.
Variations to Try:
- Add white chocolate chips for extra sweetness.
- Sprinkle with orange zest for a more intense citrus flavor.
- Dip in melted white chocolate and drizzle with orange candy melts.
- Add a pinch of cardamom or ginger for a warm, spicy twist.
- Use different types of citrus, like lemon or grapefruit, for a unique flavor.
I’m so excited for you to try this recipe and experience the joy of baking these delicious creamsicle orange cookies for yourself. Don’t be afraid to experiment with different variations and make them your own. And most importantly, have fun!
Once you’ve made them, I’d love to hear about your experience. Did you enjoy the recipe? Did you make any modifications? What did your friends and family think? Share your photos and stories in the comments below! I can’t wait to see your creations and hear your feedback. Happy baking! I am confident that you will love this recipe and it will become a staple in your baking repertoire. Remember to store them in an airtight container to keep them fresh and chewy for days. Enjoy!
Creamsicle Orange Cookies: The Ultimate Recipe for Summer
Soft, chewy orange cookies with a creamy creamsicle filling. A burst of sunshine in every bite!
Ingredients
- 2 1/4 cups all-purpose flour
- 1 teaspoon baking soda
- 1/2 teaspoon baking powder
- 1/4 teaspoon salt
- 1 cup (2 sticks) unsalted butter, softened
- 3/4 cup granulated sugar
- 3/4 cup packed light brown sugar
- 1 large egg
- 1 large egg yolk
- 1 tablespoon orange zest, finely grated
- 2 teaspoons orange extract
- 1 teaspoon vanilla extract
- 1/2 cup white chocolate chips
- 1 cup (2 sticks) unsalted butter, softened
- 4 cups powdered sugar
- 1/4 cup heavy cream
- 1 teaspoon orange extract
- 1/2 teaspoon vanilla extract
- Orange food coloring (gel preferred)
Instructions
- Combine Dry Ingredients: In a medium bowl, whisk together the flour, baking soda, baking powder, and salt.
- Cream Butter and Sugars: In a large bowl (or the bowl of a stand mixer fitted with the paddle attachment), cream together the softened butter, granulated sugar, and brown sugar until light and fluffy (3-5 minutes). Scrape down the sides of the bowl occasionally.
- Add Eggs and Extracts: Beat in the egg and egg yolk one at a time, mixing well after each addition. Stir in the orange zest, orange extract, and vanilla extract.
- Gradually Add Dry Ingredients: Gradually add the dry ingredients to the wet ingredients, mixing on low speed until just combined. Do not overmix.
- Stir in White Chocolate Chips: Gently fold in the white chocolate chips.
- Chill the Dough: Cover the bowl with plastic wrap and chill the dough in the refrigerator for at least 1 hour, or preferably 2-3 hours (or overnight).
- Preheat Oven: Preheat your oven to 350°F (175°C). Line baking sheets with parchment paper or silicone baking mats.
- Scoop and Arrange Dough: Use a cookie scoop or spoon to drop rounded tablespoons of dough onto the prepared baking sheets, leaving about 2 inches between each cookie.
- Bake: Bake for 10-12 minutes, or until the edges are lightly golden brown and the centers are set.
- Cool: Let the cookies cool on the baking sheets for a few minutes before transferring them to a wire rack to cool completely.
- Cream Butter: In a large bowl (or the bowl of a stand mixer fitted with the paddle attachment), cream the softened butter until smooth and fluffy (2-3 minutes).
- Gradually Add Powdered Sugar: Gradually add the powdered sugar, one cup at a time, mixing on low speed until combined. Scrape down the sides of the bowl frequently.
- Add Heavy Cream and Extracts: Add the heavy cream, orange extract, and vanilla extract. Beat on medium speed until light and fluffy.
- Add Food Coloring: Add a few drops of orange food coloring (gel preferred) and mix until you achieve your desired shade of orange.
- Whip: Whip the frosting for an additional minute or two until it is light and airy.
- Pair Cookies: Once the cookies are completely cooled, pair them up by size and shape.
- Frost Cookies: Spread a generous amount of the creamsicle filling onto the flat side of one cookie.
- Sandwich: Top with the flat side of another cookie, gently pressing down to create a sandwich.
- Chill (Optional): For best results, chill the assembled cookies in the refrigerator for at least 30 minutes before serving.
- Serve: Serve and enjoy your delicious Creamsicle Orange Cookies!
Notes
- Chilling the cookie dough is crucial to prevent excessive spreading during baking.
- Don’t overmix the cookie dough after adding the dry ingredients, as this can result in tough cookies.
- Use gel food coloring for the filling for a more vibrant color.
- Store assembled cookies in an airtight container in the refrigerator for up to 3 days.