Crispy chicken cannellini beans pesto prepare to be amazed! This isn’t just another weeknight dinner; it’s a flavor explosion that will have everyone at the table asking for seconds. Imagine succulent, crispy-skinned chicken nestled amongst creamy cannellini beans, all bathed in a vibrant, herbaceous pesto. Sounds divine, right?
While pesto’s origins are firmly rooted in Genoa, Italy, the combination of chicken, beans, and pesto is a delightful example of how culinary traditions evolve and adapt. This dish beautifully marries the rustic simplicity of Italian comfort food with a modern twist. Its a celebration of fresh ingredients and bold flavors.
What makes this crispy chicken cannellini beans pesto so irresistible? Its the perfect balance of textures the satisfying crunch of the chicken skin, the smooth creaminess of the beans, and the vibrant, slightly oily pesto. The taste is equally captivating, with the savory chicken complementing the earthy beans and the bright, herbaceous pesto tying everything together. Plus, it’s surprisingly easy to make, making it a fantastic option for busy weeknights when you crave something delicious and satisfying without spending hours in the kitchen. I know you’ll love this recipe as much as I do!

Ingredients:
- For the Crispy Chicken:
- 4 boneless, skinless chicken breasts (about 6 oz each)
- 1 cup all-purpose flour
- 2 large eggs, beaten
- 2 cups panko breadcrumbs
- 1 teaspoon garlic powder
- 1 teaspoon onion powder
- 1/2 teaspoon paprika
- 1/4 teaspoon cayenne pepper (optional, for a little heat)
- Salt and freshly ground black pepper to taste
- 1/2 cup olive oil, for frying
- For the Cannellini Bean Base:
- 2 tablespoons olive oil
- 1 medium yellow onion, finely chopped
- 2 cloves garlic, minced
- 2 (15-ounce) cans cannellini beans, rinsed and drained
- 1 cup chicken broth
- 1/2 cup dry white wine (optional, but adds great flavor)
- 1 teaspoon dried thyme
- 1/2 teaspoon dried rosemary
- Salt and freshly ground black pepper to taste
- 1/4 cup grated Parmesan cheese, plus more for garnish
- For the Pesto:
- 2 cups fresh basil leaves, packed
- 1/2 cup grated Parmesan cheese
- 1/3 cup pine nuts, toasted
- 2 cloves garlic
- 1/2 cup extra virgin olive oil
- Salt and freshly ground black pepper to taste
- Optional Garnishes:
- Fresh basil leaves
- Red pepper flakes
- Lemon wedges
Preparing the Pesto:
First things first, let’s whip up that vibrant pesto! You can use store-bought pesto if you’re short on time, but trust me, homemade pesto is SO much better. It’s incredibly easy, and the fresh flavors really make a difference.
- Toast the Pine Nuts: In a dry skillet over medium heat, toast the pine nuts for 3-5 minutes, or until they are lightly golden and fragrant. Watch them carefully, as they can burn quickly! Remove from the skillet and let them cool slightly.
- Combine Ingredients: In a food processor, combine the fresh basil leaves, Parmesan cheese, toasted pine nuts, and garlic cloves.
- Process and Stream in Oil: Pulse the food processor a few times to coarsely chop the ingredients. Then, with the food processor running, slowly drizzle in the extra virgin olive oil until the pesto is smooth and creamy.
- Season to Taste: Season the pesto with salt and freshly ground black pepper to taste. Give it a good pulse to incorporate the seasoning.
- Set Aside: Transfer the pesto to a small bowl and set aside. You can store it in the refrigerator for up to 3 days, but be sure to cover it tightly with plastic wrap to prevent it from browning. A thin layer of olive oil on top also helps!
Preparing the Crispy Chicken:
Now, let’s get that chicken nice and crispy! This is where the magic happens. The key is to use the breading station method flour, egg, and then panko breadcrumbs. The panko breadcrumbs are what give the chicken that amazing crunch.
- Prepare the Chicken: Pat the chicken breasts dry with paper towels. This helps the breading adhere better. If the chicken breasts are very thick, you can pound them to an even thickness (about 1/2 inch) using a meat mallet. This ensures they cook evenly.
- Set Up the Breading Station: Set up three shallow dishes. In the first dish, place the all-purpose flour. In the second dish, whisk the eggs. In the third dish, combine the panko breadcrumbs, garlic powder, onion powder, paprika, cayenne pepper (if using), salt, and pepper.
- Bread the Chicken: Dredge each chicken breast in the flour, making sure to coat it evenly. Shake off any excess flour. Then, dip the chicken breast in the beaten eggs, allowing the excess to drip off. Finally, dredge the chicken breast in the panko breadcrumb mixture, pressing gently to ensure the breadcrumbs adhere well.
- Heat the Oil: In a large skillet, heat the olive oil over medium-high heat. You want the oil to be hot enough to sizzle when you add the chicken, but not so hot that it burns the breadcrumbs.
- Fry the Chicken: Carefully place the breaded chicken breasts in the hot oil, being careful not to overcrowd the skillet. Cook for 5-7 minutes per side, or until the chicken is golden brown and cooked through. The internal temperature of the chicken should reach 165°F (74°C).
- Drain the Chicken: Remove the cooked chicken breasts from the skillet and place them on a wire rack lined with paper towels to drain off any excess oil. This helps keep them crispy!
Preparing the Cannellini Bean Base:
While the chicken is frying, let’s get started on the cannellini bean base. This is a simple but flavorful dish that complements the crispy chicken and pesto perfectly. The white wine adds a nice depth of flavor, but you can omit it if you prefer.
- Sauté the Onion and Garlic: In a large skillet or pot, heat the olive oil over medium heat. Add the chopped onion and cook for 5-7 minutes, or until softened and translucent. Add the minced garlic and cook for another minute, or until fragrant. Be careful not to burn the garlic!
- Add the Beans and Broth: Add the rinsed and drained cannellini beans, chicken broth, and white wine (if using) to the skillet. Stir to combine.
- Season and Simmer: Season the mixture with dried thyme, dried rosemary, salt, and freshly ground black pepper to taste. Bring to a simmer and cook for 10-15 minutes, or until the flavors have melded together and the sauce has thickened slightly.
- Mash Some of the Beans (Optional): For a creamier texture, you can use a potato masher or the back of a spoon to lightly mash some of the cannellini beans. This will help thicken the sauce even further.
- Stir in Parmesan Cheese: Stir in the grated Parmesan cheese until it is melted and incorporated into the sauce.
Assembling the Dish:
Now for the best part putting it all together! This is where all your hard work pays off. The combination of the crispy chicken, creamy cannellini beans, and vibrant pesto is simply divine.
- Spoon the Cannellini Bean Base: Spoon a generous amount of the cannellini bean base onto each plate.
- Top with Crispy Chicken: Place a crispy chicken breast on top of the cannellini beans.
- Drizzle with Pesto: Drizzle the chicken with a generous amount of the homemade pesto.
- Garnish (Optional): Garnish with fresh basil leaves, red pepper flakes (for a little heat), and a sprinkle of Parmesan cheese. Serve with lemon wedges, if desired.
- Serve Immediately: Serve immediately and enjoy! This dish is best served hot, so don’t let it sit around for too long.
Tips and Variations:
- Make it Gluten-Free: To make this dish gluten-free, use gluten-free all-purpose flour and gluten-free panko breadcrumbs.
- Add Vegetables: Feel free to add other vegetables to the cannellini bean base, such as chopped carrots, celery, or spinach.
- Use Different Beans: You can substitute other types of beans for the cannellini beans, such as great northern beans or navy beans.
- Spice it Up: Add a pinch of red pepper flakes to the cannellini bean base or the pesto for a little extra heat.
- Make it Ahead: You can prepare the pesto and the cannellini bean base ahead of time. Store them separately in the refrigerator and reheat the cannellini bean base before serving. The chicken is best served fresh, but you can bread it ahead of time and store it in the refrigerator until you’re ready to cook it.
Enjoy!
I hope you enjoy this Crispy Chicken with Cannellini Beans and Pesto recipe as much as I do! It’s a delicious and satisfying meal that’s perfect for a weeknight dinner or a special occasion. Don’t be afraid to experiment with the ingredients and make it your own. Happy
Conclusion:
This Crispy Chicken Cannellini Beans Pesto recipe is truly a game-changer, and I genuinely believe it deserves a spot in your regular dinner rotation. Why? Because it effortlessly combines the comfort of crispy chicken with the freshness of pesto and the heartiness of cannellini beans, creating a symphony of flavors and textures that will tantalize your taste buds. It’s quick enough for a weeknight meal but impressive enough to serve to guests. It’s a win-win!
Think about it: juicy, perfectly cooked chicken with a golden-brown, crispy exterior, nestled amongst creamy cannellini beans bathed in vibrant, homemade (or store-bought, no judgment!) pesto. The earthiness of the beans perfectly complements the richness of the pesto and the savory chicken, creating a balanced and satisfying dish that’s both healthy and incredibly delicious. It’s a far cry from boring chicken dinners, I promise you that!
But the best part? This recipe is incredibly versatile. Feel free to experiment with different variations to suit your preferences. For a lighter meal, serve the Crispy Chicken Cannellini Beans Pesto over a bed of fresh arugula or spinach. The peppery greens will add a delightful contrast to the richness of the dish. You could also toss in some roasted vegetables like bell peppers, zucchini, or cherry tomatoes for added color and nutrients.
If you’re feeling adventurous, try using different types of pesto. A sun-dried tomato pesto would add a sweet and tangy twist, while a kale pesto would provide an extra boost of vitamins and minerals. You could even experiment with different types of beans, such as Great Northern beans or chickpeas, depending on what you have on hand.
For serving suggestions, I highly recommend pairing this dish with a simple side salad and some crusty bread for soaking up all that delicious pesto sauce. A glass of crisp white wine, like Sauvignon Blanc or Pinot Grigio, would also be a perfect complement. And if you’re looking for a heartier meal, you could serve it with a side of roasted potatoes or quinoa.
Don’t be afraid to get creative and make this recipe your own! That’s the beauty of cooking, after all. It’s all about experimenting and finding what works best for you and your family.
I’m so confident that you’ll love this Crispy Chicken Cannellini Beans Pesto recipe that I urge you to give it a try. It’s a simple, satisfying, and flavorful meal that’s sure to become a family favorite. And once you’ve made it, I’d love to hear about your experience! Share your photos and comments on social media using [Your Hashtag] or leave a review on the blog. I’m always eager to see your creations and hear your feedback. Happy cooking! I can’t wait to see what you create!
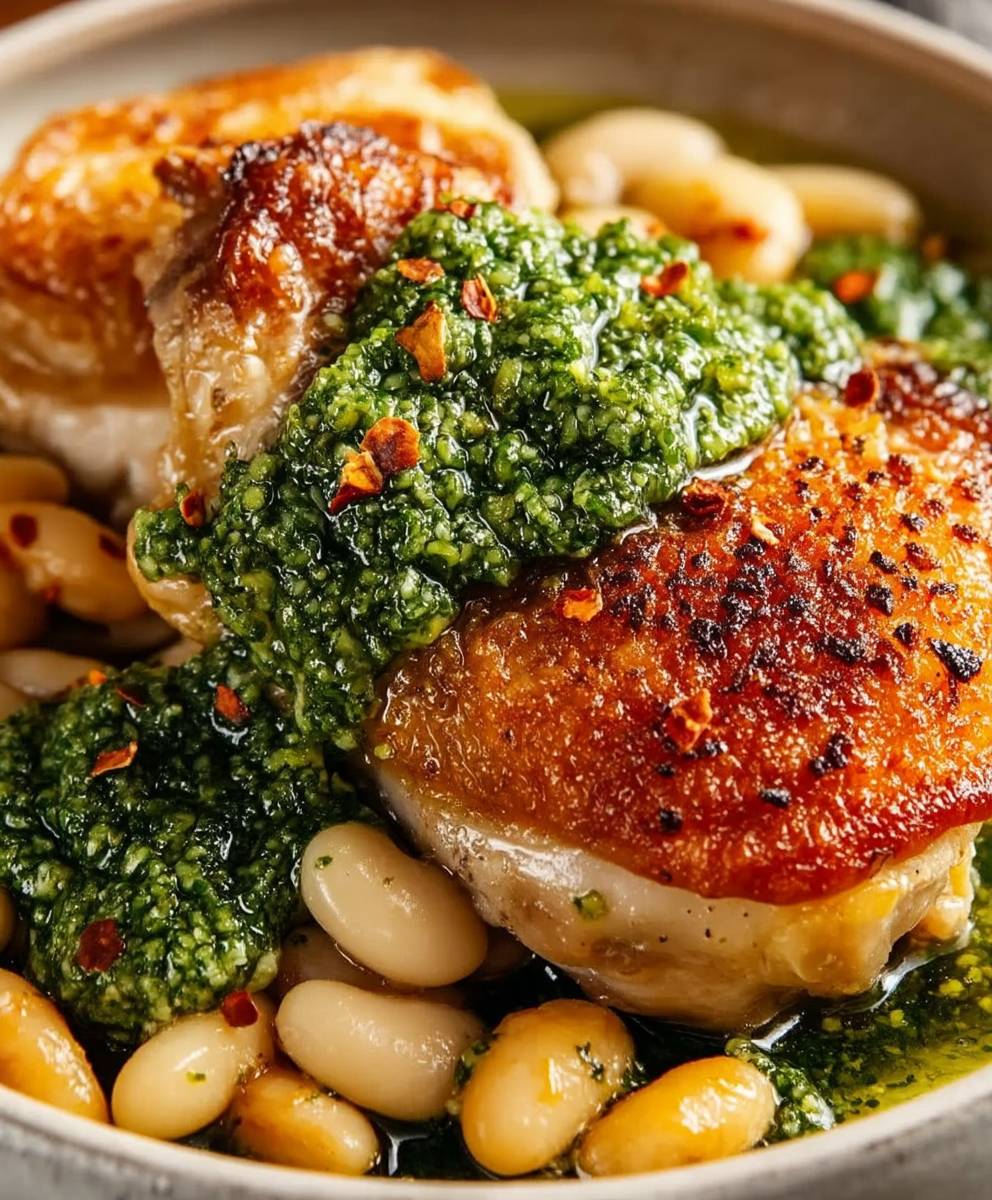
Crispy Chicken Cannellini Beans Pesto: A Delicious & Easy Recipe
Crispy, golden chicken breasts over creamy cannellini beans, drizzled with vibrant homemade pesto. A flavorful, satisfying meal!
Ingredients
- 4 boneless, skinless chicken breasts (about 6 oz each)
- 1 cup all-purpose flour
- 2 large eggs, beaten
- 2 cups panko breadcrumbs
- 1 teaspoon garlic powder
- 1 teaspoon onion powder
- 1/2 teaspoon paprika
- 1/4 teaspoon cayenne pepper (optional, for a little heat)
- Salt and freshly ground black pepper to taste
- 1/2 cup olive oil, for frying
- 2 tablespoons olive oil
- 1 medium yellow onion, finely chopped
- 2 cloves garlic, minced
- 2 (15-ounce) cans cannellini beans, rinsed and drained
- 1 cup chicken broth
- 1/2 cup dry white wine (optional, but adds great flavor)
- 1 teaspoon dried thyme
- 1/2 teaspoon dried rosemary
- Salt and freshly ground black pepper to taste
- 1/4 cup grated Parmesan cheese, plus more for garnish
- 2 cups fresh basil leaves, packed
- 1/2 cup grated Parmesan cheese
- 1/3 cup pine nuts, toasted
- 2 cloves garlic
- 1/2 cup extra virgin olive oil
- Salt and freshly ground black pepper to taste
- Fresh basil leaves
- Red pepper flakes
- Lemon wedges
Instructions
- Prepare the Pesto:
- Toast the Pine Nuts: In a dry skillet over medium heat, toast the pine nuts for 3-5 minutes, or until they are lightly golden and fragrant. Watch them carefully, as they can burn quickly! Remove from the skillet and let them cool slightly.
- Combine Ingredients: In a food processor, combine the fresh basil leaves, Parmesan cheese, toasted pine nuts, and garlic cloves.
- Process and Stream in Oil: Pulse the food processor a few times to coarsely chop the ingredients. Then, with the food processor running, slowly drizzle in the extra virgin olive oil until the pesto is smooth and creamy.
- Season to Taste: Season the pesto with salt and freshly ground black pepper to taste. Give it a good pulse to incorporate the seasoning.
- Set Aside: Transfer the pesto to a small bowl and set aside. You can store it in the refrigerator for up to 3 days, but be sure to cover it tightly with plastic wrap to prevent it from browning. A thin layer of olive oil on top also helps!
- Prepare the Crispy Chicken:
- Prepare the Chicken: Pat the chicken breasts dry with paper towels. This helps the breading adhere better. If the chicken breasts are very thick, you can pound them to an even thickness (about 1/2 inch) using a meat mallet. This ensures they cook evenly.
- Set Up the Breading Station: Set up three shallow dishes. In the first dish, place the all-purpose flour. In the second dish, whisk the eggs. In the third dish, combine the panko breadcrumbs, garlic powder, onion powder, paprika, cayenne pepper (if using), salt, and pepper.
- Bread the Chicken: Dredge each chicken breast in the flour, making sure to coat it evenly. Shake off any excess flour. Then, dip the chicken breast in the beaten eggs, allowing the excess to drip off. Finally, dredge the chicken breast in the panko breadcrumb mixture, pressing gently to ensure the breadcrumbs adhere well.
- Heat the Oil: In a large skillet, heat the olive oil over medium-high heat. You want the oil to be hot enough to sizzle when you add the chicken, but not so hot that it burns the breadcrumbs.
- Fry the Chicken: Carefully place the breaded chicken breasts in the hot oil, being careful not to overcrowd the skillet. Cook for 5-7 minutes per side, or until the chicken is golden brown and cooked through. The internal temperature of the chicken should reach 165°F (74°C).
- Drain the Chicken: Remove the cooked chicken breasts from the skillet and place them on a wire rack lined with paper towels to drain off any excess oil. This helps keep them crispy!
- Prepare the Cannellini Bean Base:
- Sauté the Onion and Garlic: In a large skillet or pot, heat the olive oil over medium heat. Add the chopped onion and cook for 5-7 minutes, or until softened and translucent. Add the minced garlic and cook for another minute, or until fragrant. Be careful not to burn the garlic!
- Add the Beans and Broth: Add the rinsed and drained cannellini beans, chicken broth, and white wine (if using) to the skillet. Stir to combine.
- Season and Simmer: Season the mixture with dried thyme, dried rosemary, salt, and freshly ground black pepper to taste. Bring to a simmer and cook for 10-15 minutes, or until the flavors have melded together and the sauce has thickened slightly.
- Mash Some of the Beans (Optional): For a creamier texture, you can use a potato masher or the back of a spoon to lightly mash some of the cannellini beans. This will help thicken the sauce even further.
- Stir in Parmesan Cheese: Stir in the grated Parmesan cheese until it is melted and incorporated into the sauce.
- Assemble the Dish:
- Spoon the Cannellini Bean Base: Spoon a generous amount of the cannellini bean base onto each plate.
- Top with Crispy Chicken: Place a crispy chicken breast on top of the cannellini beans.
- Drizzle with Pesto: Drizzle the chicken with a generous amount of the homemade pesto.
- Garnish (Optional): Garnish with fresh basil leaves, red pepper flakes (for a little heat), and a sprinkle of Parmesan cheese. Serve with lemon wedges, if desired.
- Serve Immediately: Serve immediately and enjoy! This dish is best served hot, so don’t let it sit around for too long.
Notes
- To make this dish gluten-free, use gluten-free all-purpose flour and gluten-free panko breadcrumbs.
- Feel free to add other vegetables to the cannellini bean base, such as chopped carrots, celery, or spinach.
- You can substitute other types of beans for the cannellini beans, such as great northern beans or navy beans.
- Add a pinch of red pepper flakes to the cannellini bean base or the pesto for a little extra heat.
- You can prepare the pesto and the cannellini bean base ahead of time. Store them separately in the refrigerator and reheat the cannellini bean base before serving. The chicken is best served fresh, but you can bread it ahead of time and store it in the refrigerator until you’re ready to cook it.