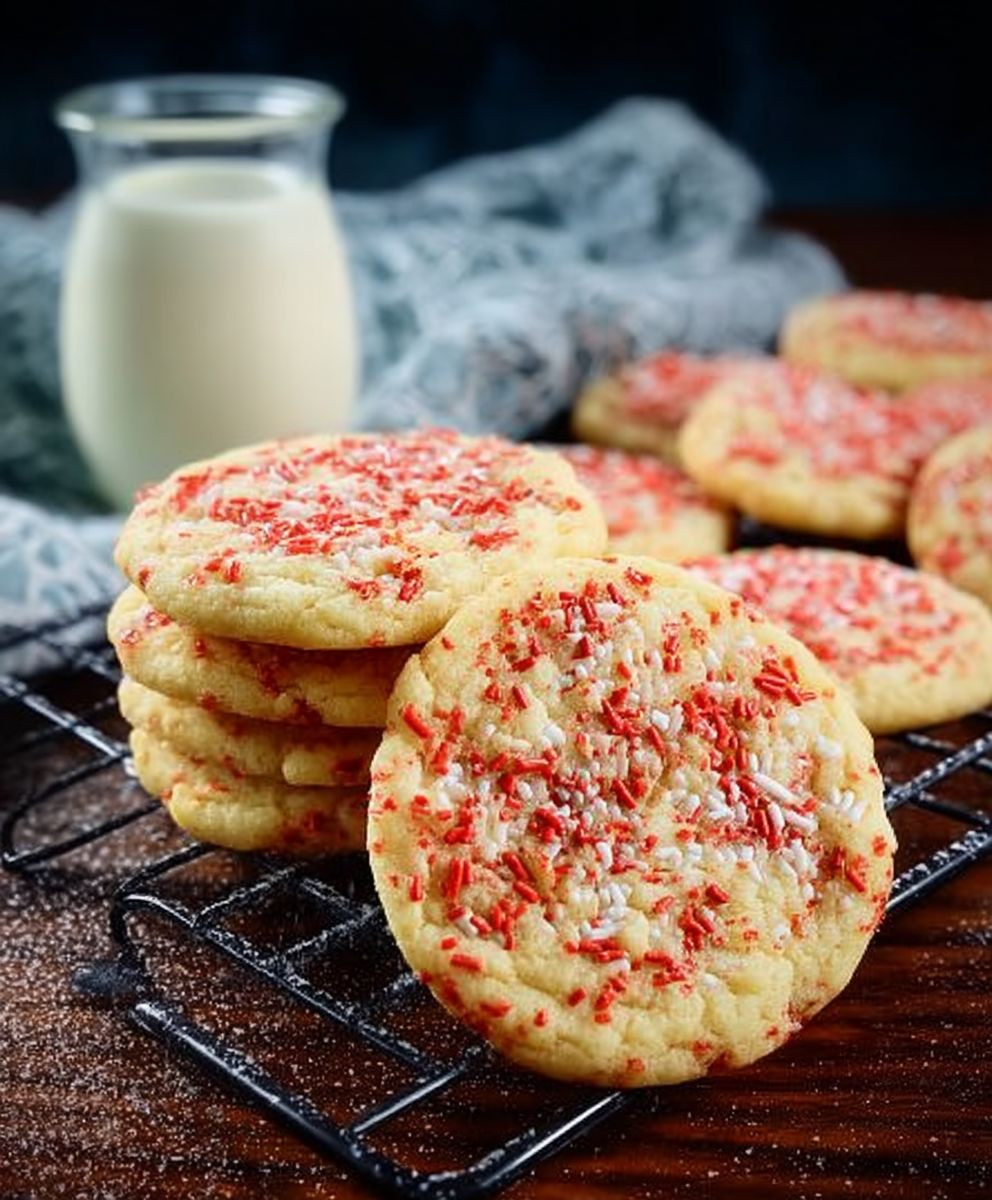
Drop Sugar Cookies: Is there anything more comforting than the aroma of freshly baked sugar cookies wafting through your home? I think not! These aren’t just any cookies; they’re a slice of pure, unadulterated joy, perfect for any occasion, or, let’s be honest, no occasion at all. I’m going to share my favorite recipe with you.
Sugar cookies, in their various forms, have a rich history, tracing back to medieval times. Early versions were often spiced and used as festive treats during celebrations. Over time, they evolved into the sweet, buttery delights we know and love today. The simplicity of the ingredients and the endless possibilities for decoration have cemented their place as a beloved classic.
What makes drop sugar cookies so irresistible? It’s the perfect balance of textures a slightly crisp edge giving way to a soft, chewy center. The subtle sweetness is satisfying without being overwhelming, making them ideal for pairing with a cup of coffee, tea, or a cold glass of milk. Plus, they’re incredibly easy to make! No rolling or cutting required, just simple dropping onto a baking sheet. This makes them a fantastic option for beginner bakers or anyone looking for a quick and delicious treat. Get ready to experience the magic of homemade sugar cookies you won’t be disappointed!

Ingredients:
- For the Cookies:
- 1 cup (2 sticks) unsalted butter, softened
- 1 ½ cups granulated sugar
- 2 large eggs
- 1 teaspoon vanilla extract
- 3 cups all-purpose flour
- 1 ½ teaspoons baking powder
- ½ teaspoon baking soda
- ½ teaspoon salt
- For Coating:
- ½ cup granulated sugar, for rolling
Preparing the Dough:
- Cream the Butter and Sugar: In a large mixing bowl, or the bowl of your stand mixer, cream together the softened butter and 1 ½ cups of granulated sugar until light and fluffy. This usually takes about 3-5 minutes. Make sure your butter is properly softened, but not melted, for the best results. You want a smooth, creamy consistency. Scraping down the sides of the bowl occasionally will help ensure everything is evenly mixed.
- Incorporate the Eggs and Vanilla: Beat in the eggs one at a time, mixing well after each addition. Add the vanilla extract and mix until combined. The mixture might look slightly curdled at this point, but don’t worry, it will come together when you add the dry ingredients.
- Combine Dry Ingredients: In a separate medium bowl, whisk together the flour, baking powder, baking soda, and salt. Whisking ensures that the baking powder and baking soda are evenly distributed throughout the flour, which is crucial for proper leavening.
- Gradually Add Dry Ingredients to Wet Ingredients: Gradually add the dry ingredients to the wet ingredients, mixing on low speed until just combined. Be careful not to overmix the dough, as this can develop the gluten in the flour and result in tough cookies. Mix until the flour is just incorporated, and then stop. A few streaks of flour are okay at this point.
- Chill the Dough: Cover the bowl with plastic wrap and refrigerate the dough for at least 1 hour, or preferably 2-3 hours. Chilling the dough is essential for preventing the cookies from spreading too much during baking. It also allows the flavors to meld together and makes the dough easier to handle. You can even chill the dough overnight for even better results.
Baking the Cookies:
- Preheat Oven and Prepare Baking Sheets: Preheat your oven to 375°F (190°C). Line baking sheets with parchment paper or silicone baking mats. This will prevent the cookies from sticking and make cleanup easier.
- Shape the Cookies: Remove the chilled dough from the refrigerator. Using a cookie scoop or a spoon, drop rounded tablespoons of dough into the ½ cup of granulated sugar, rolling to coat completely. Place the sugar-coated dough balls onto the prepared baking sheets, leaving about 2 inches between each cookie to allow for spreading.
- Bake the Cookies: Bake for 8-10 minutes, or until the edges are lightly golden brown and the centers are set. The baking time may vary depending on your oven, so keep a close eye on the cookies. You want them to be golden brown around the edges but still soft in the center.
- Cool the Cookies: Remove the baking sheets from the oven and let the cookies cool on the baking sheets for a few minutes before transferring them to a wire rack to cool completely. This prevents them from breaking while they are still soft.
Tips and Variations:
Here are some tips and variations to help you customize your drop sugar cookies:
- Soft Butter is Key: Make sure your butter is softened to room temperature before creaming it with the sugar. This will ensure that the cookies have a light and airy texture.
- Don’t Overmix: Overmixing the dough can result in tough cookies. Mix the dry ingredients into the wet ingredients until just combined.
- Chill the Dough: Chilling the dough is essential for preventing the cookies from spreading too much during baking.
- Use Parchment Paper: Lining your baking sheets with parchment paper will prevent the cookies from sticking and make cleanup easier.
- Vary the Extracts: Experiment with different extracts, such as almond extract, lemon extract, or peppermint extract, to add different flavors to your cookies.
- Add Sprinkles: Before baking, sprinkle the sugar-coated cookies with sprinkles for a festive touch.
- Make Them Gluten-Free: Substitute the all-purpose flour with a gluten-free all-purpose flour blend for a gluten-free version of these cookies.
- Add Citrus Zest: Add the zest of one lemon or orange to the dough for a bright, citrusy flavor.
- Chocolate Chips: Fold in ½ cup of chocolate chips to the dough for a chocolatey twist.
- Nuts: Add ½ cup of chopped nuts, such as pecans or walnuts, to the dough for added texture and flavor.
Storage Instructions:
Store the cooled cookies in an airtight container at room temperature for up to 5 days. You can also freeze the cookies for up to 2 months. To freeze, place the cooled cookies in a single layer on a baking sheet and freeze until solid. Then, transfer the frozen cookies to a freezer-safe bag or container. Thaw the cookies at room temperature before serving.
Troubleshooting:
Cookies are spreading too much:
- Make sure you chilled the dough for the recommended amount of time.
- Your oven temperature may be too low. Use an oven thermometer to ensure your oven is properly calibrated.
- You may have used too much butter or sugar. Measure your ingredients carefully.
Cookies are too dry:
- You may have overbaked the cookies. Reduce the baking time by a minute or two.
- You may have used too much flour. Measure your ingredients carefully.
Cookies are too tough:
- You may have overmixed the dough. Mix the dry ingredients into the wet ingredients until just combined.
- You may have used too much flour. Measure your ingredients carefully.
Enjoying Your Cookies:
These drop sugar cookies are perfect for any occasion. Enjoy them with a glass of milk, a cup of coffee, or as a sweet treat after dinner. They are also great for sharing with friends and family. I hope you enjoy making and eating these delicious cookies as much as I do!
Conclusion:
And there you have it! These Drop Sugar Cookies are truly a must-try for anyone who loves a simple, satisfying, and utterly delicious treat. From their incredibly easy preparation to their melt-in-your-mouth texture, they’re guaranteed to become a new family favorite. I know they have in my house! The subtle sweetness and delicate vanilla flavor make them perfect for any occasion, whether it’s a cozy afternoon snack, a festive holiday gathering, or simply a little something to brighten your day.
But what truly sets these cookies apart is their versatility. While they’re absolutely divine as is, there are so many ways to customize them to your liking. Feeling festive? Add a few drops of food coloring to the dough for vibrant, holiday-themed cookies. Want a little extra crunch? Sprinkle some coarse sugar on top before baking. Craving a richer flavor? Try using brown butter instead of regular melted butter for a nutty, caramel-like depth.
For serving suggestions, the possibilities are endless! These cookies are wonderful on their own with a glass of cold milk or a cup of hot coffee. They also pair beautifully with a scoop of vanilla ice cream for a simple yet elegant dessert. Or, get creative and use them to make ice cream sandwiches! Another fun idea is to crumble them over yogurt or fruit salad for a touch of sweetness and texture.
And don’t forget about decorating! While these cookies are delicious plain, they’re also the perfect blank canvas for your artistic talents. Once they’ve cooled completely, you can frost them with your favorite buttercream or royal icing and decorate them with sprinkles, candies, or edible glitter. This is a great activity to do with kids, and it’s a fun way to personalize your cookies for any occasion.
I’ve found that a simple glaze made from powdered sugar and milk, with a hint of vanilla extract, works wonders. Just whisk together the ingredients until smooth and drizzle it over the cooled cookies. The glaze will harden slightly, creating a beautiful sheen and adding an extra layer of sweetness.
Beyond the basic recipe, consider these variations:
* Lemon Zest: Add the zest of one lemon to the dough for a bright, citrusy twist.
* Almond Extract: Substitute almond extract for the vanilla extract for a nutty, slightly floral flavor.
* Chocolate Chips: Fold in a cup of mini chocolate chips for a chocolatey surprise.
* Spiced Sugar Cookies: Add a teaspoon of cinnamon, nutmeg, or ginger to the dough for a warm, comforting flavor.
I truly believe that everyone should have a go-to sugar cookie recipe, and I’m confident that this one will become yours. It’s simple, reliable, and yields consistently delicious results. Plus, it’s so adaptable that you can easily customize it to suit your own taste preferences.
So, what are you waiting for? Preheat your oven, gather your ingredients, and get ready to bake up a batch of these irresistible Drop Sugar Cookies. I promise you won’t be disappointed!
And most importantly, I’d love to hear about your experience! Once you’ve tried the recipe, please come back and leave a comment below. Let me know what you thought, what variations you tried, and any tips or tricks you discovered along the way. Sharing your feedback helps me improve the recipe and also inspires other bakers to give it a try. Happy baking! I can’t wait to see your creations!
Drop Sugar Cookies: The Ultimate Guide to Baking Perfect Cookies
Classic drop sugar cookies, perfectly sweet and soft with a delightful sugary coating. Easy to make and customizable with your favorite flavors!
Ingredients
- 1 cup (2 sticks) unsalted butter, softened
- 1 ½ cups granulated sugar
- 2 large eggs
- 1 teaspoon vanilla extract
- 3 cups all-purpose flour
- 1 ½ teaspoons baking powder
- ½ teaspoon baking soda
- ½ teaspoon salt
- ½ cup granulated sugar, for rolling
Instructions
- Cream the Butter and Sugar: In a large mixing bowl, or the bowl of your stand mixer, cream together the softened butter and 1 ½ cups of granulated sugar until light and fluffy. This usually takes about 3-5 minutes. Make sure your butter is properly softened, but not melted, for the best results. You want a smooth, creamy consistency. Scraping down the sides of the bowl occasionally will help ensure everything is evenly mixed.
- Incorporate the Eggs and Vanilla: Beat in the eggs one at a time, mixing well after each addition. Add the vanilla extract and mix until combined. The mixture might look slightly curdled at this point, but don’t worry, it will come together when you add the dry ingredients.
- Combine Dry Ingredients: In a separate medium bowl, whisk together the flour, baking powder, baking soda, and salt. Whisking ensures that the baking powder and baking soda are evenly distributed throughout the flour, which is crucial for proper leavening.
- Gradually Add Dry Ingredients to Wet Ingredients: Gradually add the dry ingredients to the wet ingredients, mixing on low speed until just combined. Be careful not to overmix the dough, as this can develop the gluten in the flour and result in tough cookies. Mix until the flour is just incorporated, and then stop. A few streaks of flour are okay at this point.
- Chill the Dough: Cover the bowl with plastic wrap and refrigerate the dough for at least 1 hour, or preferably 2-3 hours. Chilling the dough is essential for preventing the cookies from spreading too much during baking. It also allows the flavors to meld together and makes the dough easier to handle. You can even chill the dough overnight for even better results.
- Preheat Oven and Prepare Baking Sheets: Preheat your oven to 375°F (190°C). Line baking sheets with parchment paper or silicone baking mats. This will prevent the cookies from sticking and make cleanup easier.
- Shape the Cookies: Remove the chilled dough from the refrigerator. Using a cookie scoop or a spoon, drop rounded tablespoons of dough into the ½ cup of granulated sugar, rolling to coat completely. Place the sugar-coated dough balls onto the prepared baking sheets, leaving about 2 inches between each cookie to allow for spreading.
- Bake the Cookies: Bake for 8-10 minutes, or until the edges are lightly golden brown and the centers are set. The baking time may vary depending on your oven, so keep a close eye on the cookies. You want them to be golden brown around the edges but still soft in the center.
- Cool the Cookies: Remove the baking sheets from the oven and let the cookies cool on the baking sheets for a few minutes before transferring them to a wire rack to cool completely. This prevents them from breaking while they are still soft.
Notes
- Soft Butter is Key: Make sure your butter is softened to room temperature before creaming it with the sugar. This will ensure that the cookies have a light and airy texture.
- Don’t Overmix: Overmixing the dough can result in tough cookies. Mix the dry ingredients into the wet ingredients until just combined.
- Chill the Dough: Chilling the dough is essential for preventing the cookies from spreading too much during baking.
- Use Parchment Paper: Lining your baking sheets with parchment paper will prevent the cookies from sticking and make cleanup easier.
- Vary the Extracts: Experiment with different extracts, such as almond extract, lemon extract, or peppermint extract, to add different flavors to your cookies.
- Add Sprinkles: Before baking, sprinkle the sugar-coated cookies with sprinkles for a festive touch.
- Make Them Gluten-Free: Substitute the all-purpose flour with a gluten-free all-purpose flour blend for a gluten-free version of these cookies.
- Add Citrus Zest: Add the zest of one lemon or orange to the dough for a bright, citrusy flavor.
- Chocolate Chips: Fold in ½ cup of chocolate chips to the dough for a chocolatey twist.
- Nuts: Add ½ cup of chopped nuts, such as pecans or walnuts, to the dough for added texture and flavor.
- Storage Instructions: Store the cooled cookies in an airtight container at room temperature for up to 5 days. You can also freeze the cookies for up to 2 months. To freeze, place the cooled cookies in a single layer on a baking sheet and freeze until solid. Then, transfer the frozen cookies to a freezer-safe bag or container. Thaw the cookies at room temperature before serving.
- Cookies are spreading too much: Make sure you chilled the dough for the recommended amount of time. Your oven temperature may be too low. Use an oven thermometer to ensure your oven is properly calibrated. You may have used too much butter or sugar. Measure your ingredients carefully.
- Cookies are too dry: You may have overbaked the cookies. Reduce the baking time by a minute or two. You may have used too much flour. Measure your ingredients carefully.
- Cookies are too tough: You may have overmixed the dough. Mix the dry ingredients into the wet ingredients until just combined. You may have used too much flour. Measure your ingredients carefully.