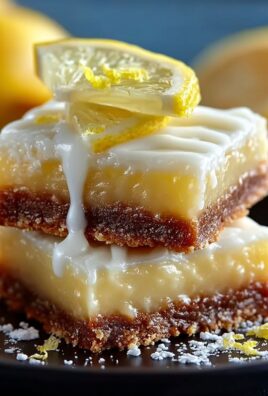
Easter Nest Tarts: Aren’t they just the cutest little treats you’ve ever seen? Imagine presenting a platter of these adorable, edible nests filled with colorful candy eggs at your Easter celebration. They’re guaranteed to be a showstopper!
While the exact origins of Easter Nest Tarts are a little fuzzy, the concept of edible nests has been around for centuries, often symbolizing new beginnings and the arrival of spring. Many cultures incorporate egg-shaped sweets into their Easter traditions, representing rebirth and the promise of life. These tarts are a delightful modern twist on that theme.
What’s not to love about these miniature masterpieces? The buttery, crumbly tart shell provides the perfect base for a sweet and often chocolatey filling. Then comes the fun part: decorating! The “nest” is typically crafted from shredded coconut, chow mein noodles, or even chocolate shavings, creating a visually appealing and texturally interesting element. And of course, the colorful candy eggs nestled inside add a burst of sweetness and a playful touch. Easter Nest Tarts are not only delicious but also incredibly fun to make, especially with kids. They’re the perfect way to add a touch of whimsy and sweetness to your Easter festivities. So, let’s get baking!

Ingredients:
- For the Sweet Pastry:
- 250g plain flour, plus extra for dusting
- 125g cold unsalted butter, cubed
- 50g icing sugar
- 1 large egg yolk
- 2-3 tbsp ice cold water
- For the Chocolate Ganache Filling:
- 200g dark chocolate (70% cocoa solids), finely chopped
- 200ml double cream
- 25g unsalted butter
- 1 tbsp golden syrup
- For the Decoration:
- Mini chocolate eggs (various colours and sizes)
- Edible glitter (optional)
Making the Sweet Pastry
- Prepare the Flour and Butter: First, grab a large mixing bowl. Sift the flour into the bowl to get rid of any lumps. Then, add the cold, cubed butter. The key here is to keep the butter as cold as possible, so work quickly!
- Rub the Butter into the Flour: Using your fingertips, rub the butter into the flour until the mixture resembles fine breadcrumbs. You can also use a food processor for this step if you prefer. Just pulse until you get the right consistency. Be careful not to over-process!
- Add the Icing Sugar: Now, stir in the icing sugar. This will add sweetness and help create a delicate, melt-in-your-mouth texture.
- Incorporate the Egg Yolk: Make a well in the center of the flour mixture and add the egg yolk. The egg yolk adds richness and helps bind the pastry together.
- Add the Cold Water: Gradually add the ice-cold water, one tablespoon at a time, mixing with a knife or your fingertips until the dough just comes together. Be careful not to add too much water, as this will make the pastry tough. You want a dough that is moist enough to hold together but not sticky.
- Form the Dough: Gently bring the dough together into a ball. Don’t knead it! Over-kneading will develop the gluten and make the pastry tough.
- Chill the Dough: Flatten the dough into a disc, wrap it in cling film, and chill in the refrigerator for at least 30 minutes. This allows the gluten to relax and the butter to firm up, which will result in a tender, flaky pastry. You can chill it for longer, even overnight, if you need to.
Preparing the Tart Cases
- Preheat the Oven: Preheat your oven to 180°C (160°C fan/Gas Mark 4). Get a baking tray ready.
- Roll Out the Pastry: Lightly flour a clean work surface. Remove the pastry from the refrigerator and roll it out to a thickness of about 3mm. Rotate the pastry as you roll to ensure it doesn’t stick to the surface.
- Cut Out the Pastry: Using a round cutter (slightly larger than the diameter of your tart tins), cut out circles of pastry. You’ll need enough circles to line all your tart tins.
- Line the Tart Tins: Gently press the pastry circles into the tart tins, making sure to push the pastry into the corners and up the sides. Trim off any excess pastry with a sharp knife.
- Prick the Bases: Prick the bases of the pastry cases with a fork. This will prevent them from puffing up during baking.
- Blind Bake the Tart Cases: Line the pastry cases with baking parchment and fill with baking beans or dried rice. This will weigh down the pastry and prevent it from shrinking. Bake for 15 minutes.
- Remove the Baking Beans: Carefully remove the baking parchment and baking beans. Return the tart cases to the oven and bake for a further 5-10 minutes, or until they are golden brown.
- Cool the Tart Cases: Remove the tart cases from the oven and allow them to cool completely in the tins before removing them.
Making the Chocolate Ganache Filling
- Chop the Chocolate: Finely chop the dark chocolate and place it in a heatproof bowl. Make sure the chocolate is finely chopped so it melts evenly.
- Heat the Cream: In a saucepan, heat the double cream and golden syrup over medium heat until it just comes to a simmer. Don’t let it boil!
- Pour the Cream over the Chocolate: Pour the hot cream over the chopped chocolate. Let it sit for a minute to allow the heat to melt the chocolate.
- Stir Until Smooth: Gently stir the mixture until the chocolate is completely melted and the ganache is smooth and glossy.
- Add the Butter: Add the butter to the ganache and stir until it is melted and fully incorporated. The butter will add richness and shine to the ganache.
- Cool Slightly: Allow the ganache to cool slightly before filling the tart cases. This will prevent the pastry from becoming soggy.
Assembling and Decorating the Easter Nest Tarts
- Fill the Tart Cases: Spoon the chocolate ganache into the cooled tart cases, filling them almost to the top.
- Arrange the Chocolate Eggs: Arrange the mini chocolate eggs on top of the ganache, creating a “nest” effect. Use a variety of colours and sizes for a more visually appealing result.
- Add Edible Glitter (Optional): If desired, sprinkle a little edible glitter over the chocolate eggs for a touch of sparkle.
- Chill the Tarts: Place the tarts in the refrigerator for at least 30 minutes to allow the ganache to set. This will make them easier to handle and prevent the eggs from sliding off.
- Serve and Enjoy: Remove the tarts from the refrigerator about 15 minutes before serving. This will allow the ganache to soften slightly and enhance the flavour. Enjoy your delicious Easter Nest Tarts!
Conclusion:
So, there you have it! These Easter Nest Tarts are more than just a dessert; they’re a little bite of springtime joy. From the buttery, crumbly tart shell to the rich, chocolatey filling and the adorable candy egg topping, every element works together to create a truly unforgettable treat. I genuinely believe this recipe is a must-try this Easter season, and here’s why:
Firstly, they’re incredibly easy to make. Don’t let the “tart” part intimidate you! The pastry comes together quickly, and the filling is as simple as melting chocolate and mixing it with cream. Even if you’re not a seasoned baker, you can absolutely nail these. Secondly, they’re visually stunning. Imagine presenting a platter of these adorable nests to your family and friends the “oohs” and “aahs” will be worth every minute spent in the kitchen. And finally, they taste absolutely divine! The combination of textures and flavors is simply irresistible.
Serving Suggestions and Variations
While these Easter Nest Tarts are perfect as is, there’s always room for a little personalization! Here are a few ideas to get your creative juices flowing:
- Fruit Filling: Instead of chocolate, try a lemon curd or a raspberry jam filling for a brighter, more tart flavor.
- Nutty Crunch: Add chopped nuts, such as pecans or walnuts, to the chocolate filling for extra texture and flavor.
- Different Chocolate: Experiment with different types of chocolate! Dark chocolate will give you a richer, more intense flavor, while milk chocolate will be sweeter and creamier. You could even use white chocolate for a completely different look and taste.
- Mini Eggs Galore: Get creative with your candy egg toppings! Use different colors, sizes, and even types of candy eggs to create unique and festive nests.
- Ice Cream Pairing: Serve these tarts warm with a scoop of vanilla ice cream for an extra decadent dessert.
- Coffee Companion: These tarts are the perfect accompaniment to a cup of coffee or tea.
Beyond these suggestions, feel free to experiment and make these Easter Nest Tarts your own! Perhaps you want to add a hint of orange zest to the pastry, or maybe you want to drizzle the finished tarts with melted white chocolate. The possibilities are endless!
I’ve poured my heart into this recipe, and I truly believe it’s a winner. I’m so excited for you to try it and experience the joy of creating these delightful Easter treats. Remember, baking is all about having fun and experimenting, so don’t be afraid to get creative and put your own spin on things.
So, what are you waiting for? Gather your ingredients, preheat your oven, and get ready to bake some magic! I’m confident that these Easter Nest Tarts will become a new family favorite. And most importantly, don’t forget to share your creations with me! I would absolutely love to see your photos and hear about your experiences. You can tag me on social media using [Your Social Media Handle] or leave a comment below. Happy baking, and Happy Easter!
I can’t wait to see all the beautiful and delicious Easter Nest Tarts you create! Let me know if you have any questions along the way, and I’ll be happy to help. Enjoy!
Easter Nest Tarts: A Delicious & Festive Recipe
Decadent mini chocolate tarts with a rich dark chocolate ganache filling, topped with colorful mini chocolate eggs to resemble Easter nests. A delightful and festive treat!
Ingredients
- 250g plain flour, plus extra for dusting
- 125g cold unsalted butter, cubed
- 50g icing sugar
- 1 large egg yolk
- 2-3 tbsp ice cold water
- 200g dark chocolate (70% cocoa solids), finely chopped
- 200ml double cream
- 25g unsalted butter
- 1 tbsp golden syrup
- Mini chocolate eggs (various colors and sizes)
- Edible glitter (optional)
Instructions
- Prepare the Flour and Butter: Sift the flour into a large mixing bowl. Add the cold, cubed butter.
- Rub the Butter into the Flour: Using your fingertips, rub the butter into the flour until the mixture resembles fine breadcrumbs. Alternatively, pulse in a food processor until the right consistency is achieved. Be careful not to over-process.
- Add the Icing Sugar: Stir in the icing sugar.
- Incorporate the Egg Yolk: Make a well in the center of the flour mixture and add the egg yolk.
- Add the Cold Water: Gradually add the ice-cold water, one tablespoon at a time, mixing with a knife or your fingertips until the dough just comes together. Be careful not to add too much water.
- Form the Dough: Gently bring the dough together into a ball. Don’t knead it.
- Chill the Dough: Flatten the dough into a disc, wrap it in cling film, and chill in the refrigerator for at least 30 minutes (or longer, even overnight).
- Preheat the Oven: Preheat your oven to 350°F (180°C). Get a baking tray ready.
- Roll Out the Pastry: Lightly flour a clean work surface. Remove the pastry from the refrigerator and roll it out to a thickness of about 3mm. Rotate the pastry as you roll to ensure it doesn’t stick to the surface.
- Cut Out the Pastry: Using a round cutter (slightly larger than the diameter of your tart tins), cut out circles of pastry. You’ll need enough circles to line all your tart tins.
- Line the Tart Tins: Gently press the pastry circles into the tart tins, making sure to push the pastry into the corners and up the sides. Trim off any excess pastry with a sharp knife.
- Prick the Bases: Prick the bases of the pastry cases with a fork. This will prevent them from puffing up during baking.
- Blind Bake the Tart Cases: Line the pastry cases with baking parchment and fill with baking beans or dried rice. This will weigh down the pastry and prevent it from shrinking. Bake for 15 minutes.
- Remove the Baking Beans: Carefully remove the baking parchment and baking beans. Return the tart cases to the oven and bake for a further 5-10 minutes, or until they are golden brown.
- Cool the Tart Cases: Remove the tart cases from the oven and allow them to cool completely in the tins before removing them.
- Chop the Chocolate: Finely chop the dark chocolate and place it in a heatproof bowl.
- Heat the Cream: In a saucepan, heat the double cream and golden syrup over medium heat until it just comes to a simmer. Don’t let it boil!
- Pour the Cream over the Chocolate: Pour the hot cream over the chopped chocolate. Let it sit for a minute to allow the heat to melt the chocolate.
- Stir Until Smooth: Gently stir the mixture until the chocolate is completely melted and the ganache is smooth and glossy.
- Add the Butter: Add the butter to the ganache and stir until it is melted and fully incorporated.
- Cool Slightly: Allow the ganache to cool slightly before filling the tart cases.
- Fill the Tart Cases: Spoon the chocolate ganache into the cooled tart cases, filling them almost to the top.
- Arrange the Chocolate Eggs: Arrange the mini chocolate eggs on top of the ganache, creating a “nest” effect. Use a variety of colors and sizes for a more visually appealing result.
- Add Edible Glitter (Optional): If desired, sprinkle a little edible glitter over the chocolate eggs for a touch of sparkle.
- Chill the Tarts: Place the tarts in the refrigerator for at least 30 minutes to allow the ganache to set.
- Serve and Enjoy: Remove the tarts from the refrigerator about 15 minutes before serving.
Notes
- Keeping the butter cold is crucial for a flaky pastry.
- Don’t over-knead the pastry dough.
- Blind baking the tart shells prevents them from becoming soggy.
- Allow the ganache to cool slightly before filling the tart shells to prevent the pastry from becoming soggy.
- Chilling the tarts after assembly helps the ganache set and makes them easier to handle.