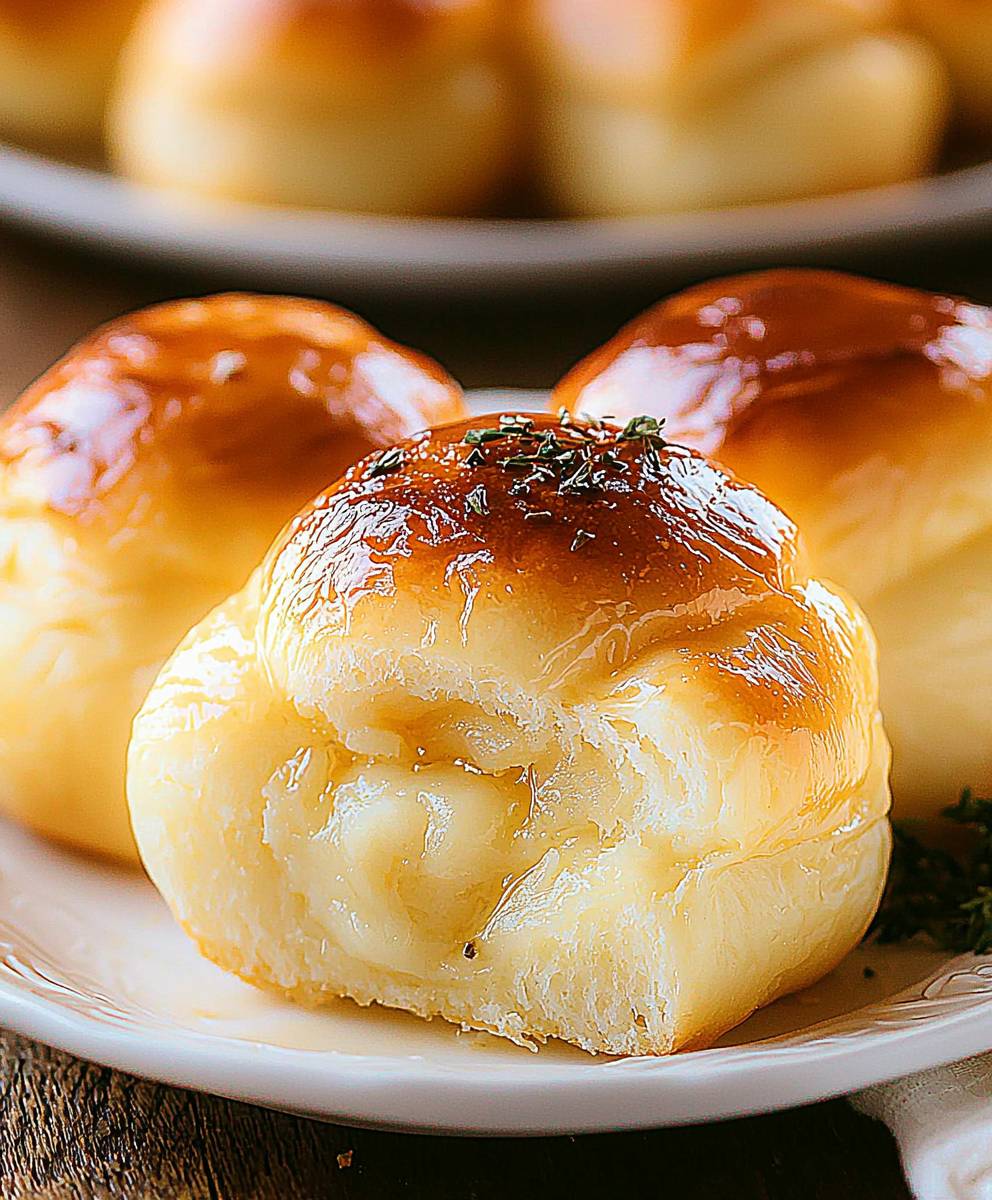
Fluffy Potato Rolls, fresh from the oven, are a simple pleasure that elevates any meal. Imagine sinking your teeth into a warm, pillowy roll, its delicate potato flavor melting in your mouth. Is there anything more comforting? These aren’t just any rolls; they’re a testament to the magic that happens when simple ingredients are combined with a little bit of love and patience.
The history of potato rolls is deeply rooted in resourcefulness. Potatoes, readily available and inexpensive, became a staple ingredient in many cultures, and their inclusion in bread and rolls was a natural progression. They add moisture, tenderness, and a subtle sweetness that you just can’t get with regular wheat flour alone. In some regions, potato rolls are a traditional part of holiday feasts, passed down through generations.
What makes fluffy potato rolls so irresistible? It’s a combination of factors. The texture is undeniably appealing soft, light, and airy. The slight sweetness of the potato complements both savory and sweet dishes beautifully. And let’s be honest, the aroma of freshly baked bread, especially these rolls, is simply intoxicating. Whether you’re serving them alongside a hearty stew, using them for mini sandwiches, or simply enjoying them with a pat of butter, these rolls are guaranteed to be a crowd-pleaser. Get ready to experience the joy of baking and savor the delightful taste of homemade goodness!

Ingredients:
- For the Sponge:
- 1 cup warm milk (105-115°F)
- 2 teaspoons (1 packet) active dry yeast
- 1 tablespoon granulated sugar
- 1 cup all-purpose flour
- For the Dough:
- 2 cups mashed potatoes (cooled, no lumps)
- 1/2 cup granulated sugar
- 1 teaspoon salt
- 1/2 cup (1 stick) unsalted butter, softened
- 2 large eggs, lightly beaten
- 3-4 cups all-purpose flour (plus more for dusting)
- For the Egg Wash:
- 1 large egg
- 1 tablespoon milk
- Optional Topping:
- Melted butter
- Sea salt flakes
Preparing the Sponge
The sponge is the key to creating incredibly light and airy potato rolls. It gives the yeast a head start and develops a wonderful flavor.
- Activate the Yeast: In a large bowl, combine the warm milk, yeast, and 1 tablespoon of sugar. Make sure your milk isn’t too hot, or it will kill the yeast. I usually aim for around 110°F. Give it a gentle stir and let it sit for 5-10 minutes, or until it becomes foamy. This indicates that the yeast is active and ready to go. If it doesn’t foam, your yeast might be old, and you’ll need to start over with fresh yeast.
- Combine with Flour: Once the yeast is foamy, add 1 cup of all-purpose flour to the bowl. Stir until just combined. The mixture will be quite wet and sticky that’s perfectly fine.
- Let it Rest: Cover the bowl with plastic wrap or a clean kitchen towel and let it rest in a warm place for 30 minutes. This allows the yeast to work its magic and create a bubbly, airy sponge. You’ll see it almost double in size.
Making the Potato Dough
Now that our sponge is ready, we can move on to creating the main dough. The mashed potatoes add moisture and a subtle sweetness, resulting in incredibly soft rolls.
- Combine Wet Ingredients: In a large mixing bowl (or the bowl of your stand mixer), combine the cooled mashed potatoes, 1/2 cup of sugar, salt, and softened butter. Make sure your mashed potatoes are completely cooled; otherwise, they could affect the yeast. Mix until everything is well combined and the butter is evenly distributed. I like to use a hand mixer for this step, but you can also do it by hand.
- Add Eggs: Add the lightly beaten eggs to the potato mixture and mix until incorporated. Don’t overmix at this stage.
- Incorporate the Sponge: Add the prepared sponge to the potato mixture. Mix until everything is well combined. The mixture will still be quite sticky at this point.
- Gradually Add Flour: Gradually add the all-purpose flour, one cup at a time, mixing well after each addition. Start with 3 cups and then add more as needed until the dough comes together and pulls away from the sides of the bowl. You might need slightly more or less flour depending on the moisture content of your mashed potatoes and the humidity in your kitchen. The dough should be soft and slightly sticky, but not so sticky that it’s impossible to handle. Aim for a dough that is tacky but not overly wet.
- Knead the Dough: Turn the dough out onto a lightly floured surface. Knead for 5-7 minutes, or until the dough is smooth and elastic. If you’re using a stand mixer, knead with the dough hook attachment for 5-7 minutes on medium speed. The dough should be soft and pliable. If it’s still too sticky, add a little more flour, a tablespoon at a time, until it reaches the desired consistency. Be careful not to add too much flour, or the rolls will be dry.
- First Rise: Place the dough in a lightly oiled bowl, turning to coat all sides. Cover with plastic wrap or a clean kitchen towel and let it rise in a warm place for 1-1.5 hours, or until doubled in size. This is a crucial step for developing the flavor and texture of the rolls. A warm environment helps the yeast to work efficiently.
Shaping and Baking the Rolls
Now comes the fun part shaping the rolls! You can make them any size or shape you like. I prefer to make small, round rolls, but you can also make larger rolls or even braided rolls.
- Punch Down the Dough: Gently punch down the dough to release the air. Turn it out onto a lightly floured surface.
- Divide the Dough: Divide the dough into 12-16 equal pieces, depending on the size you want your rolls to be. I usually aim for 12 rolls for a standard 9×13 inch baking pan.
- Shape the Rolls: To shape the rolls, gently roll each piece of dough into a smooth ball. You can also shape them into oblongs or any other shape you prefer. The key is to create a smooth surface on the top of each roll.
- Second Rise: Place the shaped rolls in a greased 9×13 inch baking pan, leaving a little space between each roll. Cover with plastic wrap or a clean kitchen towel and let them rise in a warm place for 30-45 minutes, or until they have almost doubled in size. This second rise is important for creating a light and airy texture.
- Preheat the Oven: While the rolls are rising, preheat your oven to 375°F (190°C).
- Prepare the Egg Wash: In a small bowl, whisk together the egg and milk to create the egg wash.
- Brush with Egg Wash: Gently brush the tops of the risen rolls with the egg wash. This will give them a beautiful golden-brown color and a slightly shiny finish.
- Optional Topping: If desired, sprinkle the rolls with sea salt flakes before baking. You can also brush them with melted butter after baking for extra flavor and shine.
- Bake the Rolls: Bake for 20-25 minutes, or until the rolls are golden brown and cooked through. The internal temperature should reach 200-210°F (93-99°C). If the tops of the rolls are browning too quickly, you can tent them with foil during the last few minutes of baking.
- Cool and Serve: Remove the rolls from the oven and let them cool in the pan for a few minutes before transferring them to a wire rack to cool completely. Serve warm or at room temperature.
Tips for Perfect Potato Rolls
Here are a few extra tips to ensure your potato rolls turn out perfectly every time:
- Use Good Quality Potatoes: The type of potatoes you use can affect the texture of the rolls. I recommend using Russet potatoes, as they are starchy and create a light and fluffy texture. Avoid using waxy potatoes, as they can make the rolls dense.
- Don’t Overmix the Dough: Overmixing the dough can develop too much gluten, resulting in tough rolls. Mix until just combined, and then knead for the recommended time.
- Proof in a Warm Place: A warm environment is essential for the yeast to work properly. If your kitchen is cold, you can proof the dough in a slightly warmed oven (turned off) or in a microwave with a cup of hot water.
- Don’t Overbake: Overbaking the rolls can make them dry. Bake until they are golden brown and cooked through, but not overly browned.
- Store Properly: Store the cooled rolls in an airtight container at room temperature for up to 3 days, or in the freezer for up to 2 months. To reheat frozen rolls, thaw them overnight in the refrigerator and then warm them in a low oven (300°F/150°C) for a few minutes.
Variations and Additions
Feel free to experiment with different flavors and additions to customize your potato rolls:
- Herbs: Add fresh or dried herbs to the dough for extra flavor. Rosemary, thyme, and sage are all great options.
- Cheese: Add shredded cheese to the dough for cheesy potato rolls. Cheddar, mozzarella
Conclusion:
And there you have it! These Fluffy Potato Rolls are more than just bread; they’re a comforting, melt-in-your-mouth experience that will elevate any meal. I truly believe this recipe is a must-try for anyone who appreciates the simple pleasure of homemade goodness. The subtle sweetness from the potatoes, combined with the incredibly soft and airy texture, makes them utterly irresistible. Forget store-bought rolls once you’ve tasted these, you’ll never go back!
Why are these rolls so special? It’s the perfect balance of ingredients and the careful attention to detail in the process. The potato adds a unique moisture and tenderness that you just can’t achieve with regular flour-based rolls. Plus, the aroma that fills your kitchen as they bake is simply divine. Trust me, your family and friends will be singing your praises!
But the best part is, these rolls are incredibly versatile. Serve them warm with a generous pat of butter for a classic treat. They’re also fantastic alongside soups, stews, and salads. Imagine dipping one of these fluffy clouds into a hearty bowl of chili on a cold winter evening pure bliss!
Looking for some serving suggestions or variations? I’ve got you covered! For a savory twist, try adding a sprinkle of dried herbs like rosemary or thyme to the dough before baking. A touch of garlic powder can also add a delicious depth of flavor. If you’re feeling adventurous, you could even incorporate some grated cheese, like cheddar or Parmesan, for a cheesy delight.
For a sweeter option, brush the tops of the rolls with melted butter and a sprinkle of cinnamon sugar after they come out of the oven. These make a wonderful addition to brunch or a special occasion breakfast. You could even use them to make mini sliders with pulled pork or shredded chicken the possibilities are endless!
Don’t be intimidated by the yeast I promise, this recipe is easier than it looks. Just follow the instructions carefully, and you’ll be rewarded with the most amazing Fluffy Potato Rolls you’ve ever tasted. The key is to be patient and allow the dough to rise properly. This is what gives the rolls their light and airy texture.
I’m so confident that you’ll love this recipe, and I can’t wait to hear about your experience. So, go ahead, gather your ingredients, and get baking! Don’t forget to take pictures of your beautiful creations and share them with me. I’d love to see your variations and hear what you think.
I encourage you to leave a comment below and let me know how your Fluffy Potato Rolls turned out. Did you make any modifications? What did you serve them with? Your feedback is invaluable and helps other bakers who are trying this recipe for the first time.
Happy baking, and enjoy! I hope these rolls bring as much joy to your table as they have to mine. Remember, the best meals are those shared with loved ones, and these rolls are the perfect addition to any gathering. So, get ready to impress your family and friends with your newfound baking skills! I’m sure they’ll be asking for this recipe again and again.
Fluffy Potato Rolls: The Ultimate Guide to Baking Soft, Delicious Rolls
Soft, fluffy potato rolls with a hint of sweetness and incredible texture, thanks to mashed potatoes. Perfect for holidays, sandwiches, or enjoying with butter.
Ingredients
- 1 cup warm milk (105-115°F)
- 2 teaspoons (1 packet) active dry yeast
- 1 tablespoon granulated sugar
- 1 cup all-purpose flour
- 2 cups mashed potatoes (cooled, no lumps)
- 1/2 cup granulated sugar
- 1 teaspoon salt
- 1/2 cup (1 stick) unsalted butter, softened
- 2 large eggs, lightly beaten
- 3-4 cups all-purpose flour (plus more for dusting)
- 1 large egg
- 1 tablespoon milk
- Melted butter
- Sea salt flakes
Instructions
- In a large bowl, combine the warm milk, yeast, and 1 tablespoon of sugar. Stir gently and let sit for 5-10 minutes, or until foamy.
- Add 1 cup of all-purpose flour to the bowl. Stir until just combined.
- Cover the bowl with plastic wrap or a clean kitchen towel and let it rest in a warm place for 30 minutes, or until almost doubled in size.
- In a large mixing bowl (or the bowl of your stand mixer), combine the cooled mashed potatoes, 1/2 cup of sugar, salt, and softened butter. Mix until well combined.
- Add the lightly beaten eggs to the potato mixture and mix until incorporated.
- Add the prepared sponge to the potato mixture. Mix until well combined.
- Gradually add the all-purpose flour, one cup at a time, mixing well after each addition. Start with 3 cups and then add more as needed until the dough comes together and pulls away from the sides of the bowl.
- Turn the dough out onto a lightly floured surface. Knead for 5-7 minutes, or until the dough is smooth and elastic.
- Place the dough in a lightly oiled bowl, turning to coat all sides. Cover with plastic wrap or a clean kitchen towel and let it rise in a warm place for 1-1.5 hours, or until doubled in size.
- Gently punch down the dough to release the air. Turn it out onto a lightly floured surface.
- Divide the dough into 12-16 equal pieces, depending on the size you want your rolls to be.
- Gently roll each piece of dough into a smooth ball.
- Place the shaped rolls in a greased 9×13 inch baking pan, leaving a little space between each roll. Cover with plastic wrap or a clean kitchen towel and let them rise in a warm place for 30-45 minutes, or until they have almost doubled in size.
- Preheat your oven to 375°F (190°C).
- In a small bowl, whisk together the egg and milk to create the egg wash.
- Gently brush the tops of the risen rolls with the egg wash.
- If desired, sprinkle the rolls with sea salt flakes before baking.
- Bake for 20-25 minutes, or until the rolls are golden brown and cooked through. The internal temperature should reach 200-210°F (93-99°C).
- Remove the rolls from the oven and let them cool in the pan for a few minutes before transferring them to a wire rack to cool completely. Serve warm or at room temperature.
Notes
- Make sure your milk isn’t too hot, or it will kill the yeast. Aim for around 110°F.
- If the yeast doesn’t foam, it might be old, and you’ll need to start over with fresh yeast.
- Make sure your mashed potatoes are completely cooled; otherwise, they could affect the yeast.
- The dough should be soft and slightly sticky, but not so sticky that it’s impossible to handle. Aim for a dough that is tacky but not overly wet.
- Be careful not to add too much flour, or the rolls will be dry.
- A warm environment helps the yeast to work efficiently.
- If the tops of the rolls are browning too quickly, you can tent them with foil during the last few minutes of baking.
- Use Russet potatoes, as they are starchy and create a light and fluffy texture. Avoid using waxy potatoes, as they can make the rolls dense.
- Overmixing the dough can develop too much gluten, resulting in tough rolls. Mix until just combined, and then knead for the recommended time.
- If your kitchen is cold, you can proof the dough in a slightly warmed oven (turned off) or in a microwave with a cup of hot water.
- Overbaking the rolls can make them dry. Bake until they are golden brown and cooked through, but not overly browned.
- Store the cooled rolls in an airtight container at room temperature for up to 3 days, or in the freezer for up to 2 months. To reheat frozen rolls, thaw them overnight in the refrigerator and then warm them in a low oven (300°F/150°C) for a few minutes.