Glazed Lemon Loaf: Just the name conjures images of sun-drenched afternoons, a steaming cup of tea, and the bright, zesty flavor that dances on your tongue. Have you ever craved a dessert that’s both comforting and invigorating? Something that feels like a warm hug but tastes like a burst of sunshine? Then look no further, because this recipe is about to become your new go-to treat.
Lemon loaves, in their various forms, have been a staple in kitchens for generations. While the exact origins are difficult to pinpoint, the combination of citrus and baked goods has a long and rich history, particularly in regions where lemons thrive. The simple elegance of a lemon loaf makes it perfect for everything from casual brunches to sophisticated afternoon teas.
What is it about a glazed lemon loaf that makes it so irresistible? It’s the perfect balance of sweet and tart, the moist, tender crumb, and that glistening glaze that seals in all the lemony goodness. People adore this dish because it’s relatively easy to make, incredibly satisfying to eat, and endlessly adaptable. Whether you’re a seasoned baker or just starting out, this recipe is designed to deliver a perfect glazed lemon loaf every time. Get ready to fill your kitchen with the delightful aroma of citrus and create a dessert that will impress your friends and family!

Ingredients:
- For the Loaf:
- 2 1/2 cups (300g) all-purpose flour
- 1 teaspoon baking powder
- 1/2 teaspoon baking soda
- 1/4 teaspoon salt
- 1 cup (2 sticks or 226g) unsalted butter, softened
- 1 3/4 cups (350g) granulated sugar
- 2 large eggs
- 1 teaspoon vanilla extract
- 1 cup (240ml) buttermilk
- 1/4 cup (60ml) lemon juice, freshly squeezed
- 2 tablespoons lemon zest, finely grated
- For the Lemon Glaze:
- 2 cups (240g) powdered sugar
- 1/4 cup (60ml) lemon juice, freshly squeezed (plus more as needed)
- 1 tablespoon lemon zest, finely grated (optional, for extra lemon flavor)
Preparing the Lemon Loaf Batter
Alright, let’s get started with the most important part the loaf itself! This is where all the magic happens, and we’ll be building layers of flavor to create a truly unforgettable lemon experience. Don’t be intimidated by the steps; I’ll guide you through each one.
- Preheat and Prep: First things first, preheat your oven to 350°F (175°C). This is crucial for even baking. While the oven is heating up, grease and flour a 9×5 inch loaf pan. I like to use baking spray with flour already in it for extra insurance against sticking, but good old-fashioned butter and flour work just as well. Make sure you get into all the corners!
- Combine Dry Ingredients: In a medium bowl, whisk together the flour, baking powder, baking soda, and salt. Whisking is important here because it helps to evenly distribute the leavening agents (baking powder and baking soda) throughout the flour. This will ensure a nice, even rise for your loaf. Set this bowl aside for now.
- Cream Butter and Sugar: In a large bowl (or the bowl of your stand mixer), cream together the softened butter and granulated sugar until light and fluffy. This usually takes about 3-5 minutes on medium speed. The mixture should become noticeably lighter in color and texture. This step is essential because it incorporates air into the batter, which contributes to the loaf’s tenderness.
- Add Eggs and Vanilla: Beat in the eggs one at a time, making sure each egg is fully incorporated before adding the next. Then, stir in the vanilla extract. The vanilla enhances the overall flavor profile and complements the lemon beautifully.
- Alternate Wet and Dry Ingredients: This is where we’ll gradually combine the wet and dry ingredients. Begin by adding one-third of the dry ingredients to the butter-sugar mixture and mix until just combined. Then, add half of the buttermilk and mix until just combined. Repeat with another one-third of the dry ingredients, the remaining buttermilk, and finish with the last one-third of the dry ingredients. Mix until just combined after each addition. Be careful not to overmix! Overmixing can develop the gluten in the flour, resulting in a tough loaf.
- Incorporate Lemon Juice and Zest: Finally, stir in the lemon juice and lemon zest. The lemon juice adds that signature tangy flavor, while the zest provides a burst of aromatic citrus oil. Make sure the zest is finely grated to avoid any bitter pieces in the loaf.
Baking the Lemon Loaf
Now that our batter is ready, it’s time to bake this beauty! Patience is key here; we want to ensure the loaf is cooked through without being overly browned.
- Pour into Pan: Pour the batter into the prepared loaf pan and spread it evenly.
- Bake: Bake for 55-65 minutes, or until a wooden skewer inserted into the center comes out clean. The baking time may vary depending on your oven, so start checking for doneness around 55 minutes. If the top of the loaf is browning too quickly, you can loosely tent it with aluminum foil during the last 15-20 minutes of baking.
- Cool in Pan: Once the loaf is baked, remove it from the oven and let it cool in the pan for 10-15 minutes. This allows the loaf to set slightly and makes it easier to remove from the pan without breaking.
- Invert and Cool Completely: After 10-15 minutes, carefully invert the loaf onto a wire rack and let it cool completely before glazing. Cooling completely is essential because the glaze will melt if applied to a warm loaf.
Preparing the Lemon Glaze
The glaze is the crowning glory of this lemon loaf! It adds a touch of sweetness and intensifies the lemon flavor. It’s super easy to make, so let’s get to it!
- Combine Ingredients: In a medium bowl, whisk together the powdered sugar, lemon juice, and lemon zest (if using) until smooth. Start with the specified amount of lemon juice and add more, one tablespoon at a time, until you reach your desired consistency. The glaze should be thick enough to coat the loaf but thin enough to drizzle easily.
- Adjust Consistency: If the glaze is too thick, add a little more lemon juice. If it’s too thin, add a little more powdered sugar.
Glazing the Lemon Loaf
This is the final step, and it’s so satisfying! Watching that glaze drip down the sides of the loaf is pure culinary art.
- Glaze the Loaf: Once the loaf is completely cool, place it on a wire rack set over a baking sheet (to catch any drips). Pour the lemon glaze over the top of the loaf, allowing it to drip down the sides. You can use a spatula or spoon to help spread the glaze evenly.
- Let Glaze Set: Let the glaze set for at least 30 minutes before slicing and serving. This allows the glaze to harden slightly and prevents it from being too sticky.
Tips and Variations
Want to take your lemon loaf to the next level? Here are a few tips and variations to try:
- Use High-Quality Ingredients: The quality of your ingredients will directly impact the flavor of your loaf. Use fresh lemon juice and zest, good-quality butter, and pure vanilla extract for the best results.
- Don’t Overmix: I can’t stress this enough! Overmixing develops the gluten in the flour, resulting in a tough loaf. Mix until just combined after each addition.
- Add Poppy Seeds: For a classic twist, add 2-3 tablespoons of poppy seeds to the batter along with the lemon zest.
- Make Mini Loaves: Pour the batter into mini loaf pans for individual servings. Reduce the baking time accordingly.
- Lemon Curd Filling: For an extra decadent treat, spread a layer of lemon curd in the center of the loaf before baking.
- Storage: Store the glazed lemon loaf in an airtight container at room temperature for up to 3 days or in the refrigerator for up to a week.
Troubleshooting
Sometimes things don’t go exactly as planned. Here are a few common issues and how to fix them:
- Loaf is dry: This could be due to overbaking or using too much flour. Make sure to measure your flour accurately and check for doneness frequently.
- Loaf is dense: This could be due to undermixing or using cold ingredients. Make sure your butter is softened and your buttermilk is at room temperature.
- Loaf is sinking in the middle: This could be due to using too much leavening agent or opening the oven door too frequently during baking.
- Glaze is too thick: Add a little more lemon juice, one tablespoon at a time, until you reach your desired consistency.
- Glaze is too thin: Add a little more powdered sugar, one tablespoon at a time, until you reach your desired consistency.
Enjoy!
I hope you enjoy this recipe as much as I do! It’s perfect for breakfast, brunch, or a sweet treat any time of day. Happy baking!
Conclusion:
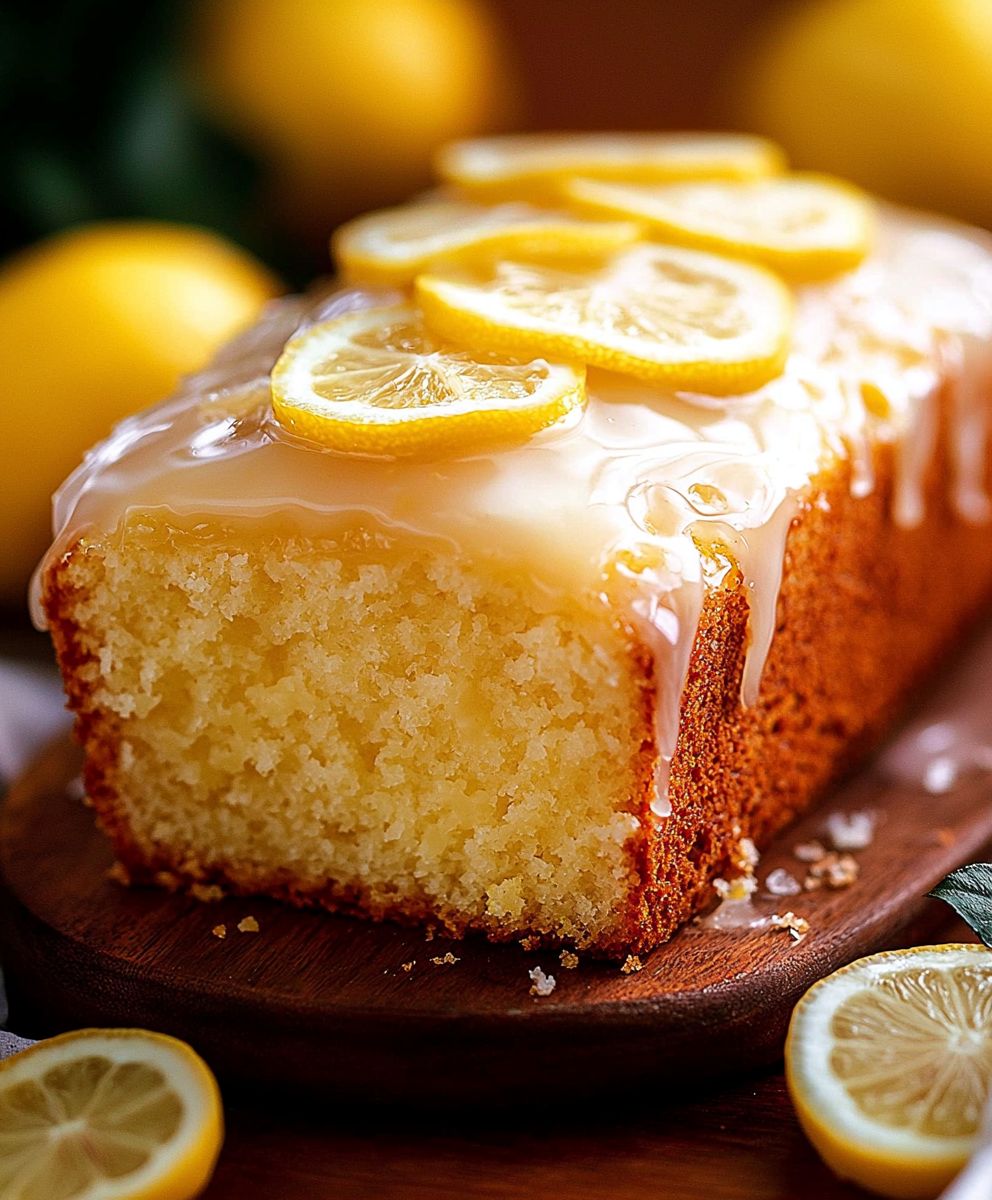
This isn’t just another lemon loaf recipe; it’s a slice of sunshine baked into a perfectly moist and tangy treat. From the zesty aroma that fills your kitchen to the sweet-tart glaze that glistens on top, every element of this Glazed Lemon Loaf is designed to delight. I truly believe this recipe is a must-try because it’s incredibly easy to follow, uses readily available ingredients, and delivers consistently delicious results. It’s the kind of recipe you’ll find yourself reaching for again and again, whether you’re baking for a special occasion or simply craving a comforting afternoon snack.
But the best part? It’s incredibly versatile! While I adore it exactly as written, there are so many ways to customize this loaf to suit your own tastes. For a richer, more decadent experience, try adding a handful of white chocolate chips to the batter. The creamy sweetness of the white chocolate pairs beautifully with the bright lemon flavor. Alternatively, you could incorporate some fresh blueberries or raspberries for a burst of juicy flavor and a pop of color. Imagine a warm slice of lemon loaf studded with plump blueberries pure bliss!
Serving suggestions are endless, too. A simple slice of this Glazed Lemon Loaf is perfect on its own with a cup of tea or coffee. But if you’re looking to elevate it a bit, try serving it with a dollop of whipped cream or a scoop of vanilla ice cream. For a truly indulgent treat, warm a slice slightly and drizzle it with a homemade lemon curd. And don’t forget about brunch! This loaf makes a fantastic addition to any brunch spread, adding a touch of elegance and a burst of citrusy freshness. You can even cut it into smaller squares and serve it as part of a dessert platter.
Beyond the variations and serving suggestions, the real magic of this recipe lies in its ability to bring people together. Baking is an act of love, and sharing a homemade loaf of Glazed Lemon Loaf is a wonderful way to show your friends and family that you care. Imagine the smiles on their faces as they savor each bite of this moist, flavorful treat. It’s the perfect way to brighten someone’s day and create lasting memories.
So, what are you waiting for? Preheat your oven, gather your ingredients, and get ready to bake up a batch of this irresistible Glazed Lemon Loaf. I promise you won’t be disappointed. It’s a recipe that’s sure to become a family favorite.
And once you’ve tried it, I’d absolutely love to hear about your experience! Did you make any variations? What did you think of the glaze? Did your family and friends enjoy it as much as I do? Please feel free to share your thoughts and photos in the comments below. I’m always eager to learn from my readers and see how they’ve made this recipe their own. Happy baking! I am confident that you will love this Glazed Lemon Loaf as much as I do.
Glazed Lemon Loaf: The Ultimate Recipe for a Perfect Loaf
A bright and tangy lemon loaf cake with a sweet lemon glaze. Perfect for breakfast, brunch, or dessert!
Ingredients
- 2 1/2 cups (300g) all-purpose flour
- 1 teaspoon baking powder
- 1/2 teaspoon baking soda
- 1/4 teaspoon salt
- 1 cup (2 sticks or 226g) unsalted butter, softened
- 1 3/4 cups (350g) granulated sugar
- 2 large eggs
- 1 teaspoon vanilla extract
- 1 cup (240ml) buttermilk
- 1/4 cup (60ml) lemon juice, freshly squeezed
- 2 tablespoons lemon zest, finely grated
- 2 cups (240g) powdered sugar
- 1/4 cup (60ml) lemon juice, freshly squeezed (plus more as needed)
- 1 tablespoon lemon zest, finely grated (optional, for extra lemon flavor)
Instructions
- Preheat oven to 350°F (175°C). Grease and flour a 9×5 inch loaf pan.
- In a medium bowl, whisk together the flour, baking powder, baking soda, and salt. Set aside.
- In a large bowl, cream together the softened butter and granulated sugar until light and fluffy (3-5 minutes).
- Beat in the eggs one at a time, then stir in the vanilla extract.
- Add one-third of the dry ingredients to the butter-sugar mixture and mix until just combined. Add half of the buttermilk and mix until just combined. Repeat with another one-third of the dry ingredients, the remaining buttermilk, and finish with the last one-third of the dry ingredients. Mix until just combined after each addition. Be careful not to overmix!
- Stir in the lemon juice and lemon zest.
- Pour the batter into the prepared loaf pan and spread it evenly.
- Bake for 55-65 minutes, or until a wooden skewer inserted into the center comes out clean. If the top of the loaf is browning too quickly, you can loosely tent it with aluminum foil during the last 15-20 minutes of baking.
- Remove from oven and let cool in the pan for 10-15 minutes.
- Carefully invert the loaf onto a wire rack and let it cool completely before glazing.
- In a medium bowl, whisk together the powdered sugar, lemon juice, and lemon zest (if using) until smooth. Adjust consistency with more lemon juice or powdered sugar as needed.
- Place the cooled loaf on a wire rack over a baking sheet. Pour the lemon glaze over the top of the loaf, allowing it to drip down the sides.
- Let the glaze set for at least 30 minutes before slicing and serving.
Notes
- Use high-quality ingredients for the best flavor.
- Don’t overmix the batter.
- Add poppy seeds for a classic twist.
- Store in an airtight container at room temperature for up to 3 days or in the refrigerator for up to a week.
- If the loaf is browning too quickly, tent it with foil during the last 15-20 minutes of baking.