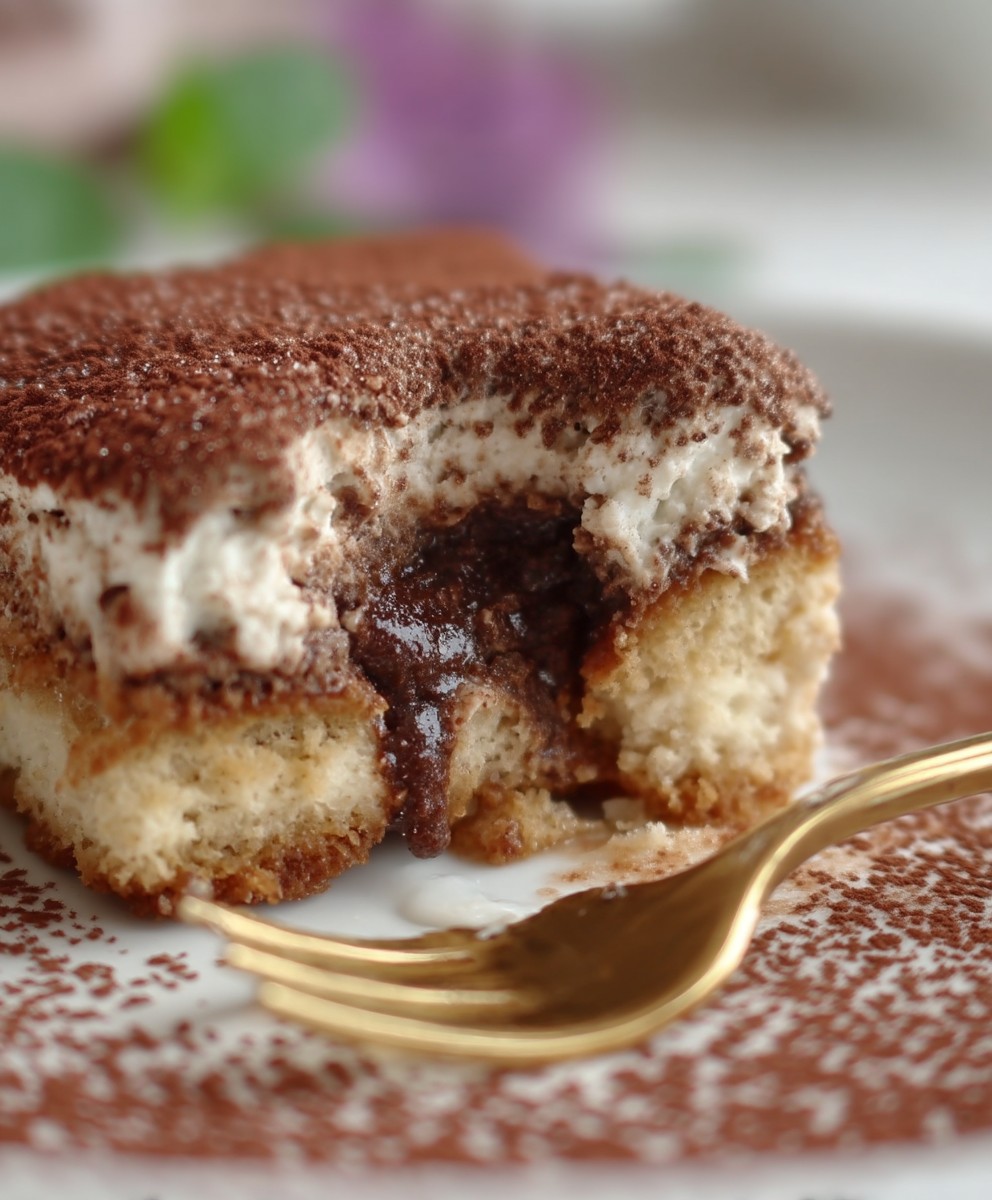
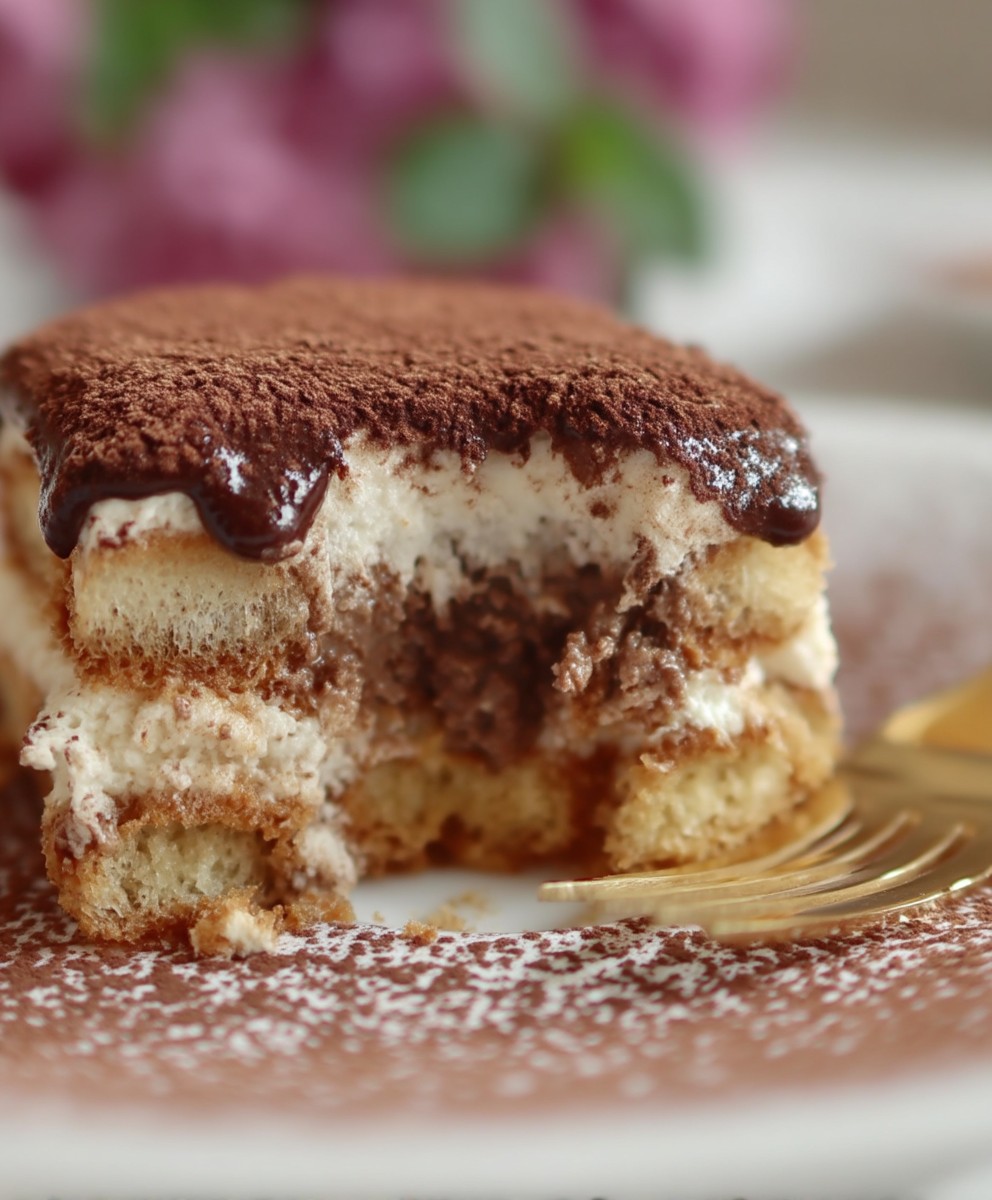
Gluten Free Tiramisu: a phrase that might have seemed like an impossible dream just a few years ago! But today, I’m thrilled to share a recipe that proves you can absolutely enjoy this classic Italian dessert, even with dietary restrictions. Imagine layers of delicate, coffee-soaked ladyfingers, a rich and creamy mascarpone filling, and a dusting of cocoa powder all without a trace of gluten.
Tiramisu, meaning “pick me up” or “cheer me up” in Italian, has a relatively recent history, believed to have originated in the Veneto region of Italy in the latter half of the 20th century. It quickly became a beloved dessert worldwide, celebrated for its delightful combination of textures and flavors. The bitterness of the coffee perfectly complements the sweetness of the mascarpone, creating a truly irresistible treat.
What makes tiramisu so universally adored? It’s the symphony of flavors, the creamy smoothness, and the satisfyingly soft texture. Plus, it’s a dessert that can be prepared ahead of time, making it perfect for entertaining. Now, with this Gluten Free Tiramisu recipe, everyone can partake in the joy of this iconic Italian dessert. Ive spent time perfecting this recipe, ensuring that it captures the authentic taste and texture of traditional tiramisu, while remaining completely gluten-free. Get ready to experience a truly decadent and worry-free dessert!
Ingredients:
- For the Gluten-Free Ladyfingers:
- 1 cup (120g) gluten-free all-purpose flour blend (with xanthan gum)
- 1/4 teaspoon baking powder
- 1/4 teaspoon salt
- 4 large eggs, separated
- 1/2 cup (100g) granulated sugar, divided
- 1 teaspoon vanilla extract
- Powdered sugar, for dusting
- For the Mascarpone Cream:
- 16 ounces (450g) mascarpone cheese, cold
- 1 1/4 cups (300ml) heavy cream, cold
- 3/4 cup (150g) granulated sugar
- 1 teaspoon vanilla extract
- 1/4 cup Marsala wine (optional, but highly recommended!)
- For the Coffee Syrup:
- 1 1/2 cups (360ml) strong brewed coffee, cooled
- 1/4 cup (50g) granulated sugar
- 2 tablespoons coffee liqueur (such as Kahlua, optional)
- For Dusting:
- Unsweetened cocoa powder
Making the Gluten-Free Ladyfingers:
- Prepare the Dry Ingredients: In a medium bowl, whisk together the gluten-free flour, baking powder, and salt. Make sure everything is evenly distributed. This helps ensure a consistent texture in your ladyfingers.
- Separate the Eggs: Carefully separate the eggs into two clean bowls. It’s crucial that no yolk gets into the egg whites, as this will prevent them from whipping properly.
- Whip the Egg Whites: In the bowl with the egg whites, add 1/4 cup (50g) of the granulated sugar. Using an electric mixer (handheld or stand mixer), beat the egg whites on medium speed until stiff peaks form. This means the peaks hold their shape when you lift the beaters. Be careful not to overwhip, or they’ll become dry.
- Beat the Egg Yolks: In the bowl with the egg yolks, add the remaining 1/4 cup (50g) of granulated sugar and the vanilla extract. Beat on medium speed until the yolks are pale yellow and thickened. This usually takes about 3-5 minutes.
- Combine the Mixtures: Gently fold the beaten egg yolks into the whipped egg whites. Use a rubber spatula and be careful not to deflate the egg whites. We want to keep as much air in the mixture as possible for light and airy ladyfingers.
- Add the Dry Ingredients: Gradually add the dry ingredients to the egg mixture, folding gently until just combined. Again, be careful not to overmix. Overmixing will develop the gluten (even in gluten-free flour blends), resulting in tough ladyfingers.
- Pipe the Ladyfingers: Transfer the batter to a piping bag fitted with a large round tip (or just cut the tip off a disposable piping bag). Pipe the batter into 3-4 inch long strips onto a baking sheet lined with parchment paper. Leave about an inch of space between each ladyfinger.
- Dust with Powdered Sugar: Dust the ladyfingers generously with powdered sugar. Let them sit for 5 minutes, then dust again. This helps create a slightly crisp exterior.
- Bake the Ladyfingers: Bake in a preheated oven at 350°F (175°C) for 12-15 minutes, or until lightly golden brown.
- Cool Completely: Let the ladyfingers cool completely on the baking sheet before handling. They will be delicate when warm.
Making the Mascarpone Cream:
- Combine Ingredients: In a large bowl, combine the cold mascarpone cheese, cold heavy cream, granulated sugar, vanilla extract, and Marsala wine (if using).
- Beat Until Smooth: Using an electric mixer, beat on medium speed until the mixture is smooth, thick, and holds its shape. Be careful not to overwhip, as mascarpone can curdle if overbeaten. Start on a low speed to prevent the sugar from flying everywhere.
- Chill: Cover the bowl with plastic wrap and refrigerate for at least 30 minutes to allow the flavors to meld and the cream to firm up slightly.
Making the Coffee Syrup:
- Combine Coffee and Sugar: In a small saucepan, combine the cooled strong brewed coffee and granulated sugar.
- Heat and Dissolve: Heat over medium heat, stirring constantly, until the sugar is completely dissolved.
- Add Liqueur (Optional): Remove from heat and stir in the coffee liqueur (if using).
- Cool Completely: Let the coffee syrup cool completely before using.
Assembling the Tiramisu:
- Prepare Your Dish: Choose a rectangular or square dish that is approximately 9×13 inches.
- Dip the Ladyfingers: Quickly dip each ladyfinger into the cooled coffee syrup, one at a time. Don’t soak them for too long, or they will become soggy. Aim for a quick dip on each side.
- Create the First Layer: Arrange the soaked ladyfingers in a single layer on the bottom of the dish, covering the entire surface. You may need to break some ladyfingers to fit.
- Spread the Mascarpone Cream: Spread half of the mascarpone cream evenly over the ladyfinger layer.
- Create the Second Layer: Repeat steps 2 and 3 to create a second layer of coffee-soaked ladyfingers.
- Top with Remaining Cream: Spread the remaining mascarpone cream evenly over the second layer of ladyfingers.
- Dust with Cocoa Powder: Generously dust the top of the tiramisu with unsweetened cocoa powder. Use a fine-mesh sieve for an even coating.
- Chill: Cover the tiramisu with plastic wrap and refrigerate for at least 4 hours, or preferably overnight. This allows the flavors to meld and the tiramisu to set properly.
- Serve: Before serving, dust with a little more cocoa powder if desired. Cut into squares and enjoy!

Conclusion:
This isn’t just another dessert recipe; it’s a passport to Italy, reimagined for everyone! I truly believe this Gluten Free Tiramisu is a must-try, and here’s why: it delivers all the classic flavors and textures you crave from a traditional tiramisu, without any of the gluten. The creamy mascarpone, the bold coffee-soaked ladyfingers (or gluten-free alternatives!), and the dusting of cocoa powder create a symphony of flavors that will dance on your taste buds. It’s rich, decadent, and surprisingly easy to make, making it the perfect showstopper for any occasion, or even just a special treat for yourself.
But the best part? It’s incredibly versatile!
Serving Suggestions and Variations:
* Classic Presentation: Serve chilled in individual glasses or as a slice from a larger dish. A light dusting of cocoa powder just before serving is a must!
* Coffee Kick: For an extra jolt, add a tablespoon of coffee liqueur (like Kahlua) to the coffee mixture used to soak the ladyfingers.
* Chocolate Lover’s Dream: Grate some dark chocolate over the top along with the cocoa powder for an even more intense chocolate experience. You could even stir some chocolate shavings into the mascarpone cream.
* Berry Bliss: Add a layer of fresh berries (raspberries, strawberries, or blueberries work beautifully) between the ladyfingers and the mascarpone cream for a fruity twist.
* Individual Parfaits: Layer the ingredients in small glasses or jars for a beautiful and convenient individual dessert. This is perfect for parties or potlucks.
* Espresso Infusion: Use a stronger espresso for soaking the ladyfingers to really amplify the coffee flavor.
* Amaretto Accent: A splash of Amaretto liqueur in the mascarpone cream adds a subtle almond flavor that complements the coffee perfectly.
* Vegan Option: While this recipe is not inherently vegan, with some clever substitutions (like using vegan ladyfingers, a plant-based mascarpone alternative, and a flax egg replacer), you can absolutely create a delicious vegan version of this Gluten Free Tiramisu.
I’ve poured my heart into perfecting this recipe, and I’m confident that you’ll love it as much as I do. It’s the perfect dessert to impress your friends and family, and it’s so satisfying to create something so delicious and inclusive.
So, what are you waiting for? Gather your ingredients, put on some Italian music, and get ready to embark on a culinary adventure. I promise, you won’t regret it!
Once you’ve tried this recipe, I’d absolutely love to hear about your experience. Did you make any variations? What did your friends and family think? Share your photos and stories in the comments below! Your feedback is invaluable, and it helps me continue to create and share recipes that everyone can enjoy. Happy baking (or should I say, happy layering!) and Buon Appetito! I can’t wait to see your creations! Let me know if you have any questions, I’m always happy to help.
Gluten Free Tiramisu: The Ultimate Guide & Recipe
Gluten-free twist on a classic Italian dessert. Features layers of coffee-soaked ladyfingers and rich mascarpone cream, finished with a dusting of cocoa.
Ingredients
- 1 cup (120g) gluten-free all-purpose flour blend (with xanthan gum)
- 1/4 teaspoon baking powder
- 1/4 teaspoon salt
- 4 large eggs, separated
- 1/2 cup (100g) granulated sugar, divided
- 1 teaspoon vanilla extract
- Powdered sugar, for dusting
- 16 ounces (450g) mascarpone cheese, cold
- 1 1/4 cups (300ml) heavy cream, cold
- 3/4 cup (150g) granulated sugar
- 1 teaspoon vanilla extract
- 1/4 cup Marsala wine (optional, but highly recommended!)
- 1 1/2 cups (360ml) strong brewed coffee, cooled
- 1/4 cup (50g) granulated sugar
- 2 tablespoons coffee liqueur (such as Kahlua, optional)
- Unsweetened cocoa powder
Instructions
- In a medium bowl, whisk together the gluten-free flour, baking powder, and salt. Make sure everything is evenly distributed. This helps ensure a consistent texture in your ladyfingers.
- Carefully separate the eggs into two clean bowls. It’s crucial that no yolk gets into the egg whites, as this will prevent them from whipping properly.
- In the bowl with the egg whites, add 1/4 cup (50g) of the granulated sugar. Using an electric mixer (handheld or stand mixer), beat the egg whites on medium speed until stiff peaks form. This means the peaks hold their shape when you lift the beaters. Be careful not to overwhip, or they’ll become dry.
- In the bowl with the egg yolks, add the remaining 1/4 cup (50g) of granulated sugar and the vanilla extract. Beat on medium speed until the yolks are pale yellow and thickened. This usually takes about 3-5 minutes.
- Gently fold the beaten egg yolks into the whipped egg whites. Use a rubber spatula and be careful not to deflate the egg whites. We want to keep as much air in the mixture as possible for light and airy ladyfingers.
- Gradually add the dry ingredients to the egg mixture, folding gently until just combined. Again, be careful not to overmix. Overmixing will develop the gluten (even in gluten-free flour blends), resulting in tough ladyfingers.
- Transfer the batter to a piping bag fitted with a large round tip (or just cut the tip off a disposable piping bag). Pipe the batter into 3-4 inch long strips onto a baking sheet lined with parchment paper. Leave about an inch of space between each ladyfinger.
- Dust the ladyfingers generously with powdered sugar. Let them sit for 5 minutes, then dust again. This helps create a slightly crisp exterior.
- Bake in a preheated oven at 350°F (175°C) for 12-15 minutes, or until lightly golden brown.
- Let the ladyfingers cool completely on the baking sheet before handling. They will be delicate when warm.
- In a large bowl, combine the cold mascarpone cheese, cold heavy cream, granulated sugar, vanilla extract, and Marsala wine (if using).
- Using an electric mixer, beat on medium speed until the mixture is smooth, thick, and holds its shape. Be careful not to overwhip, as mascarpone can curdle if overbeaten. Start on a low speed to prevent the sugar from flying everywhere.
- Cover the bowl with plastic wrap and refrigerate for at least 30 minutes to allow the flavors to meld and the cream to firm up slightly.
- In a small saucepan, combine the cooled strong brewed coffee and granulated sugar.
- Heat over medium heat, stirring constantly, until the sugar is completely dissolved.
- Remove from heat and stir in the coffee liqueur (if using).
- Let the coffee syrup cool completely before using.
- Choose a rectangular or square dish that is approximately 9×13 inches.
- Quickly dip each ladyfinger into the cooled coffee syrup, one at a time. Don’t soak them for too long, or they will become soggy. Aim for a quick dip on each side.
- Arrange the soaked ladyfingers in a single layer on the bottom of the dish, covering the entire surface. You may need to break some ladyfingers to fit.
- Spread half of the mascarpone cream evenly over the ladyfinger layer.
- Repeat steps 2 and 3 to create a second layer of coffee-soaked ladyfingers.
- Spread the remaining mascarpone cream evenly over the second layer of ladyfingers.
- Generously dust the top of the tiramisu with unsweetened cocoa powder. Use a fine-mesh sieve for an even coating.
- Cover the tiramisu with plastic wrap and refrigerate for at least 4 hours, or preferably overnight. This allows the flavors to meld and the tiramisu to set properly.
- Before serving, dust with a little more cocoa powder if desired. Cut into squares and enjoy!
Notes
- For the best flavor, use high-quality coffee and mascarpone cheese.
- Don’t oversoak the ladyfingers, or the tiramisu will be soggy.
- Chilling the tiramisu overnight is highly recommended for the best flavor and texture.
- If you don’t have Marsala wine, you can substitute with a different fortified wine or omit it altogether.
- Make sure your mascarpone and heavy cream are very cold for the mascarpone cream.


