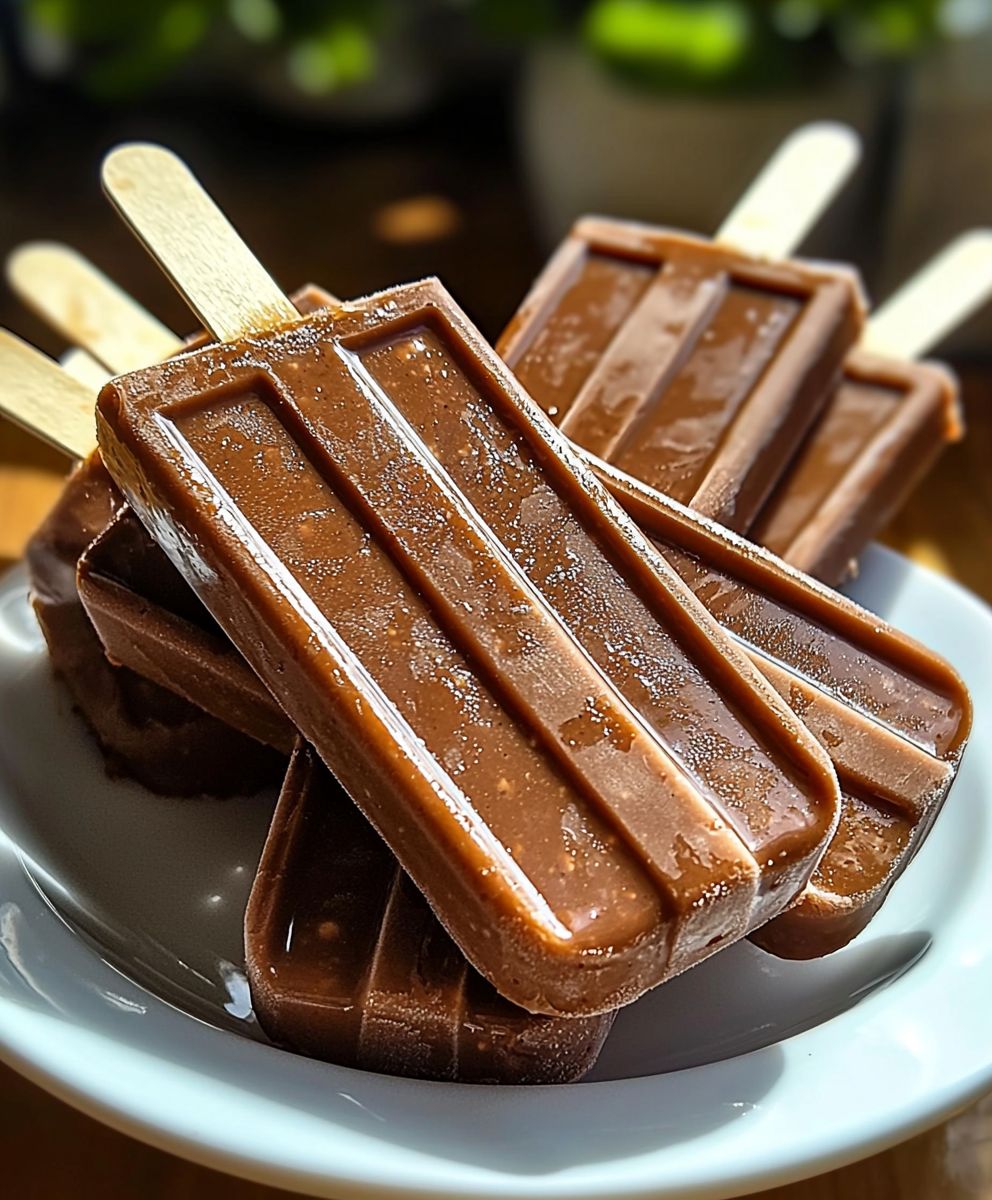
Homemade Fudgesicles, a nostalgic treat that instantly transports you back to childhood summers, are surprisingly easy to make and infinitely more delicious than anything you’ll find in the freezer aisle. Forget those overly sweet, artificially flavored pops we’re talking about rich, creamy, intensely chocolatey goodness that will have everyone begging for more.
While the exact origin of the fudgesicle is debated, its popularity soared in the mid-20th century, becoming a staple of ice cream trucks and family gatherings. It’s a testament to the simple pleasure of frozen chocolate, a concept that transcends generations and cultures. The fudgesicle offers a unique textural experience a smooth, melt-in-your-mouth sensation that’s both refreshing and deeply satisfying.
What makes homemade fudgesicles so irresistible? It’s the perfect balance of creamy texture and intense chocolate flavor. Plus, you control the ingredients! This means you can customize the sweetness, richness, and even add a touch of coffee or spice for a unique twist. Get ready to ditch the store-bought versions and embrace the joy of creating your own frozen chocolate masterpieces. Let’s get started!

Ingredients:
- 1 cup granulated sugar
- 1/4 cup unsweetened cocoa powder
- 1/4 teaspoon salt
- 1 cup whole milk
- 1 cup heavy cream
- 1 teaspoon vanilla extract
- 1/2 teaspoon instant coffee granules (optional, enhances chocolate flavor)
Preparing the Fudgesicle Base:
Okay, let’s get started on these fudgesicles! The first step is creating the rich, chocolatey base that will make these frozen treats so irresistible. Don’t worry, it’s easier than you think!
- Combine Dry Ingredients: In a medium saucepan, whisk together the granulated sugar, unsweetened cocoa powder, and salt. Make sure there are no lumps of cocoa powder remaining. This ensures a smooth and even chocolate flavor throughout the fudgesicles. I like to use a whisk for this, but a fork will work in a pinch.
- Add Milk and Cream: Gradually pour in the whole milk, whisking constantly to prevent any clumping. Once the milk is fully incorporated, add the heavy cream. The heavy cream is what gives these fudgesicles their incredibly creamy texture, so don’t skimp on it!
- Heat and Dissolve: Place the saucepan over medium heat. Continue to whisk the mixture constantly as it heats up. The goal here is to dissolve the sugar and cocoa powder completely. You’ll know it’s ready when the mixture is smooth and glossy, and the sugar granules are no longer visible on the bottom of the pan. This usually takes about 5-7 minutes. Be patient and don’t let it boil! Boiling can change the texture and flavor.
- Simmer Gently: Once the mixture is smooth, reduce the heat to low and let it simmer gently for about 2-3 minutes. This step helps to deepen the chocolate flavor and thicken the base slightly. Keep stirring occasionally to prevent scorching. You should see tiny bubbles forming around the edges of the pan.
- Remove from Heat: Take the saucepan off the heat and let it cool slightly for about 5 minutes. This will prevent the vanilla extract from evaporating too quickly in the next step.
- Add Flavor Enhancers: Stir in the vanilla extract and instant coffee granules (if using). The vanilla extract adds a classic sweetness and aroma, while the instant coffee granules enhance the chocolate flavor without making the fudgesicles taste like coffee. If you’re not a coffee fan, feel free to skip the coffee granules.
- Cool Completely: This is a crucial step! Allow the mixture to cool completely to room temperature. This is important because pouring a hot mixture into popsicle molds can cause them to crack or warp. Plus, it will take longer to freeze. You can speed up the cooling process by placing the saucepan in an ice bath, stirring occasionally.
Preparing the Molds and Freezing:
Now that our fudgesicle base is ready, it’s time to get those molds ready and freeze these delicious treats!
- Prepare the Molds: If you’re using reusable popsicle molds, make sure they are clean and dry. If you’re using disposable popsicle molds, have your popsicle sticks ready. I like to lightly grease the inside of my reusable molds with a little bit of coconut oil or cooking spray. This helps the fudgesicles release easily once they’re frozen.
- Pour into Molds: Carefully pour the cooled fudgesicle mixture into the prepared molds, leaving a little bit of space at the top for expansion during freezing. If you’re using molds with built-in sticks, insert them now. If you’re using disposable molds, cover the molds with foil and insert the popsicle sticks through the foil. This will help keep the sticks upright while the fudgesicles freeze.
- Freeze Solid: Place the filled molds in the freezer and freeze for at least 6 hours, or preferably overnight. This ensures that the fudgesicles are completely frozen solid. The longer they freeze, the better they will hold their shape when you unmold them.
Unmolding and Serving:
The moment we’ve all been waiting for! Time to unmold those fudgesicles and enjoy the fruits (or rather, chocolates) of our labor!
- Unmolding the Fudgesicles: To easily unmold the fudgesicles, run the molds under warm water for a few seconds. Be careful not to let the water get too hot, as this can melt the fudgesicles. Gently wiggle the popsicle sticks until the fudgesicles release from the molds. If you’re having trouble, you can also try dipping the molds in a bowl of warm water for a few seconds.
- Serving: Once the fudgesicles are unmolded, they’re ready to be enjoyed! Serve them immediately for the best texture. If you’re not planning on eating them right away, you can wrap them individually in plastic wrap or parchment paper and store them in the freezer for up to a week.
Tips and Variations:
Want to customize your fudgesicles? Here are a few ideas:
- Add Chocolate Chips: Stir in some mini chocolate chips into the fudgesicle base before pouring it into the molds for an extra chocolatey treat.
- Peanut Butter Swirl: Swirl a spoonful of peanut butter into each mold before freezing for a delicious peanut butter chocolate combination.
- Coconut Fudgesicles: Replace 1/2 cup of the milk with coconut milk for a tropical twist.
- Mexican Chocolate Fudgesicles: Add a pinch of cinnamon and a dash of cayenne pepper to the fudgesicle base for a spicy kick.
- Healthier Option: Use unsweetened almond milk and a sugar substitute like stevia or erythritol to make these fudgesicles a bit healthier.
Troubleshooting:
Here are a few common issues and how to fix them:
- Fudgesicles are too icy: This is usually caused by not using enough heavy cream or by freezing them for too long. Make sure to use the correct amount of heavy cream and don’t freeze them for more than a week.
- Fudgesicles are too hard: This can be caused by using too much sugar or by freezing them at too low of a temperature. Try reducing the amount of sugar slightly or adjusting the freezer temperature.
- Fudgesicles are difficult to unmold: Make sure to grease the molds before pouring in the mixture and run the molds under warm water for a few seconds before unmolding.
Enjoy!
I hope you enjoy these homemade fudgesicles as much as I do! They’re the perfect treat for a hot summer day, and they’re so easy to make. Let me know in the comments if you try them and what variations you come up with!
Conclusion:
And there you have it! These Homemade Fudgesicles are so much more than just a frozen treat; they’re a nostalgic trip down memory lane, a healthy-ish indulgence, and a guaranteed crowd-pleaser, all rolled into one delicious package. Seriously, what’s not to love? I know, I know, you might be thinking, “Another recipe? Do I really need this?” And to that, I say, YES! You absolutely do. Forget those store-bought fudgesicles loaded with artificial flavors and questionable ingredients. This recipe gives you complete control over what goes into your frozen delights, allowing you to create a truly wholesome and satisfying dessert. Plus, the rich, chocolatey flavor is simply unparalleled. But the best part? It’s incredibly easy! Even if you’re a complete beginner in the kitchen, you can whip up a batch of these Homemade Fudgesicles in no time. The simple steps and readily available ingredients make this recipe a winner for busy weeknights or lazy weekend afternoons. Now, let’s talk serving suggestions and variations, because the possibilities are endless! For a classic experience, simply enjoy them straight from the freezer. But if you’re feeling a little fancy, try dipping them in melted chocolate and sprinkling them with chopped nuts or shredded coconut. You could even drizzle them with caramel sauce or add a dollop of whipped cream for an extra decadent treat. Looking for variations? Get creative! Add a teaspoon of instant coffee to the mixture for a mocha-flavored fudgesicle. Or, stir in some chopped peanut butter cups for a peanut butter chocolate explosion. For a healthier twist, use unsweetened almond milk and a touch of honey or maple syrup instead of sugar. You can even add a pinch of sea salt to enhance the chocolate flavor. The only limit is your imagination! I truly believe that these Homemade Fudgesicles are a must-try for anyone who loves chocolate, frozen treats, or simply wants to create something delicious and wholesome at home. They’re perfect for kids, adults, and everyone in between. They’re also a fantastic way to cool down on a hot summer day or satisfy a chocolate craving any time of year. So, what are you waiting for? Gather your ingredients, grab your popsicle molds, and get ready to experience the joy of homemade fudgesicles. I promise you won’t be disappointed. And once you’ve tried this recipe, I would absolutely love to hear about your experience! Did you make any variations? What did you think of the flavor? Share your photos and comments in the section below. I’m always eager to see your creations and learn from your experiences. Let’s spread the fudgesicle love! I am confident that you will find this recipe for Homemade Fudgesicles to be a new family favorite. Happy freezing! Print
Homemade Fudgesicles: The Ultimate Guide to Delicious Frozen Treats
- Total Time: 385 minutes
- Yield: 6–8 fudgesicles 1x
Description
Creamy, homemade fudgesicles with a rich chocolate flavor. Easy to make and perfect for a hot day!
Ingredients
- 1 cup granulated sugar
- 1/4 cup unsweetened cocoa powder
- 1/4 teaspoon salt
- 1 cup whole milk
- 1 cup heavy cream
- 1 teaspoon vanilla extract
- 1/2 teaspoon instant coffee granules (optional, enhances chocolate flavor)
Instructions
- Combine Dry Ingredients: In a medium saucepan, whisk together the granulated sugar, unsweetened cocoa powder, and salt. Ensure no lumps remain.
- Add Milk and Cream: Gradually pour in the whole milk, whisking constantly. Once incorporated, add the heavy cream.
- Heat and Dissolve: Place the saucepan over medium heat. Whisk constantly until the mixture is smooth and glossy, and the sugar granules are dissolved (5-7 minutes). Do not boil.
- Simmer Gently: Reduce heat to low and simmer gently for 2-3 minutes, stirring occasionally.
- Remove from Heat: Take the saucepan off the heat and let it cool slightly for about 5 minutes.
- Add Flavor Enhancers: Stir in the vanilla extract and instant coffee granules (if using).
- Cool Completely: Allow the mixture to cool completely to room temperature.
- Prepare the Molds: Lightly grease the inside of reusable molds.
- Pour into Molds: Carefully pour the cooled fudgesicle mixture into the prepared molds, leaving a little bit of space at the top for expansion during freezing. Insert sticks.
- Freeze Solid: Place the filled molds in the freezer and freeze for at least 6 hours, or preferably overnight.
- Unmolding the Fudgesicles: To easily unmold the fudgesicles, run the molds under warm water for a few seconds.
- Serving: Once the fudgesicles are unmolded, they’re ready to be enjoyed! Serve them immediately for the best texture.
Notes
- For extra chocolatey fudgesicles, stir in mini chocolate chips before freezing.
- For a peanut butter swirl, add a spoonful of peanut butter to each mold before freezing.
- Replace 1/2 cup of the milk with coconut milk for a tropical twist.
- Add a pinch of cinnamon and a dash of cayenne pepper to the fudgesicle base for a spicy kick.
- Use unsweetened almond milk and a sugar substitute like stevia or erythritol to make these fudgesicles a bit healthier.
- If fudgesicles are too icy, use more heavy cream and don’t freeze them for too long.
- If fudgesicles are too hard, reduce the amount of sugar slightly or adjust the freezer temperature.
- If fudgesicles are difficult to unmold, grease the molds before pouring in the mixture and run the molds under warm water for a few seconds before unmolding.
- Prep Time: 15 minutes
- Cook Time: 10 minutes