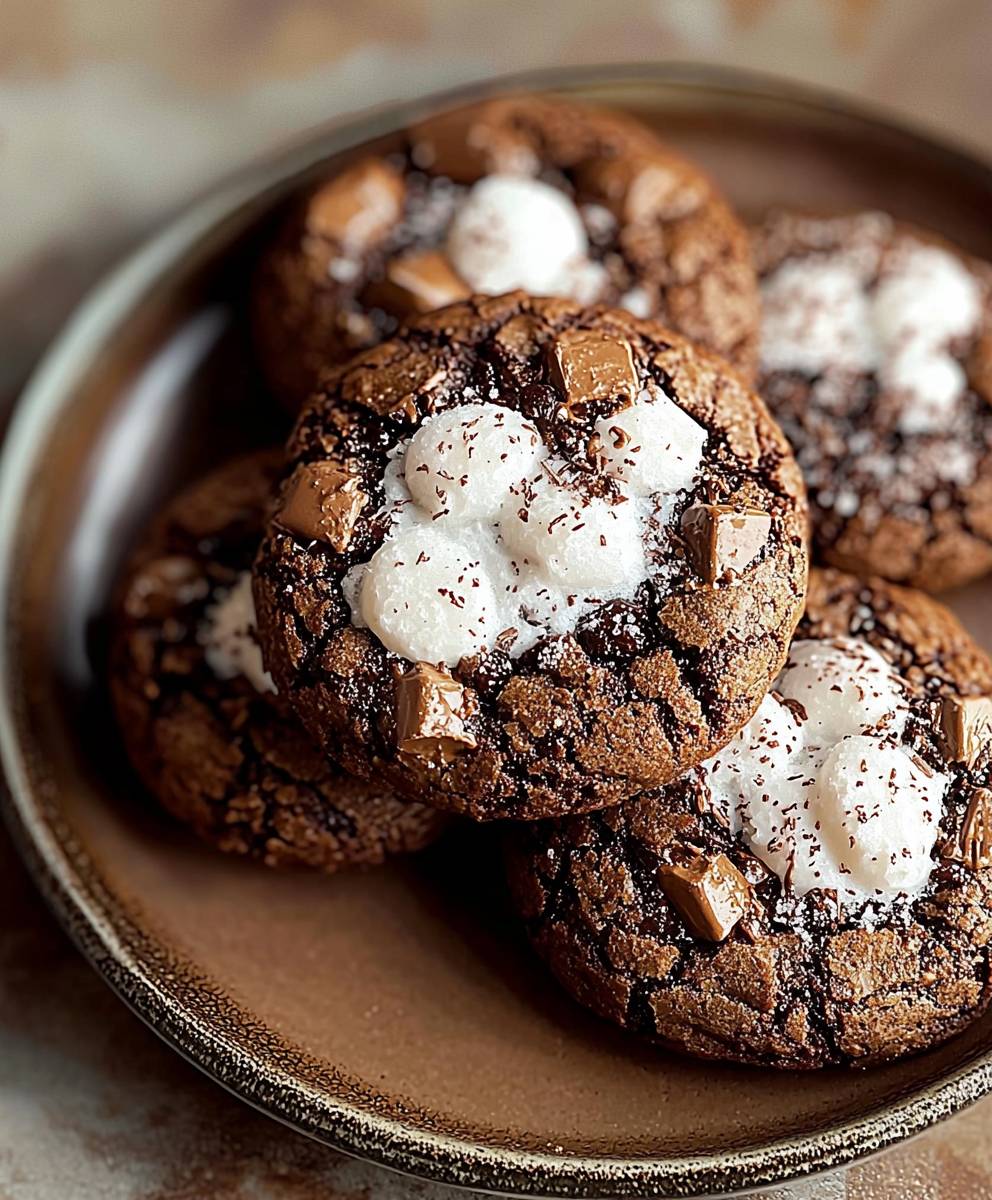
Hot Chocolate Brownie Cookies: Prepare to be amazed! Imagine the fudgy, decadent center of a warm brownie, perfectly melded with the comforting, chocolatey goodness of hot cocoa. That’s exactly what you get with these incredible cookies, and trust me, they are as dreamy as they sound. This isn’t just another cookie recipe; it’s a delightful experience that will transport you back to cozy winter nights by the fireplace.
While the exact origins of combining hot chocolate and brownies into a cookie are a bit of a modern mystery, the inspiration is clear. Both hot chocolate and brownies are beloved comfort foods with rich histories. Hot chocolate, dating back to ancient Mayan civilizations, was a sacred and often bitter drink. Over time, it evolved into the sweet, creamy beverage we know and love today. Brownies, a more recent invention from the late 19th century, quickly became a staple dessert in American households. Combining these two classics creates a symphony of flavors and textures that’s simply irresistible.
People adore these Hot Chocolate Brownie Cookies for several reasons. The intense chocolate flavor is a major draw, of course. But it’s the unique texture the crisp edges giving way to a gooey, almost molten center that truly sets them apart. Plus, they’re surprisingly easy to make! Whether you’re baking for a holiday gathering, a special occasion, or simply craving a sweet treat, these cookies are guaranteed to be a crowd-pleaser. Get ready to experience the ultimate chocolate indulgence!

Ingredients:
- 1 cup (2 sticks) unsalted butter, softened
- 1 ½ cups granulated sugar
- ½ cup packed light brown sugar
- 2 large eggs
- 1 teaspoon vanilla extract
- 1 cup all-purpose flour
- ½ cup unsweetened cocoa powder
- ½ teaspoon baking powder
- ¼ teaspoon salt
- 1 cup semi-sweet chocolate chips
- ½ cup mini marshmallows
- ¼ cup hot chocolate mix (powdered)
Preparing the Dough:
- First, let’s cream together the butter and sugars. In a large bowl, or the bowl of your stand mixer, beat the softened butter, granulated sugar, and brown sugar together until light and fluffy. This usually takes about 3-5 minutes. Don’t rush this step; it’s crucial for creating a tender cookie!
- Next, beat in the eggs one at a time, making sure each egg is fully incorporated before adding the next. Then, stir in the vanilla extract. The vanilla really enhances the chocolate flavor, so don’t skip it!
- Now, for the dry ingredients. In a separate medium bowl, whisk together the flour, cocoa powder, baking powder, salt, and hot chocolate mix. Whisking ensures that everything is evenly distributed, preventing clumps of cocoa or baking powder in your cookies.
- Gradually add the dry ingredients to the wet ingredients, mixing on low speed until just combined. Be careful not to overmix! Overmixing develops the gluten in the flour, which can result in tough cookies. We want them soft and chewy!
- Finally, fold in the chocolate chips and mini marshmallows. I like to use a rubber spatula for this step to avoid overmixing. Make sure the chocolate chips and marshmallows are evenly distributed throughout the dough.
- Cover the bowl with plastic wrap and chill the dough in the refrigerator for at least 30 minutes. This chilling time is important because it allows the butter to firm up, which prevents the cookies from spreading too thin while baking. It also helps to develop the flavors. You can chill the dough for up to 24 hours if you want to make it ahead of time.
Baking the Cookies:
- Preheat your oven to 350°F (175°C). Line baking sheets with parchment paper. Parchment paper prevents the cookies from sticking and makes cleanup a breeze.
- Remove the chilled dough from the refrigerator. Using a cookie scoop or a spoon, drop rounded tablespoons of dough onto the prepared baking sheets, leaving about 2 inches between each cookie. The cookies will spread a bit as they bake.
- Bake for 10-12 minutes, or until the edges are set and the centers are still slightly soft. Don’t overbake the cookies, or they will be dry. They should still look a little underbaked in the center when you take them out of the oven.
- Remove the baking sheets from the oven and let the cookies cool on the baking sheets for a few minutes before transferring them to a wire rack to cool completely. This allows the cookies to firm up a bit and prevents them from breaking when you move them.
Optional Additions and Variations:
These cookies are delicious as they are, but here are a few ideas for adding your own personal touch:
- Espresso Powder: Add 1 teaspoon of espresso powder to the dry ingredients to enhance the chocolate flavor.
- Nuts: Fold in ½ cup of chopped walnuts or pecans for added texture and flavor.
- Peppermint Extract: Add ¼ teaspoon of peppermint extract to the wet ingredients for a festive holiday flavor.
- White Chocolate Chips: Substitute some of the semi-sweet chocolate chips with white chocolate chips for a different flavor combination.
- Sea Salt: Sprinkle a pinch of sea salt on top of the cookies before baking for a sweet and salty treat.
- Marshmallow Fluff Swirl: After scooping the dough onto the baking sheet, use a toothpick to swirl a small dollop of marshmallow fluff into the top of each cookie.
- Chocolate Chunks: Instead of chocolate chips, use chopped chocolate chunks for a richer, more intense chocolate flavor.
Tips for Perfect Cookies:
- Use Room Temperature Ingredients: Make sure your butter and eggs are at room temperature for the best results. Room temperature ingredients emulsify better, resulting in a smoother dough and more evenly baked cookies.
- Measure Flour Accurately: Use the spoon and level method to measure your flour. Spoon the flour into your measuring cup and then level it off with a knife. Avoid scooping the flour directly from the bag, as this can pack the flour and result in too much flour in your recipe.
- Don’t Overmix the Dough: Overmixing the dough develops the gluten in the flour, which can result in tough cookies. Mix the dry ingredients into the wet ingredients until just combined.
- Chill the Dough: Chilling the dough is important for preventing the cookies from spreading too thin while baking. It also helps to develop the flavors.
- Bake on the Middle Rack: Bake the cookies on the middle rack of your oven for even baking.
- Don’t Overbake: Overbaking the cookies will result in dry cookies. They should still look a little underbaked in the center when you take them out of the oven.
- Cool Completely: Let the cookies cool completely on a wire rack before storing them. This prevents them from sticking together and becoming soggy.
Storing Your Cookies:
Store the cooled cookies in an airtight container at room temperature for up to 3 days. You can also freeze the cookies for up to 2 months. To freeze, place the cooled cookies in a single layer on a baking sheet and freeze for 30 minutes. Then, transfer the frozen cookies to a freezer-safe bag or container. Thaw the cookies at room temperature before serving.
Troubleshooting:
- Cookies are too flat: This could be due to using butter that is too soft, not chilling the dough long enough, or overmixing the dough. Make sure your butter is softened but not melted, chill the dough for at least 30 minutes, and avoid overmixing.
- Cookies are too dry: This could be due to overbaking the cookies or using too much flour. Don’t overbake the cookies, and make sure you are measuring your flour accurately.
- Cookies are too hard: This could be due to overmixing the dough or using too much flour. Avoid overmixing the dough, and make sure you are measuring your flour accurately.
- Cookies are not spreading: This could be due to using butter that is too cold or not using enough sugar. Make sure your butter is softened but not melted, and make sure you are using the correct amount of sugar.
Serving Suggestions:
These hot chocolate brownie cookies are perfect for:
- An afternoon snack
- Dessert after dinner
- A holiday treat
- A gift for friends and family
- A bake sale
- A party
Serve them with a glass of milk, a cup of coffee, or a scoop of ice cream. Enjoy!
Conclusion:
And there you have it! These Hot Chocolate Brownie Cookies are truly a must-try for anyone who loves the rich, comforting flavors of hot chocolate and the fudgy goodness of brownies. Seriously, what’s not to love? The crackled tops, the gooey centers, and that intense chocolate hit they’re simply irresistible. I know I’ve already made three batches this week!
But beyond just the incredible taste, these cookies are surprisingly easy to make. The recipe is straightforward, using ingredients you likely already have in your pantry. No fancy techniques or complicated steps required! This makes them perfect for a quick weeknight treat, a fun baking project with the kids, or even a last-minute dessert to impress your guests. Plus, the aroma that fills your kitchen while they’re baking is pure bliss. It’s like a warm hug in cookie form!
I truly believe these cookies are special. They’re more than just a dessert; they’re an experience. They evoke memories of cozy winter nights, crackling fireplaces, and shared moments of joy. And that’s what makes them so worth making.
Now, let’s talk serving suggestions and variations, because the possibilities are endless! For the ultimate indulgence, serve these warm with a scoop of vanilla ice cream and a drizzle of chocolate sauce. Or, if you’re feeling extra decadent, add a dollop of whipped cream and a sprinkle of mini marshmallows just like a real cup of hot chocolate!
Another fun variation is to add chopped nuts to the batter. Walnuts, pecans, or even hazelnuts would complement the chocolate flavor beautifully. You could also experiment with different types of chocolate chips. Milk chocolate chips will make them sweeter, while dark chocolate chips will add a deeper, more intense flavor. For a festive touch, try adding a few crushed candy canes to the batter during the holidays.
If you’re looking to elevate the presentation, dust the cooled cookies with powdered sugar for a snowy effect. Or, you can drizzle them with melted white chocolate for a beautiful contrast. You could even dip half of each cookie in melted chocolate and sprinkle with festive sprinkles.
These Hot Chocolate Brownie Cookies are also fantastic for gifting. Package them in a cute box or tin, and they’re sure to be a hit with friends, family, and neighbors. Who wouldn’t love to receive a batch of these delicious treats?
I’m so excited for you to try this recipe! I know you’re going to love them as much as I do. Don’t be afraid to get creative and experiment with different variations to make them your own. And most importantly, have fun!
Once you’ve made these cookies, I would absolutely love to hear about your experience. Did you make any changes to the recipe? What were your favorite serving suggestions? Share your photos and stories in the comments below! I can’t wait to see what you create. Happy baking, and enjoy every delicious bite of these incredible Hot Chocolate Brownie Cookies! They are truly the best of both worlds!
Hot Chocolate Brownie Cookies: The Ultimate Recipe
Decadent hot chocolate brownie cookies packed with chocolate chips and mini marshmallows. Soft, chewy, and perfect for satisfying your sweet tooth!
Ingredients
- 1 cup (2 sticks) unsalted butter, softened
- 1 ½ cups granulated sugar
- ½ cup packed light brown sugar
- 2 large eggs
- 1 teaspoon vanilla extract
- 1 cup all-purpose flour
- ½ cup unsweetened cocoa powder
- ½ teaspoon baking powder
- ¼ teaspoon salt
- 1 cup semi-sweet chocolate chips
- ½ cup mini marshmallows
- ¼ cup hot chocolate mix (powdered)
Instructions
- In a large bowl or stand mixer, beat softened butter, granulated sugar, and brown sugar until light and fluffy (3-5 minutes).
- Beat in eggs one at a time, fully incorporating each before adding the next. Stir in vanilla extract.
- In a separate medium bowl, whisk together flour, cocoa powder, baking powder, salt, and hot chocolate mix.
- Gradually add dry ingredients to wet ingredients, mixing on low speed until just combined. Do not overmix.
- Fold in chocolate chips and mini marshmallows until evenly distributed.
- Cover the bowl with plastic wrap and chill the dough in the refrigerator for at least 30 minutes (up to 24 hours).
- Preheat oven to 350°F (175°C). Line baking sheets with parchment paper.
- Remove chilled dough from refrigerator. Drop rounded tablespoons of dough onto prepared baking sheets, leaving 2 inches between each cookie.
- Bake for 10-12 minutes, or until edges are set and centers are slightly soft. Do not overbake.
- Remove baking sheets from oven and let cookies cool on baking sheets for a few minutes before transferring them to a wire rack to cool completely.
Notes
- Room Temperature Ingredients: Use room temperature butter and eggs for best results.
- Measure Flour Accurately: Spoon and level method for measuring flour.
- Don’t Overmix: Overmixing leads to tough cookies.
- Chill Dough: Chilling prevents spreading and develops flavor.
- Bake on Middle Rack: Ensures even baking.
- Don’t Overbake: Cookies should be slightly underbaked in the center.
- Cool Completely: Prevents sticking and sogginess.
- Optional Additions: Espresso powder, nuts, peppermint extract, white chocolate chips, sea salt, marshmallow fluff swirl, chocolate chunks.
- Storage: Store in an airtight container at room temperature for up to 3 days or freeze for up to 2 months.