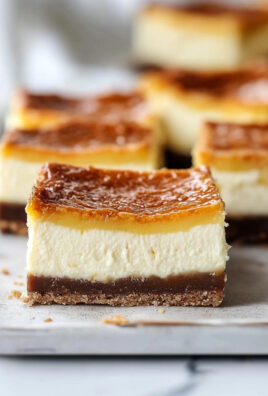
Hot Chocolate Icebox Pie: Just the name conjures up images of cozy winter nights, doesn’t it? But what if I told you that you could enjoy that warm, comforting hot chocolate flavor in a cool, creamy, no-bake dessert, perfect for any time of year? This isn’t just any pie; it’s a slice of pure indulgence that requires absolutely no oven time!
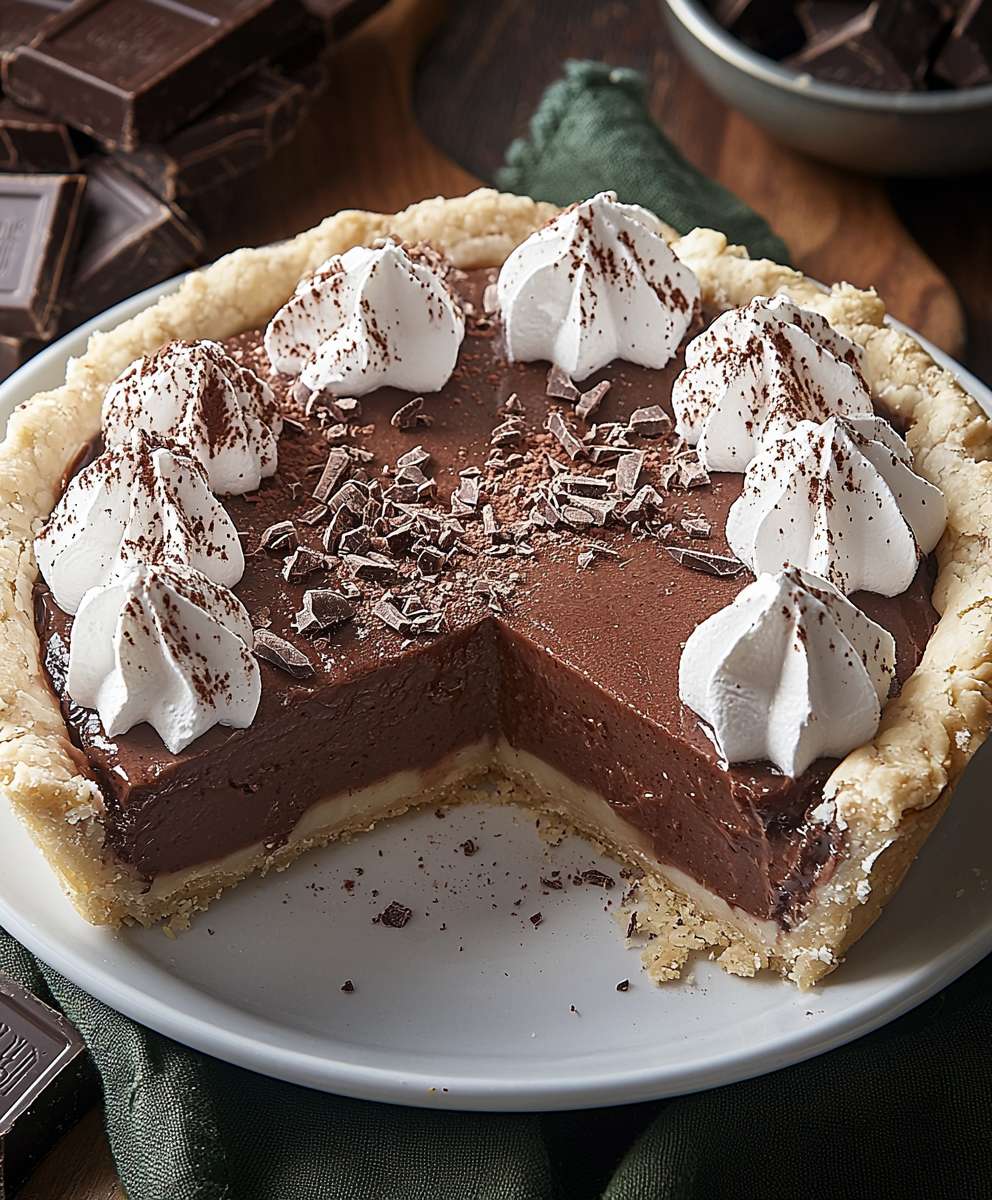
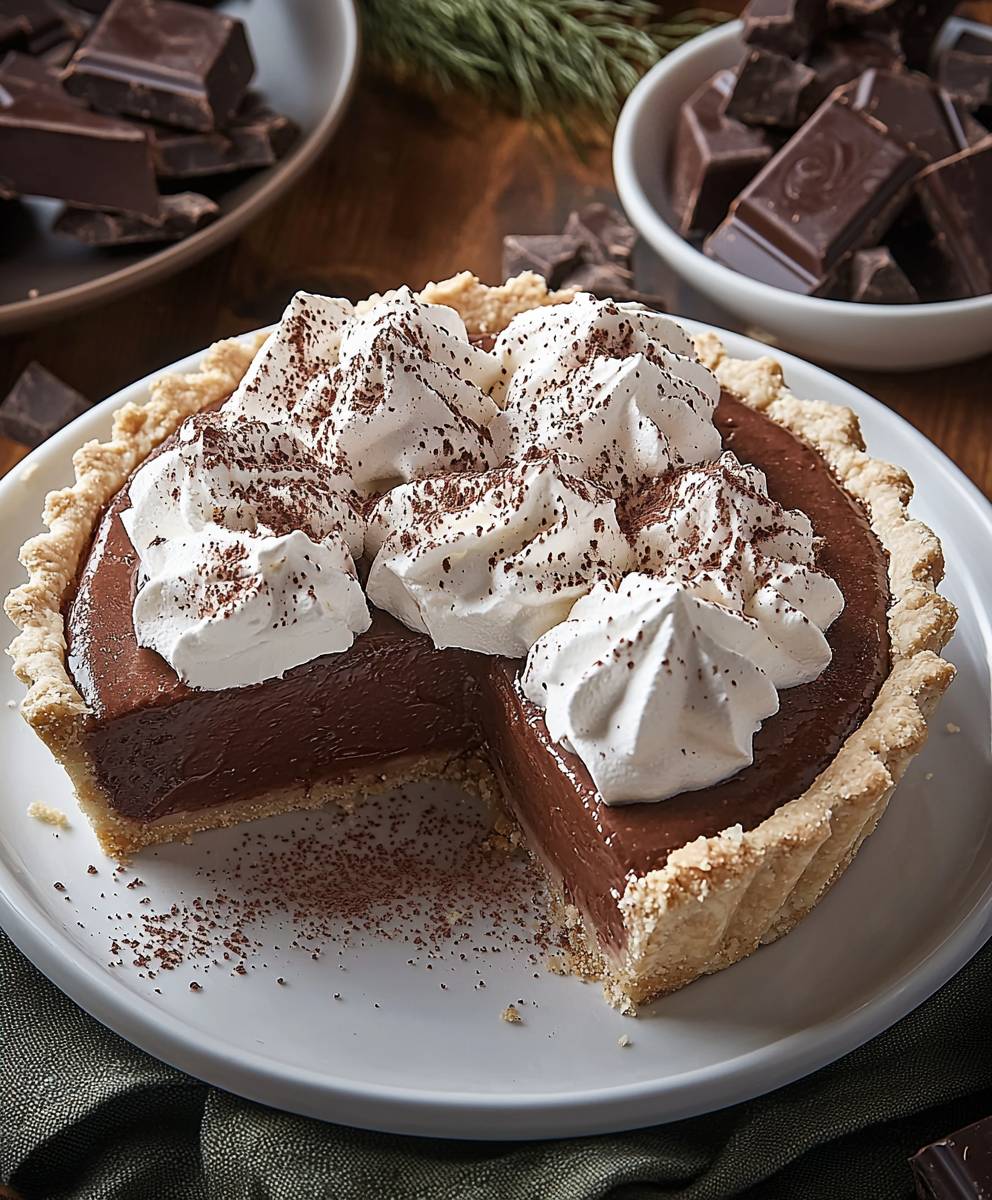
Icebox pies, a delightful invention born out of necessity before widespread refrigeration, have been a beloved staple in American households for generations. They offered a sweet escape from the summer heat, and this Hot Chocolate Icebox Pie takes that classic concept and elevates it to a whole new level of chocolatey goodness. Imagine a rich, decadent chocolate filling, reminiscent of your favorite hot cocoa, nestled in a crisp, crumbly crust.
What makes this pie so irresistible? It’s the perfect balance of textures the smooth, velvety filling against the satisfying crunch of the crust. The intense chocolate flavor is both comforting and sophisticated, making it a crowd-pleaser for all ages. Plus, let’s be honest, the sheer convenience of a no-bake dessert is a major win! Whether you’re looking for a show-stopping dessert for a special occasion or a simple treat to satisfy your chocolate cravings, this Hot Chocolate Icebox Pie is guaranteed to be a hit. So, grab your ingredients, and let’s get started on this easy and delicious recipe!
Ingredients:
- For the Crust:
- 1 ½ cups chocolate wafer crumbs (about 36 wafers)
- 5 tablespoons unsalted butter, melted
- 2 tablespoons granulated sugar
- For the Hot Chocolate Filling:
- 4 cups whole milk
- 1 cup heavy cream
- 1 cup granulated sugar
- ½ cup unsweetened cocoa powder
- ¼ teaspoon salt
- 6 ounces bittersweet chocolate, chopped
- 2 ounces milk chocolate, chopped
- 2 tablespoons cornstarch
- 2 tablespoons cold water
- 1 teaspoon vanilla extract
- For the Whipped Cream Topping:
- 1 ½ cups heavy cream
- 3 tablespoons powdered sugar
- ½ teaspoon vanilla extract
- Optional Garnishes:
- Mini marshmallows
- Chocolate shavings
- Cocoa powder
Preparing the Chocolate Wafer Crust
- Crush the Chocolate Wafers: I like to use a food processor for this, it’s the quickest and easiest way to get a fine, even crumb. If you don’t have one, you can place the chocolate wafers in a large zip-top bag and crush them with a rolling pin. Make sure to get them as fine as possible!
- Combine the Crumbs with Butter and Sugar: In a medium bowl, combine the chocolate wafer crumbs, melted butter, and granulated sugar. Mix well until all the crumbs are evenly moistened. The mixture should resemble wet sand.
- Press the Crust into the Pie Plate: Transfer the crumb mixture to a 9-inch pie plate. Using the bottom of a measuring cup or your fingers, firmly press the crumbs evenly across the bottom and up the sides of the pie plate. Make sure the crust is compact and uniform in thickness. This is important for a sturdy crust that won’t crumble when you slice the pie.
- Pre-bake the Crust (Optional): For an extra-crisp crust, you can pre-bake it in a preheated oven at 350°F (175°C) for about 8-10 minutes. This step is optional, but I find it helps prevent the crust from becoming soggy. Let the crust cool completely before adding the filling. If you choose not to pre-bake, that’s perfectly fine too! Just make sure the crust is well-pressed.
Making the Hot Chocolate Filling
- Combine Milk, Cream, Sugar, Cocoa Powder, and Salt: In a large saucepan, whisk together the whole milk, heavy cream, granulated sugar, unsweetened cocoa powder, and salt. Whisk until the cocoa powder is fully incorporated and there are no lumps.
- Heat the Mixture: Place the saucepan over medium heat and bring the mixture to a simmer, stirring occasionally to prevent scorching. Be patient and keep an eye on it, as milk can easily burn on the bottom of the pan.
- Add the Chocolate: Once the mixture is simmering, remove the saucepan from the heat and add the chopped bittersweet chocolate and milk chocolate. Let the chocolate sit for a minute or two to soften, then whisk until it is completely melted and the mixture is smooth and glossy.
- Prepare the Cornstarch Slurry: In a small bowl, whisk together the cornstarch and cold water until smooth. This is your cornstarch slurry, which will help thicken the filling.
- Thicken the Filling: Return the saucepan to medium heat. Slowly pour the cornstarch slurry into the hot chocolate mixture, whisking constantly to prevent lumps from forming. Continue to cook, whisking constantly, until the filling thickens to a pudding-like consistency. This should take about 2-3 minutes. You’ll know it’s ready when it coats the back of a spoon.
- Remove from Heat and Add Vanilla: Remove the saucepan from the heat and stir in the vanilla extract. This adds a lovely aroma and enhances the chocolate flavor.
- Cool Slightly: Let the filling cool slightly for about 5-10 minutes before pouring it into the crust. This will help prevent the crust from becoming soggy.
Assembling the Icebox Pie
- Pour the Filling into the Crust: Carefully pour the slightly cooled hot chocolate filling into the prepared chocolate wafer crust. Spread the filling evenly to the edges of the crust.
- Cover and Chill: Cover the pie with plastic wrap, pressing it gently onto the surface of the filling to prevent a skin from forming. Refrigerate the pie for at least 4 hours, or preferably overnight, to allow the filling to set completely. This is crucial for a clean slice!
Preparing the Whipped Cream Topping
- Chill the Bowl and Whisk: Before making the whipped cream, chill your mixing bowl and whisk (or the bowl and whisk attachment of your stand mixer) in the freezer for about 15-20 minutes. This will help the cream whip up faster and hold its shape better.
- Whip the Cream: Pour the heavy cream into the chilled bowl. Using a whisk or an electric mixer, whip the cream until soft peaks begin to form.
- Add Sugar and Vanilla: Gradually add the powdered sugar and vanilla extract to the cream. Continue to whip until stiff peaks form. Be careful not to overwhip, as this can turn the cream into butter. You want the peaks to hold their shape but still be smooth and creamy.
Finishing Touches and Serving
- Spread the Whipped Cream: Once the pie is fully chilled and set, remove it from the refrigerator. Spread the whipped cream evenly over the top of the pie. You can create swirls or peaks with a spoon or spatula for a more decorative look.
- Garnish (Optional): If desired, garnish the pie with mini marshmallows, chocolate shavings, or a dusting of cocoa powder. Get creative and have fun with it!
- Slice and Serve: Slice the pie into wedges and serve immediately. The pie can be stored in the refrigerator for up to 2-3 days, but the crust may soften slightly over time.
Tips for Success:
- Use High-Quality Chocolate: The quality of the chocolate will greatly impact the flavor of the pie. I recommend using a good-quality bittersweet and milk chocolate for the best results.
- Don’t Overcook the Filling: Be careful not to overcook the hot chocolate filling, as this can make it too thick and gummy. Cook it just until it coats the back of a spoon.
- Chill Thoroughly: Chilling the pie for at least 4 hours, or preferably overnight, is essential for a firm and sliceable pie.
- Make Ahead: This pie is a great make-ahead dessert. You can prepare the crust and filling a day or two in advance and store them separately in the refrigerator. Assemble the pie and add the whipped cream topping just before serving.
- Variations: Feel free to customize this pie to your liking. You can add a pinch of cinnamon or cayenne pepper to the filling for a spicy kick, or top it with different types of chocolate candies or nuts.
Enjoy your delicious Hot Chocolate Icebox Pie!
Conclusion:
This Hot Chocolate Icebox Pie isn’t just dessert; it’s an experience. It’s the kind of treat that evokes cozy winter nights, crackling fireplaces, and the pure joy of indulging in something truly decadent. The creamy, rich chocolate filling, perfectly balanced by the crisp, crumbly crust, creates a symphony of textures and flavors that will leave you wanting more. Trust me, once you take that first bite, you’ll understand why I’m so passionate about this recipe. It’s simple enough for a weeknight treat, yet elegant enough to impress at your next dinner party.
But what truly makes this pie a must-try is its versatility. While it’s absolutely divine as is, there are so many ways to customize it to your liking. Feeling adventurous? Try adding a hint of peppermint extract to the filling for a festive holiday twist. Or, for a mocha-inspired delight, stir in a tablespoon of instant coffee granules. For those who love a little heat, a pinch of cayenne pepper will add a subtle kick that complements the chocolate beautifully.
Serving Suggestions and Variations:
* Classic: Serve chilled with a dollop of freshly whipped cream and a sprinkle of cocoa powder.
* Peppermint Perfection: Add 1/2 teaspoon of peppermint extract to the filling and top with crushed candy canes.
* Mocha Magic: Stir in 1 tablespoon of instant coffee granules to the filling and garnish with chocolate-covered espresso beans.
* Spicy Chocolate: Add 1/4 teaspoon of cayenne pepper to the filling for a subtle kick.
* Nutty Delight: Sprinkle chopped pecans or walnuts over the crust before baking for added texture and flavor.
* Boozy Boost: A splash of your favorite liqueur, like Kahlua or Baileys, can elevate the filling to a whole new level of indulgence. Just be sure to add it sparingly!
Don’t be afraid to experiment and find your own perfect combination. The beauty of this Hot Chocolate Icebox Pie is that it’s incredibly forgiving and adaptable. Whether you’re a seasoned baker or a complete novice, you’ll find this recipe easy to follow and incredibly rewarding.
I truly believe that everyone deserves a slice of this heavenly pie. It’s the perfect way to treat yourself, share with loved ones, or simply brighten up a gloomy day. So, what are you waiting for? Gather your ingredients, preheat your oven, and get ready to embark on a delicious adventure.
I’m so excited for you to try this recipe and experience the magic of this Hot Chocolate Icebox Pie for yourself. And please, don’t be shy! I’d love to hear about your experience. Share your photos, your variations, and your thoughts in the comments below. Let’s create a community of pie lovers and spread the joy of this incredible dessert. Happy baking! I can’t wait to see what you create! Remember to tag me in your photos so I can see your amazing creations. Let’s make the world a sweeter place, one slice of pie at a time!
Hot Chocolate Icebox Pie: A Decadent No-Bake Dessert
Decadent Hot Chocolate Icebox Pie! Rich, creamy hot chocolate filling in a chocolate wafer crust, topped with homemade whipped cream. Perfect no-bake dessert for chocolate lovers.
Ingredients
- 1 ½ cups chocolate wafer crumbs (about 36 wafers)
- 5 tablespoons unsalted butter, melted
- 2 tablespoons granulated sugar
- 4 cups whole milk
- 1 cup heavy cream
- 1 cup granulated sugar
- ½ cup unsweetened cocoa powder
- ¼ teaspoon salt
- 6 ounces bittersweet chocolate, chopped
- 2 ounces milk chocolate, chopped
- 2 tablespoons cornstarch
- 2 tablespoons cold water
- 1 teaspoon vanilla extract
- 1 ½ cups heavy cream
- 3 tablespoons powdered sugar
- ½ teaspoon vanilla extract
- Mini marshmallows
- Chocolate shavings
- Cocoa powder
Instructions
- Crush the chocolate wafers using a food processor or by placing them in a zip-top bag and crushing with a rolling pin.
- In a medium bowl, combine the chocolate wafer crumbs, melted butter, and granulated sugar. Mix well until evenly moistened.
- Transfer the crumb mixture to a 9-inch pie plate. Press firmly across the bottom and up the sides.
- (Optional) Pre-bake the crust at 350°F (175°C) for 8-10 minutes for an extra-crisp crust. Let cool completely.
- In a large saucepan, whisk together the whole milk, heavy cream, granulated sugar, unsweetened cocoa powder, and salt.
- Place over medium heat and bring to a simmer, stirring occasionally.
- Remove from heat and add the chopped bittersweet chocolate and milk chocolate. Let sit for a minute, then whisk until melted and smooth.
- In a small bowl, whisk together the cornstarch and cold water until smooth (cornstarch slurry).
- Return the saucepan to medium heat. Slowly pour in the cornstarch slurry, whisking constantly until the filling thickens to a pudding-like consistency (2-3 minutes).
- Remove from heat and stir in the vanilla extract.
- Let the filling cool slightly for 5-10 minutes.
- Carefully pour the slightly cooled hot chocolate filling into the prepared chocolate wafer crust.
- Cover the pie with plastic wrap, pressing it gently onto the surface.
- Refrigerate for at least 4 hours, or preferably overnight, to allow the filling to set completely.
- Chill your mixing bowl and whisk in the freezer for 15-20 minutes.
- Pour the heavy cream into the chilled bowl. Whip until soft peaks form.
- Gradually add the powdered sugar and vanilla extract. Continue to whip until stiff peaks form. Be careful not to overwhip.
- Once the pie is fully chilled, remove it from the refrigerator.
- Spread the whipped cream evenly over the top of the pie.
- Garnish with mini marshmallows, chocolate shavings, or cocoa powder (optional).
- Slice and serve immediately.
Notes
- Use high-quality chocolate for the best flavor.
- Don’t overcook the filling. Cook just until it coats the back of a spoon.
- Chill thoroughly for a firm and sliceable pie.
- This pie can be made ahead. Prepare the crust and filling a day or two in advance and store separately. Assemble and add the whipped cream just before serving.
- Customize the pie by adding cinnamon or cayenne pepper to the filling, or topping with different candies or nuts.