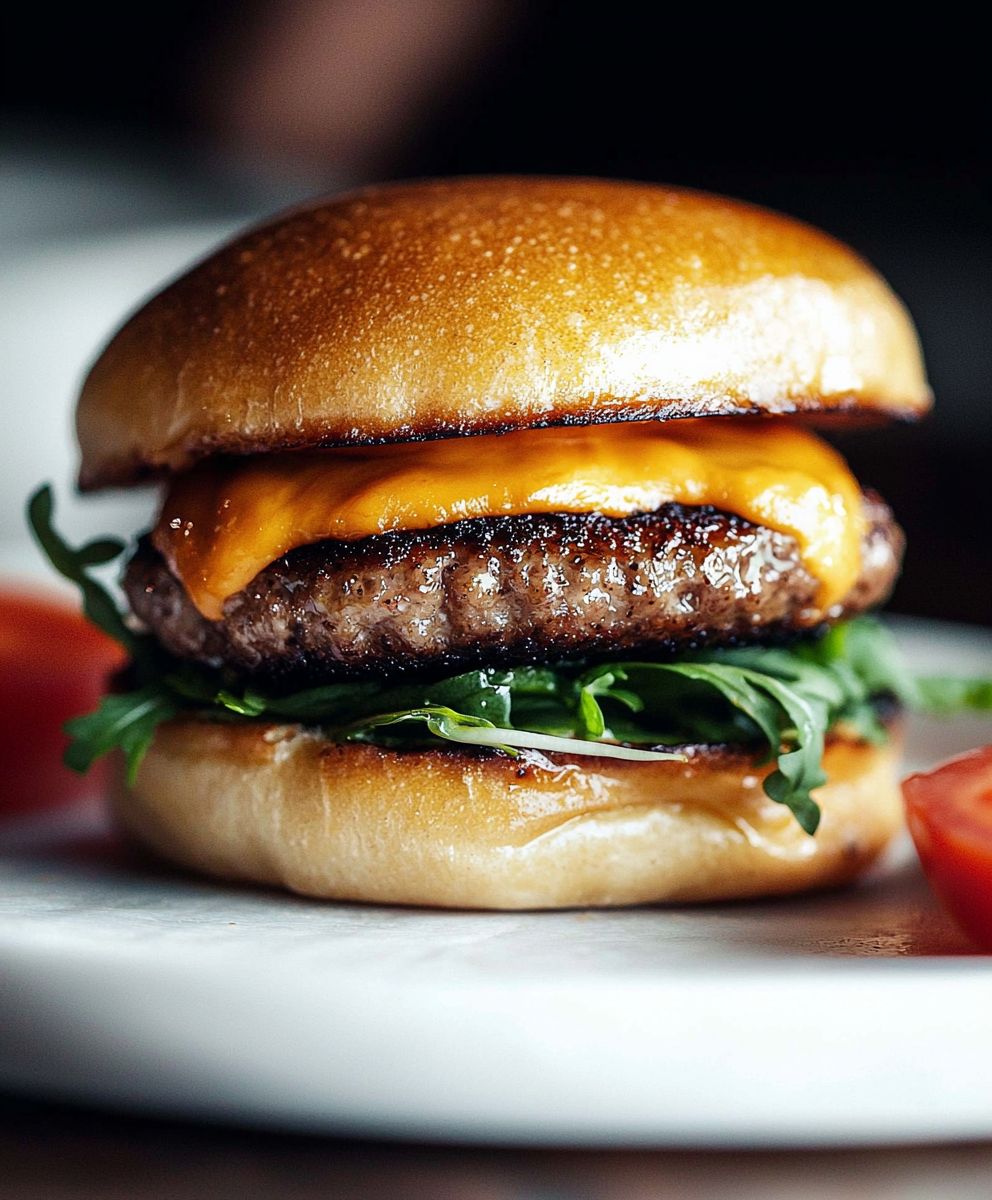
Juicy Lucy burger, a molten cheese-filled marvel, isn’t just a burger; it’s an experience. Imagine sinking your teeth into a perfectly grilled patty, only to be greeted by a river of hot, gooey cheese erupting from its core. Intrigued? I thought you might be! This isn’t your average backyard barbecue fare; it’s a culinary adventure born from the heart of Minneapolis.
The history of the Juicy Lucy is shrouded in delicious mystery, with two Minneapolis bars, Matt’s Bar and the 5-8 Club, both claiming to be its birthplace in the 1950s. Regardless of its true origin, the Juicy Lucy quickly became a local legend and then spread its cheesy goodness across the nation. The debate over who invented it, and whether it should be spelled “Juicy Lucy” or “Jucy Lucy,” only adds to its charm and enduring appeal.
But what makes the Juicy Lucy burger so irresistible? It’s the surprise element, the anticipation of that first bite, and the sheer satisfaction of the molten cheese explosion. The contrast between the savory beef and the creamy, melted cheese is a symphony of flavors and textures that keeps people coming back for more. Plus, it’s undeniably fun to eat! So, ditch the ordinary and prepare to embark on a cheesy journey with my ultimate Juicy Lucy recipe. Get ready to create a burger that’s guaranteed to impress!

Ingredients:
- For the Patties:
- 2 pounds ground beef (80/20 blend recommended for juiciness)
- 1 teaspoon kosher salt
- 1/2 teaspoon black pepper
- 4 ounces cheddar cheese, cut into small cubes (about 1/4 inch)
- Optional: 1 tablespoon Worcestershire sauce
- Optional: 1 teaspoon garlic powder
- Optional: 1/2 teaspoon onion powder
- For the Buns & Toppings:
- 4 burger buns (brioche or potato buns work great)
- 2 tablespoons butter, melted (for toasting the buns)
- Optional: Lettuce leaves
- Optional: Sliced tomatoes
- Optional: Sliced red onion
- Optional: Pickles
- Optional: Your favorite burger sauce (mayonnaise, mustard, ketchup, special sauce)
Preparing the Juicy Lucy Patties:
- Combine the Ground Beef and Seasonings: In a large bowl, gently combine the ground beef, salt, pepper, Worcestershire sauce (if using), garlic powder (if using), and onion powder (if using). Be careful not to overmix, as this can result in tough patties. I like to use my hands for this, but a spatula works too. Just make sure everything is evenly distributed.
- Divide the Mixture: Divide the ground beef mixture into 8 equal portions. This will give you 4 Juicy Lucy burgers. I find it easiest to weigh the mixture to ensure even patty sizes, but you can eyeball it too.
- Form the Bottom Patties: Gently form 4 of the portions into patties, about 1/2 inch thick and slightly larger than your burger buns. Make a well in the center of each patty, creating a space for the cheese. The well should be deep enough to hold a generous amount of cheese without it spilling out too much during cooking.
- Add the Cheese: Divide the cheddar cheese cubes evenly among the wells in the patties. Pack the cheese in tightly, ensuring it’s completely surrounded by the ground beef. This is crucial to keep the cheese molten and contained during cooking. Don’t be shy with the cheese! The more, the merrier (and juicier!).
- Form the Top Patties: Form the remaining 4 portions of ground beef into patties, similar in size and thickness to the bottom patties. These will be the “lids” for your cheesy creations.
- Seal the Patties: Carefully place a top patty over each cheese-filled bottom patty. Pinch the edges of the top and bottom patties together tightly to completely seal the cheese inside. Make sure there are no gaps or holes, or the cheese will leak out during cooking. This is the most important step! I like to use my fingers to crimp the edges, ensuring a good seal. You can also use a fork to press the edges together for a decorative touch and extra security.
- Flatten and Shape: Gently flatten the sealed patties to about 3/4 inch thickness. Reshape them as needed to ensure they are round and even. This will help them cook evenly.
- Chill the Patties (Optional but Recommended): Place the formed patties on a plate or baking sheet lined with parchment paper. Cover them loosely with plastic wrap and refrigerate for at least 30 minutes. This will help the patties hold their shape during cooking and prevent the cheese from melting too quickly. I find that chilling them for an hour or even longer makes a big difference.
Cooking the Juicy Lucy Burgers:
There are several ways to cook a Juicy Lucy, each with its own advantages. I’ll cover grilling, pan-frying, and using a cast-iron skillet.
Grilling:
- Prepare the Grill: Preheat your grill to medium-high heat (about 375-450°F). Make sure the grates are clean and lightly oiled to prevent sticking.
- Grill the Patties: Place the patties on the hot grill grates. Grill for about 5-7 minutes per side, or until the internal temperature reaches 160°F for medium doneness. Be careful not to press down on the patties while grilling, as this will squeeze out the juices (and the cheese!).
- Check for Doneness: Use a meat thermometer to check the internal temperature. Insert the thermometer into the side of the patty to avoid hitting the cheese pocket. If the cheese starts to leak out, don’t panic! Just try to keep the patties intact as much as possible.
- Rest the Patties: Remove the patties from the grill and let them rest for 5 minutes before serving. This allows the juices to redistribute, resulting in a more flavorful and juicy burger.
Pan-Frying:
- Prepare the Pan: Heat a large skillet (preferably cast iron) over medium-high heat. Add about 1 tablespoon of oil (vegetable or canola oil works well).
- Sear the Patties: Once the oil is hot, carefully place the patties in the skillet. Sear for about 4-5 minutes per side, or until they are nicely browned.
- Reduce Heat and Cook Through: Reduce the heat to medium and continue cooking for another 5-7 minutes per side, or until the internal temperature reaches 160°F. You may need to adjust the heat to prevent the patties from burning.
- Check for Doneness: Use a meat thermometer to check the internal temperature. Insert the thermometer into the side of the patty.
- Rest the Patties: Remove the patties from the skillet and let them rest for 5 minutes before serving.
Cast-Iron Skillet:
- Preheat the Skillet: Place a cast-iron skillet in the oven and preheat the oven to 400°F (200°C). This ensures the skillet is evenly heated.
- Sear the Patties (Stovetop): Carefully remove the hot skillet from the oven (use oven mitts!). Place the skillet on the stovetop over medium-high heat. Add about 1 tablespoon of oil (vegetable or canola oil works well).
- Sear the Patties: Once the oil is hot, carefully place the patties in the skillet. Sear for about 2-3 minutes per side, or until they are nicely browned. This creates a flavorful crust.
- Bake in the Oven: Transfer the skillet with the patties back to the preheated oven. Bake for 8-10 minutes, or until the internal temperature reaches 160°F.
- Check for Doneness: Use a meat thermometer to check the internal temperature. Insert the thermometer into the side of the patty.
- Rest the Patties: Remove the skillet from the oven (use oven mitts!). Let the patties rest in the skillet for 5 minutes before serving.
Assembling the Juicy Lucy Burgers:
- Toast the Buns: While the patties are resting, toast the burger buns. Spread the melted butter on the cut sides of the buns and toast them in a skillet or on the grill until golden brown. This adds flavor and prevents the buns from getting soggy.
- Add Toppings: Spread your favorite burger sauce on the top and bottom buns. Add lettuce, tomato, red onion, and pickles, if desired.
- Place the Patty: Carefully place a Juicy Lucy patty on the bottom bun. Be careful when taking the first bite, as the molten cheese can be very hot!
- Top with the Bun: Place the top bun on the patty.
- Serve Immediately: Serve the Juicy Lucy burgers immediately and enjoy the cheesy goodness!
Tips for Success:
- Don’t Overmix the Ground Beef: Overmixing can result in tough patties. Gently combine the ingredients until just combined.
- Seal the Patties Well: This is the most important step to prevent the cheese from leaking out. Make sure there are no gaps or holes.
- Use a Meat Thermometer: This is the best way to ensure the patties are cooked to the correct internal temperature.
- Let the Patties Rest: This allows the juices to redistribute, resulting in a more flavorful and juicy burger.
- Be Careful When Biting: The molten cheese can be very hot! Let the burger cool slightly before taking a bite.
Variations:
- Cheese Variations: Experiment with different types of cheese, such as pepper jack, provolone, or Swiss.
Conclusion:
Well, there you have it! I truly believe this Juicy Lucy burger recipe is a game-changer, and one you absolutely must try. It’s not just another burger; it’s an experience. The molten cheese core, the perfectly seasoned patty, the satisfying squish with every bite it’s burger perfection redefined. Forget dry, boring burgers; this is juicy, cheesy, and bursting with flavor from the first bite to the last.
Why is it a must-try? Because it’s surprisingly simple to make, yet delivers restaurant-quality results. You control the ingredients, ensuring a fresh and delicious meal every time. Plus, the “wow” factor when you reveal that molten cheese center is guaranteed to impress your family and friends. It’s a conversation starter, a crowd-pleaser, and a genuinely fun cooking project.
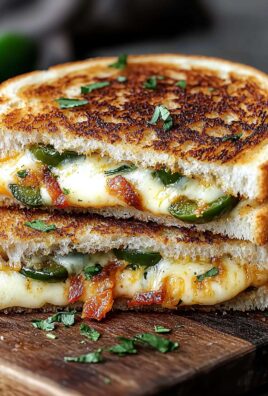
But the fun doesn’t stop there! This recipe is just a starting point. Feel free to get creative with your fillings. Imagine a Juicy Lucy stuffed with pepper jack cheese and jalapenos for a spicy kick, or a blend of Gruyere and caramelized onions for a sophisticated twist. You could even experiment with different types of ground meat, like ground turkey or lamb, to create your own signature Juicy Lucy.
As for serving suggestions, the possibilities are endless. Classic burger toppings like lettuce, tomato, onion, and pickles are always a good choice. But don’t be afraid to think outside the box! Try adding a smear of sriracha mayo for extra heat, or a dollop of guacamole for a creamy, cool contrast. Crispy bacon is always a welcome addition, and a fried egg on top takes it to a whole new level of indulgence.
On the side, you can’t go wrong with classic french fries or sweet potato fries. Onion rings are another great option, or a simple side salad for a lighter meal. And don’t forget the condiments! Ketchup, mustard, mayonnaise, and your favorite burger sauce are all essential.
Here are a few more variations to consider:
Variations
- The “Spicy Lucy”: Use pepper jack cheese and add diced jalapenos to the cheese filling.
- The “Gourmet Lucy”: Use Gruyere cheese and caramelized onions for a sophisticated flavor.
- The “Mediterranean Lucy”: Use feta cheese, spinach, and sun-dried tomatoes.
- The “Breakfast Lucy”: Top with a fried egg and crispy bacon.
I’m so excited for you to try this recipe and experience the joy of a perfectly cooked Juicy Lucy. I’m confident that it will become a new favorite in your household.
So, what are you waiting for? Gather your ingredients, fire up the grill (or stovetop), and get ready to make the best burger of your life. And most importantly, don’t forget to share your experience! I’d love to hear about your creations, your variations, and your overall thoughts on this Juicy Lucy burger recipe. Leave a comment below, tag me in your photos on social media, and let’s spread the Juicy Lucy love! Happy cooking!
Juicy Lucy Burger: The Ultimate Guide to Minneapolis's Cheeseburger Icon
A Juicy Lucy burger features molten cheese inside a juicy beef patty. This recipe includes instructions for grilling, pan-frying, and cast-iron skillet cooking.
Ingredients
- 2 pounds ground beef (80/20 blend recommended)
- 1 teaspoon kosher salt
- 1/2 teaspoon black pepper
- 4 ounces cheddar cheese, cut into small cubes (about 1/4 inch)
- 1 tablespoon Worcestershire sauce (Optional)
- 1 teaspoon garlic powder (Optional)
- 1/2 teaspoon onion powder (Optional)
- 4 burger buns (brioche or potato buns work great)
- 2 tablespoons butter, melted (for toasting the buns)
- Lettuce leaves (Optional)
- Sliced tomatoes (Optional)
- Sliced red onion (Optional)
- Pickles (Optional)
- Your favorite burger sauce (mayonnaise, mustard, ketchup, special sauce) (Optional)
Instructions
- In a large bowl, gently combine the ground beef, salt, pepper, Worcestershire sauce (if using), garlic powder (if using), and onion powder (if using). Be careful not to overmix.
- Divide the ground beef mixture into 8 equal portions.
- Gently form 4 of the portions into patties, about 1/2 inch thick and slightly larger than your burger buns. Make a well in the center of each patty.
- Divide the cheddar cheese cubes evenly among the wells in the patties. Pack the cheese in tightly.
- Form the remaining 4 portions of ground beef into patties, similar in size and thickness to the bottom patties.
- Carefully place a top patty over each cheese-filled bottom patty. Pinch the edges of the top and bottom patties together tightly to completely seal the cheese inside.
- Gently flatten the sealed patties to about 3/4 inch thickness. Reshape them as needed to ensure they are round and even.
- Place the formed patties on a plate or baking sheet lined with parchment paper. Cover them loosely with plastic wrap and refrigerate for at least 30 minutes.
- Preheat your grill to medium-high heat (about 375-450°F). Make sure the grates are clean and lightly oiled to prevent sticking.
- Place the patties on the hot grill grates. Grill for about 5-7 minutes per side, or until the internal temperature reaches 160°F for medium doneness.
- Use a meat thermometer to check the internal temperature. Insert the thermometer into the side of the patty to avoid hitting the cheese pocket.
- Remove the patties from the grill and let them rest for 5 minutes before serving.
- Heat a large skillet (preferably cast iron) over medium-high heat. Add about 1 tablespoon of oil (vegetable or canola oil works well).
- Once the oil is hot, carefully place the patties in the skillet. Sear for about 4-5 minutes per side, or until they are nicely browned.
- Reduce the heat to medium and continue cooking for another 5-7 minutes per side, or until the internal temperature reaches 160°F. You may need to adjust the heat to prevent the patties from burning.
- Use a meat thermometer to check the internal temperature. Insert the thermometer into the side of the patty.
- Remove the patties from the skillet and let them rest for 5 minutes before serving.
- Place a cast-iron skillet in the oven and preheat the oven to 400°F (200°C). This ensures the skillet is evenly heated.
- Carefully remove the hot skillet from the oven (use oven mitts!). Place the skillet on the stovetop over medium-high heat. Add about 1 tablespoon of oil (vegetable or canola oil works well).
- Once the oil is hot, carefully place the patties in the skillet. Sear for about 2-3 minutes per side, or until they are nicely browned. This creates a flavorful crust.
- Transfer the skillet with the patties back to the preheated oven. Bake for 8-10 minutes, or until the internal temperature reaches 160°F.
- Use a meat thermometer to check the internal temperature. Insert the thermometer into the side of the patty.
- Remove the skillet from the oven (use oven mitts!). Let the patties rest in the skillet for 5 minutes before serving.
- While the patties are resting, toast the burger buns. Spread the melted butter on the cut sides of the buns and toast them in a skillet or on the grill until golden brown. This adds flavor and prevents the buns from getting soggy.
- Spread your favorite burger sauce on the top and bottom buns. Add lettuce, tomato, red onion, and pickles, if desired.
- Carefully place a Juicy Lucy patty on the bottom bun. Be careful when taking the first bite, as the molten cheese can be very hot!
- Place the top bun on the patty.
- Serve the Juicy Lucy burgers immediately and enjoy the cheesy goodness!
Notes
- Don’t Overmix the Ground Beef: Overmixing can result in tough patties. Gently combine the ingredients until just combined.
- Seal the Patties Well: This is the most important step to prevent the cheese from leaking out. Make sure there are no gaps or holes.
- Use a Meat Thermometer: This is the best way to ensure the patties are cooked to the correct internal temperature.
- Let the Patties Rest: This allows the juices to redistribute, resulting in a more flavorful and juicy burger.
- Be Careful When Biting: The molten cheese can be very hot! Let the burger cool slightly before taking a bite.
- Cheese Variations: Experiment with different types of cheese, such as pepper jack, provolone, or Swiss.