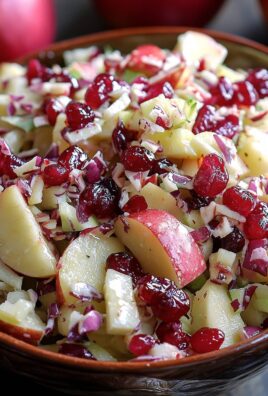
Kimchi Fried Rice: Prepare to embark on a culinary adventure that will tantalize your taste buds and leave you craving more! Imagine a symphony of flavors dancing on your palate the tangy, spicy kick of kimchi perfectly balanced with savory rice, all brought together in a sizzling, satisfying dish. It’s not just food; it’s an experience!
Kimchi Fried Rice, or kimchi bokkeumbap, is more than just a quick meal in Korea; it’s a comforting staple, often made with leftover kimchi and rice. It represents resourcefulness and the ability to create something incredibly delicious from simple ingredients. Generations have enjoyed this dish, passing down family recipes and variations that reflect regional preferences and personal tastes.
What makes Kimchi Fried Rice so universally loved? It’s the perfect marriage of textures the slightly chewy rice, the crisp edges from the frying pan, and the satisfying crunch of vegetables. The taste is an explosion of umami, spice, and subtle sweetness. Plus, it’s incredibly convenient! Ready in minutes, it’s the ideal weeknight dinner or a satisfying lunch. Whether you’re a seasoned cook or a kitchen novice, this recipe is guaranteed to impress. So, let’s get cooking and create a bowl of pure deliciousness!

Ingredients:
- For the Rice:
- 2 cups cooked rice, preferably day-old and chilled (this helps prevent it from getting mushy)
- For the Kimchi & Vegetables:
- 1 cup kimchi, well-fermented and chopped (reserve some kimchi juice!)
- 1/2 cup onion, finely chopped
- 1/2 cup carrot, finely diced
- 1/4 cup green onions, thinly sliced (separate the white and green parts)
- 2 cloves garlic, minced
- For the Sauce:
- 1 tablespoon gochujang (Korean chili paste) – adjust to your spice preference
- 1 tablespoon soy sauce
- 1 teaspoon sesame oil
- 1 teaspoon sugar
- 1 tablespoon kimchi juice (from the chopped kimchi)
- 1/2 teaspoon gochugaru (Korean chili flakes, optional for extra heat)
- For Cooking:
- 2 tablespoons vegetable oil (or any neutral cooking oil)
- 1 tablespoon butter (optional, but adds richness)
- For Toppings (optional):
- Fried egg(s)
- Sesame seeds
- Seaweed flakes (kim)
- Extra green onions, sliced
- Sriracha or gochujang (for extra spice)
- Protein Options (optional):
- Cooked bacon, diced
- Cooked spam, diced
- Cooked chicken, diced
- Tofu, crumbled and pan-fried
Preparing the Kimchi Fried Rice
- Prepare the Rice: If you’re using freshly cooked rice, spread it out on a baking sheet and let it cool down completely in the refrigerator for at least an hour. This will help dry it out and prevent it from clumping together when you fry it. Day-old rice is ideal!
- Chop the Vegetables: Finely chop the onion, carrot, and kimchi. Mince the garlic. Separate the white and green parts of the green onions. We’ll use the white parts for cooking and the green parts for garnish.
- Make the Sauce: In a small bowl, whisk together the gochujang, soy sauce, sesame oil, sugar, kimchi juice, and gochugaru (if using). Taste and adjust the seasonings to your liking. If you prefer a sweeter flavor, add a little more sugar. For more spice, add more gochujang or gochugaru.
- Prepare the Protein (Optional): If you’re adding protein, cook it separately and set it aside. Bacon should be cooked until crispy and then diced. Spam can be diced and pan-fried until lightly browned. Chicken should be cooked through and diced. Tofu should be pressed to remove excess water, crumbled, and pan-fried until golden brown.
Cooking the Kimchi Fried Rice
- Heat the Oil and Butter: In a large skillet or wok, heat the vegetable oil and butter (if using) over medium-high heat. Make sure the pan is hot before adding the vegetables.
- Sauté the Aromatics: Add the chopped onion and the white parts of the green onions to the hot pan. Sauté for about 2-3 minutes, or until the onion becomes translucent and fragrant.
- Add the Garlic and Carrot: Add the minced garlic and diced carrot to the pan. Sauté for another 1-2 minutes, until the garlic is fragrant and the carrot is slightly softened. Be careful not to burn the garlic.
- Add the Kimchi: Add the chopped kimchi to the pan. Sauté for about 3-5 minutes, stirring frequently, until the kimchi is slightly softened and its flavors have melded with the other vegetables. This step is crucial for developing the characteristic kimchi fried rice flavor.
- Add the Rice: Add the cooked rice to the pan. Use a spatula or wooden spoon to break up any clumps of rice. Stir-fry the rice with the vegetables and kimchi for about 2-3 minutes, until the rice is heated through and evenly coated with the kimchi mixture.
- Pour in the Sauce: Pour the prepared sauce over the rice. Stir-fry for another 2-3 minutes, until the sauce is evenly distributed and the rice is nicely coated and slightly sticky. Make sure to scrape the bottom of the pan to prevent sticking and ensure even flavor distribution.
- Incorporate the Protein (Optional): If you’re adding protein, add it to the pan and stir-fry for another minute or two, until the protein is heated through and incorporated into the rice.
- Taste and Adjust Seasonings: Taste the kimchi fried rice and adjust the seasonings as needed. If it needs more saltiness, add a little more soy sauce. If it needs more spice, add more gochujang or gochugaru. If it needs more sweetness, add a little more sugar.
Serving the Kimchi Fried Rice
- Serve Immediately: Serve the kimchi fried rice immediately while it’s hot and flavorful.
- Top with a Fried Egg (Optional): A fried egg is a classic topping for kimchi fried rice. Fry an egg to your desired doneness (sunny-side up, over easy, or over medium) and place it on top of the rice. The runny yolk adds richness and flavor to the dish.
- Garnish (Optional): Garnish the kimchi fried rice with sesame seeds, seaweed flakes (kim), and the remaining green onions. You can also add a drizzle of sriracha or gochujang for extra spice.
- Enjoy! Dig in and enjoy your delicious homemade kimchi fried rice!
Tips and Variations:
- Rice Type: Day-old rice is best for kimchi fried rice because it’s drier and less likely to get mushy. If you don’t have day-old rice, you can spread freshly cooked rice on a baking sheet and refrigerate it for at least an hour to dry it out. Short-grain or medium-grain rice is generally preferred for fried rice.
- Kimchi Fermentation: The more fermented the kimchi, the more flavorful the fried rice will be. If you prefer a milder flavor, use less fermented kimchi.
- Spice Level: Adjust the amount of gochujang and gochugaru to your spice preference. If you’re sensitive to spice, start with a small amount and add more to taste.
- Vegetable Variations: Feel free to add other vegetables to your kimchi fried rice, such as mushrooms, zucchini, or bell peppers.
- Protein Variations: You can use any type of protein you like in kimchi fried rice, such as beef, pork, shrimp, or tofu.
- Cheese: Some people like to add a sprinkle of shredded mozzarella or cheddar cheese to their kimchi fried rice. The cheese melts into the rice and adds a creamy, savory flavor.
- Vegan Option: To make kimchi fried rice vegan, omit the butter and use a vegan kimchi (some kimchi contains fish sauce). You can also use tofu as the protein source.
- Egg Alternatives: If you don’t want to use a fried egg, you can scramble an egg and stir it into the rice during the cooking process.
- Leftovers: Kimchi fried rice is a great way to use up leftover rice and kimchi. It can be stored in the refrigerator for up to 3 days. Reheat it in the microwave or in a skillet over medium heat.
Serving Suggestions:
- Serve kimchi fried rice as a main course for lunch or dinner.
- Serve it as a side dish with Korean BBQ or other Korean dishes.
- Pack it in a lunchbox for a delicious and satisfying meal.
- Serve it with a side of kimchi and other Korean side dishes (banchan).
Enjoy your delicious and flavorful Kimchi Fried Rice!

Conclusion:
This isn’t just another fried rice recipe; it’s a flavor explosion waiting to happen! Seriously, if you’re looking for a dish that’s quick, satisfying, and packed with umami, then this Kimchi Fried Rice is an absolute must-try. The tangy kimchi, the savory gochujang, and the perfectly cooked rice all come together to create a symphony of tastes and textures that will leave you craving more. I know I always do!
But what makes this recipe truly special is its versatility. Feel free to experiment and make it your own! For a heartier meal, top it with a perfectly fried egg the runny yolk adds a richness that complements the spice beautifully. Or, if you’re feeling adventurous, try adding some crispy bacon or crumbled sausage for an extra layer of savory goodness. Vegetarians can easily swap out the protein for tofu or mushrooms, ensuring everyone can enjoy this delicious dish.
And the serving suggestions are endless! This Kimchi Fried Rice is fantastic on its own as a quick lunch or dinner. It also makes a great side dish to grilled meats or Korean BBQ. I’ve even been known to pack it in my lunchbox for a flavorful midday pick-me-up. You could also serve it with a side of Korean cucumber salad (oi muchim) for a refreshing contrast to the richness of the rice. Another great pairing is some crispy seaweed snacks the salty, briny flavor complements the kimchi perfectly.
Don’t be intimidated by the ingredients list. Most of them are readily available at your local grocery store or Asian market. And once you have them on hand, this recipe comes together in a snap. It’s perfect for those busy weeknights when you need a delicious and satisfying meal on the table in under 30 minutes. Plus, it’s a great way to use up leftover rice!
I’ve poured my heart into perfecting this recipe, and I’m confident that you’ll love it as much as I do. The key is to not be afraid to adjust the seasonings to your liking. If you prefer a spicier dish, add more gochujang. If you like it a little sweeter, add a touch of honey or sugar. The beauty of cooking is that you can always customize it to your own taste.
So, what are you waiting for? Gather your ingredients, fire up your wok, and get ready to experience the magic of Kimchi Fried Rice. I promise you won’t be disappointed.
And most importantly, I want to hear about your experience! Once you’ve tried this recipe, please come back and leave a comment below. Let me know what you thought, what variations you tried, and any tips or tricks you discovered along the way. Sharing your feedback helps me improve the recipe and inspires other readers to give it a try. Happy cooking, and enjoy! I can’t wait to hear what you think of this flavorful and easy-to-make dish. Remember to tag me in your photos on social media I love seeing your culinary creations!
Kimchi Fried Rice: The Ultimate Guide to Delicious Korean Comfort Food
Quick and easy Kimchi Fried Rice! Uses fermented kimchi, gochujang, and protein for a delicious meal.
Ingredients
- 2 cups cooked rice, preferably day-old and chilled
- 1 cup kimchi, well-fermented and chopped (reserve some kimchi juice!)
- 1/2 cup onion, finely chopped
- 1/2 cup carrot, finely diced
- 1/4 cup green onions, thinly sliced (separate the white and green parts)
- 2 cloves garlic, minced
- 1 tablespoon gochujang (Korean chili paste)
- 1 tablespoon soy sauce
- 1 teaspoon sesame oil
- 1 teaspoon sugar
- 1 tablespoon kimchi juice (from the chopped kimchi)
- 1/2 teaspoon gochugaru (Korean chili flakes, optional for extra heat)
- 2 tablespoons vegetable oil (or any neutral cooking oil)
- 1 tablespoon butter (optional, but adds richness)
- Fried egg(s)
- Sesame seeds
- Seaweed flakes (kim)
- Extra green onions, sliced
- Sriracha or gochujang (for extra spice)
- Cooked bacon, diced
- Cooked spam, diced
- Cooked chicken, diced
- Tofu, crumbled and pan-fried
Instructions
- Prepare the Rice: If using freshly cooked rice, spread it on a baking sheet and refrigerate for at least an hour to cool and dry. Day-old rice is ideal.
- Chop the Vegetables: Finely chop the onion, carrot, and kimchi. Mince the garlic. Separate the white and green parts of the green onions.
- Make the Sauce: In a small bowl, whisk together the gochujang, soy sauce, sesame oil, sugar, kimchi juice, and gochugaru (if using). Taste and adjust seasonings.
- Prepare the Protein (Optional): Cook your chosen protein separately and set aside.
- Heat the Oil and Butter: In a large skillet or wok, heat the vegetable oil and butter (if using) over medium-high heat.
- Sauté the Aromatics: Add the chopped onion and the white parts of the green onions. Sauté for 2-3 minutes, until translucent and fragrant.
- Add the Garlic and Carrot: Add the minced garlic and diced carrot. Sauté for another 1-2 minutes, until fragrant and slightly softened.
- Add the Kimchi: Add the chopped kimchi. Sauté for 3-5 minutes, stirring frequently, until slightly softened and flavors have melded.
- Add the Rice: Add the cooked rice. Break up any clumps. Stir-fry with the vegetables and kimchi for 2-3 minutes, until heated through and evenly coated.
- Pour in the Sauce: Pour the prepared sauce over the rice. Stir-fry for another 2-3 minutes, until evenly distributed and the rice is nicely coated and slightly sticky.
- Incorporate the Protein (Optional): Add the protein and stir-fry for another minute or two, until heated through.
- Taste and Adjust Seasonings: Taste and adjust seasonings as needed.
- Serve Immediately: Serve hot.
- Top with a Fried Egg (Optional): Fry an egg to your desired doneness and place it on top.
- Garnish (Optional): Garnish with sesame seeds, seaweed flakes (kim), and the remaining green onions. Add a drizzle of sriracha or gochujang for extra spice.
Notes
- Day-old rice is best to prevent mushiness.
- The more fermented the kimchi, the more flavorful the dish.
- Adjust the amount of gochujang and gochugaru to your spice preference.
- Feel free to add other vegetables, such as mushrooms, zucchini, or bell peppers.
- You can use any type of protein you like.
- For a vegan option, omit the butter and use vegan kimchi.
- Kimchi fried rice is a great way to use up leftover rice and kimchi.