Lazy Chicken Enchiladas: the name says it all! Are you craving the comforting, cheesy goodness of enchiladas but dreading the thought of spending hours in the kitchen? Then you’ve come to the right place. This recipe is your secret weapon for a delicious, satisfying meal with minimal effort.
Enchiladas, a cornerstone of Mexican cuisine, have a rich history dating back to the Mayan civilization, where corn tortillas were used to wrap small fish. Over time, the dish evolved, incorporating various fillings and sauces, becoming the beloved comfort food we know today. While traditional enchiladas can be time-consuming, requiring meticulous sauce preparation and individual rolling, our Lazy Chicken Enchiladas recipe streamlines the process without sacrificing flavor.
What makes enchiladas so irresistible? It’s the perfect combination of textures and tastes: tender chicken, savory sauce, melted cheese, all wrapped in a soft tortilla. People adore enchiladas because they are incredibly versatile, easily customizable to suit individual preferences, and, most importantly, utterly delicious. This simplified version maintains all the elements that make enchiladas a crowd-pleaser, but with a fraction of the work. Get ready to enjoy a restaurant-quality meal in the comfort of your own home, without breaking a sweat!

Ingredients:
- 1 tablespoon olive oil
- 1 medium onion, chopped
- 2 cloves garlic, minced
- 1 teaspoon chili powder
- 1/2 teaspoon cumin
- 1/4 teaspoon smoked paprika
- 1/4 teaspoon oregano
- 1/4 teaspoon salt
- 1/4 teaspoon black pepper
- 2 cups cooked chicken, shredded (rotisserie chicken works great!)
- 1 (10 ounce) can diced tomatoes and green chilies (like Rotel), undrained
- 1 (10.75 ounce) can condensed cream of chicken soup
- 1 cup sour cream
- 1 cup shredded cheddar cheese, divided
- 1 cup shredded Monterey Jack cheese, divided
- 10 (6-inch) corn tortillas
- Optional toppings: chopped cilantro, avocado, extra sour cream
Preparing the Chicken Filling:
Okay, let’s get started with the heart of our enchiladas the chicken filling! This is where all the flavor comes together, and trust me, it’s super easy.
- Sauté the Aromatics: First, grab a large skillet and heat the olive oil over medium heat. Once the oil is shimmering, add the chopped onion and cook until it’s softened and translucent, about 5-7 minutes. Don’t rush this step; letting the onions soften properly really builds a good base flavor.
- Add the Garlic and Spices: Now, toss in the minced garlic and cook for another minute, until fragrant. Be careful not to burn the garlic, as it can turn bitter quickly. Next, add the chili powder, cumin, smoked paprika, oregano, salt, and pepper. Stir everything together well, coating the onions and garlic with the spices. Cook for about 30 seconds, allowing the spices to bloom and release their aromas. This step is crucial for maximizing the flavor of your enchiladas.
- Combine the Chicken and Tomatoes: Add the shredded cooked chicken and the can of diced tomatoes and green chilies (undrained) to the skillet. Stir everything together, making sure the chicken is well coated with the spices and tomatoes. Bring the mixture to a simmer and cook for about 5-10 minutes, stirring occasionally, until heated through and the flavors have melded together. This simmering time allows the chicken to absorb all those delicious spices and tomato juices.
- Stir in the Creamy Goodness: Remove the skillet from the heat and stir in the condensed cream of chicken soup and sour cream. Mix well until everything is smooth and creamy. This is what gives our enchilada filling that extra richness and moisture. Finally, stir in 1/2 cup of the shredded cheddar cheese and 1/2 cup of the shredded Monterey Jack cheese. The cheese will melt into the mixture, adding even more flavor and creaminess. Set the filling aside while you prepare the tortillas.
Softening the Tortillas:
This step is crucial! Nobody wants enchiladas that crack and fall apart. Softening the tortillas makes them pliable and easy to roll without breaking.
- Microwave Method (My Preferred Way): Stack the corn tortillas and wrap them in a damp paper towel. Microwave on high for about 1-2 minutes, or until they are soft and pliable. The exact time will depend on your microwave, so start with 1 minute and add more time as needed. Be careful when unwrapping them, as the steam can be hot!
- Oven Method: Preheat your oven to 350°F (175°C). Wrap the corn tortillas in foil and bake for about 10-15 minutes, or until they are soft and pliable.
- Skillet Method: Heat a dry skillet over medium heat. Warm each tortilla individually for about 15-20 seconds per side, until they are soft and pliable. Be careful not to burn them.
Assembling the Enchiladas:
Now for the fun part putting it all together! This is where your enchiladas start to take shape.
- Preheat and Prepare: Preheat your oven to 350°F (175°C). Lightly grease a 9×13 inch baking dish. This will prevent the enchiladas from sticking to the bottom.
- Fill and Roll: Take one softened tortilla and spoon about 1/4 cup of the chicken filling down the center. Roll the tortilla up tightly and place it seam-side down in the prepared baking dish. Repeat with the remaining tortillas and filling, arranging them snugly in the dish.
- Top with Cheese: Sprinkle the remaining 1/2 cup of shredded cheddar cheese and 1/2 cup of shredded Monterey Jack cheese evenly over the enchiladas. Don’t be shy with the cheese it’s what makes them extra delicious!
Baking the Enchiladas:
Almost there! Now it’s time to bake our enchiladas until they’re bubbly, cheesy, and heated through.
- Bake: Cover the baking dish with foil and bake for 20 minutes. This helps to keep the enchiladas moist and prevents the cheese from burning.
- Uncover and Bake: Remove the foil and bake for another 10-15 minutes, or until the cheese is melted and bubbly and the enchiladas are heated through. Keep an eye on them to make sure the cheese doesn’t get too brown.
- Rest: Let the enchiladas rest for a few minutes before serving. This allows them to set up a bit and makes them easier to serve.
Serving and Enjoying:
The best part! Time to dig in and enjoy your delicious, lazy chicken enchiladas.
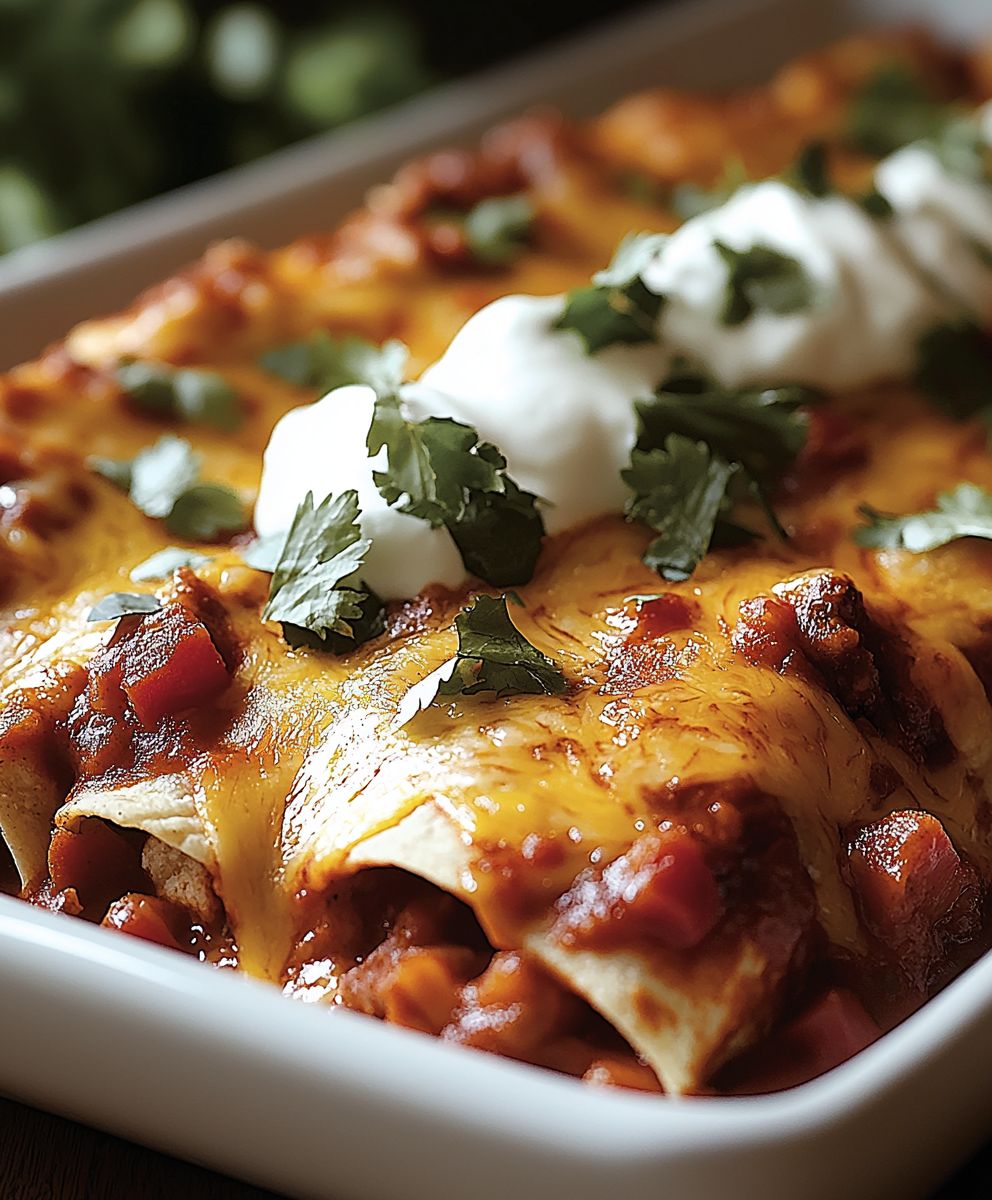
- Garnish (Optional but Recommended): Top the enchiladas with your favorite toppings, such as chopped cilantro, avocado slices, and extra sour cream. A dollop of guacamole would also be amazing!
- Serve: Serve the enchiladas hot and enjoy! They’re perfect for a weeknight dinner or a casual gathering with friends and family.
Tips and Variations:
- Spice it Up: If you like your enchiladas with a little more kick, add a pinch of cayenne pepper to the chicken filling or use a spicier brand of diced tomatoes and green chilies.
- Use Different Cheese: Feel free to experiment with different types of cheese, such as pepper jack, Colby jack, or even a Mexican cheese blend.
- Add Veggies: You can add other vegetables to the chicken filling, such as bell peppers, corn, or black beans.
- Make it Vegetarian: Substitute the chicken with black beans, pinto beans, or a vegetarian ground meat substitute.
- Make it Ahead: You can assemble the enchiladas ahead of time and store them in the refrigerator for up to 24 hours. Just add a few extra minutes to the baking time.
- Freezing Instructions: Assemble the enchiladas in a freezer-safe dish. Cover tightly with plastic wrap and then foil. Freeze for up to 3 months. Thaw overnight in the refrigerator before baking as directed, adding about 10-15 minutes to the baking time.
Enjoy your homemade Lazy Chicken Enchiladas! They’re sure to be a crowd-pleaser.
Conclusion:
So, there you have it! These Lazy Chicken Enchiladas are truly a game-changer for busy weeknights or any time you’re craving that classic enchilada flavor without all the fuss. I know what you’re thinking: “Can something *this* easy really be *that* good?” And the answer, my friend, is a resounding YES! The combination of tender shredded chicken, that creamy, cheesy filling, and the tangy enchilada sauce baked to bubbly perfection is simply irresistible. It’s a comforting, satisfying meal that the whole family will devour, and you’ll love how little effort it takes to get it on the table. But the best part? This recipe is incredibly versatile! Feel free to experiment with different fillings. Want to add some veggies? Sauté some bell peppers, onions, and corn and toss them in with the chicken. Craving a little heat? Add a pinch of cayenne pepper to the chicken mixture or use a spicier enchilada sauce. You could even swap out the chicken for shredded pork or ground beef for a completely different flavor profile. Serving Suggestions: These enchiladas are delicious on their own, but they’re even better with a few simple sides. I love to serve them with a dollop of sour cream or Greek yogurt, a sprinkle of fresh cilantro, and a side of Mexican rice and refried beans. A simple green salad with a lime vinaigrette also makes a refreshing accompaniment. For a truly decadent experience, try topping them with some crumbled cotija cheese or a drizzle of queso fresco. Variations to Explore: * Creamy Chicken Enchiladas: Mix a can of cream of chicken soup into the chicken mixture for an extra creamy and comforting version. * White Chicken Enchiladas: Use a white enchilada sauce (made with sour cream, green chiles, and spices) instead of the traditional red sauce. * Vegetarian Enchiladas: Replace the chicken with black beans, corn, and your favorite vegetables. * Spicy Chicken Enchiladas: Add a diced jalapeño or a pinch of red pepper flakes to the chicken mixture. * Enchilada Casserole: Instead of rolling the tortillas, layer them with the chicken mixture and sauce in a baking dish for an even easier casserole version. I truly believe that these Lazy Chicken Enchiladas will become a staple in your recipe rotation. They’re quick, easy, delicious, and endlessly customizable. What more could you ask for? So, go ahead, give this recipe a try! I promise you won’t be disappointed. And when you do, please come back and let me know what you think! I’d love to hear about your experience and any variations you tried. Share your photos and comments below I can’t wait to see your culinary creations! Happy cooking! I am confident that you will love this easy and delicious take on Lazy Chicken Enchiladas. Don’t forget to rate the recipe once you’ve tried it! Your feedback helps other home cooks discover this amazing dish. Enjoy! Print
Lazy Chicken Enchiladas: Quick & Easy Recipe
- Total Time: 65 minutes
- Yield: 10 enchiladas 1x
Description
Easy and delicious chicken enchiladas made with shredded chicken, creamy sauce, and plenty of cheese. Perfect for a quick weeknight dinner!
Ingredients
- 1 tablespoon olive oil
- 1 medium onion, chopped
- 2 cloves garlic, minced
- 1 teaspoon chili powder
- 1/2 teaspoon cumin
- 1/4 teaspoon smoked paprika
- 1/4 teaspoon oregano
- 1/4 teaspoon salt
- 1/4 teaspoon black pepper
- 2 cups cooked chicken, shredded (rotisserie chicken works great!)
- 1 (10 ounce) can diced tomatoes and green chilies (like Rotel), undrained
- 1 (10.75 ounce) can condensed cream of chicken soup
- 1 cup sour cream
- 1 cup shredded cheddar cheese, divided
- 1 cup shredded Monterey Jack cheese, divided
- 10 (6-inch) corn tortillas
- Optional toppings: chopped cilantro, avocado, extra sour cream
Instructions
- Heat olive oil in a large skillet over medium heat. Add chopped onion and cook until softened, about 5-7 minutes. Add minced garlic and cook for 1 minute until fragrant. Stir in chili powder, cumin, smoked paprika, oregano, salt, and pepper. Cook for 30 seconds.
- Add shredded chicken and diced tomatoes and green chilies (undrained) to the skillet. Simmer for 5-10 minutes, stirring occasionally.
- Remove from heat and stir in condensed cream of chicken soup and sour cream until smooth. Stir in 1/2 cup cheddar cheese and 1/2 cup Monterey Jack cheese. Set aside.
- Wrap tortillas in a damp paper towel and microwave on high for 1-2 minutes until soft.
- Preheat oven to 350°F (175°C). Lightly grease a 9×13 inch baking dish.
- Spoon about 1/4 cup of chicken filling down the center of each softened tortilla. Roll up tightly and place seam-side down in the baking dish.
- Sprinkle the remaining 1/2 cup cheddar cheese and 1/2 cup Monterey Jack cheese evenly over the enchiladas.
- Cover the baking dish with foil and bake for 20 minutes. Remove foil and bake for another 10-15 minutes, or until cheese is melted and bubbly and enchiladas are heated through.
- Let the enchiladas rest for a few minutes before serving.
- Top with optional toppings like chopped cilantro, avocado slices, and extra sour cream.
Notes
- Spice it Up: Add a pinch of cayenne pepper to the chicken filling or use a spicier brand of diced tomatoes and green chilies.
- Use Different Cheese: Experiment with different types of cheese, such as pepper jack, Colby jack, or even a Mexican cheese blend.
- Add Veggies: Add other vegetables to the chicken filling, such as bell peppers, corn, or black beans.
- Make it Vegetarian: Substitute the chicken with black beans, pinto beans, or a vegetarian ground meat substitute.
- Make it Ahead: Assemble the enchiladas ahead of time and store them in the refrigerator for up to 24 hours. Just add a few extra minutes to the baking time.
- Freezing Instructions: Assemble the enchiladas in a freezer-safe dish. Cover tightly with plastic wrap and then foil. Freeze for up to 3 months. Thaw overnight in the refrigerator before baking as directed, adding about 10-15 minutes to the baking time.
- Prep Time: 20 minutes
- Cook Time: 45 minutes