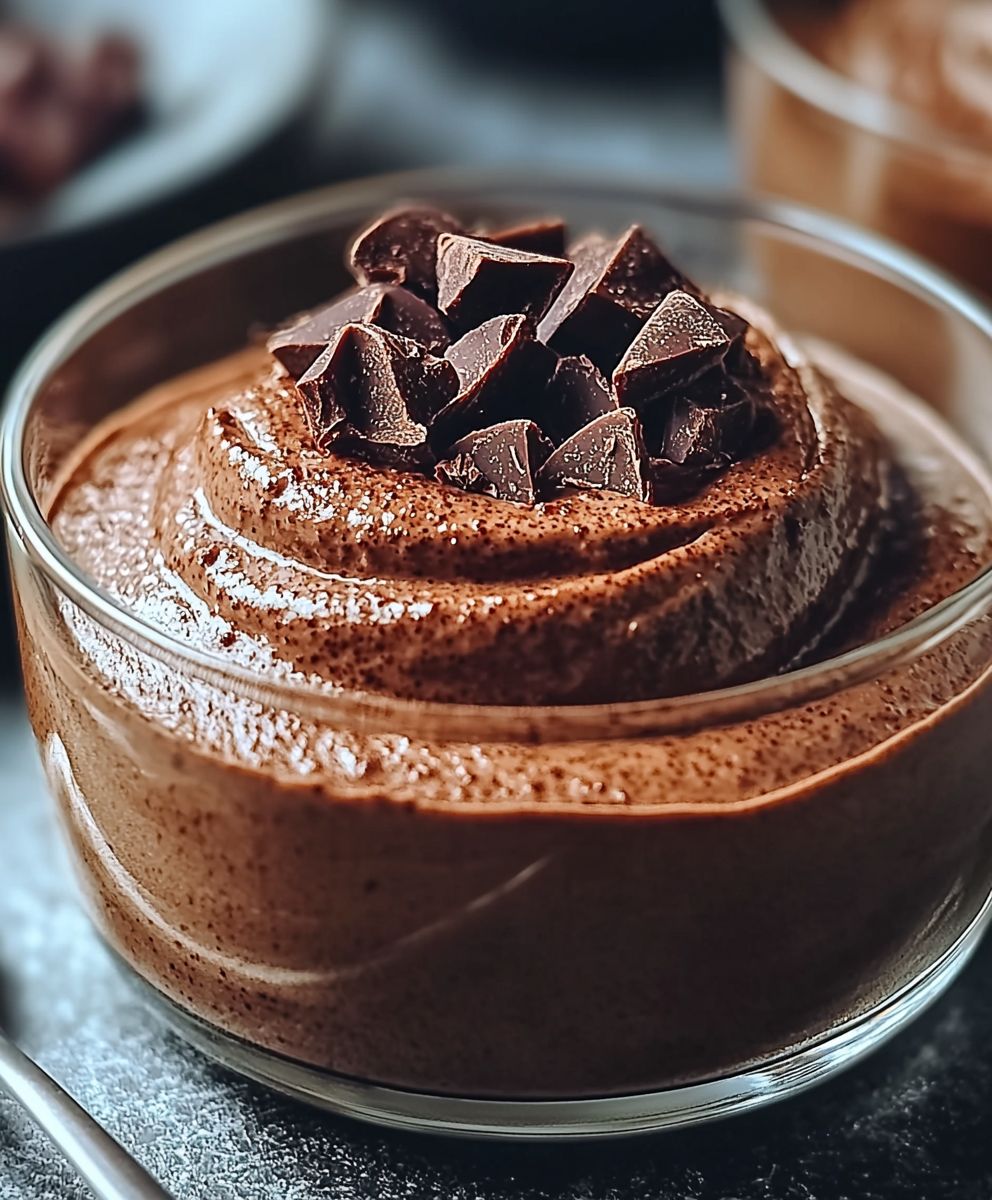
Low GI Chocolate Mousse: Indulge in the rich, decadent flavor of chocolate without the guilt! Have you ever craved a dessert that satisfies your sweet tooth while keeping your blood sugar levels stable? This is it! This isn’t just another chocolate mousse recipe; it’s a game-changer for anyone watching their glycemic index or simply seeking a healthier treat.
Chocolate mousse, in its classic form, has been a beloved dessert for centuries, gracing the tables of royalty and delighting generations with its airy texture and intense chocolate flavor. While its origins are firmly rooted in French culinary tradition, we’ve given it a modern, health-conscious twist. We’ve reimagined this classic dessert to create a low GI chocolate mousse that doesn’t compromise on taste or texture.
People adore chocolate mousse for its luxurious mouthfeel, the way it melts on the tongue, and the deeply satisfying chocolate experience it provides. This version maintains all of that magic, but with ingredients that are kinder to your body. It’s the perfect dessert for those with diabetes, anyone following a low-carb diet, or simply those who want to enjoy a guilt-free indulgence. Get ready to experience the best of both worlds a classic dessert made healthier and even more irresistible!

Ingredients:
- 1 cup unsweetened almond milk
- 1/4 cup chia seeds
- 1/4 cup unsweetened cocoa powder
- 1/4 cup erythritol (or other low-GI sweetener to taste)
- 1 teaspoon vanilla extract
- 1/4 teaspoon sea salt
- 1/4 cup avocado, mashed (for creaminess, optional)
- 1/4 cup Greek yogurt (for extra protein and creaminess, optional)
- Optional toppings: berries, chopped nuts, unsweetened coconut flakes, sugar-free chocolate chips
Preparing the Base:
Okay, let’s get started! This Low GI Chocolate Mousse is super easy and requires minimal effort. The base of our mousse relies on the magic of chia seeds to create that thick, luscious texture we all crave. Don’t worry, you won’t taste the chia seeds they just work their thickening magic!
- Combine the Liquids: In a medium-sized bowl, whisk together the almond milk, vanilla extract, and sea salt. Make sure everything is nicely combined. The salt enhances the chocolate flavor, so don’t skip it!
- Add the Chia Seeds and Cocoa: Now, add the chia seeds and cocoa powder to the almond milk mixture. Whisk vigorously to ensure there are no clumps of cocoa powder. We want a smooth, even chocolatey base.
- Sweeten to Perfection: Stir in the erythritol (or your preferred low-GI sweetener). Start with the recommended amount and then taste. You can always add more to reach your desired level of sweetness. Remember, everyone’s taste buds are different!
- Blend in the Goodness (Optional): If you’re using avocado and/or Greek yogurt, now’s the time to add them. The avocado adds a wonderful creaminess without a strong flavor, and the Greek yogurt boosts the protein content and adds a slight tang that complements the chocolate beautifully. Use an immersion blender or transfer the mixture to a regular blender and blend until completely smooth. This step is crucial for achieving that perfect mousse texture if you’re using these ingredients. If you prefer a slightly less smooth texture, you can skip the blending.
- The Waiting Game: Cover the bowl with plastic wrap or a lid and refrigerate for at least 4 hours, or preferably overnight. This allows the chia seeds to fully absorb the liquid and create that thick, mousse-like consistency. The longer it sits, the thicker it will become.
Checking and Adjusting the Consistency:
After the chilling period, it’s time to check on our mousse! This is where we can make any final adjustments to ensure it’s absolutely perfect.
- Assess the Thickness: Remove the mousse from the refrigerator and give it a good stir. It should be thick and pudding-like. If it’s still too thin, you can add another tablespoon or two of chia seeds, stir well, and refrigerate for another hour or two.
- Adjust the Sweetness (If Needed): Give it a taste! If it’s not sweet enough for your liking, add a little more erythritol (or your chosen sweetener), stir well, and taste again. Remember to add it in small increments to avoid over-sweetening.
- Add More Flavor (Optional): At this stage, you can also add a few drops of peppermint extract, a pinch of cinnamon, or a dash of instant coffee powder to enhance the flavor. Be careful not to overdo it a little goes a long way!
Serving and Topping:
Now for the best part serving and enjoying our delicious Low GI Chocolate Mousse! Get creative with your toppings and make it a truly special treat.
- Portion it Out: Spoon the mousse into individual serving dishes or glasses. This makes it easy to control portion sizes and creates a beautiful presentation.
- Add Your Favorite Toppings: This is where you can really personalize your mousse! Here are some ideas:
- Fresh Berries: Raspberries, strawberries, blueberries, and blackberries all pair perfectly with chocolate.
- Chopped Nuts: Almonds, walnuts, pecans, or hazelnuts add a satisfying crunch.
- Unsweetened Coconut Flakes: For a tropical twist.
- Sugar-Free Chocolate Chips: For an extra dose of chocolatey goodness.
- Whipped Cream (Sugar-Free): A dollop of sugar-free whipped cream adds a touch of indulgence.
- A Drizzle of Nut Butter: Peanut butter, almond butter, or cashew butter add a creamy, nutty flavor.
- Serve Immediately: For the best texture and flavor, serve the mousse immediately after adding the toppings.
Tips and Tricks for the Perfect Mousse:
Here are a few extra tips and tricks to ensure your Low GI Chocolate Mousse is a resounding success:
- Use High-Quality Cocoa Powder: The quality of your cocoa powder will significantly impact the flavor of the mousse. Opt for a Dutch-processed cocoa powder for a richer, smoother chocolate flavor.
- Don’t Skip the Salt: A pinch of sea salt enhances the sweetness and brings out the chocolate flavor.
- Adjust the Sweetener to Your Liking: Erythritol is a great low-GI option, but you can also use stevia, monk fruit sweetener, or xylitol. Just be sure to adjust the amount according to the sweetener’s sweetness level.
- For a Vegan Version: Make sure to use plant-based milk and skip the Greek yogurt. The avocado will provide plenty of creaminess.
- Make it Ahead: This mousse is perfect for making ahead of time. It will keep in the refrigerator for up to 3 days.
- Experiment with Flavors: Get creative and add different extracts, spices, or even a shot of espresso to customize the flavor.
- If it’s too thick: If your mousse becomes too thick after chilling, simply add a tablespoon or two of almond milk and stir until it reaches your desired consistency.
- If it’s not thick enough: If your mousse isn’t thick enough after chilling, add another tablespoon of chia seeds, stir well, and refrigerate for another hour or two.
Variations and Add-ins:
Want to spice things up a bit? Here are some fun variations and add-ins to try:
- Peppermint Chocolate Mousse: Add 1/4 teaspoon of peppermint extract to the base mixture.
- Mocha Chocolate Mousse: Add 1 teaspoon of instant coffee powder to the base mixture.
- Spicy Chocolate Mousse: Add a pinch of cayenne pepper to the base mixture for a subtle kick.
- Orange Chocolate Mousse: Add 1 teaspoon of orange zest to the base mixture.
- Nut Butter Chocolate Mousse: Swirl a tablespoon of your favorite nut butter into the mousse before chilling.
- Berry Swirl Chocolate Mousse: Swirl a tablespoon of berry puree (such as raspberry or strawberry) into the mousse before chilling.
Nutritional Information (Approximate):
Please note that the nutritional information is an estimate and may vary depending on the specific ingredients you use.
Per serving (without toppings):
- Calories: Approximately 150-200
- Net Carbs: Approximately 5-10 grams (depending on the sweetener used)
- Protein: Approximately 5-10 grams (depending on whether you use Greek yogurt)
- Fat: Approximately 10-15 grams (depending on whether you use avocado)
Enjoy your guilt-free Low GI Chocolate Mousse! It’s the perfect healthy and delicious treat for any occasion.
Conclusion:
This isn’t just another dessert recipe; it’s a guilt-free indulgence that will redefine your understanding of healthy treats. I truly believe this Low GI Chocolate Mousse is a must-try for anyone looking to satisfy their sweet cravings without the sugar crash. The rich, decadent flavor, combined with the light and airy texture, makes it an irresistible experience. It’s so easy to prepare, even on a busy weeknight, and the results are consistently impressive. You’ll be amazed at how something so delicious can be so good for you! But the best part? It’s incredibly versatile! Serve it chilled in elegant glasses for a sophisticated dessert, or spoon it into small ramekins for individual portions. For a truly decadent experience, top it with a dollop of whipped coconut cream and a sprinkle of unsweetened cocoa powder. If you’re feeling adventurous, try adding a few raspberries or strawberries for a burst of fresh fruit flavor. A drizzle of sugar-free caramel sauce would also be divine! And don’t be afraid to experiment with variations! If you’re a coffee lover, add a teaspoon of instant espresso powder to the mixture for a mocha-flavored mousse. For a spicier kick, a pinch of cinnamon or chili powder will add a delightful warmth. You could even incorporate some finely chopped nuts, like almonds or walnuts, for added texture and flavor. The possibilities are endless! I’ve personally made this Low GI Chocolate Mousse countless times, and it’s always a hit. It’s perfect for parties, potlucks, or simply a quiet night in. It’s also a fantastic option for those with dietary restrictions, as it’s naturally gluten-free and can easily be made vegan by using plant-based milk and chocolate. I’m so confident that you’ll love this recipe as much as I do. It’s a game-changer for anyone who wants to enjoy a delicious dessert without compromising their health goals. It’s proof that you can have your cake (or mousse!) and eat it too. So, what are you waiting for? Gather your ingredients, follow the simple steps, and prepare to be amazed. I promise you won’t be disappointed. This Low GI Chocolate Mousse is more than just a recipe; it’s an experience. Once you’ve tried it, I’d absolutely love to hear about your experience! Did you make any variations? What did you think of the texture and flavor? Share your photos and comments on social media using #LowGIChocolateMousse and tag me so I can see your creations. I’m always excited to see how others adapt and enjoy my recipes. Let’s spread the word about this delicious and healthy treat! Happy cooking (and eating)! I can’t wait to hear what you think! Print
Low GI Chocolate Mousse: Guilt-Free Dessert Recipe
- Total Time: 240 minutes
- Yield: 2–4 servings 1x
Description
A decadent and healthy Low GI Chocolate Mousse made with chia seeds, cocoa powder, and your choice of low-GI sweetener. Creamy, delicious, and perfect for a guilt-free treat!
Ingredients
- 1 cup unsweetened almond milk
- 1/4 cup chia seeds
- 1/4 cup unsweetened cocoa powder
- 1/4 cup erythritol (or other low-GI sweetener to taste)
- 1 teaspoon vanilla extract
- 1/4 teaspoon sea salt
- 1/4 cup avocado, mashed (for creaminess, optional)
- 1/4 cup Greek yogurt (for extra protein and creaminess, optional)
- Optional toppings: berries, chopped nuts, unsweetened coconut flakes, sugar-free chocolate chips
Instructions
- Combine the Liquids: In a medium-sized bowl, whisk together the almond milk, vanilla extract, and sea salt.
- Add the Chia Seeds and Cocoa: Add the chia seeds and cocoa powder to the almond milk mixture. Whisk vigorously to ensure there are no clumps of cocoa powder.
- Sweeten to Perfection: Stir in the erythritol (or your preferred low-GI sweetener). Start with the recommended amount and then taste. Add more to reach your desired sweetness.
- Blend in the Goodness (Optional): If using avocado and/or Greek yogurt, add them now. Use an immersion blender or transfer the mixture to a regular blender and blend until completely smooth. Skip blending for a slightly less smooth texture.
- The Waiting Game: Cover the bowl with plastic wrap or a lid and refrigerate for at least 4 hours, or preferably overnight.
- Assess the Thickness: Remove the mousse from the refrigerator and give it a good stir. It should be thick and pudding-like. If it’s still too thin, you can add another tablespoon or two of chia seeds, stir well, and refrigerate for another hour or two.
- Adjust the Sweetness (If Needed): Give it a taste! If it’s not sweet enough for your liking, add a little more erythritol (or your chosen sweetener), stir well, and taste again. Remember to add it in small increments to avoid over-sweetening.
- Add More Flavor (Optional): At this stage, you can also add a few drops of peppermint extract, a pinch of cinnamon, or a dash of instant coffee powder to enhance the flavor. Be careful not to overdo it a little goes a long way!
- Portion it Out: Spoon the mousse into individual serving dishes or glasses.
- Add Your Favorite Toppings: Top with fresh berries, chopped nuts, unsweetened coconut flakes, sugar-free chocolate chips, sugar-free whipped cream, or a drizzle of nut butter.
- Serve Immediately: For the best texture and flavor, serve the mousse immediately after adding the toppings.
Notes
- Use high-quality cocoa powder for the best flavor.
- Don’t skip the salt; it enhances the sweetness and chocolate flavor.
- Adjust the sweetener to your liking.
- For a vegan version, use plant-based milk and skip the Greek yogurt.
- This mousse can be made ahead of time and stored in the refrigerator for up to 3 days.
- Experiment with flavors by adding different extracts, spices, or a shot of espresso.
- If the mousse becomes too thick, add a tablespoon or two of almond milk and stir until it reaches your desired consistency.
- If the mousse isn’t thick enough, add another tablespoon of chia seeds, stir well, and refrigerate for another hour or two.
- Prep Time: 5 minutes
- Cook Time: 0 minutes