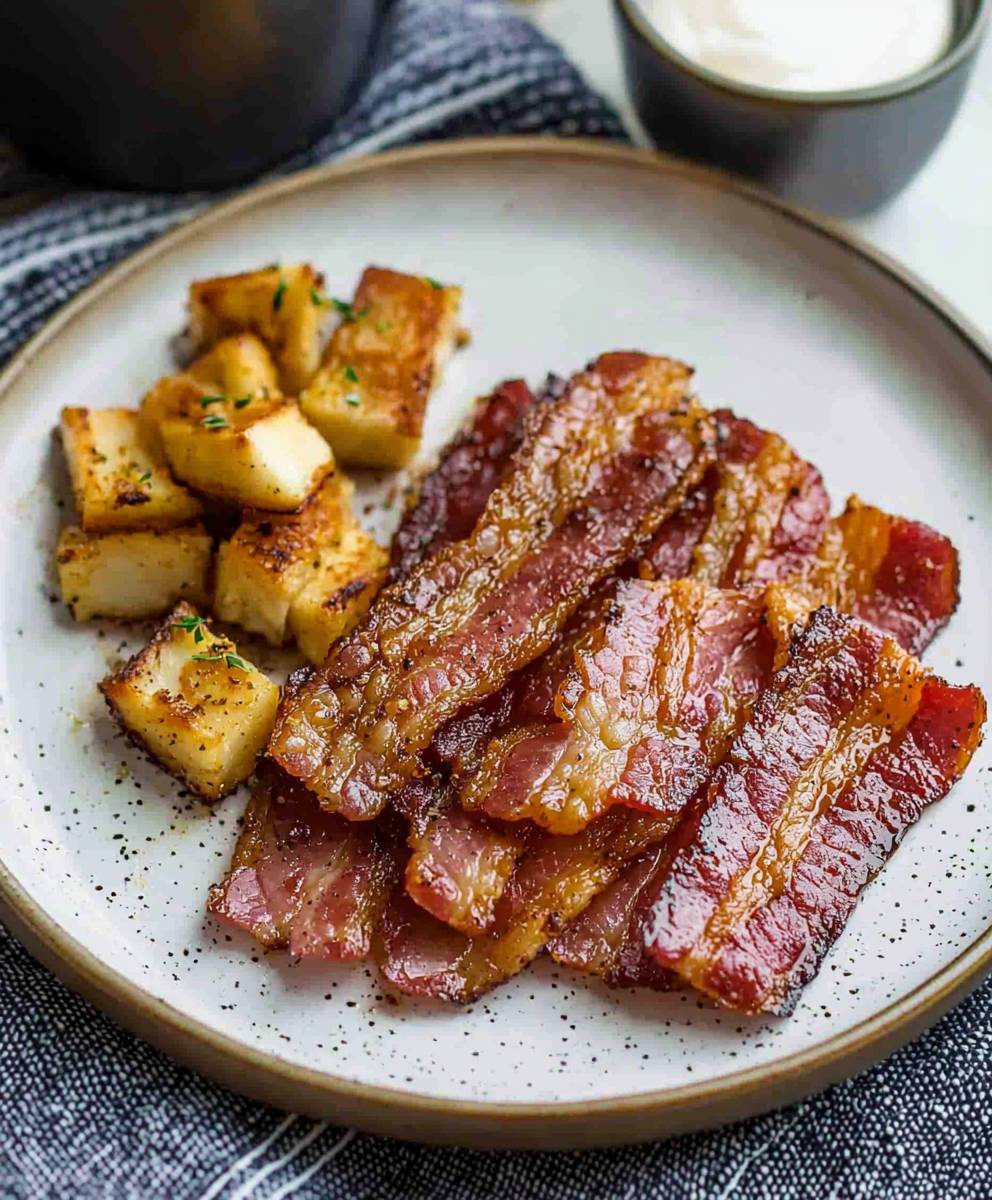
Oven baked bacon: Prepare to revolutionize your breakfast routine! Forget standing over a splattering pan, dodging hot grease. We’re about to unlock the secrets to perfectly crispy, evenly cooked bacon, all thanks to the magic of your oven. This method is so easy, so clean, and so consistently delicious, you’ll wonder why you ever cooked bacon any other way.
While bacon itself has a long and savory history, dating back to ancient China, the oven-baked method is a relatively modern innovation. It’s a testament to our constant quest for culinary efficiency and perfection. Think about it: bacon has always been a beloved breakfast staple, a crispy, salty indulgence that elevates everything from eggs to pancakes. But the traditional stovetop method can be messy and time-consuming.
That’s where oven baked bacon comes in. People adore this method because it’s incredibly convenient. You can cook a large batch of bacon at once, making it perfect for family breakfasts or brunch gatherings. Plus, the oven heat renders the fat evenly, resulting in bacon that’s crispy, not burnt, and delightfully chewy in all the right places. The cleanup is a breeze too! Say goodbye to greasy stovetops and hello to perfectly cooked bacon with minimal effort. Get ready to experience bacon bliss!
Ingredients:
- 1 pound thick-cut bacon
- Optional: 2 tablespoons brown sugar (for a sweeter bacon)
- Optional: 1 teaspoon black pepper (freshly ground is best!)
- Optional: Pinch of cayenne pepper (for a little kick)
- Optional: Maple syrup for drizzling after baking
Preparing the Bacon for Baking
Okay, let’s get started! Baking bacon is seriously a game-changer. No more splattering grease, no more unevenly cooked strips. Just perfectly crispy (or chewy, if that’s your thing) bacon, every single time. First, we need to get our bacon ready for its oven adventure.
- Preheat your oven to 400°F (200°C). This is the sweet spot for getting that perfect crispness without burning the bacon. Make sure your oven is fully preheated before you put the bacon in.
- Prepare your baking sheet. Line a baking sheet with parchment paper or aluminum foil. This is crucial for easy cleanup! Trust me, you’ll thank me later. Parchment paper is my personal preference as it prevents the bacon from sticking and promotes even cooking. If you’re using foil, you might want to lightly grease it with cooking spray to prevent sticking.
- Arrange the bacon strips. Lay the bacon strips in a single layer on the prepared baking sheet. Make sure the strips aren’t overlapping, as this will prevent them from cooking evenly. If you have a lot of bacon, you might need to use two baking sheets or bake in batches. Don’t overcrowd the pan! Give each strip some breathing room.
- Optional: Add your seasonings. If you’re going for a sweet and savory bacon, now’s the time to sprinkle on the brown sugar, black pepper, and cayenne pepper (if using). I like to gently press the seasonings into the bacon so they adhere well. You can also experiment with other seasonings like garlic powder, smoked paprika, or even a little bit of chili powder. Get creative!
Baking the Bacon to Perfection
Now for the magic! This is where the oven does all the work. Just sit back, relax, and let the delicious aroma of bacon fill your kitchen.
- Bake the bacon. Place the baking sheet in the preheated oven and bake for 15-20 minutes, or until the bacon is cooked to your desired level of crispness. The exact baking time will depend on the thickness of your bacon and your oven, so keep an eye on it. I usually start checking around 15 minutes.
- Monitor the bacon closely. Keep a close watch on the bacon as it bakes. You want it to be perfectly crispy, but not burnt. If you notice any areas browning too quickly, you can rotate the baking sheet or lower the oven temperature slightly.
- Adjust baking time as needed. If your bacon is thinner, it might be done in less than 15 minutes. If it’s super thick-cut, it might need a few extra minutes. Use your judgment and don’t be afraid to experiment to find the perfect baking time for your bacon.
- For chewier bacon: If you prefer your bacon on the chewier side, you can reduce the baking time by a few minutes. Just make sure it’s still cooked through and not raw.
Removing and Draining the Bacon
Almost there! Now we need to get that perfectly cooked bacon off the baking sheet and drain off any excess grease.
- Remove the bacon from the oven. Once the bacon is cooked to your liking, carefully remove the baking sheet from the oven. Be careful, as the baking sheet and bacon will be very hot!
- Transfer the bacon to a paper towel-lined plate. Use tongs to transfer the bacon strips to a plate lined with paper towels. This will help to absorb any excess grease and keep the bacon crispy.
- Let the bacon cool slightly. Allow the bacon to cool for a few minutes before serving. This will allow it to crisp up even further and make it easier to handle.
- Optional: Drizzle with maple syrup. If you’re feeling fancy, drizzle the bacon with a little bit of maple syrup for an extra touch of sweetness. This is especially delicious if you’ve already added brown sugar and pepper!
Tips and Tricks for Perfect Oven-Baked Bacon
Here are a few extra tips and tricks to ensure your oven-baked bacon is always a success:
- Use a wire rack (optional). For even crispier bacon, you can place a wire rack on top of the baking sheet and arrange the bacon on the rack. This allows the hot air to circulate around the bacon, resulting in more even cooking and crispier results.
- Don’t overcrowd the pan. As mentioned earlier, it’s important not to overcrowd the baking sheet. Overcrowding will prevent the bacon from cooking evenly and can result in soggy bacon. If you have a lot of bacon, bake it in batches.
- Adjust the oven temperature. If you find that your bacon is browning too quickly, you can lower the oven temperature to 375°F (190°C). This will allow the bacon to cook more slowly and evenly.
- Save the bacon grease. Don’t throw away that delicious bacon grease! Strain it through a fine-mesh sieve and store it in an airtight container in the refrigerator. You can use it to add flavor to other dishes like eggs, vegetables, or even cornbread.
- Experiment with different seasonings. Don’t be afraid to experiment with different seasonings to create your own signature bacon flavor. Some other ideas include garlic powder, onion powder, smoked paprika, chili powder, or even a sprinkle of brown sugar and cinnamon.
- For extra crispy bacon: After baking, you can broil the bacon for a minute or two to get it extra crispy. Just be sure to watch it closely, as it can burn quickly under the broiler.
- Clean up is a breeze! Because you lined the baking sheet with parchment paper or foil, cleanup is super easy. Just discard the parchment paper or foil and wipe down the baking sheet. No more scrubbing greasy pans!
Serving Suggestions
Now that you’ve got a plate of perfectly cooked bacon, it’s time to enjoy it! Here are a few serving suggestions:
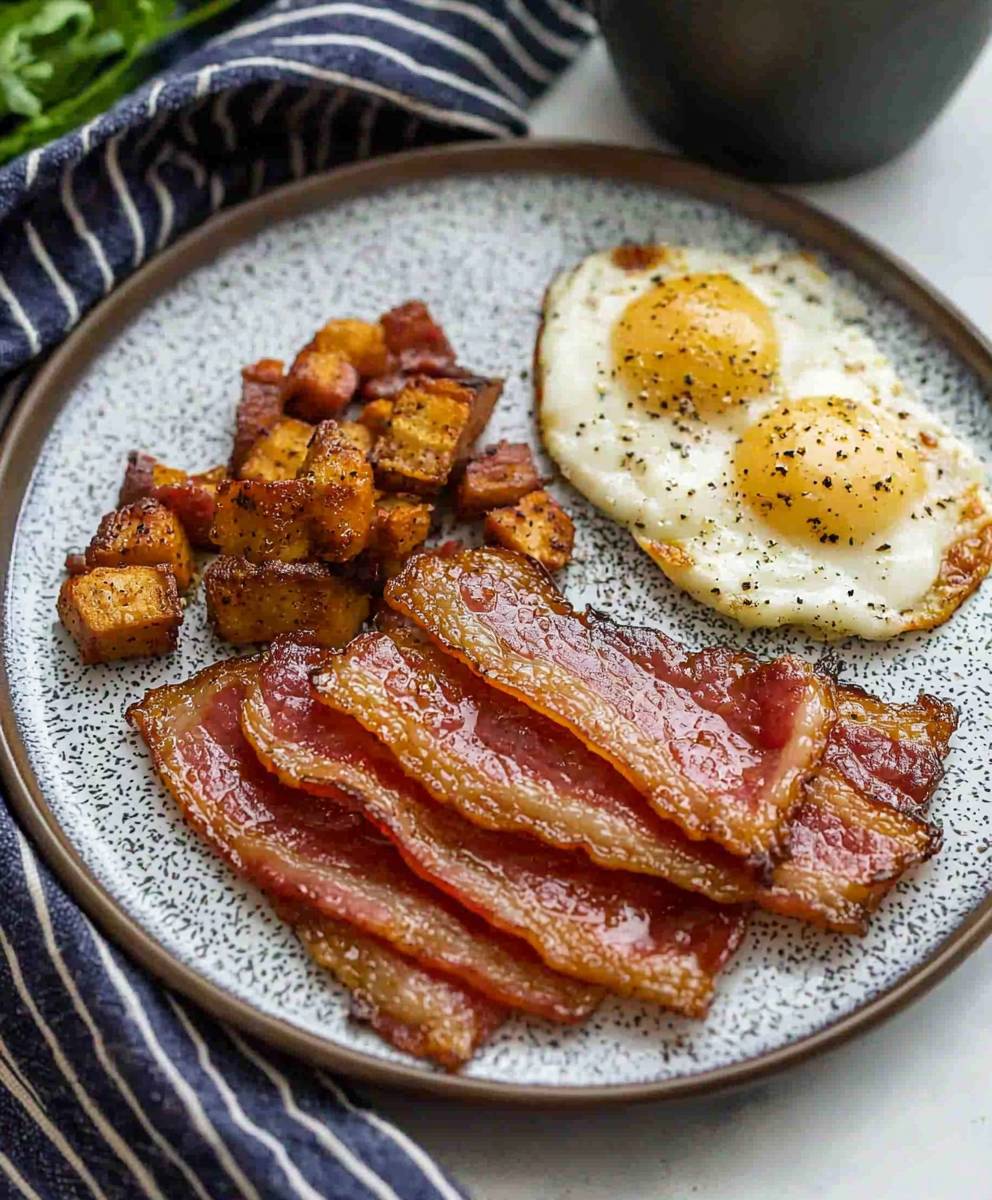
- Classic breakfast. Serve the bacon alongside scrambled eggs, toast, and a side of fruit for a classic breakfast.
- BLT sandwich. Use the bacon to make a delicious BLT sandwich with lettuce, tomato, and mayonnaise on toasted bread.
- Bacon cheeseburger. Add a few strips of bacon to your favorite cheeseburger for an extra layer of flavor and texture.
- Salad topping. Crumble the bacon and sprinkle it over a salad for a salty and savory topping.
- Baked potato topping. Top a baked potato with crumbled bacon, sour cream, and chives for a hearty and satisfying meal.
- Deviled eggs. Crumble the bacon and sprinkle it over deviled eggs for a flavorful and elegant appetizer.
- Pasta dish. Add crumbled bacon to a pasta dish for a smoky and savory flavor. Carbonara is a classic example!
- Pizza topping. Use the bacon as a pizza topping for a delicious and indulgent treat.
- Just eat it! Honestly, sometimes the best way to enjoy oven-baked bacon is just to eat it straight off the plate. It’s that good!
Storing Leftover Bacon
If you happen to have any leftover bacon (which is rare in my house!), you can store it in an airtight container in the refrigerator for up to 3-4 days. To reheat the bacon, you can microwave it for a few seconds, bake it in the oven for a few minutes, or pan-fry it until it’s warmed through.
Enjoy your perfectly oven-baked bacon! I hope this recipe helps you achieve bacon perfection every time. Happy cooking!
Conclusion:
So, there you have it! Oven-baked bacon a game-changer in the world of breakfast (and beyond!). I truly believe this method is a must-try for anyone who loves crispy, evenly cooked bacon without the mess and fuss of stovetop frying. It’s a simple technique that delivers consistently perfect results, freeing you up to focus on other parts of your meal (or just enjoy a leisurely morning!). Why is this recipe a must-try? Let me recap. First, the cleanup is a breeze. No more splattered grease all over your stovetop! Second, the bacon cooks evenly, ensuring every strip is perfectly crisp from end to end. Third, it’s incredibly hands-off. Pop it in the oven, set a timer, and let the magic happen. You can even cook a large batch at once, making it ideal for brunch gatherings or meal prepping. And finally, the flavor! The oven allows the bacon to render its fat slowly, resulting in a richer, more intense bacon flavor that you just can’t achieve on the stovetop. But the fun doesn’t stop there! Let’s talk serving suggestions and variations. Of course, classic bacon and eggs are always a winner. But don’t limit yourself! Crumble this perfectly cooked bacon over salads for a salty, smoky crunch. Use it to elevate your BLTs to a whole new level of deliciousness. Wrap dates or asparagus in bacon for a sophisticated appetizer. Add it to your favorite mac and cheese recipe for an extra layer of flavor. Or, get creative and use it to make a bacon jam trust me, it’s addictive!Serving Suggestions:
- Classic Bacon & Eggs
- Bacon, Lettuce, and Tomato Sandwich (BLT)
- Crumbled over salads
- Wrapped around dates or asparagus
- Added to mac and cheese
- Made into bacon jam
Bacon Variations:
- Thick-Cut Bacon
- Applewood Smoked Bacon
- Peppered Bacon
- Maple Syrup Glazed Bacon
- Brown Sugar Glazed Bacon
Oven Baked Bacon: The Crispiest, Easiest Method
- Total Time: 25 minutes
- Yield: 8–12 servings 1x
Description
Perfectly crispy (or chewy!) oven-baked bacon, every time. No splattering grease, just delicious bacon with easy cleanup.
Ingredients
- 1 pound thick-cut bacon
- Optional: 2 tablespoons brown sugar (for a sweeter bacon)
- Optional: 1 teaspoon black pepper (freshly ground is best!)
- Optional: Pinch of cayenne pepper (for a little kick)
- Optional: Maple syrup for drizzling after baking
Instructions
- Preheat: Preheat your oven to 400°F (200°C).
- Prepare Baking Sheet: Line a baking sheet with parchment paper or aluminum foil.
- Arrange Bacon: Lay bacon strips in a single layer on the prepared baking sheet, ensuring they don’t overlap.
- Season (Optional): Sprinkle with brown sugar, black pepper, and cayenne pepper (if using). Gently press the seasonings into the bacon.
- Bake: Bake for 15-20 minutes, or until the bacon is cooked to your desired level of crispness. Monitor closely to prevent burning.
- Remove and Drain: Carefully remove the baking sheet from the oven. Use tongs to transfer the bacon to a paper towel-lined plate to drain excess grease.
- Cool and Serve: Let the bacon cool slightly before serving. Drizzle with maple syrup (optional).
Notes
- For even crispier bacon, use a wire rack on top of the baking sheet.
- Don’t overcrowd the pan; bake in batches if necessary.
- Adjust oven temperature to 375°F (190°C) if bacon is browning too quickly.
- Save the bacon grease for other cooking uses.
- Experiment with different seasonings like garlic powder, smoked paprika, or chili powder.
- For extra crispy bacon, broil for a minute or two after baking, watching closely.
- Store leftover bacon in an airtight container in the refrigerator for up to 3-4 days.
- Prep Time: 5 minutes
- Cook Time: 15