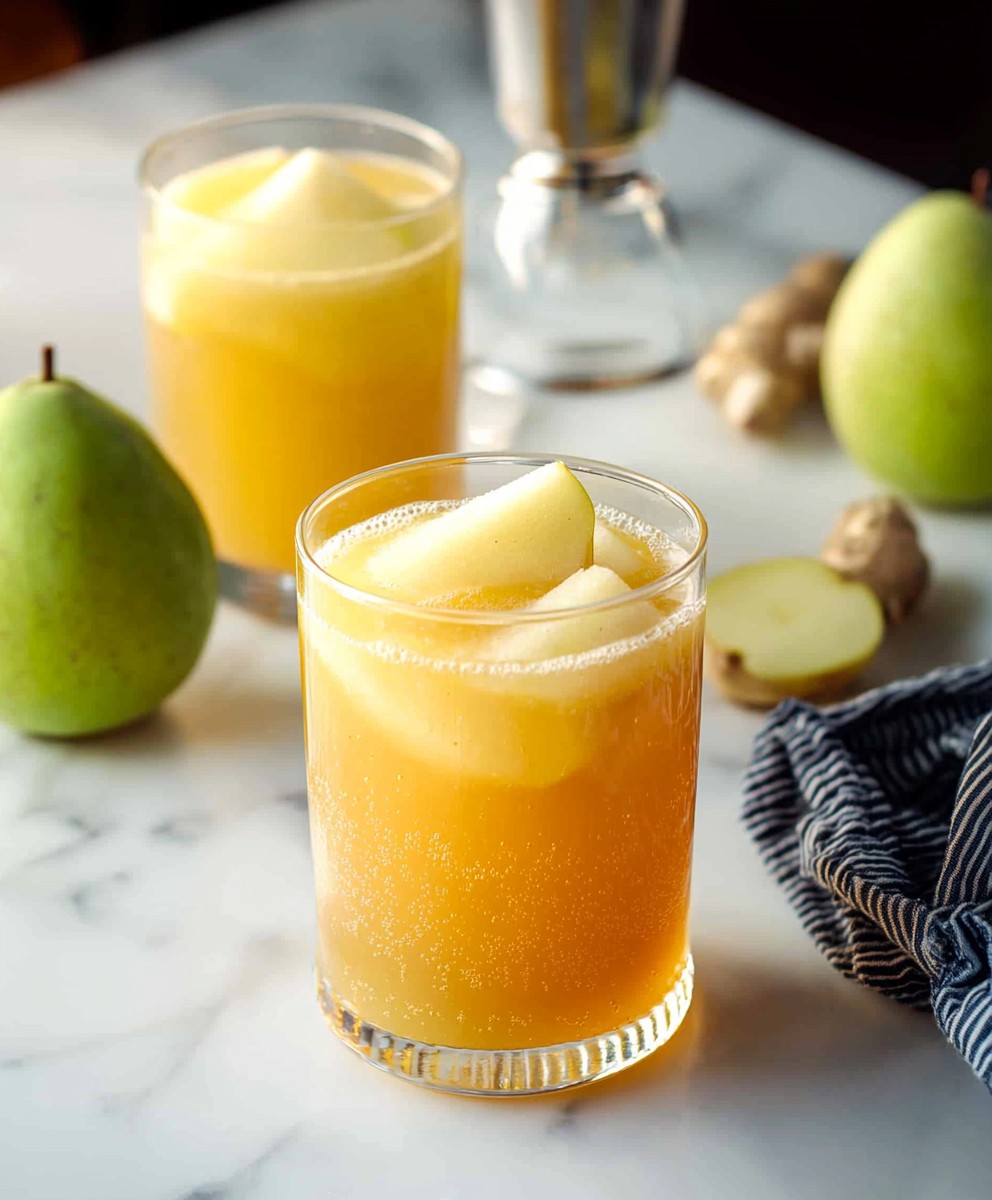
Pear Juice Apple Ginger: Prepare to tantalize your taste buds with a vibrant and invigorating elixir! Forget those sugary, store-bought juices; we’re diving headfirst into a homemade concoction that’s bursting with natural sweetness and a delightful spicy kick. This isn’t just a drink; it’s a wellness boost disguised as a delicious treat.
The combination of pear, apple, and ginger isn’t just a happy accident; it’s a time-honored tradition in many cultures. For centuries, these ingredients have been celebrated for their health benefits and harmonious flavors. Ginger, in particular, has been used in traditional medicine for its anti-inflammatory and digestive properties. Think of this pear juice apple ginger blend as a modern twist on an ancient remedy.
So, why do people adore this particular juice combination? It’s simple! The sweetness of the pear and apple perfectly complements the zesty warmth of the ginger, creating a balanced and refreshing flavor profile. The texture is smooth and silky, making it incredibly easy to drink. Plus, it’s incredibly convenient to make at home with just a few simple ingredients and a blender or juicer. Whether you’re looking for a healthy breakfast alternative, a post-workout recovery drink, or simply a delicious way to stay hydrated, this pear juice apple ginger recipe is sure to become a new favorite.

Ingredients:
- For the Pear and Ginger Cake:
- 2 cups all-purpose flour
- 2 teaspoons baking powder
- 1/2 teaspoon baking soda
- 1/4 teaspoon salt
- 1 cup (2 sticks) unsalted butter, softened
- 1 1/2 cups granulated sugar
- 2 large eggs
- 1 teaspoon vanilla extract
- 1 cup pear juice
- 1/2 cup finely grated fresh ginger
- 2 medium pears, peeled, cored, and diced
- For the Ginger Glaze:
- 1 cup powdered sugar
- 2-3 tablespoons pear juice
- 1/4 teaspoon ground ginger
Preparing the Pear and Ginger Cake Batter
- Preheat and Prepare: First things first, preheat your oven to 350°F (175°C). Grease and flour a 9×13 inch baking pan. This will prevent the cake from sticking and make it easy to remove after baking. I like to use a baking spray that contains flour for extra insurance.
- Combine Dry Ingredients: In a large bowl, whisk together the flour, baking powder, baking soda, and salt. Whisking is important to evenly distribute the leavening agents (baking powder and baking soda) throughout the flour. This ensures a light and fluffy cake. Set this bowl aside for now.
- Cream Butter and Sugar: In a separate large bowl, cream together the softened butter and granulated sugar until light and fluffy. This usually takes about 3-5 minutes using an electric mixer. The mixture should become noticeably paler and increase in volume. This step is crucial for incorporating air into the batter, which contributes to the cake’s texture.
- Add Eggs and Vanilla: Beat in the eggs one at a time, making sure each egg is fully incorporated before adding the next. Then, stir in the vanilla extract. The vanilla enhances the overall flavor of the cake.
- Alternate Wet and Dry Ingredients: Gradually add the dry ingredients to the wet ingredients, alternating with the pear juice, beginning and ending with the dry ingredients. I usually add the dry ingredients in three additions and the pear juice in two additions. This method helps to prevent overmixing, which can lead to a tough cake. Mix until just combined. Be careful not to overmix!
- Incorporate Ginger and Pears: Gently fold in the grated fresh ginger and diced pears. Make sure the ginger is evenly distributed throughout the batter. The pears should be coated in batter to prevent them from sinking to the bottom of the pan during baking.
- Pour into Pan: Pour the batter into the prepared baking pan and spread it evenly.
Baking the Pear and Ginger Cake
- Bake: Bake in the preheated oven for 30-35 minutes, or until a wooden skewer inserted into the center comes out clean. The baking time may vary depending on your oven, so it’s always a good idea to check for doneness a few minutes early.
- Cool: Let the cake cool in the pan for 10-15 minutes before inverting it onto a wire rack to cool completely. Cooling the cake in the pan allows it to set and prevents it from crumbling when you try to remove it.
Preparing the Ginger Glaze
- Whisk Ingredients: In a small bowl, whisk together the powdered sugar, pear juice, and ground ginger until smooth. Add more pear juice, one teaspoon at a time, if needed to reach your desired consistency. The glaze should be thick enough to coat the cake but thin enough to drizzle easily.
Glazing and Serving the Pear and Ginger Cake
- Glaze the Cake: Once the cake is completely cool, drizzle the ginger glaze evenly over the top. You can use a spoon or a whisk to drizzle the glaze.
- Let Glaze Set: Allow the glaze to set for about 15-20 minutes before slicing and serving. This will prevent the glaze from running when you cut the cake.
- Serve and Enjoy: Slice the cake and serve. This Pear and Ginger Cake is delicious on its own, but you can also serve it with a scoop of vanilla ice cream or a dollop of whipped cream. It’s perfect for a fall dessert or a special occasion.
Tips and Variations
- Spice it Up: For an extra layer of flavor, add 1/2 teaspoon of ground cinnamon or nutmeg to the dry ingredients.
- Nutty Addition: Add 1/2 cup of chopped walnuts or pecans to the batter for a nutty crunch.
- Pear Variety: You can use different varieties of pears, such as Bartlett, Anjou, or Bosc, depending on your preference.
- Ginger Intensity: Adjust the amount of fresh ginger to your liking. If you prefer a milder ginger flavor, use less ginger. If you want a stronger ginger flavor, use more ginger.
- Gluten-Free Option: To make this cake gluten-free, use a gluten-free all-purpose flour blend. Make sure to check the label to ensure that the blend contains xanthan gum, which helps to bind the ingredients together.
- Dairy-Free Option: To make this cake dairy-free, use a dairy-free butter substitute and a dairy-free milk alternative in place of the pear juice.
- Storage: Store the cake in an airtight container at room temperature for up to 3 days. You can also store it in the refrigerator for up to 5 days.
- Freezing: You can freeze the cake for up to 2 months. Wrap the cake tightly in plastic wrap and then in aluminum foil before freezing. Thaw the cake overnight in the refrigerator before serving.
Troubleshooting
- Cake is Dry: If your cake turns out dry, it could be due to overbaking or using too much flour. Make sure to measure the flour accurately and check the cake for doneness a few minutes early.
- Cake is Dense: If your cake is dense, it could be due to overmixing the batter or not creaming the butter and sugar properly. Be careful not to overmix the batter and make sure the butter and sugar are creamed together until light and fluffy.
- Cake is Sinking: If your cake is sinking in the middle, it could be due to underbaking or opening the oven door too frequently during baking. Make sure the cake is fully baked before removing it from the oven and avoid opening the oven door unnecessarily.
- Glaze is Too Thick: If your glaze is too thick, add more pear juice, one teaspoon at a time, until it reaches your desired consistency.
- Glaze is Too Thin: If your glaze is too thin, add more powdered sugar, one tablespoon at a time, until it reaches your desired consistency.
Why This Recipe Works
This Pear and Ginger Cake recipe is a winner because it perfectly balances the sweetness of the pears with the warmth of the ginger. The pear juice not only adds moisture but also enhances the pear flavor. The combination of baking powder and baking soda ensures a light and airy texture. The glaze adds a touch of sweetness and a final burst of ginger flavor. Plus, it’s easy to make and can be customized to your liking with different spices and nuts. I’ve made this cake countless times, and it’s always a crowd-pleaser!
Serving Suggestions
This Pear and Ginger Cake is incredibly versatile and can be enjoyed in many ways. Here are a few of my favorite serving suggestions:
- Classic Dessert: Serve a slice of warm cake with a scoop of vanilla ice cream or a dollop of whipped cream.
- Afternoon Tea: Pair a slice of cake with a cup of hot tea or coffee for a cozy afternoon treat.
- Brunch: Add a slice of cake to your brunch spread for a sweet and satisfying addition.
- Holiday Dessert: This cake is perfect for Thanksgiving, Christmas, or any other holiday gathering.
- Gift Giving: Bake a cake and wrap it up as a thoughtful homemade gift for friends and family.
Nutritional Information (Approximate)
Please note that the nutritional information is an estimate and may vary depending on the specific ingredients used.
- Calories: 350 per serving
- Fat: 18g
- Saturated Fat: 11g
- Cholesterol: 60mg
- Sodium: 200mg
- Carbohydrates: 45g
- Sugar:
Conclusion:
This Pear Juice Apple Ginger blend isn’t just another juice recipe; it’s a vibrant, revitalizing experience waiting to happen. The sweetness of the pear perfectly complements the crisp tartness of the apple, while the ginger adds a delightful zing that awakens your senses. It’s a symphony of flavors that’s both refreshing and incredibly good for you. I truly believe this is a must-try recipe for anyone looking to boost their daily dose of vitamins and antioxidants in a delicious and convenient way. But why is this particular combination so special? Beyond the incredible taste, it’s the synergy of the ingredients that makes it a winner. Pears are packed with fiber and vitamin C, apples are rich in antioxidants and pectin, and ginger is renowned for its anti-inflammatory and digestive properties. Together, they create a powerhouse of nutrients that can support your overall well-being. And let’s be honest, who wouldn’t want a delicious way to feel good from the inside out? Now, let’s talk about serving suggestions and variations! While this juice is absolutely divine on its own, there are plenty of ways to customize it to your liking. For a cooler, more refreshing drink on a hot day, try adding a few ice cubes or even blending in some frozen pear or apple chunks. If you prefer a sweeter juice, you can add a touch of honey or maple syrup. For a spicier kick, increase the amount of ginger or add a pinch of cayenne pepper. Looking for something a little more adventurous? Consider adding a handful of spinach or kale for an extra boost of nutrients. Don’t worry, the pear and apple will mask the taste of the greens, making it a sneaky way to get your daily dose of vegetables. You could also experiment with different types of pears and apples to find your perfect flavor combination. A crisp Granny Smith apple will add a tartness, while a ripe Bartlett pear will contribute a smooth sweetness. The possibilities are endless! This pear juice apple ginger recipe is also incredibly versatile. It’s perfect as a morning pick-me-up, an afternoon refresher, or even a healthy dessert alternative. You can also use it as a base for smoothies, cocktails, or even popsicles. Imagine a refreshing pear juice popsicle on a hot summer day pure bliss! I’m so excited for you to try this recipe and experience the deliciousness for yourself. It’s quick, easy, and requires minimal ingredients. Plus, it’s a fantastic way to use up any leftover pears or apples you might have lying around. So, what are you waiting for? Grab your ingredients, dust off your juicer or blender, and get ready to create a truly amazing juice. I’m confident that you’ll love it as much as I do. And finally, I would absolutely love to hear about your experience! Once you’ve tried the recipe, please come back and share your thoughts in the comments below. Did you make any variations? What was your favorite part? Your feedback is invaluable and helps me to create even better recipes in the future. Happy juicing! I can’t wait to hear what you think of this pear juice apple ginger creation. Print
Pear Juice Apple Ginger: Benefits, Recipe, and More
- Total Time: 60 minutes
- Yield: 12–16 servings 1x
Description
A moist and flavorful Pear and Ginger Cake with a sweet ginger glaze. Perfect for fall, holidays, or any special occasion.
Ingredients
- 2 cups all-purpose flour
- 2 teaspoons baking powder
- 1/2 teaspoon baking soda
- 1/4 teaspoon salt
- 1 cup (2 sticks) unsalted butter, softened
- 1 1/2 cups granulated sugar
- 2 large eggs
- 1 teaspoon vanilla extract
- 1 cup pear juice
- 1/2 cup finely grated fresh ginger
- 2 medium pears, peeled, cored, and diced
- 1 cup powdered sugar
- 2–3 tablespoons pear juice
- 1/4 teaspoon ground ginger
Instructions
- Preheat oven to 350°F (175°C). Grease and flour a 9×13 inch baking pan.
- In a large bowl, whisk together the flour, baking powder, baking soda, and salt. Set aside.
- In a separate large bowl, cream together the softened butter and granulated sugar until light and fluffy (3-5 minutes with an electric mixer).
- Beat in the eggs one at a time, then stir in the vanilla extract.
- Gradually add the dry ingredients to the wet ingredients, alternating with the pear juice, beginning and ending with the dry ingredients. Mix until just combined. Do not overmix.
- Gently fold in the grated fresh ginger and diced pears.
- Pour the batter into the prepared baking pan and spread it evenly.
- Bake in the preheated oven for 30-35 minutes, or until a wooden skewer inserted into the center comes out clean.
- Let the cake cool in the pan for 10-15 minutes before inverting it onto a wire rack to cool completely.
- In a small bowl, whisk together the powdered sugar, pear juice, and ground ginger until smooth. Add more pear juice, one teaspoon at a time, if needed to reach your desired consistency.
- Once the cake is completely cool, drizzle the ginger glaze evenly over the top.
- Allow the glaze to set for about 15-20 minutes before slicing and serving.
- Slice the cake and serve.
Notes
- Spice it Up: Add 1/2 teaspoon of ground cinnamon or nutmeg to the dry ingredients.
- Nutty Addition: Add 1/2 cup of chopped walnuts or pecans to the batter.
- Pear Variety: Use different varieties of pears, such as Bartlett, Anjou, or Bosc.
- Ginger Intensity: Adjust the amount of fresh ginger to your liking.
- Gluten-Free Option: Use a gluten-free all-purpose flour blend with xanthan gum.
- Dairy-Free Option: Use a dairy-free butter substitute and a dairy-free milk alternative in place of the pear juice.
- Storage: Store the cake in an airtight container at room temperature for up to 3 days or in the refrigerator for up to 5 days.
- Freezing: Freeze the cake for up to 2 months. Wrap tightly in plastic wrap and then in aluminum foil. Thaw overnight in the refrigerator before serving.
- Prep Time: 20 minutes
- Cook Time: 30 minutes