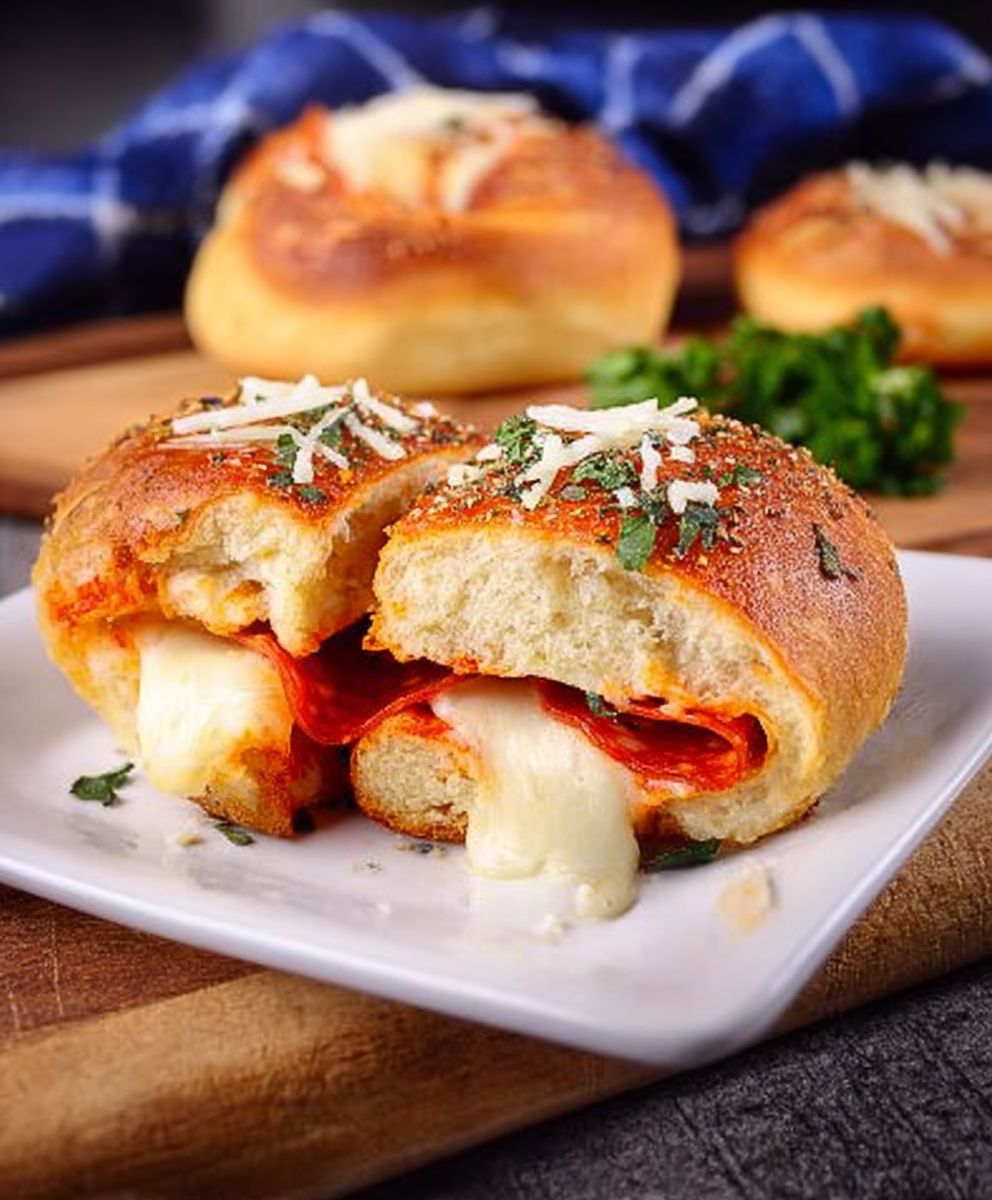
Pepperoni rolls, those savory, hand-held pockets of deliciousness, are more than just a snack; they’re a culinary emblem of West Virginia. Imagine biting into a warm, soft roll, the yeasty dough giving way to a burst of melted mozzarella and spicy pepperoni. Is your mouth watering yet? Mine is!
These aren’t just any rolls; they’re a testament to the ingenuity of Italian immigrant coal miners in the early 20th century. Seeking a convenient and filling lunch that could withstand long hours underground, they combined readily available ingredients to create what is now a beloved regional specialty. The beauty of pepperoni rolls lies in their simplicity and portability. They require no refrigeration and provide a satisfying combination of carbohydrates, protein, and fat perfect for a quick energy boost.
But beyond their practicality, people adore pepperoni rolls for their incredible flavor and comforting texture. The slight tang of the pepperoni, the creamy richness of the cheese, and the pillowy softness of the bread create a symphony of sensations that’s hard to resist. Whether you’re a West Virginian native or simply a food enthusiast looking for a new and exciting recipe, these rolls are guaranteed to become a new favorite. So, let’s get baking and bring a taste of Appalachia to your kitchen!

Ingredients:
- For the Dough:
- 3 ½ cups all-purpose flour, plus more for dusting
- 1 packet (2 ¼ teaspoons) active dry yeast
- 1 teaspoon granulated sugar
- 1 ½ teaspoons salt
- 1 ¼ cups warm water (105-115°F)
- 2 tablespoons olive oil, plus more for greasing
- For the Filling:
- 8 ounces sliced pepperoni, cut into quarters
- 4 ounces shredded mozzarella cheese (about 1 cup)
- Optional: 2 ounces provolone cheese, shredded
- Optional: 2 tablespoons grated Parmesan cheese
- Optional: Italian seasoning, to taste
- Optional: Garlic powder, to taste
- For the Egg Wash (Optional):
- 1 large egg
- 1 tablespoon milk or water
- For Serving (Optional):
- Marinara sauce, for dipping
Preparing the Dough:
- Activate the Yeast: In a large bowl, or the bowl of your stand mixer, combine the warm water, sugar, and yeast. Let it sit for 5-10 minutes, or until the yeast is foamy. This step is crucial to ensure your yeast is alive and active, which will give you a nice, fluffy dough. If the yeast doesn’t foam, it’s likely dead, and you’ll need to start over with fresh yeast.
- Combine Dry Ingredients: Add the flour and salt to the yeast mixture. If using a stand mixer, use the dough hook attachment. If mixing by hand, use a wooden spoon or your hands.
- Mix the Dough: Begin mixing on low speed (if using a stand mixer) or by hand until the dough starts to come together. Add the olive oil and continue mixing until a shaggy dough forms.
- Knead the Dough: If using a stand mixer, knead the dough on medium speed for 5-7 minutes, or until it becomes smooth and elastic. If kneading by hand, turn the dough out onto a lightly floured surface and knead for 8-10 minutes, until it’s smooth and elastic. The dough should be slightly tacky but not sticky. If it’s too sticky, add a little more flour, one tablespoon at a time.
- First Rise: Lightly grease a large bowl with olive oil. Place the dough in the bowl, turning to coat it with the oil. Cover the bowl with plastic wrap or a clean kitchen towel and let it rise in a warm place for 1-1.5 hours, or until doubled in size. A warm environment helps the yeast work its magic. I usually preheat my oven to the lowest setting for a minute or two, then turn it off and place the bowl inside.
Assembling the Pepperoni Rolls:
- Preheat Oven and Prepare Baking Sheet: Preheat your oven to 375°F (190°C). Line a baking sheet with parchment paper. This will prevent the rolls from sticking and make cleanup a breeze.
- Punch Down the Dough: Once the dough has doubled in size, gently punch it down to release the air.
- Divide the Dough: Turn the dough out onto a lightly floured surface. Divide the dough into 12 equal pieces. I find it easiest to cut the dough in half, then each half into six pieces.
- Shape the Rolls: Take one piece of dough and flatten it into a small circle, about 4-5 inches in diameter. You can use a rolling pin or just your fingers.
- Add the Filling: Place about 6-8 pieces of pepperoni in the center of the dough circle. Sprinkle with about 1-2 tablespoons of mozzarella cheese (and provolone and Parmesan, if using). Add a pinch of Italian seasoning and garlic powder, if desired. Don’t overfill the rolls, or they might burst open during baking.
- Seal the Rolls: Bring the edges of the dough circle up and over the filling, pinching them together to seal tightly. Make sure there are no gaps, or the cheese will melt out. You can shape the rolls into balls or oblong shapes, depending on your preference.
- Place on Baking Sheet: Place the sealed rolls on the prepared baking sheet, seam-side down, leaving about 1-2 inches between each roll.
- Second Rise (Optional): For a slightly fluffier roll, cover the baking sheet with a clean kitchen towel and let the rolls rise for another 15-20 minutes. This step is optional, but it will give you a lighter texture.
- Prepare Egg Wash (Optional): In a small bowl, whisk together the egg and milk (or water).
- Brush with Egg Wash (Optional): Brush the tops of the rolls with the egg wash. This will give them a beautiful golden-brown color and a slightly shiny finish.
Baking the Pepperoni Rolls:
- Bake: Bake in the preheated oven for 20-25 minutes, or until the rolls are golden brown and the cheese is melted and bubbly. Keep a close eye on them, as baking times can vary depending on your oven.
- Cool Slightly: Remove the baking sheet from the oven and let the rolls cool on the baking sheet for a few minutes before transferring them to a wire rack to cool completely. This will prevent them from getting soggy on the bottom.
Serving and Storing:
- Serve Warm: Serve the pepperoni rolls warm, with marinara sauce for dipping, if desired. They’re best enjoyed fresh out of the oven, when the cheese is gooey and the pepperoni is flavorful.
- Storing Leftovers: Store any leftover pepperoni rolls in an airtight container in the refrigerator for up to 3 days.
- Reheating: To reheat, you can microwave them for a few seconds, but they’re best reheated in the oven at 350°F (175°C) for about 5-10 minutes, or until warmed through. You can also reheat them in an air fryer for a few minutes.
- Freezing: Pepperoni rolls can also be frozen for longer storage. Let them cool completely, then wrap them individually in plastic wrap and place them in a freezer bag. They can be frozen for up to 2 months. To reheat, thaw them in the refrigerator overnight and then reheat as directed above.
Tips and Variations:
- Cheese Variations: Feel free to experiment with different types of cheese. Asiago, fontina, or even a spicy pepper jack would be delicious.
- Spice it Up: Add a pinch of red pepper flakes to the filling for a little heat.
- Add Veggies: Finely chopped onions, bell peppers, or mushrooms can be added to the filling for extra flavor and nutrients. Sauté them lightly before adding them to the rolls.
- Garlic Butter Topping: Melt some butter with minced garlic and brush it over the rolls before baking for an extra layer of flavor.
- Herb Infusion: Add fresh herbs like rosemary or thyme to the dough for a more aromatic roll.
- Make it a Meal: Serve the pepperoni rolls with a side salad or soup for a complete and satisfying meal.
- Dough Shortcut: If you’re short on time, you can use store-bought pizza dough instead of making your own. Just be sure to adjust the baking time accordingly.
- Preventing Soggy Bottoms: To prevent the bottoms of the rolls from getting soggy, you can place a baking stone in the oven while it preheats. The stone will help to distribute the heat evenly and keep the bottoms of the rolls crispy.
- Even Baking: Rotate the baking sheet halfway through baking to ensure even browning.
- Doneness Check: The best way to check if the rolls are done is to insert a toothpick into the center. If it comes out clean, they’re ready.
Troubleshooting:
- Dough Not Rising: If your dough isn’t rising, make sure your yeast is fresh and that the water is the correct temperature (105-115°F). Also, ensure that the room is warm enough.
- Rolls Bursting Open: If your rolls are bursting open during baking, it’s likely that you’ve overfilled them. Next time, use less filling.
- Rolls Too Dry: If
Conclusion:
So, there you have it! These aren’t just any rolls; they’re a warm, comforting, and utterly delicious experience. I truly believe this pepperoni rolls recipe is a must-try for anyone who loves a satisfying snack, a quick lunch, or a crowd-pleasing appetizer. The combination of the soft, slightly sweet dough with the savory, spicy pepperoni and melty cheese is simply irresistible. It’s a flavor explosion in every bite, and I promise you, once you make these, they’ll become a regular request from family and friends.
But the best part? This recipe is incredibly versatile! Feel free to get creative and adapt it to your own tastes.
Serving Suggestions and Variations:
* Dipping Sauces: Serve these warm pepperoni rolls with a side of marinara sauce, ranch dressing, or even a spicy garlic aioli for dipping. The possibilities are endless!
* Cheese Variations: While I love using mozzarella, you can experiment with other cheeses like provolone, cheddar, or even a blend of Italian cheeses for a different flavor profile.
* Spice It Up: Add a pinch of red pepper flakes to the dough or filling for an extra kick. You could also incorporate some chopped jalapeños for a spicier version.
* Vegetarian Option: For a vegetarian twist, replace the pepperoni with sautéed mushrooms, bell peppers, and onions. You can even add some spinach or artichoke hearts for extra flavor and nutrients.
* Herb Infusion: Mix some dried Italian herbs into the dough for a more aromatic and flavorful roll. Rosemary, oregano, and basil all work beautifully.
* Breakfast Rolls: Transform these into breakfast rolls by adding scrambled eggs and crumbled sausage or bacon to the filling.
* Pizza Rolls: For a pizza-inspired version, add some pizza sauce to the filling along with your favorite pizza toppings.These are just a few ideas to get you started. Don’t be afraid to experiment and find your own perfect combination! I’ve even tried adding a sprinkle of parmesan cheese on top before baking for a crispy, cheesy crust highly recommended!
I know that baking can sometimes seem intimidating, but trust me, this recipe is surprisingly easy to follow. The dough is forgiving, and the process is straightforward. Even if you’re a beginner baker, I’m confident that you can successfully make these delicious pepperoni rolls. The aroma that fills your kitchen as they bake is simply heavenly, and the taste is even better.
So, what are you waiting for? Gather your ingredients, preheat your oven, and get ready to embark on a culinary adventure. I’m so excited for you to try this recipe and experience the joy of homemade pepperoni rolls.
And most importantly, I want to hear about your experience! Did you make any variations? What dipping sauce did you choose? What did your family and friends think? Please, share your photos and stories in the comments below. I love seeing your creations and hearing about your baking adventures. Let’s build a community of pepperoni roll enthusiasts! Happy baking, and enjoy every delicious bite of your homemade pepperoni rolls! I am sure you will love them as much as I do.
Pepperoni Rolls: The Ultimate Guide to Baking Delicious Rolls
Fluffy, homemade pepperoni rolls filled with savory pepperoni and melted mozzarella cheese. Perfect as a snack, appetizer, or a quick meal!
Ingredients
- 3 ½ cups all-purpose flour, plus more for dusting
- 1 packet (2 ¼ teaspoons) active dry yeast
- 1 teaspoon granulated sugar
- 1 ½ teaspoons salt
- 1 ¼ cups warm water (105-115°F)
- 2 tablespoons olive oil, plus more for greasing
- 8 ounces sliced pepperoni, cut into quarters
- 4 ounces shredded mozzarella cheese (about 1 cup)
- Optional: 2 ounces provolone cheese, shredded
- Optional: 2 tablespoons grated Parmesan cheese
- Optional: Italian seasoning, to taste
- Optional: Garlic powder, to taste
- 1 large egg
- 1 tablespoon milk or water
- Marinara sauce, for dipping
Instructions
- Activate the Yeast: In a large bowl, or the bowl of your stand mixer, combine the warm water, sugar, and yeast. Let it sit for 5-10 minutes, or until the yeast is foamy.
- Combine Dry Ingredients: Add the flour and salt to the yeast mixture. If using a stand mixer, use the dough hook attachment. If mixing by hand, use a wooden spoon or your hands.
- Mix the Dough: Begin mixing on low speed (if using a stand mixer) or by hand until the dough starts to come together. Add the olive oil and continue mixing until a shaggy dough forms.
- Knead the Dough: If using a stand mixer, knead the dough on medium speed for 5-7 minutes, or until it becomes smooth and elastic. If kneading by hand, turn the dough out onto a lightly floured surface and knead for 8-10 minutes, until it’s smooth and elastic. The dough should be slightly tacky but not sticky. If it’s too sticky, add a little more flour, one tablespoon at a time.
- First Rise: Lightly grease a large bowl with olive oil. Place the dough in the bowl, turning to coat it with the oil. Cover the bowl with plastic wrap or a clean kitchen towel and let it rise in a warm place for 1-1.5 hours, or until doubled in size.
- Preheat Oven and Prepare Baking Sheet: Preheat your oven to 375°F (190°C). Line a baking sheet with parchment paper.
- Punch Down the Dough: Once the dough has doubled in size, gently punch it down to release the air.
- Divide the Dough: Turn the dough out onto a lightly floured surface. Divide the dough into 12 equal pieces.
- Shape the Rolls: Take one piece of dough and flatten it into a small circle, about 4-5 inches in diameter. You can use a rolling pin or just your fingers.
- Add the Filling: Place about 6-8 pieces of pepperoni in the center of the dough circle. Sprinkle with about 1-2 tablespoons of mozzarella cheese (and provolone and Parmesan, if using). Add a pinch of Italian seasoning and garlic powder, if desired.
- Seal the Rolls: Bring the edges of the dough circle up and over the filling, pinching them together to seal tightly.
- Place on Baking Sheet: Place the sealed rolls on the prepared baking sheet, seam-side down, leaving about 1-2 inches between each roll.
- Second Rise (Optional): For a slightly fluffier roll, cover the baking sheet with a clean kitchen towel and let the rolls rise for another 15-20 minutes.
- Prepare Egg Wash (Optional): In a small bowl, whisk together the egg and milk (or water).
- Brush with Egg Wash (Optional): Brush the tops of the rolls with the egg wash.
- Bake: Bake in the preheated oven for 20-25 minutes, or until the rolls are golden brown and the cheese is melted and bubbly.
- Cool Slightly: Remove the baking sheet from the oven and let the rolls cool on the baking sheet for a few minutes before transferring them to a wire rack to cool completely.
- Serve Warm: Serve the pepperoni rolls warm, with marinara sauce for dipping, if desired.
- Storing Leftovers: Store any leftover pepperoni rolls in an airtight container in the refrigerator for up to 3 days.
- Reheating: To reheat, you can microwave them for a few seconds, but they’re best reheated in the oven at 350°F (175°C) for about 5-10 minutes, or until warmed through. You can also reheat them in an air fryer for a few minutes.
- Freezing: Pepperoni rolls can also be frozen for longer storage. Let them cool completely, then wrap them individually in plastic wrap and place them in a freezer bag. They can be frozen for up to 2 months. To reheat, thaw them in the refrigerator overnight and then reheat as directed above.
Notes
- A warm environment helps the yeast work its magic. I usually preheat my oven to the lowest setting for a minute or two, then turn it off and place the bowl inside.
- This step is crucial to ensure your yeast is alive and active, which will give you a nice, fluffy dough. If the yeast doesn’t foam, it’s likely dead, and you’ll need to start over with fresh yeast.
- This will prevent the rolls from sticking and make cleanup a breeze.
- Don’t overfill the rolls, or they might burst open during baking.
- Make sure there are no gaps, or the cheese will melt out. You can shape the rolls into balls or oblong shapes, depending on your preference.
- This step is optional, but it will give you a lighter texture.
- This will give them a beautiful golden-brown color and a slightly shiny finish.
- Keep a close eye on them, as baking times can vary depending on your oven.
- This will prevent them from getting soggy on the bottom.
- They’re best enjoyed fresh out of the oven, when the cheese is gooey and the pepperoni is flavorful.