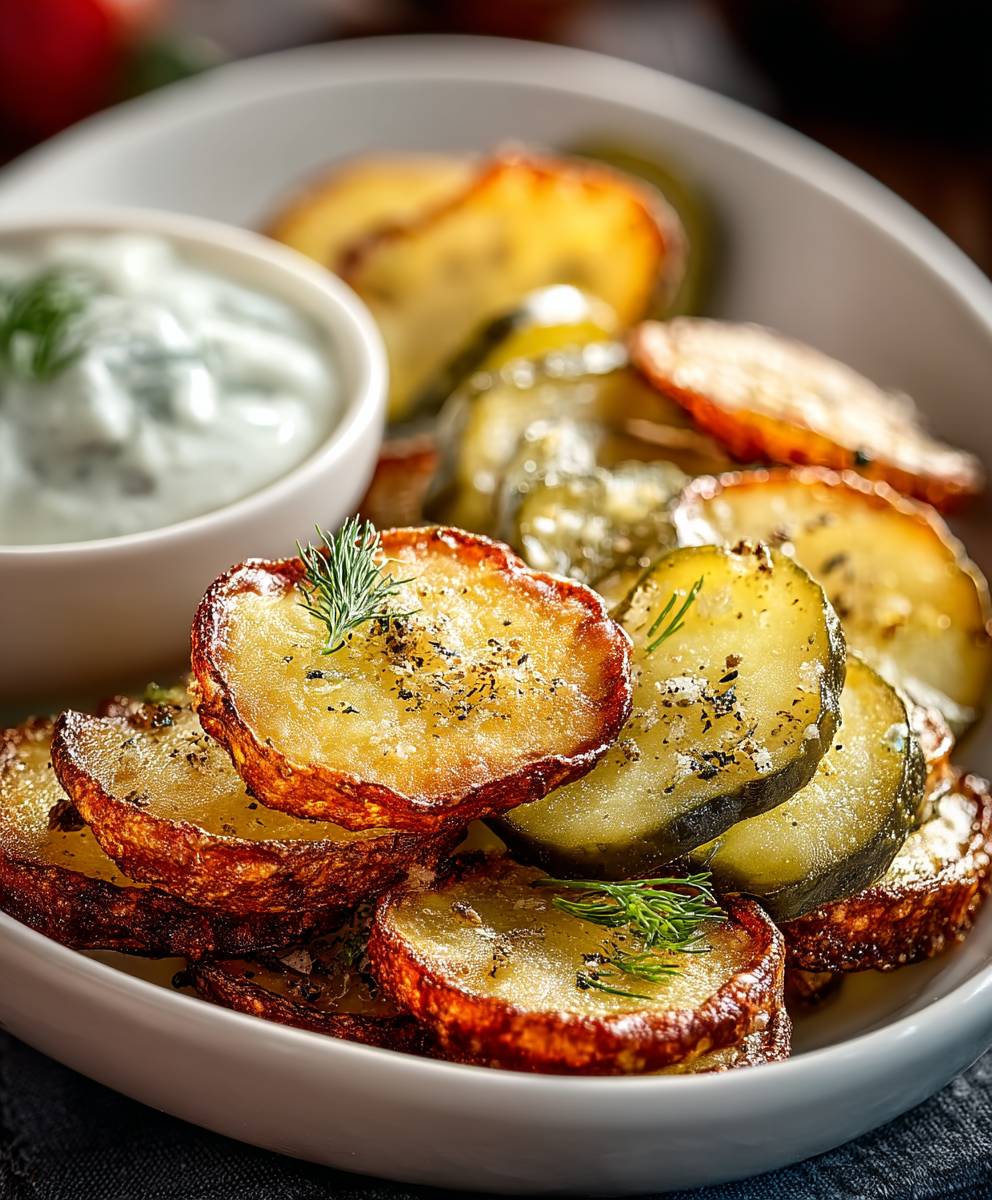
Pickle Chips: Prepare to meet your new favorite snack! Forget everything you thought you knew about pickles because these crispy, tangy delights are about to revolutionize your snacking game. Imagine the satisfying crunch of a perfectly fried potato chip, but with the bold, vinegary zing of a dill pickle. Intrigued? You should be!
While the exact origins of fried pickles are debated, their popularity exploded in the American South, particularly in Arkansas, during the 1960s. It’s said that a local restaurant owner, looking for a way to use up excess pickle brine, decided to experiment with frying pickle slices. The result? A culinary sensation that quickly spread across the nation.
But what makes pickle chips so irresistible? It’s the perfect marriage of textures and flavors. The initial crunch gives way to a soft, juicy interior, followed by that unmistakable pickle tang that awakens your taste buds. They’re salty, sour, and utterly addictive! Plus, they’re incredibly easy to make at home, requiring just a handful of simple ingredients and a few minutes of your time. Whether you’re looking for a fun appetizer to share with friends, a unique side dish for your next barbecue, or simply a satisfying snack to enjoy on your own, these crispy pickle chips are guaranteed to be a hit. Let’s get started!

Ingredients:
- 1 large dill pickle jar (46 oz), preferably Claussen or similar, drained
- 1 cup all-purpose flour
- 1/2 cup cornstarch
- 2 teaspoons smoked paprika
- 1 teaspoon garlic powder
- 1 teaspoon onion powder
- 1/2 teaspoon cayenne pepper (optional, for heat)
- 1 teaspoon dried dill weed
- 1/2 teaspoon black pepper
- 1/2 teaspoon salt
- 1 cup buttermilk
- 1 large egg
- Vegetable oil, for frying (about 4-6 cups)
- Optional dipping sauces: Ranch dressing, spicy mayo, honey mustard
Preparing the Pickle Chips:
- Drain the pickles thoroughly. This is crucial for crispy pickle chips. Open the jar of pickles and pour the contents into a colander. Let them drain for at least 30 minutes, or even better, an hour. Gently pat them dry with paper towels to remove any excess moisture. The drier the pickles, the better the breading will adhere.
- Slice the pickles into chips. If your pickles are whole, slice them into 1/4-inch thick chips. If they are already sliced, you can skip this step. Try to keep the slices uniform in thickness so they cook evenly.
- Pat the pickle chips dry again. Even after draining, the pickles will still have some moisture. Before breading, give them another pat down with paper towels. This will help the breading stick and prevent soggy pickle chips.
Preparing the Breading:
- Combine the dry ingredients. In a medium-sized bowl, whisk together the flour, cornstarch, smoked paprika, garlic powder, onion powder, cayenne pepper (if using), dried dill weed, black pepper, and salt. The cornstarch helps create a lighter, crispier coating. The smoked paprika adds a wonderful smoky flavor, but you can use regular paprika if you prefer.
- Prepare the wet ingredients. In a separate bowl, whisk together the buttermilk and egg. The buttermilk adds a tangy flavor and helps the breading adhere to the pickles. If you don’t have buttermilk, you can make a substitute by adding 1 tablespoon of lemon juice or white vinegar to 1 cup of milk and letting it sit for 5 minutes.
Breading the Pickle Chips:
- Set up a breading station. This will make the breading process much easier. You’ll need three shallow dishes: one for the dry ingredients, one for the wet ingredients, and one for the breaded pickle chips.
- Dredge the pickle chips in flour. Take a handful of pickle chips and toss them in the dry flour mixture, making sure they are fully coated. Shake off any excess flour. This initial coating helps the wet ingredients adhere better.
- Dip the pickle chips in buttermilk. Dip the floured pickle chips into the buttermilk mixture, ensuring they are completely submerged. Let any excess buttermilk drip off.
- Coat the pickle chips in the breading mixture. Return the buttermilk-dipped pickle chips to the dry flour mixture and toss them until they are completely coated. Press the breading gently onto the pickles to ensure it adheres well.
- Place the breaded pickle chips on a plate or baking sheet. As you bread the pickle chips, place them in a single layer on a plate or baking sheet lined with parchment paper. This prevents them from sticking together.
- Repeat the breading process. Continue breading the remaining pickle chips until they are all coated.
- Chill the breaded pickle chips (optional but recommended). For the best results, place the breaded pickle chips in the refrigerator for at least 30 minutes, or even up to an hour. This helps the breading set and prevents it from falling off during frying.
Frying the Pickle Chips:
- Heat the oil. Pour the vegetable oil into a large, heavy-bottomed pot or Dutch oven. Heat the oil over medium-high heat to 350°F (175°C). Use a deep-fry thermometer to monitor the temperature of the oil. Maintaining the correct temperature is crucial for crispy, evenly cooked pickle chips. If the oil is too hot, the breading will burn before the pickles are cooked through. If the oil is too cold, the pickle chips will absorb too much oil and become soggy.
- Fry the pickle chips in batches. Carefully add the breaded pickle chips to the hot oil in a single layer, being careful not to overcrowd the pot. Overcrowding the pot will lower the temperature of the oil and result in soggy pickle chips.
- Fry for 2-3 minutes per side. Fry the pickle chips for 2-3 minutes per side, or until they are golden brown and crispy. Use a slotted spoon or spider to flip the pickle chips and ensure they cook evenly.
- Remove the pickle chips and drain. Once the pickle chips are golden brown and crispy, remove them from the oil with a slotted spoon or spider and place them on a wire rack lined with paper towels to drain off any excess oil.
- Repeat the frying process. Continue frying the remaining pickle chips in batches until they are all cooked.
- Check the oil temperature between batches. Make sure the oil temperature remains consistent between batches. If the temperature drops too low, allow the oil to heat back up before adding more pickle chips.
Serving the Pickle Chips:
- Season with salt (optional). While the pickle chips are still hot, you can sprinkle them with a little extra salt, if desired.
- Serve immediately. Fried pickle chips are best served immediately while they are still hot and crispy.
- Serve with your favorite dipping sauces. Fried pickle chips are delicious on their own, but they are even better with dipping sauces. Some popular choices include ranch dressing, spicy mayo, honey mustard, or even a simple ketchup.
Tips for Perfect Fried Pickle Chips:
- Use good quality pickles. The quality of the pickles will directly impact the flavor of the fried pickle chips. Choose a brand that you enjoy and that has a good, crisp texture. I personally prefer Claussen, but feel free to experiment with other brands.
- Don’t overcrowd the pot. As mentioned earlier, overcrowding the pot will lower the temperature of the oil and result in soggy pickle chips. Fry the pickle chips in batches to ensure they cook evenly.
- Maintain the correct oil temperature. Use a deep-fry thermometer to monitor the temperature of the oil and adjust the heat as needed to maintain a consistent temperature of 350°F (175°C).
- Don’t overcook the pickle chips. Overcooking the pickle chips will result in a burnt breading and a mushy pickle. Fry them for just 2-3 minutes per side, or until they are golden brown and crispy.
- Drain the pickle chips thoroughly. After frying, place the pickle chips on a wire rack lined with paper towels to drain off any excess oil. This will help them stay crispy.
- Experiment with different seasonings. Feel free to experiment with different seasonings in the breading mixture. Some other options include chili powder, cumin, or even a little bit of sugar.
- Make them ahead of time (partially). You can bread the pickle chips ahead of time and store them in the refrigerator for up to 24 hours. This is a great way to save time when you’re ready to fry them. Just be sure to keep them in a single layer on a plate or baking sheet lined with parchment paper.
Variations:
- Spicy Fried Pickle Chips: Add more cayenne pepper to the breading mixture for a spicier kick. You can also add a pinch of red pepper flakes.
- Garlic Parmesan Fried Pickle Chips: Add grated Parmesan cheese and extra garlic powder to the breading mixture.
- Ranch Fried Pickle Chips: Add a packet of ranch dressing mix to the breading mixture.
- Air Fryer Fried Pickle Chips: For a healthier option, you can air fry the pickle chips instead of deep frying them. Preheat your air fryer to 400°F (200°C). Spray the breaded pickle chips with cooking spray and air fry for 8-10 minutes, flipping halfway through, or until they are golden brown and crispy.
Conclusion:
So there you have it! These aren’t just any pickle chips; they’re a crispy, tangy, and utterly addictive snack that will disappear faster than you can say “dill-icious!” Seriously, if you’re looking for a crowd-pleaser, a unique appetizer, or just a satisfyingly crunchy treat to enjoy on your own, this recipe is an absolute must-try. I know I’m biased, but I truly believe these homemade pickle chips are far superior to anything you can buy in a store. The freshness, the flavor, and the satisfying crunch are simply unmatched.
But the best part? This recipe is incredibly versatile! While I love serving them with a classic ranch dressing or a spicy sriracha mayo, the possibilities are endless. Imagine these pickle chips piled high on a juicy burger for an extra layer of tangy goodness. Or, how about using them as a crunchy topping for a creamy mac and cheese? You could even crush them up and use them as a breading for chicken tenders or fish fillets! The salty, vinegary flavor adds a unique twist that will have everyone asking for your secret ingredient.
And speaking of variations, don’t be afraid to experiment with different types of pickles! While I typically use dill pickles for this recipe, you could easily substitute sweet pickles, spicy pickles, or even bread and butter pickles for a completely different flavor profile. You can also adjust the spices to your liking. Add a pinch of cayenne pepper for a little heat, or a dash of garlic powder for extra savory flavor. The key is to have fun and make it your own!
Serving Suggestions to Elevate Your Pickle Chip Experience
Beyond the dipping sauces I mentioned earlier, consider pairing these pickle chips with a creamy blue cheese dressing, a tangy honey mustard, or even a simple aioli. For a truly decadent treat, try dipping them in melted chocolate! The sweet and salty combination is surprisingly delicious. And if you’re hosting a party, arrange the pickle chips on a platter with other appetizers like cheese cubes, crackers, and olives for a visually appealing and flavorful spread.
Don’t Forget the Drinks!
These pickle chips pair perfectly with a variety of beverages. A crisp, cold beer is always a good choice, as is a refreshing glass of lemonade or iced tea. For a more sophisticated pairing, try a dry white wine like Sauvignon Blanc or Pinot Grigio. The acidity of the wine will complement the tanginess of the pickles beautifully.
Ready to Get Cooking?
I’m so excited for you to try this recipe! I know you’re going to love it. It’s simple, straightforward, and guaranteed to impress. So, gather your ingredients, preheat your oven, and get ready to experience the best pickle chips you’ve ever tasted.
Now, I want to hear from you! Once you’ve made these pickle chips, please come back and share your experience in the comments below. Did you make any variations? What dipping sauces did you use? What did your friends and family think? I can’t wait to hear all about it! And don’t forget to snap a picture of your creations and tag me on social media! I love seeing your culinary masterpieces. Happy cooking, and enjoy your delicious homemade pickle chips! I’m confident this will become a staple recipe in your kitchen, just as it has in mine.
Pickle Chips: The Ultimate Guide to Crispy, Tangy Perfection
Crispy, tangy fried pickle chips are the perfect appetizer or snack. Made with dill pickles, flavorful breading, and your favorite dipping sauce.
Ingredients
- 1 large dill pickle jar (46 oz), preferably Claussen or similar, drained
- 1 cup all-purpose flour
- 1/2 cup cornstarch
- 2 teaspoons smoked paprika
- 1 teaspoon garlic powder
- 1 teaspoon onion powder
- 1/2 teaspoon cayenne pepper (optional, for heat)
- 1 teaspoon dried dill weed
- 1/2 teaspoon black pepper
- 1/2 teaspoon salt
- 1 cup buttermilk
- 1 large egg
- Vegetable oil, for frying (about 4-6 cups)
- Optional dipping sauces: Ranch dressing, spicy mayo, honey mustard
Instructions
- Open the jar of pickles and pour the contents into a colander. Let them drain for at least 30 minutes, or even better, an hour. Gently pat them dry with paper towels to remove any excess moisture.
- If your pickles are whole, slice them into 1/4-inch thick chips. If they are already sliced, you can skip this step. Try to keep the slices uniform in thickness so they cook evenly.
- Even after draining, the pickles will still have some moisture. Before breading, give them another pat down with paper towels.
- In a medium-sized bowl, whisk together the flour, cornstarch, smoked paprika, garlic powder, onion powder, cayenne pepper (if using), dried dill weed, black pepper, and salt.
- In a separate bowl, whisk together the buttermilk and egg.
- You’ll need three shallow dishes: one for the dry ingredients, one for the wet ingredients, and one for the breaded pickle chips.
- Take a handful of pickle chips and toss them in the dry flour mixture, making sure they are fully coated. Shake off any excess flour.
- Dip the floured pickle chips into the buttermilk mixture, ensuring they are completely submerged. Let any excess buttermilk drip off.
- Return the buttermilk-dipped pickle chips to the dry flour mixture and toss them until they are completely coated. Press the breading gently onto the pickles to ensure it adheres well.
- As you bread the pickle chips, place them in a single layer on a plate or baking sheet lined with parchment paper.
- Continue breading the remaining pickle chips until they are all coated.
- For the best results, place the breaded pickle chips in the refrigerator for at least 30 minutes, or even up to an hour.
- Pour the vegetable oil into a large, heavy-bottomed pot or Dutch oven. Heat the oil over medium-high heat to 350°F (175°C). Use a deep-fry thermometer to monitor the temperature of the oil.
- Carefully add the breaded pickle chips to the hot oil in a single layer, being careful not to overcrowd the pot.
- Fry the pickle chips for 2-3 minutes per side, or until they are golden brown and crispy. Use a slotted spoon or spider to flip the pickle chips and ensure they cook evenly.
- Once the pickle chips are golden brown and crispy, remove them from the oil with a slotted spoon or spider and place them on a wire rack lined with paper towels to drain off any excess oil.
- Continue frying the remaining pickle chips in batches until they are all cooked.
- Make sure the oil temperature remains consistent between batches. If the temperature drops too low, allow the oil to heat back up before adding more pickle chips.
- While the pickle chips are still hot, you can sprinkle them with a little extra salt, if desired.
- Fried pickle chips are best served immediately while they are still hot and crispy.
- Fried pickle chips are delicious on their own, but they are even better with dipping sauces. Some popular choices include ranch dressing, spicy mayo, honey mustard, or even a simple ketchup.
Notes
- Use good quality pickles: Choose a brand that you enjoy and that has a good, crisp texture.
- Don’t overcrowd the pot: Fry the pickle chips in batches to ensure they cook evenly.
- Maintain the correct oil temperature: Use a deep-fry thermometer to monitor the temperature of the oil and adjust the heat as needed to maintain a consistent temperature of 350°F (175°C).
- Don’t overcook the pickle chips: Fry them for just 2-3 minutes per side, or until they are golden brown and crispy.
- Drain the pickle chips thoroughly: After frying, place the pickle chips on a wire rack lined with paper towels to drain off any excess oil.
- Experiment with different seasonings: Feel free to experiment with different seasonings in the breading mixture. Some other options include chili powder, cumin, or even a little bit of sugar.
- Make them ahead of time (partially): You can bread the pickle chips ahead of time and store them in the refrigerator for up to 24 hours. Just be sure to keep them in a single layer on a plate or baking sheet lined with parchment paper.