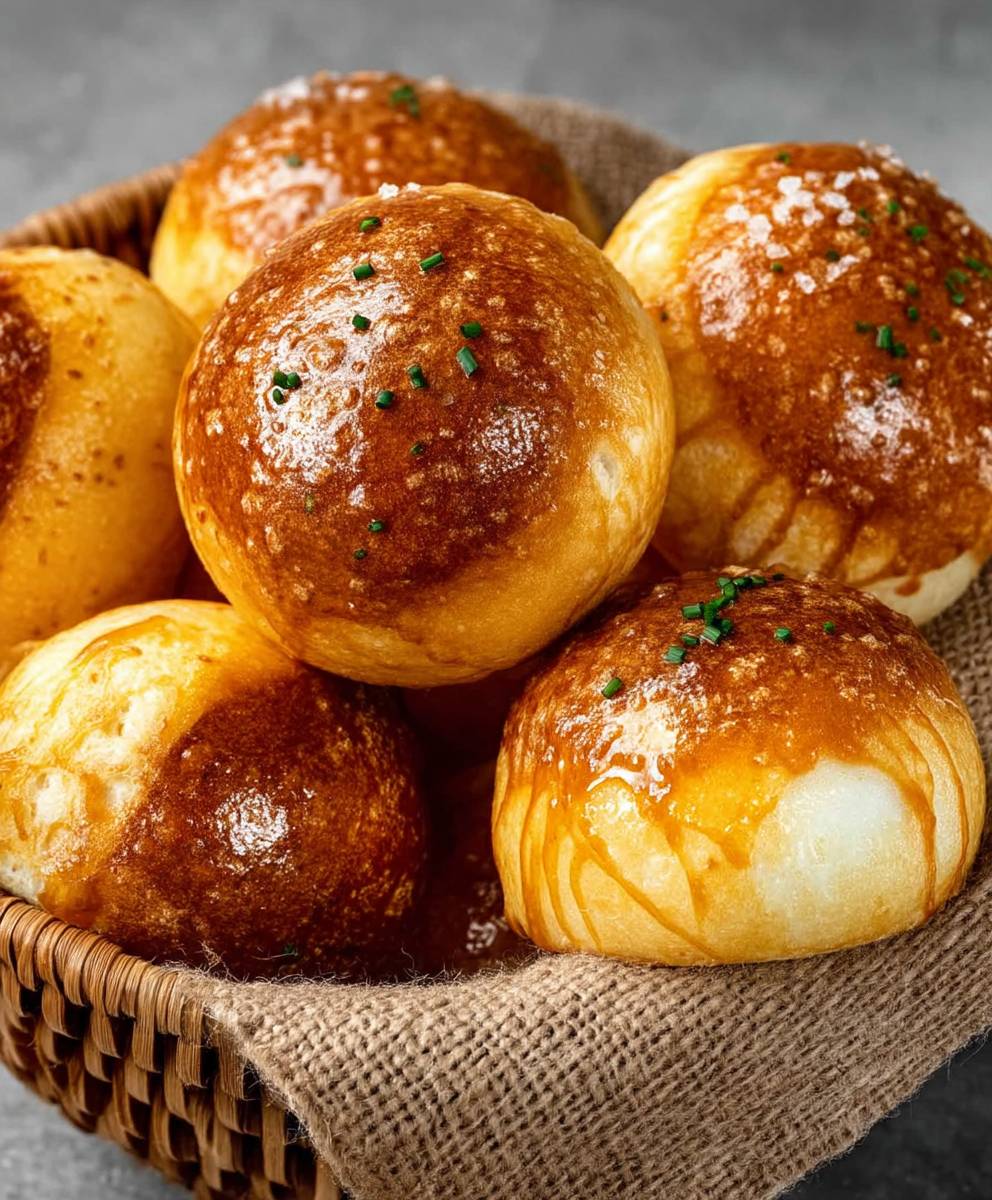
Rolls without Yeast? Yes, you read that right! Imagine sinking your teeth into a warm, fluffy roll, fresh from the oven, without the hours of waiting for yeast to do its thing. It sounds too good to be true, doesn’t it? But trust me, these delightful little bread clouds are absolutely achievable, and I’m thrilled to share my foolproof recipe with you.
While yeasted rolls have a long and storied history, gracing tables for centuries and playing a central role in countless cultural traditions, sometimes we need a quicker, more convenient option. Perhaps you’re short on time, or maybe you simply ran out of yeast (we’ve all been there!). Whatever the reason, these rolls without yeast offer a fantastic alternative that doesn’t compromise on taste or texture.
What makes these rolls so irresistible? It’s the perfect combination of a soft, slightly chewy interior and a golden-brown crust. They’re incredibly versatile, pairing perfectly with soups, stews, salads, or simply enjoyed with a pat of butter. Plus, the ease of preparation makes them a weeknight winner. Forget the kneading and proofing this recipe comes together in a fraction of the time, delivering warm, satisfying rolls that the whole family will love. Get ready to experience the joy of homemade bread, without the yeast-induced wait!

Ingredients:
- 4 cups all-purpose flour, plus more for dusting
- 4 teaspoons baking powder
- 2 teaspoons salt
- 1/2 teaspoon baking soda
- 1/4 cup granulated sugar
- 1/2 cup (1 stick) cold unsalted butter, cut into cubes
- 1 1/2 cups buttermilk, cold
- 2 tablespoons melted butter, for brushing
Preparing the Dough:
- First things first, let’s get our dry ingredients ready. In a large bowl, whisk together the 4 cups of all-purpose flour, 4 teaspoons of baking powder, 2 teaspoons of salt, 1/2 teaspoon of baking soda, and 1/4 cup of granulated sugar. Make sure you whisk it really well to distribute the baking powder and soda evenly. This is crucial for getting those rolls to rise properly without yeast!
- Now, for the butter. This is where the magic happens. Add the 1/2 cup (1 stick) of cold, cubed unsalted butter to the flour mixture. Using a pastry blender or your fingertips (if you’re feeling adventurous!), cut the butter into the flour until the mixture resembles coarse crumbs. You want to see small pieces of butter still visible these little pockets of butter will create flaky layers in your rolls. Don’t overmix! Overmixing will develop the gluten in the flour too much, resulting in tough rolls.
- Time for the buttermilk! Pour in the 1 1/2 cups of cold buttermilk. Gently stir the mixture with a wooden spoon or spatula until just combined. The dough will be shaggy and a little sticky that’s perfectly fine. Again, resist the urge to overmix. A few streaks of flour are okay at this stage.
- Turn the dough out onto a lightly floured surface. Gently knead the dough a few times, just until it comes together into a cohesive ball. You don’t want to develop the gluten too much, so aim for about 5-6 kneads. The dough should still be slightly sticky, but manageable.
- Pat the dough into a rectangle about 1 inch thick. Using a 2-inch biscuit cutter (or a sharp knife, if you don’t have a cutter), cut out the rolls. If you’re using a cutter, press straight down avoid twisting the cutter, as this can seal the edges and prevent the rolls from rising properly.
- Gently gather the scraps of dough, pat them back into a rectangle, and cut out more rolls. Repeat until all the dough is used. Don’t worry if the last few rolls aren’t perfectly shaped they’ll still taste delicious!
Baking the Rolls:
- Preheat your oven to 450°F (232°C). Make sure your oven is fully preheated before you put the rolls in. A hot oven is essential for getting a good rise and a golden-brown crust.
- Line a baking sheet with parchment paper. This will prevent the rolls from sticking and make cleanup a breeze.
- Arrange the rolls on the prepared baking sheet, placing them close together but not touching. This will help them rise taller and create soft sides.
- Bake for 12-15 minutes, or until the rolls are golden brown on top and cooked through. The baking time may vary depending on your oven, so keep an eye on them. A good way to check for doneness is to insert a toothpick into the center of a roll if it comes out clean, they’re ready.
- While the rolls are baking, melt the 2 tablespoons of butter in a small bowl.
- As soon as the rolls come out of the oven, brush them generously with the melted butter. This will give them a beautiful sheen and add a rich, buttery flavor.
Serving and Storing:
- Let the rolls cool slightly on the baking sheet before serving. They’re best enjoyed warm, straight from the oven.
- Serve the rolls with your favorite toppings, such as butter, jam, honey, or cream cheese. They’re also delicious on their own!
- To store leftover rolls, let them cool completely and then place them in an airtight container at room temperature. They’ll keep for 2-3 days.
- To reheat the rolls, wrap them in foil and bake them in a preheated oven at 350°F (175°C) for 5-10 minutes, or until warmed through. You can also microwave them for a few seconds, but they may become a little tough.
- For longer storage, you can freeze the baked rolls. Let them cool completely, wrap them individually in plastic wrap, and then place them in a freezer bag. They’ll keep in the freezer for up to 2 months. To thaw, let them sit at room temperature for a few hours or overnight. Reheat as directed above.
Tips and Tricks for Perfect Rolls:
- Use cold ingredients. Cold butter and buttermilk are essential for creating flaky layers in the rolls. The cold butter will create steam as it bakes, which will help the rolls rise and become light and airy.
- Don’t overmix the dough. Overmixing will develop the gluten in the flour, resulting in tough rolls. Mix the dough just until the ingredients are combined.
- Handle the dough gently. Be careful not to overwork the dough when you’re kneading and cutting out the rolls. Gentle handling will help keep the rolls tender.
- Bake in a hot oven. A hot oven is essential for getting a good rise and a golden-brown crust. Make sure your oven is fully preheated before you put the rolls in.
- Brush with melted butter. Brushing the rolls with melted butter after they come out of the oven will give them a beautiful sheen and add a rich, buttery flavor.
- Experiment with flavors. Feel free to add other ingredients to the dough to customize the flavor of your rolls. Some popular additions include herbs, cheese, garlic, and spices.
- Make them ahead of time. You can prepare the dough ahead of time and store it in the refrigerator for up to 24 hours. When you’re ready to bake the rolls, simply take the dough out of the refrigerator and let it sit at room temperature for 30 minutes before cutting out the rolls.
- Freeze for later. These rolls freeze beautifully! Bake as directed, let cool completely, then wrap individually in plastic wrap and place in a freezer bag. Thaw at room temperature and reheat in a warm oven for a few minutes.
Variations:
- Herb Rolls: Add 1-2 tablespoons of chopped fresh herbs, such as rosemary, thyme, or parsley, to the dough.
- Cheese Rolls: Add 1/2 cup of shredded cheese, such as cheddar, Parmesan, or Gruyere, to the dough.
- Garlic Rolls: Add 1-2 cloves of minced garlic to the dough. You can also brush the baked rolls with garlic butter.
- Sweet Rolls: Increase the amount of sugar in the dough to 1/2 cup and add 1/2 teaspoon of ground cinnamon. You can also glaze the baked rolls with a simple powdered sugar glaze.
- Whole Wheat Rolls: Substitute 1-2 cups of the all-purpose flour with whole wheat flour. You may need to add a little more buttermilk to the dough to compensate for the extra absorption of the whole wheat flour.
Troubleshooting:
- Rolls are not rising: Make sure your baking powder and baking soda are fresh. Also, be careful not to overmix the dough.
- Rolls are tough: You may have overmixed the dough. Be gentle when kneading and cutting out the rolls.
- Rolls are dry: You may have overbaked the rolls. Check them frequently while they’re baking and remove them from the oven as soon as they’re golden brown.
- Rolls are sticking to the baking sheet: Make sure to line the baking sheet with parchment paper.
Enjoy your homemade, yeast-free rolls! They’re perfect for any occasion.
Conclusion:
So there you have it! These Rolls without Yeast are truly a game-changer, and I wholeheartedly believe you need to experience their fluffy, delicious goodness for yourself. Forget hours of proofing and worrying about active dry yeast; this recipe delivers warm, comforting rolls in a fraction of the time. The simplicity alone makes it a must-try, especially for those busy weeknights when you crave homemade bread but don’t have the energy for a complicated baking project.
But the speed and ease aren’t the only reasons to fall in love with these rolls. The texture is surprisingly soft and airy, with a subtle tang that complements both sweet and savory dishes. They’re perfect for soaking up gravy with your Sunday roast, building the ultimate slider for game day, or simply enjoying warm with a generous slather of butter and a sprinkle of sea salt. Honestly, I’ve even been known to sneak one straight from the oven they’re that irresistible!
And the best part? This recipe is incredibly versatile. Feel free to experiment with different flours to create your own unique twist. Whole wheat flour will add a nutty flavor and a slightly denser texture, while spelt flour offers a subtle sweetness. You could also incorporate herbs and spices into the dough. Imagine adding a tablespoon of dried rosemary and a pinch of garlic powder for a savory roll that pairs perfectly with Italian dishes. Or, for a sweeter treat, try adding a teaspoon of cinnamon and a handful of raisins. The possibilities are endless!
Serving suggestions are just as varied. These rolls are fantastic alongside soups and stews, providing a comforting and satisfying accompaniment. They also make excellent sandwich rolls, holding up well to fillings without becoming soggy. For a truly decadent experience, try using them to make mini breakfast sandwiches with scrambled eggs, cheese, and your favorite breakfast meat. And don’t forget about dessert! Warm rolls with a scoop of vanilla ice cream and a drizzle of chocolate sauce are a simple yet elegant way to end any meal.
I’m confident that once you try this recipe, it will become a staple in your kitchen. It’s quick, easy, and yields incredibly delicious results every time. Plus, it’s a fantastic way to impress your family and friends with your baking skills, even if you’re a beginner.
So, what are you waiting for? Gather your ingredients, preheat your oven, and get ready to bake some seriously amazing Rolls without Yeast. I’m so excited for you to try this recipe and discover just how easy and rewarding it is to make homemade bread.
Once you’ve had a chance to bake these rolls, I would absolutely love to hear about your experience! Did you make any variations? What did you serve them with? Share your photos and stories in the comments below. Your feedback is invaluable, and it helps me continue to create recipes that you’ll love. Happy baking!
Rolls Without Yeast: Easy Recipe for Delicious Homemade Bread
Fluffy, buttery, and easy yeast-free rolls, perfect for any meal! These homemade rolls are quick to make and require no yeast, making them a simple and delicious addition to your table.
Ingredients
- 4 cups all-purpose flour, plus more for dusting
- 4 teaspoons baking powder
- 2 teaspoons salt
- 1/2 teaspoon baking soda
- 1/4 cup granulated sugar
- 1/2 cup (1 stick) cold unsalted butter, cut into cubes
- 1 1/2 cups buttermilk, cold
- 2 tablespoons melted butter, for brushing
Instructions
- Prepare Dry Ingredients: In a large bowl, whisk together the flour, baking powder, salt, baking soda, and sugar.
- Incorporate Butter: Cut in the cold, cubed butter using a pastry blender or your fingertips until the mixture resembles coarse crumbs. Do not overmix.
- Add Buttermilk: Pour in the cold buttermilk and gently stir until just combined. The dough will be shaggy and sticky. Avoid overmixing.
- Knead Lightly: Turn the dough out onto a lightly floured surface. Gently knead a few times until it comes together into a cohesive ball (about 5-6 kneads). The dough should still be slightly sticky.
- Cut Rolls: Pat the dough into a 1-inch thick rectangle. Use a 2-inch biscuit cutter (or a sharp knife) to cut out the rolls. Press straight down without twisting.
- Re-roll Scraps: Gather the scraps, pat them into a rectangle, and cut out more rolls until all the dough is used.
- Preheat Oven: Preheat your oven to 450°F (232°C).
- Prepare Baking Sheet: Line a baking sheet with parchment paper.
- Arrange Rolls: Arrange the rolls on the baking sheet, placing them close together but not touching.
- Bake: Bake for 12-15 minutes, or until golden brown on top and cooked through.
- Brush with Butter: While the rolls are baking, melt the 2 tablespoons of butter. As soon as the rolls come out of the oven, brush them generously with the melted butter.
- Cool and Serve: Let the rolls cool slightly on the baking sheet before serving. Serve warm with your favorite toppings.
Notes
- Cold Ingredients are Key: Using cold butter and buttermilk is crucial for creating flaky layers.
- Don’t Overmix: Overmixing will result in tough rolls. Mix just until combined.
- Handle Gently: Be gentle when kneading and cutting to keep the rolls tender.
- Hot Oven: A hot oven is essential for a good rise and golden-brown crust.
- Brush with Butter: Brushing with melted butter adds flavor and a beautiful sheen.
- Make Ahead: Dough can be stored in the refrigerator for up to 24 hours before baking.
- Freezing: Baked rolls freeze well. Cool completely, wrap individually, and freeze for up to 2 months.