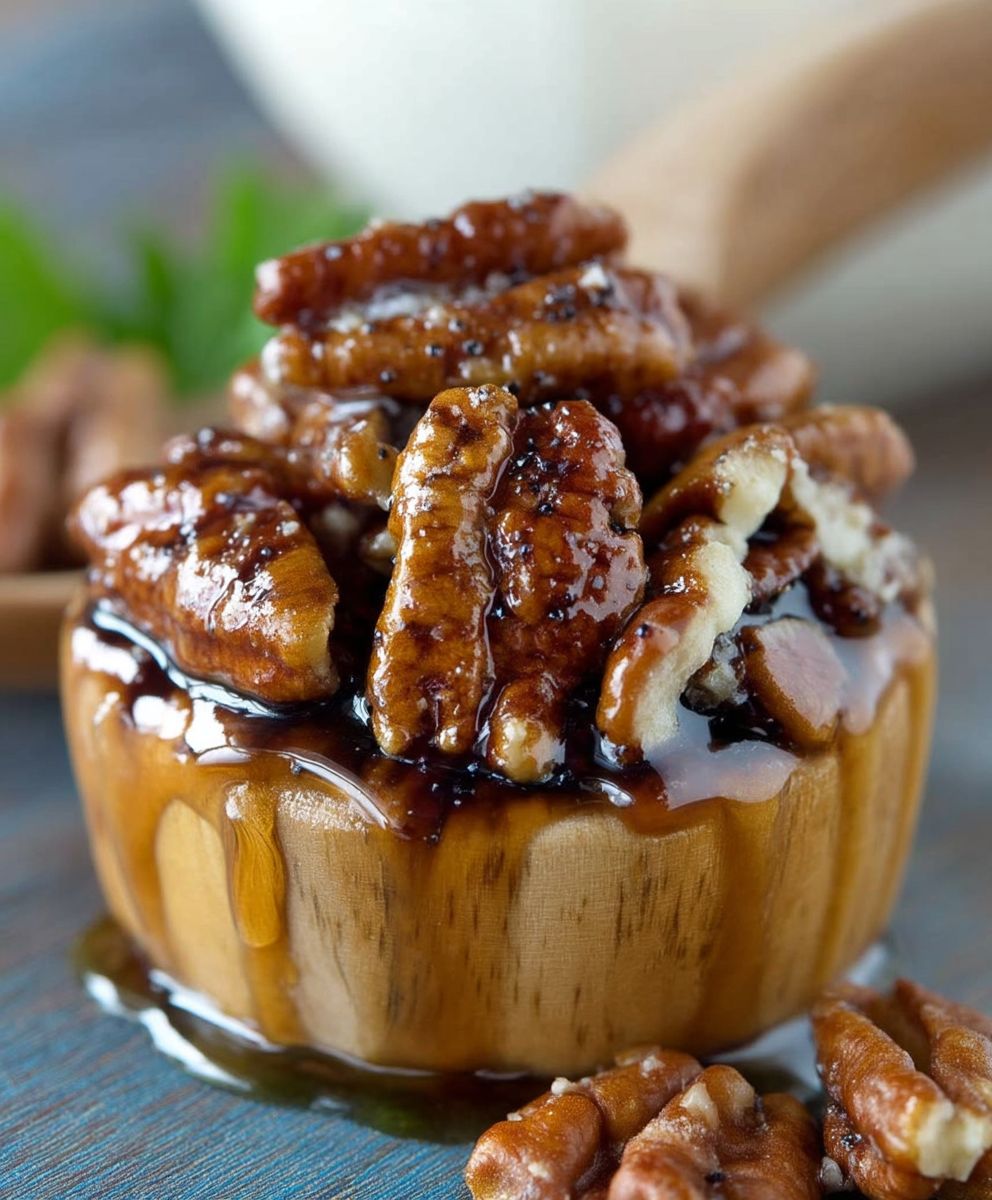
Sticky nuts, a delightful confection that perfectly balances sweet and savory, are about to become your new favorite snack. Imagine this: a symphony of crunchy nuts, coated in a luscious, caramelized glaze that clings to every crevice, creating an irresistible treat that’s impossible to resist. Are you ready to experience a burst of flavor and texture that will leave you craving more?
While the exact origins of glazed nuts are difficult to pinpoint, similar candied nut preparations have been enjoyed for centuries across various cultures. From the sugared almonds of Europe to the honey-roasted peanuts of Asia, the concept of enhancing the natural goodness of nuts with a sweet coating is a time-honored tradition. This particular recipe for sticky nuts draws inspiration from these global influences, resulting in a truly unique and addictive treat.
What makes these nuts so universally appealing? It’s the perfect combination of textures the satisfying crunch of the nuts against the smooth, sticky glaze. The flavor profile is equally captivating, with the earthy notes of the nuts complementing the rich, sweet caramel. Plus, they’re incredibly easy to make! Whether you’re looking for a quick and delicious snack, a thoughtful homemade gift, or a crowd-pleasing addition to your next party, these sticky nuts are guaranteed to be a hit. Let’s get started!

Ingredients:
- 2 cups mixed nuts (almonds, pecans, walnuts, cashews your choice!)
- 1/2 cup granulated sugar
- 1/4 cup light corn syrup
- 1/4 cup water
- 1 tablespoon butter
- 1/4 teaspoon salt
- 1/2 teaspoon vanilla extract
- Optional: 1/4 teaspoon ground cinnamon or other spices
Preparing the Caramel
Okay, let’s get started! The key to amazing sticky nuts is a perfectly made caramel. Don’t be intimidated; it’s easier than you think. Just follow these steps carefully, and you’ll be rewarded with a sweet, nutty treat.
- Combine Sugar, Corn Syrup, and Water: In a medium-sized, heavy-bottomed saucepan, combine the granulated sugar, light corn syrup, and water. The heavy-bottomed saucepan is important because it helps distribute the heat evenly, preventing the sugar from burning.
- Stir Until Dissolved: Place the saucepan over medium heat. Stir the mixture constantly with a wooden spoon or heat-resistant spatula until the sugar is completely dissolved. You’ll know it’s dissolved when the mixture is clear and there are no visible sugar granules at the bottom of the pan. This usually takes a few minutes.
- Boil Without Stirring: Once the sugar is dissolved, stop stirring! This is crucial. Let the mixture come to a boil. Use a candy thermometer to monitor the temperature. If you don’t have a candy thermometer, you can watch for visual cues. The mixture will start to bubble vigorously, and the bubbles will become smaller and closer together.
- Cook to Hard-Crack Stage: Continue boiling the mixture until it reaches the hard-crack stage, which is between 300-310°F (149-154°C) on a candy thermometer. If you don’t have a thermometer, you can test the caramel by dropping a small amount into a bowl of ice water. If it forms hard, brittle threads that snap easily, it’s ready. Be very careful when working with hot sugar, as it can cause severe burns.
- Add Butter and Salt: Once the caramel reaches the hard-crack stage, remove the saucepan from the heat. Immediately stir in the butter and salt. The butter will add richness and flavor, while the salt will balance the sweetness. Be careful, as the mixture will bubble up when you add the butter.
- Stir in Vanilla Extract: Stir in the vanilla extract. The vanilla will enhance the overall flavor of the sticky nuts. If you’re using any other spices like cinnamon, add them now as well.
Adding the Nuts
Now comes the fun part incorporating the nuts into the caramel! This step needs to be done quickly to ensure the nuts are evenly coated before the caramel starts to harden.
- Add the Nuts: Pour the mixed nuts into the saucepan with the caramel.
- Stir to Coat: Using a wooden spoon or heat-resistant spatula, quickly stir the nuts to coat them evenly with the caramel. Make sure all the nuts are well coated. This step needs to be done relatively quickly, as the caramel will start to harden as it cools.
Spreading and Cooling
The final step is to spread the sticky nuts onto a prepared surface to cool and harden. This will prevent them from clumping together and ensure they have that perfect sticky-sweet texture.
- Prepare Baking Sheet: Line a baking sheet with parchment paper or a silicone baking mat. This will prevent the nuts from sticking to the baking sheet and make cleanup much easier.
- Spread the Nuts: Pour the caramel-coated nuts onto the prepared baking sheet. Use a spatula or your fingers (be careful, they might still be hot!) to spread the nuts into a single layer. Try to separate any large clumps of nuts so that they cool evenly.
- Cool Completely: Let the sticky nuts cool completely at room temperature. This usually takes about 30-60 minutes, depending on the temperature of your kitchen. You’ll know they’re ready when the caramel is firm and the nuts are no longer sticky to the touch.
- Break Apart: Once the nuts are completely cooled, break them apart into smaller clusters or individual nuts. They should easily snap apart.
Tips and Variations
Want to customize your sticky nuts? Here are a few ideas to get you started:
- Spice it Up: Experiment with different spices like ground ginger, nutmeg, or even a pinch of cayenne pepper for a little heat.
- Chocolate Drizzle: Once the nuts are cooled, drizzle them with melted chocolate for an extra decadent treat.
- Sea Salt: Sprinkle a pinch of sea salt over the nuts while they’re still warm for a sweet and salty flavor combination.
- Different Nuts: Use your favorite combination of nuts. You can even add seeds like pumpkin seeds or sunflower seeds.
- Storage: Store the sticky nuts in an airtight container at room temperature for up to a week.
Troubleshooting
Sometimes things don’t go exactly as planned. Here are a few common issues and how to fix them:
- Caramel is too hard: If the caramel is too hard, it means it was cooked to too high of a temperature. Next time, be sure to use a candy thermometer and remove the caramel from the heat when it reaches the hard-crack stage.
- Caramel is too soft: If the caramel is too soft, it means it wasn’t cooked to a high enough temperature. Next time, cook the caramel a little longer until it reaches the hard-crack stage.
- Nuts are sticking together: If the nuts are sticking together too much, try spreading them out more evenly on the baking sheet. You can also try adding a little bit of oil to the baking sheet before spreading the nuts.
- Caramel is burning: If the caramel is burning, it means the heat is too high. Reduce the heat to medium-low and stir the mixture constantly to prevent burning. A heavy-bottomed saucepan will also help prevent burning.
Enjoy!
That’s it! You’ve successfully made delicious sticky nuts. Enjoy them as a snack, give them as a gift, or use them to top your favorite desserts. I hope you enjoy this recipe as much as I do!
Conclusion:
And there you have it! These sticky nuts are more than just a snack; they’re a flavor explosion waiting to happen. I truly believe this recipe is a must-try for anyone who loves a sweet and savory treat. The combination of crunchy nuts, the rich, caramel-like coating, and that hint of salt is simply irresistible. It’s the kind of snack that disappears in minutes, leaving you wanting more.
But why is this recipe so special? It’s the perfect balance of simplicity and sophistication. It requires minimal ingredients, most of which you probably already have in your pantry. The process is straightforward, making it a great option for both experienced cooks and kitchen novices. And the result? A gourmet-quality snack that rivals anything you’d find in a specialty store.
Beyond the ease of preparation and the incredible taste, these sticky nuts are incredibly versatile. They’re fantastic on their own as a quick and satisfying snack. Imagine enjoying a handful while curled up with a good book or sharing them with friends during a game night. But don’t stop there! These nuts also make a wonderful addition to cheese boards, adding a touch of sweetness and crunch to complement the savory cheeses.
Thinking about serving suggestions, consider pairing them with a creamy goat cheese or a sharp cheddar for a delightful contrast. You could also sprinkle them over a salad for added texture and flavor. They’re especially delicious on a spinach salad with a balsamic vinaigrette. And for a truly decadent treat, try crumbling them over vanilla ice cream or adding them to your favorite yogurt parfait.
Looking for variations? The possibilities are endless! Feel free to experiment with different types of nuts. Pecans, walnuts, almonds, and cashews all work beautifully in this recipe. You can also add a pinch of spice to the coating. A dash of cinnamon, nutmeg, or even a pinch of cayenne pepper can add a warm and inviting flavor. For a chocolatey twist, try drizzling the finished nuts with melted dark chocolate. Or, if you’re feeling adventurous, add a sprinkle of sea salt for an extra burst of flavor.
I’ve personally made these sticky nuts countless times, and they’re always a hit. They’re the perfect homemade gift for friends and family, especially during the holidays. Package them in a pretty jar with a ribbon, and you’ve got a thoughtful and delicious present that everyone will appreciate.
So, what are you waiting for? Gather your ingredients, preheat your oven, and get ready to experience the magic of these sticky nuts. I promise you won’t be disappointed. This recipe is a guaranteed crowd-pleaser, and I’m confident that it will become a staple in your kitchen.
I’m so excited for you to try this recipe and discover your own favorite variations. Once you’ve made them, I’d love to hear about your experience! Share your photos and comments on social media using [Your Hashtag Here]. Let me know what nuts you used, what spices you added, and how you served them. I can’t wait to see your creations and hear your feedback. Happy snacking!
Sticky Nuts: The Ultimate Guide to Making and Storing Them
Sweet and crunchy sticky nuts coated in a homemade caramel. A perfect snack or gift!
Ingredients
- 2 cups mixed nuts (almonds, pecans, walnuts, cashews your choice!)
- 1/2 cup granulated sugar
- 1/4 cup light corn syrup
- 1/4 cup water
- 1 tablespoon butter
- 1/4 teaspoon salt
- 1/2 teaspoon vanilla extract
- Optional: 1/4 teaspoon ground cinnamon or other spices
Instructions
- Combine Sugar, Corn Syrup, and Water: In a medium-sized, heavy-bottomed saucepan, combine the granulated sugar, light corn syrup, and water.
- Stir Until Dissolved: Place the saucepan over medium heat. Stir the mixture constantly with a wooden spoon or heat-resistant spatula until the sugar is completely dissolved.
- Boil Without Stirring: Once the sugar is dissolved, stop stirring! Let the mixture come to a boil. Use a candy thermometer to monitor the temperature.
- Cook to Hard-Crack Stage: Continue boiling the mixture until it reaches the hard-crack stage, which is between 300-310°F (149-154°C) on a candy thermometer. If you don’t have a thermometer, you can test the caramel by dropping a small amount into a bowl of ice water. If it forms hard, brittle threads that snap easily, it’s ready.
- Add Butter and Salt: Once the caramel reaches the hard-crack stage, remove the saucepan from the heat. Immediately stir in the butter and salt.
- Stir in Vanilla Extract: Stir in the vanilla extract. If you’re using any other spices like cinnamon, add them now as well.
- Add the Nuts: Pour the mixed nuts into the saucepan with the caramel.
- Stir to Coat: Using a wooden spoon or heat-resistant spatula, quickly stir the nuts to coat them evenly with the caramel.
- Prepare Baking Sheet: Line a baking sheet with parchment paper or a silicone baking mat.
- Spread the Nuts: Pour the caramel-coated nuts onto the prepared baking sheet. Use a spatula or your fingers (be careful, they might still be hot!) to spread the nuts into a single layer.
- Cool Completely: Let the sticky nuts cool completely at room temperature. This usually takes about 30-60 minutes, depending on the temperature of your kitchen.
- Break Apart: Once the nuts are completely cooled, break them apart into smaller clusters or individual nuts.
Notes
- A heavy-bottomed saucepan is important for even heat distribution.
- Be very careful when working with hot sugar, as it can cause severe burns.
- The caramel needs to reach the hard-crack stage for the right texture.
- Spread the nuts in a single layer to prevent clumping.
- Store in an airtight container at room temperature for up to a week.
- Experiment with different spices, chocolate drizzle, or sea salt for variations.