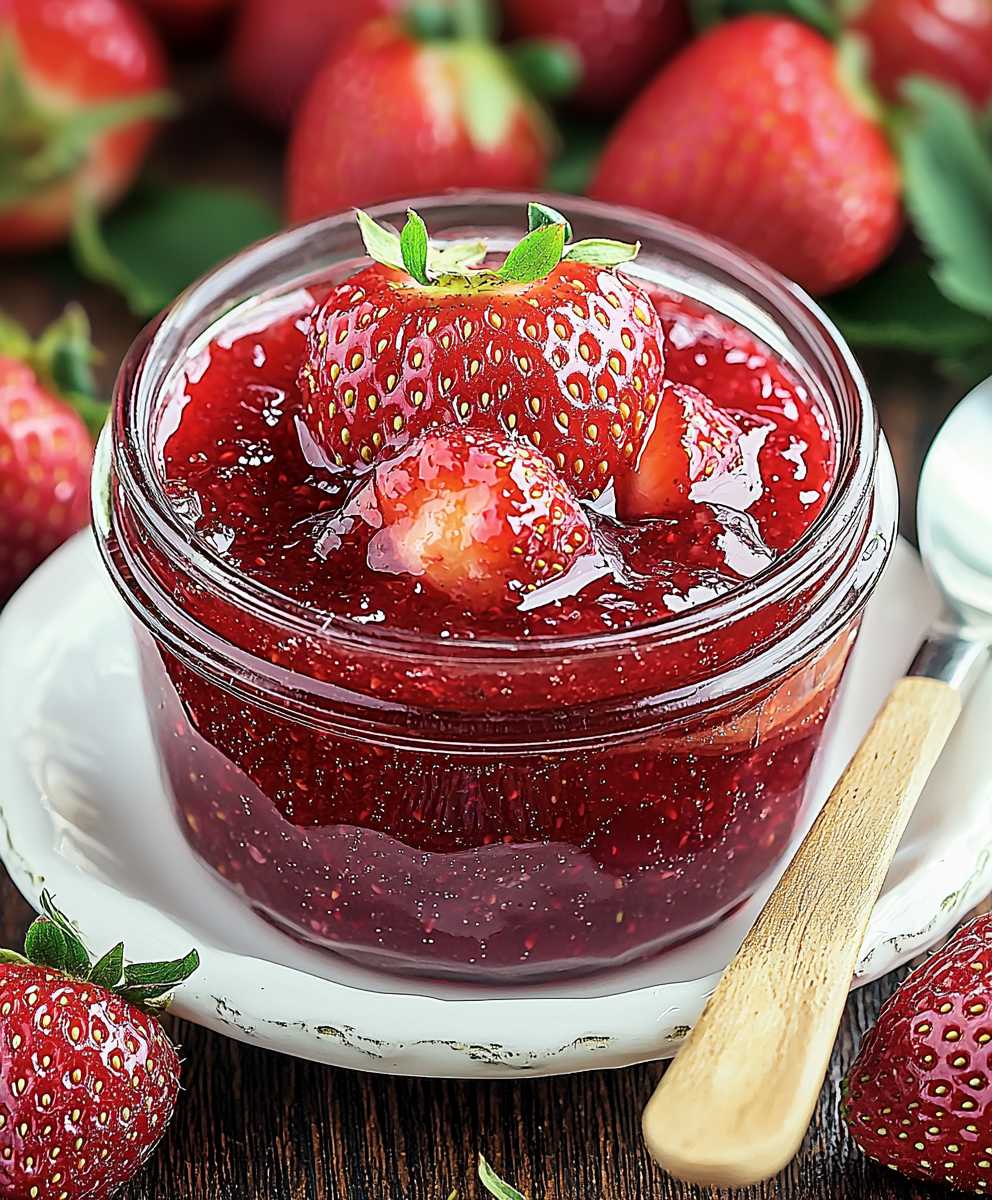
Strawberry Jam, that ruby-red jewel of the pantry, isn’t just a spread; it’s a taste of sunshine bottled for a rainy day. Imagine waking up to the aroma of freshly baked bread, slathered generously with this sweet, fruity concoction. It’s a simple pleasure, yet it holds a certain magic, doesn’t it?
The history of preserving fruits in sugar dates back centuries, with early versions of jam being enjoyed by royalty and the wealthy. While the exact origins of strawberry jam are debated, its popularity exploded in the 19th century with advancements in sugar production and canning techniques. It quickly became a staple in households around the world, a testament to its deliciousness and versatility.
What is it about Strawberry Jam that makes it so universally loved? Perhaps it’s the vibrant, sweet-tart flavor that dances on your tongue. Or maybe it’s the smooth, spreadable texture that makes it perfect for toast, scones, or even as a glaze for pastries. For me, it’s the nostalgia the memories of childhood summers spent picking strawberries and helping my grandmother stir the bubbling pot on the stove. Whatever the reason, this classic preserve continues to delight generations with its simple yet irresistible charm. So, let’s get started and create your own batch of homemade sunshine!

Ingredients:
- 2 lbs fresh strawberries, hulled and halved (or quartered if large)
- 4 cups granulated sugar
- 1/4 cup lemon juice, freshly squeezed
- 1/4 teaspoon butter or margarine (to reduce foaming)
- Pinch of salt (optional, but enhances flavor)
- Optional: 1 packet (1.75 oz) powdered pectin (for a firmer set)
Preparing the Strawberries:
- Wash the Strawberries Thoroughly: Begin by carefully washing your strawberries under cool running water. Gently rub them to remove any dirt or debris. Don’t soak them for too long, as they can become waterlogged.
- Hull and Prepare: After washing, hull the strawberries. This means removing the green leafy tops. A strawberry huller is a handy tool for this, but a paring knife works just as well. Simply insert the knife near the stem and gently twist to remove the core.
- Chop or Crush: Depending on your preference, you can either chop the strawberries into smaller pieces or crush them slightly. Chopping will result in a jam with more distinct pieces of fruit, while crushing will create a smoother consistency. I personally like a bit of both, so I usually chop about half and crush the other half with a potato masher.
- Measure Accurately: It’s crucial to measure your strawberries accurately. You need 2 pounds of prepared strawberries for this recipe. Using a kitchen scale is the most precise method.
Combining Ingredients and Initial Cooking:
- Combine Strawberries and Sugar: In a large, heavy-bottomed pot (stainless steel or enamel-coated cast iron is ideal), combine the prepared strawberries and granulated sugar. The sugar acts as a preservative and helps the jam set properly.
- Macerate the Mixture: Gently stir the strawberries and sugar together. Then, cover the pot and let the mixture sit at room temperature for at least 30 minutes, or even up to a few hours. This process, called maceration, allows the sugar to draw out the natural juices from the strawberries, creating a syrupy base for the jam. The longer you macerate, the less cooking time you’ll need later.
- Add Lemon Juice and Butter: After maceration, add the freshly squeezed lemon juice and butter (or margarine) to the pot. The lemon juice provides acidity, which is essential for proper pectin activation and helps prevent the jam from being overly sweet. The butter helps to reduce foaming during the cooking process, resulting in a clearer jam.
- Optional: Add Pectin: If you’re using powdered pectin, now is the time to add it. Stir it in thoroughly to ensure it’s evenly distributed. Pectin helps the jam set more quickly and reliably, especially if your strawberries are not naturally high in pectin. If you skip the pectin, you’ll need to cook the jam longer to achieve the desired consistency.
The Cooking Process:
- Bring to a Boil: Place the pot over medium-high heat and bring the mixture to a full rolling boil. A full rolling boil is one that continues to bubble vigorously even when stirred. Stir constantly to prevent the jam from sticking to the bottom of the pot and burning.
- Monitor the Temperature: If you have a candy thermometer, clip it to the side of the pot, making sure the bulb is submerged in the jam but not touching the bottom. You’re aiming for a temperature of 220°F (104°C). This is the setting point for jam.
- Cook to Setting Point: Continue to cook the jam, stirring frequently, until it reaches the setting point. This can take anywhere from 10 to 30 minutes, depending on the heat, the amount of liquid, and whether you’re using pectin.
- Skim Off Foam: As the jam cooks, foam will likely form on the surface. Use a spoon to skim off this foam and discard it. This will help to create a clearer, more visually appealing jam.
- Test for Setting Point (Without a Thermometer): If you don’t have a candy thermometer, you can use the “cold plate test” to determine if the jam is ready. Place a small plate in the freezer before you start cooking the jam. To test, spoon a small amount of jam onto the cold plate and return it to the freezer for about a minute. Then, push the jam with your finger. If it wrinkles and forms a skin, it’s ready. If it’s still runny, continue cooking for a few more minutes and test again.
Preparing Jars and Canning:
- Sterilize Jars and Lids: Proper sterilization is crucial for safe canning. There are several ways to sterilize your jars and lids. The most common method is to boil them in a large pot of water for 10 minutes. Make sure the jars are completely submerged. You can also sterilize them in a dishwasher on the sanitize cycle or in the oven at 250°F (120°C) for 20 minutes. Sterilize the lids by simmering them in hot (not boiling) water for 10 minutes. Keep the jars and lids hot until you’re ready to fill them.
- Fill the Jars: Carefully ladle the hot jam into the sterilized jars, leaving about 1/4 inch of headspace (the space between the top of the jam and the rim of the jar). Use a clean, damp cloth to wipe the rim of each jar to remove any spills or drips.
- Remove Air Bubbles: Insert a clean utensil (like a chopstick or a bubble remover tool) into the jar and gently run it around the inside to release any trapped air bubbles.
- Place Lids and Rings: Place the sterilized lids on the jars and screw on the rings until they are fingertip tight. This means tightening them until you feel resistance, but not forcing them.
Processing the Jars (Water Bath Canning):
- Prepare the Water Bath Canner: Fill a large pot with enough water to cover the jars by at least 1 inch. Place a rack in the bottom of the pot to prevent the jars from sitting directly on the heat. Bring the water to a boil.
- Load the Jars: Carefully lower the filled jars into the boiling water bath, making sure they are not touching each other. You may need to process in batches depending on the size of your pot.
- Process for the Correct Time: Once the water is boiling again, process the jars for 10 minutes for half-pint or pint jars. If you live at an altitude above 1,000 feet, you’ll need to increase the processing time. Add 1 minute for every 1,000 feet above sea level.
- Turn Off Heat and Let Sit: After processing, turn off the heat and let the jars sit in the hot water for 5 minutes before removing them. This helps to prevent siphoning (when liquid is drawn out of the jars).
- Remove and Cool: Carefully remove the jars from the water bath using a jar lifter and place them on a towel-lined surface to cool completely. Avoid placing them directly on a cold countertop, as this can cause them to crack.
- Check for Seals: As the jars cool, you should hear a popping sound as the lids seal. After 12-24 hours, check the seals by pressing down on the center of each lid. If the lid doesn’t flex or pop back up, it’s properly sealed. If the lid flexes, it’s not sealed and should be refrigerated and used within a few weeks.
Storing Your Strawberry Jam:
- Remove Rings: Once the jars are completely cool and you’ve confirmed that they are properly sealed, remove the rings. This is important because if a jar isn’t sealed properly, the ring can create a false seal.
- Label and Date: Label each jar with the date and contents. This will help you keep track of your inventory.
- Store in a Cool, Dark Place: Store your sealed jars of strawberry jam in a cool, dark, and dry place, such as a pantry or cupboard. Properly canned jam can last for up to a year or even longer.
- Refrigerate After Opening: Once you open a jar of strawberry jam, refrigerate it and use it within a few weeks.
Conclusion:
And there you have it! This isn’t just any jam; it’s a vibrant burst of summer sunshine bottled up for you to enjoy all year round. I truly believe this Strawberry Jam recipe is a must-try for anyone who appreciates homemade goodness. The intense strawberry flavor, the perfect balance of sweetness and tartness, and the satisfyingly thick texture make it utterly irresistible. Forget store-bought once you’ve tasted this, you’ll never go back!
But why is it so special? It’s the simplicity, really. We’re using fresh, ripe strawberries at their peak, allowing their natural sweetness to shine through. There are no artificial flavors or preservatives here, just pure, unadulterated strawberry bliss. Plus, the process itself is incredibly rewarding. There’s something so satisfying about transforming simple ingredients into something so delicious and beautiful. The aroma that fills your kitchen as the jam simmers is simply divine!
Now, let’s talk about how to enjoy this liquid gold. Of course, the classic pairing is with warm, crusty bread or a freshly baked scone. Imagine slathering a generous spoonful onto a warm biscuit pure heaven! But don’t stop there. This Strawberry Jam is incredibly versatile.
Think beyond breakfast! It’s fantastic swirled into yogurt or oatmeal for a fruity kick. Use it as a glaze for grilled chicken or pork for a sweet and savory twist. Spread it on a peanut butter sandwich for an elevated PB&J experience. Or, get creative and use it as a filling for thumbprint cookies or a topping for cheesecake. The possibilities are endless!
Looking for variations? Absolutely! For a hint of warmth, add a pinch of cinnamon or nutmeg to the jam as it simmers. If you prefer a smoother texture, you can use an immersion blender to puree the jam slightly after it’s cooked. For a more sophisticated flavor profile, try adding a splash of balsamic vinegar or a few sprigs of fresh basil during the last few minutes of cooking. These additions will elevate the strawberry flavor and add a unique twist to your jam.
Another fun variation is to add other berries! A mix of strawberries and raspberries creates a beautiful and complex flavor. Or, try adding a handful of blueberries for a burst of antioxidants and a slightly different sweetness. Just be sure to adjust the sugar and pectin accordingly, as different berries have different levels of natural pectin.
I’m so confident that you’ll love this recipe. It’s easy to follow, uses simple ingredients, and delivers incredible results. The satisfaction of making your own Strawberry Jam is truly unmatched. It’s a wonderful way to preserve the flavors of summer and enjoy them throughout the year.
So, what are you waiting for? Gather your ingredients, put on some music, and get ready to embark on a jam-making adventure! I promise you won’t regret it. And when you do, please, please, please come back and share your experience! I’d love to hear how it turned out, what variations you tried, and how you’re enjoying your homemade jam. Leave a comment below and let me know! Happy jamming! I can’t wait to hear all about your delicious creations!
Strawberry Jam: The Ultimate Guide to Making, Storing, and Enjoying
Classic homemade strawberry jam, bursting with fresh strawberry flavor. Perfect for toast, scones, or as a gift!
Ingredients
- 2 lbs fresh strawberries, hulled and halved (or quartered if large)
- 4 cups granulated sugar
- 1/4 cup lemon juice, freshly squeezed
- 1/4 teaspoon butter or margarine (to reduce foaming)
- Pinch of salt (optional, but enhances flavor)
- Optional: 1 packet (1.75 oz) powdered pectin (for a firmer set)
Instructions
- Prepare Strawberries: Wash strawberries thoroughly. Hull and chop or crush to desired consistency. Measure accurately to 2 lbs.
- Combine Ingredients: In a large, heavy-bottomed pot, combine strawberries and sugar.
- Macerate: Cover and let sit at room temperature for at least 30 minutes (up to a few hours).
- Add Lemon Juice and Butter: Add lemon juice and butter (or margarine) to the pot.
- Optional: Add Pectin: If using, stir in powdered pectin thoroughly.
- Bring to a Boil: Place pot over medium-high heat and bring to a full rolling boil, stirring constantly.
- Monitor Temperature: If using a candy thermometer, aim for 220°F (104°C).
- Cook to Setting Point: Continue cooking, stirring frequently, until it reaches the setting point (10-30 minutes).
- Skim Off Foam: Skim off any foam that forms on the surface.
- Test for Setting Point (Without Thermometer): Use the cold plate test. Spoon a small amount of jam onto a cold plate and return it to the freezer for about a minute. Then, push the jam with your finger. If it wrinkles and forms a skin, it’s ready.
- Sterilize Jars and Lids: Sterilize jars and lids by boiling them in a large pot of water for 10 minutes. Sterilize the lids by simmering them in hot (not boiling) water for 10 minutes. Keep the jars and lids hot until you’re ready to fill them.
- Fill the Jars: Carefully ladle the hot jam into the sterilized jars, leaving about 1/4 inch of headspace. Wipe the rim of each jar.
- Remove Air Bubbles: Insert a clean utensil into the jar and gently run it around the inside to release any trapped air bubbles.
- Place Lids and Rings: Place the sterilized lids on the jars and screw on the rings until they are fingertip tight.
- Prepare the Water Bath Canner: Fill a large pot with enough water to cover the jars by at least 1 inch. Place a rack in the bottom of the pot to prevent the jars from sitting directly on the heat. Bring the water to a boil.
- Load the Jars: Carefully lower the filled jars into the boiling water bath, making sure they are not touching each other. You may need to process in batches depending on the size of your pot.
- Process for the Correct Time: Once the water is boiling again, process the jars for 10 minutes for half-pint or pint jars. If you live at an altitude above 1,000 feet, you’ll need to increase the processing time. Add 1 minute for every 1,000 feet above sea level.
- Turn Off Heat and Let Sit: After processing, turn off the heat and let the jars sit in the hot water for 5 minutes before removing them.
- Remove and Cool: Carefully remove the jars from the water bath using a jar lifter and place them on a towel-lined surface to cool completely.
- Check for Seals: After 12-24 hours, check the seals by pressing down on the center of each lid. If the lid doesn’t flex or pop back up, it’s properly sealed. If the lid flexes, it’s not sealed and should be refrigerated and used within a few weeks.
- Remove Rings: Once the jars are completely cool and you’ve confirmed that they are properly sealed, remove the rings.
- Label and Date: Label each jar with the date and contents.
- Store in a Cool, Dark Place: Store your sealed jars of strawberry jam in a cool, dark, and dry place, such as a pantry or cupboard.
- Refrigerate After Opening: Once you open a jar of strawberry jam, refrigerate it and use it within a few weeks.
Notes
- Macerating the strawberries with sugar helps draw out their natural juices and reduces cooking time.
- Lemon juice is essential for proper pectin activation and prevents the jam from being overly sweet.
- Butter or margarine helps reduce foaming during cooking, resulting in a clearer jam.
- If not using pectin, cook the jam longer to achieve the desired consistency.
- Proper sterilization and processing are crucial for safe canning and long-term storage.
- Altitude adjustments are necessary for processing time to ensure a proper seal.