Turkey Stock: the unsung hero of Thanksgiving leftovers! Have you ever wondered how to transform that magnificent roasted turkey carcass into liquid gold? I’m here to tell you, it’s easier than you think, and the flavor payoff is absolutely incredible. Forget those bland, store-bought broths; homemade turkey stock is the key to unlocking a depth of flavor in your soups, stews, sauces, and gravies that you simply can’t achieve any other way.
Historically, making stock from leftover bones has been a cornerstone of resourceful cooking in cultures around the world. It’s a testament to minimizing waste and maximizing flavor, a tradition passed down through generations. Think of it as a culinary hug, warming you from the inside out.
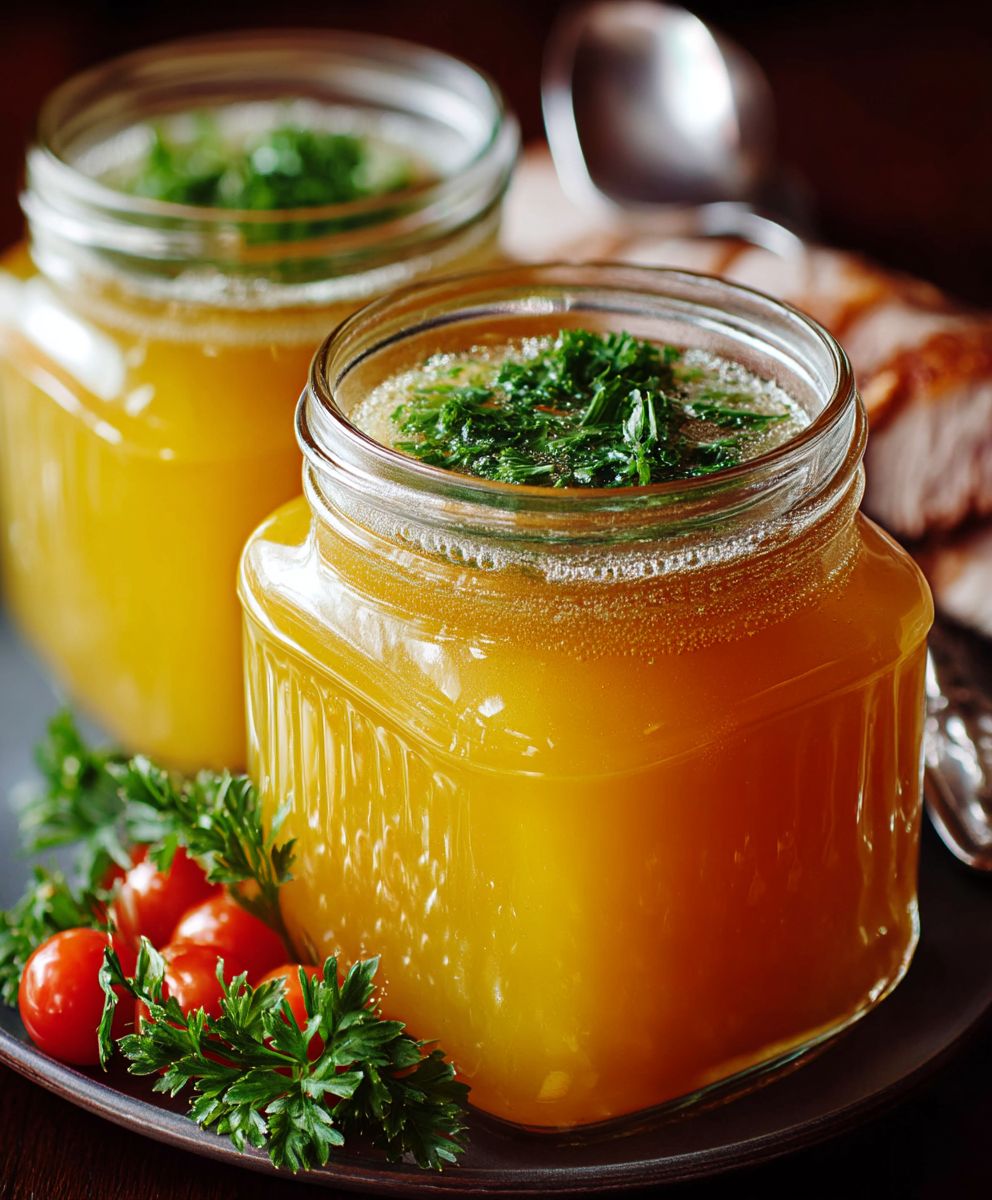
But why is turkey stock so beloved? It’s all about that rich, savory, umami-packed flavor. The slow simmering process extracts every last bit of goodness from the bones, creating a broth that’s both comforting and complex. Plus, it’s incredibly versatile! Use it as a base for a hearty turkey noodle soup, deglaze your roasting pan for a show-stopping gravy, or simply sip it on its own for a nourishing and restorative treat. Trust me, once you taste the difference that homemade turkey stock makes, you’ll never go back to the store-bought stuff again!

Ingredients:
- 1 whole turkey carcass, mostly meat removed (about 8-10 pounds)
- 2 large yellow onions, roughly chopped
- 3 carrots, roughly chopped
- 3 celery stalks, roughly chopped
- 1 head of garlic, cut in half horizontally
- 2 bay leaves
- 1 tablespoon black peppercorns
- 1 teaspoon dried thyme
- 1/2 teaspoon dried rosemary
- 1/4 teaspoon dried sage
- 1 bunch of fresh parsley stems (optional)
- 1 gallon (16 cups) cold water, plus more as needed
- 1 tablespoon apple cider vinegar (optional, helps release nutrients from the bones)
- Salt to taste (added at the end)
Preparing the Turkey Carcass and Vegetables:
- First, make sure you’ve removed most of the meat from your turkey carcass. Don’t worry about getting every last shred; we’re after the flavor from the bones and connective tissues. If there’s still a good amount of meat clinging to the bones, you can pick it off and save it for sandwiches or soup later.
- Next, prepare your vegetables. Roughly chop the onions, carrots, and celery. Don’t worry about making them pretty; they’re just going to add flavor to the stock and will be strained out later.
- Cut the head of garlic in half horizontally. This allows the garlic flavor to infuse into the stock more easily. You don’t need to peel the garlic; the papery skin adds a subtle flavor and color to the stock.
- If you roasted your turkey, you might have some roasted vegetables leftover. Feel free to add these to the stock for extra flavor! Just be mindful of any strong flavors that might overpower the turkey flavor.
Simmering the Stock:
- Now, it’s time to combine all the ingredients in a large stockpot or Dutch oven. Place the turkey carcass in the pot, followed by the chopped onions, carrots, celery, and garlic.
- Add the bay leaves, black peppercorns, dried thyme, dried rosemary, and dried sage. If you have fresh parsley stems, add them now as well. These herbs will add a wonderful depth of flavor to your stock.
- Pour in the cold water. Make sure the water completely covers the turkey carcass and vegetables. If needed, add more water until everything is submerged.
- If you’re using apple cider vinegar, add it now. The vinegar helps to break down the bones and release more nutrients into the stock.
- Bring the mixture to a boil over high heat. Once it reaches a boil, immediately reduce the heat to low and simmer gently. You want to see just a few bubbles occasionally rising to the surface.
- Simmer the stock for at least 4 hours, or up to 8 hours for a richer, more flavorful stock. The longer it simmers, the more flavor will be extracted from the bones and vegetables. I usually aim for 6-8 hours.
- During the simmering process, occasionally skim off any foam or impurities that rise to the surface. This will help to keep the stock clear and clean-tasting. Use a ladle or spoon to gently remove the foam.
- Check the water level periodically and add more water if needed to keep the turkey carcass and vegetables submerged.
Straining and Cooling the Stock:
- After simmering for the desired amount of time, it’s time to strain the stock. Carefully remove the turkey carcass from the pot using tongs or a slotted spoon. Place it in a large bowl or on a baking sheet to cool slightly.
- Place a large fine-mesh sieve or colander lined with cheesecloth over a clean bowl or pot.
- Pour the stock through the sieve, straining out the solids. Discard the vegetables, herbs, and peppercorns.
- Once the turkey carcass has cooled enough to handle, pick off any remaining meat and add it back to the strained stock. This is optional, but it adds some extra protein and flavor.
- Let the stock cool completely at room temperature. This will take several hours.
- Once the stock is cool, transfer it to the refrigerator. As the stock chills, the fat will rise to the surface and solidify. This makes it easy to remove the fat, resulting in a clearer, healthier stock.
Removing the Fat and Storing the Stock:
- After the stock has chilled in the refrigerator for several hours or overnight, you’ll notice a layer of solidified fat on the surface.
- Use a spoon or spatula to carefully remove the fat. You can discard the fat, or save it for cooking. Turkey fat can be used in place of butter or oil to add a rich, savory flavor to dishes.
- Once the fat has been removed, the stock is ready to use. You can use it immediately in soups, stews, sauces, or any other recipe that calls for turkey stock.
- To store the stock, transfer it to airtight containers. You can use glass jars, plastic containers, or freezer bags.
- If you’re planning to use the stock within a few days, store it in the refrigerator. It will keep for up to 3-4 days.
- For longer storage, freeze the stock. It will keep in the freezer for up to 3-6 months. Be sure to leave some headspace in the containers to allow for expansion during freezing.
- You can also freeze the stock in ice cube trays for smaller portions. Once the cubes are frozen, transfer them to a freezer bag for easy storage.
Tips and Variations:
- Roasting the Bones: For a deeper, richer flavor, roast the turkey carcass in the oven before making the stock. Preheat the oven to 400°F (200°C). Place the carcass on a baking sheet and roast for 30-45 minutes, or until browned. This will caramelize the bones and add a wonderful depth of flavor to the stock.
- Adding Other Vegetables: Feel free to add other vegetables to the stock, such as parsnips, turnips, or leeks. Just be mindful of any strong flavors that might overpower the turkey flavor.
- Using Different Herbs: Experiment with different herbs to customize the flavor of your stock. Some other herbs that work well with turkey include sage, marjoram, and savory.
- Adding Wine: For a more complex flavor, add a cup of dry white wine to the stock during the simmering process. The wine will add acidity and depth of flavor.
- Making Bone Broth: To make turkey bone broth, simmer the stock for a longer period of time, up to 24 hours. This will extract more collagen from the bones, resulting in a richer, more gelatinous broth. Bone broth is known for its health benefits, including supporting gut health and reducing inflammation.
- Salt: I prefer to add salt at the end of the cooking process. This allows me to control the saltiness of the stock and adjust it to my liking. Start with a small amount of salt and add more to taste.
- Don’t Overcrowd the Pot: Make sure the turkey carcass and vegetables have enough room in the pot. If the pot is too crowded, the stock won’t simmer properly and the flavor won’t be as good. If necessary, use two pots.
- Low and Slow: The key to making a great stock is to simmer it low and slow. This allows the flavors to meld together and develop over time. Don’t rush the process!
- Cooling Properly: Cooling the stock properly is important for food safety. Don’t leave the stock at room temperature for more than two hours. Divide the stock into smaller containers to help it cool more quickly.
Enjoy your homemade turkey stock! It’s so much better than store-bought and you’ll be amazed at the difference it makes in your cooking.
Conclusion:
So, there you have it! Making your own turkey stock is truly a game-changer in the kitchen, and I sincerely hope I’ve convinced you to give it a try. It’s not just about using up leftovers; it’s about unlocking a depth of flavor you simply can’t get from store-bought broth. Think of it as liquid gold, ready to elevate your soups, stews, sauces, and so much more.
Why is this recipe a must-try? Well, first and foremost, the taste is unparalleled. The rich, savory notes of roasted turkey bones, combined with the aromatic vegetables and herbs, create a complex and satisfying flavor profile that will have you saying goodbye to bland dishes forever. Secondly, it’s incredibly versatile. You can use it as a base for a hearty turkey noodle soup, a creamy risotto, or even a flavorful gravy to drizzle over your Thanksgiving leftovers (or any roasted poultry, for that matter!). And finally, it’s a fantastic way to reduce food waste and be a little more eco-conscious in your cooking.
But the fun doesn’t stop there! Feel free to experiment with variations to make this turkey stock truly your own. For a spicier kick, add a few dried chili flakes or a pinch of cayenne pepper during the simmering process. If you prefer a more herbaceous flavor, try incorporating different herbs like thyme, rosemary, or sage. You can also adjust the vegetables to your liking carrots, celery, and onions are the classic trio, but you could also add parsnips, leeks, or even a few cloves of garlic for extra depth.
Serving Suggestions and Beyond:
Beyond the obvious soup and gravy applications, consider using your homemade turkey stock to braise vegetables, deglaze pans for flavorful sauces, or even cook grains like quinoa or rice. Imagine the difference it will make in your next batch of stuffing! You can also freeze the stock in ice cube trays for convenient, single-serving portions that are perfect for adding a boost of flavor to quick weeknight meals. I often use a cube or two when sautéing vegetables or making a simple pan sauce for chicken or fish.
I know that making stock from scratch might seem a little intimidating at first, but trust me, it’s much easier than you think. And the reward that incredible, homemade flavor is well worth the effort. So, gather your leftover turkey bones, chop up some vegetables, and get ready to create something truly special. I’m confident that once you try this recipe, you’ll never go back to store-bought broth again.
I’m so excited for you to try this recipe and experience the magic of homemade turkey stock for yourself! Please, don’t hesitate to leave a comment below and share your experience. I’d love to hear how it turned out, what variations you tried, and what delicious dishes you created with it. Happy cooking!
And remember, the best part about cooking is sharing your creations with loved ones. So, whip up a batch of this amazing stock, invite some friends over for a cozy soup night, and enjoy the warmth and flavor of homemade goodness together. Bon appétit!
Turkey Stock: A Complete Guide to Making and Using It
Transform your leftover turkey carcass into rich and flavorful homemade stock. Perfect for soups, stews, and sauces!
Ingredients
- 1 whole turkey carcass, mostly meat removed (about 8-10 pounds)
- 2 large yellow onions, roughly chopped
- 3 carrots, roughly chopped
- 3 celery stalks, roughly chopped
- 1 head of garlic, cut in half horizontally
- 2 bay leaves
- 1 tablespoon black peppercorns
- 1 teaspoon dried thyme
- 1/2 teaspoon dried rosemary
- 1/4 teaspoon dried sage
- 1 bunch of fresh parsley stems (optional)
- 1 gallon (16 cups) cold water, plus more as needed
- 1 tablespoon apple cider vinegar (optional, helps release nutrients from the bones)
- Salt to taste (added at the end)
Instructions
- Prepare the Carcass and Vegetables: Remove most of the meat from the turkey carcass. Roughly chop the onions, carrots, and celery. Cut the head of garlic in half horizontally.
- Simmer the Stock: Place the turkey carcass, chopped vegetables, garlic, bay leaves, peppercorns, thyme, rosemary, sage, and parsley stems (if using) in a large stockpot or Dutch oven.
- Pour in the cold water, ensuring the carcass and vegetables are completely submerged. Add apple cider vinegar, if using.
- Bring to a boil over high heat, then immediately reduce heat to low and simmer gently for at least 4 hours, or up to 8 hours for a richer flavor.
- Occasionally skim off any foam or impurities that rise to the surface. Check the water level and add more water as needed to keep the ingredients submerged.
- Strain and Cool: Carefully remove the turkey carcass from the pot. Place a fine-mesh sieve or colander lined with cheesecloth over a clean bowl or pot. Pour the stock through the sieve, discarding the solids.
- Once the carcass has cooled, pick off any remaining meat and add it back to the strained stock (optional).
- Let the stock cool completely at room temperature, then transfer it to the refrigerator.
- Remove Fat and Store: After chilling, remove the solidified fat from the surface.
- Use the stock immediately or transfer it to airtight containers and store in the refrigerator for up to 3-4 days or freeze for up to 3-6 months.
Notes
- For a deeper flavor, roast the turkey carcass before making the stock.
- Feel free to add other vegetables like parsnips, turnips, or leeks.
- Experiment with different herbs like sage, marjoram, or savory.
- Add a cup of dry white wine for a more complex flavor.
- For turkey bone broth, simmer for up to 24 hours.
- Add salt at the end to control the saltiness.
- Don’t overcrowd the pot; use two pots if necessary.
- Simmer low and slow for the best flavor.
- Cool the stock properly for food safety.