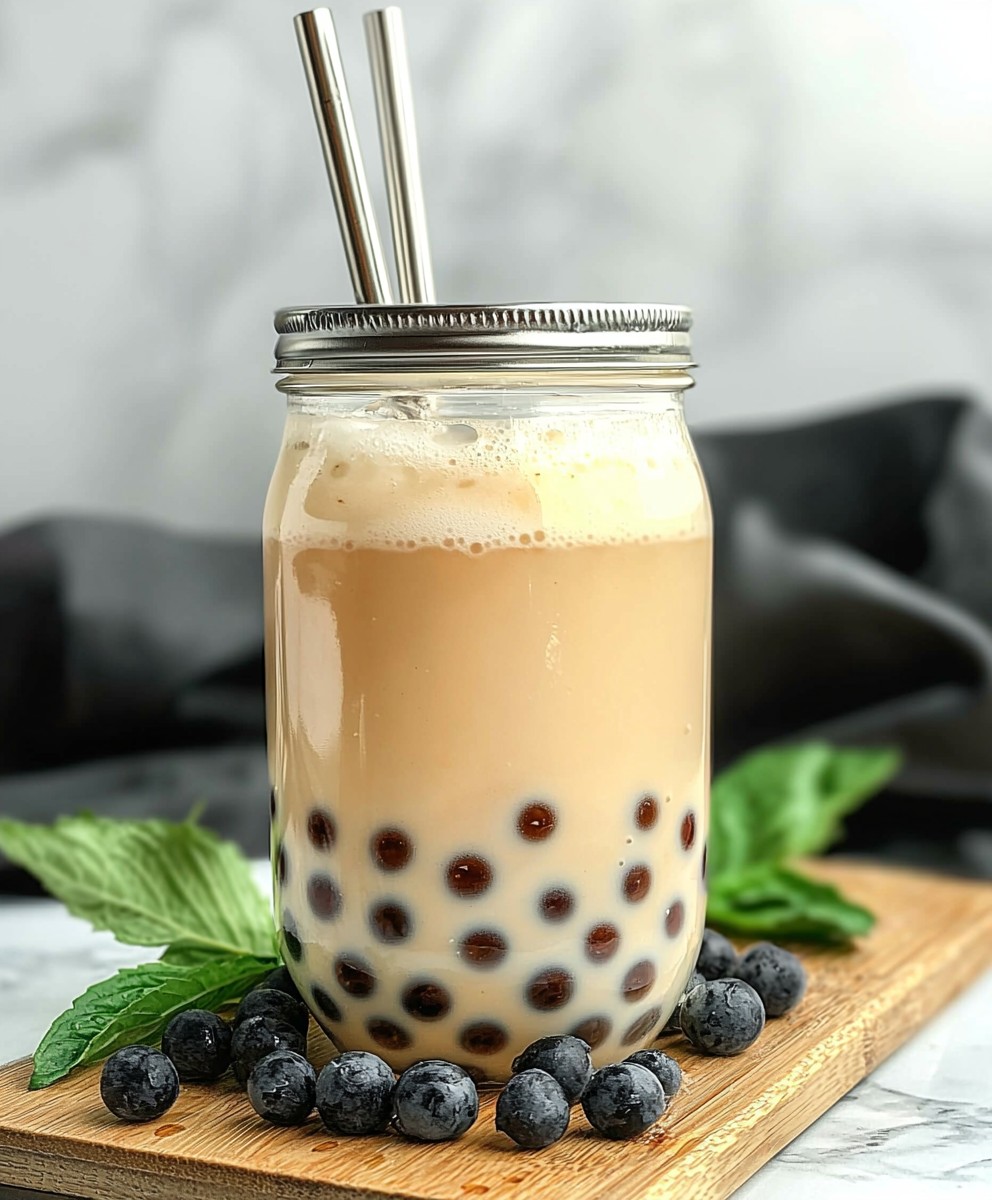
Vanilla Bubble Tea, oh, where do I even begin? Imagine a creamy, dreamy concoction that dances on your tongue, a symphony of sweet vanilla and chewy tapioca pearls. This isn’t just a drink; it’s an experience, a mini-vacation in a cup! I’m thrilled to share my absolute favorite recipe with you.
Bubble tea, also known as boba, originated in Taiwan in the 1980s and has since taken the world by storm. While the original versions often featured black tea and milk, the possibilities are truly endless. And that’s where this Vanilla Bubble Tea recipe shines. It takes the classic boba experience and elevates it with the comforting and universally loved flavor of vanilla.
Why do people adore bubble tea so much? Well, it’s a multi-sensory delight! The combination of the smooth, milky tea with the delightfully chewy tapioca pearls is simply irresistible. Plus, it’s incredibly customizable. You can adjust the sweetness, the amount of ice, and even add different toppings to create your perfect cup. This vanilla version is particularly appealing because it’s both comforting and refreshing, making it the perfect treat any time of year. Get ready to whip up a batch of this delightful drink you won’t regret it!

Ingredients:
- For the Tapioca Pearls:
- 1 cup tapioca starch, plus extra for dusting
- ¾ cup boiling water
- ½ cup brown sugar (or granulated sugar), for cooking
- For the Vanilla Syrup:
- 1 cup granulated sugar
- 1 cup water
- 2 vanilla beans, split and scraped (or 2 teaspoons vanilla extract)
- For the Bubble Tea:
- 4 cups brewed black tea, cooled (Assam or Ceylon recommended)
- 1 cup milk (dairy or non-dairy, your preference!)
- Ice cubes
- Vanilla Syrup (to taste)
- Cooked Tapioca Pearls (as desired)
Preparing the Tapioca Pearls:
Okay, let’s tackle the tapioca pearls first. This part can be a little tricky, but don’t worry, I’ll guide you through it. The key is to work quickly and precisely!
- Make the Dough: In a heat-safe bowl, pour the boiling water over the tapioca starch. Stir immediately and vigorously with a spoon or spatula. The mixture will start to come together quickly.
- Knead the Dough: Once the mixture has cooled enough to handle (but is still warm!), turn it out onto a lightly dusted surface (use tapioca starch for dusting). Knead the dough until it forms a smooth, elastic ball. This might take a few minutes. If the dough is too dry, add a tiny bit of water, a teaspoon at a time. If it’s too sticky, add a little more tapioca starch. The consistency should be similar to playdough.
- Shape the Pearls: This is where the patience comes in! Pinch off small pieces of dough (about ¼ inch in diameter) and roll them into small, round balls. Keep the finished pearls covered with a damp cloth or plastic wrap to prevent them from drying out. You can also dust them lightly with tapioca starch.
- Cook the Pearls: Bring a large pot of water to a rolling boil. Gently add the tapioca pearls. They will initially sink to the bottom, but as they cook, they will float to the surface. Cook for about 15-20 minutes, or until they are translucent with a small white center. The cooking time can vary depending on the size of your pearls, so test one to make sure it’s cooked through.
- Sweeten the Pearls: While the pearls are cooking, prepare a simple syrup by combining ½ cup brown sugar (or granulated sugar) and ½ cup water in a small saucepan. Bring to a simmer over medium heat, stirring until the sugar is dissolved. Once the pearls are cooked, drain them and immediately transfer them to the sugar syrup. Let them soak for at least 30 minutes, or longer for a sweeter flavor. This also prevents them from sticking together.
Making the Vanilla Syrup:
Now, let’s create that delicious vanilla syrup that will give our bubble tea its signature flavor. This is super easy and makes all the difference!
- Combine Ingredients: In a small saucepan, combine the granulated sugar, water, and vanilla beans (split and scraped). If you’re using vanilla extract, you’ll add it later.
- Simmer and Infuse: Bring the mixture to a simmer over medium heat, stirring until the sugar is completely dissolved. Once the sugar is dissolved, reduce the heat to low and let the syrup simmer gently for about 10-15 minutes. This allows the vanilla flavor to infuse into the syrup.
- Strain and Cool: If you used vanilla beans, remove the saucepan from the heat and let the syrup cool slightly. Then, strain the syrup through a fine-mesh sieve to remove the vanilla bean solids. If you’re using vanilla extract, stir it in now.
- Store: Transfer the vanilla syrup to an airtight container and store it in the refrigerator. It will keep for several weeks.
Assembling the Vanilla Bubble Tea:
Alright, we’ve got our pearls, we’ve got our syrup, now it’s time to put it all together and enjoy our homemade Vanilla Bubble Tea! This is the fun part!
- Prepare the Tea: Brew your black tea (Assam or Ceylon are great choices) according to the package directions. Let it cool completely. You can even brew it ahead of time and chill it in the refrigerator.
- Add Pearls to Glass: Scoop a generous amount of cooked tapioca pearls into the bottom of each glass. The amount is really up to your personal preference. I usually go for about ¼ to ½ cup per glass.
- Add Ice: Fill the glass with ice cubes.
- Pour in Tea: Pour the cooled black tea over the ice. Leave some room at the top for the milk and vanilla syrup.
- Add Milk: Pour in the milk (dairy or non-dairy) to your liking. Start with about ¼ cup and adjust to taste.
- Sweeten with Vanilla Syrup: Add the vanilla syrup to taste. Start with a tablespoon and stir well. Taste and add more syrup if needed. Remember, the tapioca pearls are already sweetened, so you might not need as much syrup as you think.
- Stir and Enjoy: Stir everything together well. Serve immediately with a wide straw (bubble tea straws are ideal) so you can slurp up those delicious tapioca pearls!
Tips and Variations:
- Tapioca Pearl Consistency: The texture of the tapioca pearls is crucial. If they’re undercooked, they’ll be hard and chewy. If they’re overcooked, they’ll be mushy. Aim for a slightly chewy, but still soft, texture.
- Vanilla Bean vs. Extract: Using vanilla beans will give you a richer, more complex vanilla flavor. However, vanilla extract is a perfectly acceptable substitute.
- Tea Strength: Adjust the strength of your tea to your liking. If you prefer a stronger tea flavor, use more tea bags or loose-leaf tea when brewing.
- Milk Options: Feel free to experiment with different types of milk. Almond milk, soy milk, oat milk, and coconut milk all work well.
- Sweetness Level: The sweetness of the bubble tea is entirely up to you. Adjust the amount of vanilla syrup to your taste. You can also use other sweeteners, such as honey or agave nectar.
- Add-ins: Get creative with your bubble tea! You can add other flavors, such as fruit purees, chocolate syrup, or even a splash of rum extract for a boozy twist (for adults only, of course!).
- Making Pearls Ahead: You can make the tapioca pearls ahead of time, but they are best served fresh. If you do make them in advance, store them in the sugar syrup in the refrigerator. They may harden slightly, but you can soften them by microwaving them for a few seconds before serving.
- Adjusting the Recipe: This recipe is easily adaptable. You can double or triple the ingredients to make a larger batch.
Troubleshooting:
- Tapioca Pearls Sticking Together: If your tapioca pearls are sticking together, make sure you are cooking them in plenty of boiling water and stirring them occasionally. Also, transferring them to the sugar syrup immediately after cooking will help prevent them from sticking.
- Dough Too Dry: If your tapioca dough is too dry and crumbly, add a tiny bit of water, a teaspoon at a time, until it comes together.
- Dough Too Sticky: If your tapioca dough is too sticky, add a little more tapioca starch, a teaspoon at a time, until it is easier to handle.
I hope you enjoy making and drinking this Vanilla Bubble Tea as much as I do! It’s a fun and delicious treat that’s perfect for any occasion.
Conclusion:
This isn’t just another bubble tea recipe; it’s your passport to a creamy, dreamy, and utterly delightful vanilla bubble tea experience right in your own kitchen. I truly believe this recipe is a must-try for anyone who loves the sweet, comforting flavor of vanilla and the playful texture of chewy tapioca pearls. It’s simple enough for a weeknight treat, yet impressive enough to serve to guests. Why is it a must-try? Because it’s customizable, cost-effective, and, most importantly, incredibly delicious! Forget those overpriced bubble tea shops you can create a drink that perfectly suits your taste preferences, using high-quality ingredients and adjusting the sweetness to your liking. Plus, you’ll have the satisfaction of knowing you made it yourself! The subtle vanilla notes dance beautifully with the creamy milk and the satisfying chew of the boba, creating a symphony of flavors and textures that will leave you wanting more. But the fun doesn’t stop there! This recipe is just a starting point. Feel free to experiment with different variations to create your own signature bubble tea.Serving Suggestions and Variations:
* Iced or Blended: Enjoy it as a classic iced bubble tea, or blend it with ice for a frosty, milkshake-like treat. Perfect for those hot summer days! * Dairy-Free Delight: Substitute the milk with your favorite non-dairy alternative, such as almond milk, soy milk, oat milk, or coconut milk. Each option will add a unique flavor profile to your drink. * Sweetness Level: Adjust the amount of sweetener to your liking. Start with the recommended amount and add more if needed. You can use sugar, honey, maple syrup, or your preferred sugar substitute. * Vanilla Intensity: For a more intense vanilla flavor, add a few drops of vanilla extract or use vanilla-infused sugar. * Toppings Galore: Get creative with your toppings! In addition to the classic tapioca pearls, you can add popping boba, jelly, pudding, or even a dollop of whipped cream. * Spice it Up: Add a pinch of cinnamon or nutmeg for a warm, comforting twist. * Coffee Kick: For a vanilla latte bubble tea hybrid, add a shot of espresso or strong brewed coffee. * Fruity Fun: Blend in some fresh or frozen fruit, such as strawberries, bananas, or mangoes, for a fruity and refreshing twist. I’m so excited for you to try this recipe and discover your own perfect vanilla bubble tea creation. Don’t be afraid to get creative and experiment with different flavors and toppings. The possibilities are endless! I truly believe that making your own bubble tea is a rewarding and enjoyable experience. It’s a chance to unleash your inner barista and create a drink that’s perfectly tailored to your taste. So, gather your ingredients, put on some music, and get ready to embark on a delicious adventure. Once you’ve tried this recipe, I’d love to hear about your experience! Share your photos and comments on social media using [Your Hashtag Here] or leave a review on the blog. Let me know what variations you tried and what you thought of the recipe. Your feedback is invaluable and helps me create even better recipes in the future. Happy sipping! I hope you enjoy this recipe as much as I do! Print
Vanilla Bubble Tea: A Deliciously Creamy Recipe You’ll Love
- Total Time: 75 minutes
- Yield: 4 servings 1x
Description
Homemade Vanilla Bubble Tea with chewy tapioca pearls, fragrant vanilla syrup, and your favorite tea and milk. A fun and customizable treat!
Ingredients
- 1 cup tapioca starch, plus extra for dusting
- ¾ cup boiling water
- ½ cup brown sugar (or granulated sugar), for cooking
- 1 cup granulated sugar
- 1 cup water
- 2 vanilla beans, split and scraped (or 2 teaspoons vanilla extract)
- 4 cups brewed black tea, cooled (Assam or Ceylon recommended)
- 1 cup milk (dairy or non-dairy, your preference!)
- Ice cubes
- Vanilla Syrup (to taste)
- Cooked Tapioca Pearls (as desired)
Instructions
- In a heat-safe bowl, pour the boiling water over the tapioca starch. Stir immediately and vigorously with a spoon or spatula. The mixture will start to come together quickly.
- Once the mixture has cooled enough to handle (but is still warm!), turn it out onto a lightly dusted surface (use tapioca starch for dusting). Knead the dough until it forms a smooth, elastic ball. This might take a few minutes. If the dough is too dry, add a tiny bit of water, a teaspoon at a time. If it’s too sticky, add a little more tapioca starch. The consistency should be similar to playdough.
- Pinch off small pieces of dough (about ¼ inch in diameter) and roll them into small, round balls. Keep the finished pearls covered with a damp cloth or plastic wrap to prevent them from drying out. You can also dust them lightly with tapioca starch.
- Bring a large pot of water to a rolling boil. Gently add the tapioca pearls. They will initially sink to the bottom, but as they cook, they will float to the surface. Cook for about 15-20 minutes, or until they are translucent with a small white center. The cooking time can vary depending on the size of your pearls, so test one to make sure it’s cooked through.
- While the pearls are cooking, prepare a simple syrup by combining ½ cup brown sugar (or granulated sugar) and ½ cup water in a small saucepan. Bring to a simmer over medium heat, stirring until the sugar is dissolved. Once the pearls are cooked, drain them and immediately transfer them to the sugar syrup. Let them soak for at least 30 minutes, or longer for a sweeter flavor. This also prevents them from sticking together.
- In a small saucepan, combine the granulated sugar, water, and vanilla beans (split and scraped). If you’re using vanilla extract, you’ll add it later.
- Bring the mixture to a simmer over medium heat, stirring until the sugar is completely dissolved. Once the sugar is dissolved, reduce the heat to low and let the syrup simmer gently for about 10-15 minutes. This allows the vanilla flavor to infuse into the syrup.
- If you used vanilla beans, remove the saucepan from the heat and let the syrup cool slightly. Then, strain the syrup through a fine-mesh sieve to remove the vanilla bean solids. If you’re using vanilla extract, stir it in now.
- Transfer the vanilla syrup to an airtight container and store it in the refrigerator. It will keep for several weeks.
- Brew your black tea (Assam or Ceylon are great choices) according to the package directions. Let it cool completely. You can even brew it ahead of time and chill it in the refrigerator.
- Scoop a generous amount of cooked tapioca pearls into the bottom of each glass. The amount is really up to your personal preference. I usually go for about ¼ to ½ cup per glass.
- Fill the glass with ice cubes.
- Pour the cooled black tea over the ice. Leave some room at the top for the milk and vanilla syrup.
- Pour in the milk (dairy or non-dairy) to your liking. Start with about ¼ cup and adjust to taste.
- Add the vanilla syrup to taste. Start with a tablespoon and stir well. Taste and add more syrup if needed. Remember, the tapioca pearls are already sweetened, so you might not need as much syrup as you think.
- Stir everything together well. Serve immediately with a wide straw (bubble tea straws are ideal) so you can slurp up those delicious tapioca pearls!
Notes
- Tapioca Pearl Consistency: The texture of the tapioca pearls is crucial. If they’re undercooked, they’ll be hard and chewy. If they’re overcooked, they’ll be mushy. Aim for a slightly chewy, but still soft, texture.
- Vanilla Bean vs. Extract: Using vanilla beans will give you a richer, more complex vanilla flavor. However, vanilla extract is a perfectly acceptable substitute.
- Tea Strength: Adjust the strength of your tea to your liking. If you prefer a stronger tea flavor, use more tea bags or loose-leaf tea when brewing.
- Milk Options: Feel free to experiment with different types of milk. Almond milk, soy milk, oat milk, and coconut milk all work well.
- Sweetness Level: The sweetness of the bubble tea is entirely up to you. Adjust the amount of vanilla syrup to your taste. You can also use other sweeteners, such as honey or agave nectar.
- Add-ins: Get creative with your bubble tea! You can add other flavors, such as fruit purees, chocolate syrup, or even a splash of rum extract for a boozy twist (for adults only, of course!).
- Making Pearls Ahead: You can make the tapioca pearls ahead of time, but they are best served fresh. If you do make them in advance, store them in the sugar syrup in the refrigerator. They may harden slightly, but you can soften them by microwaving them for a few seconds before serving.
- Adjusting the Recipe: This recipe is easily adaptable. You can double or triple the ingredients to make a larger batch.
- Tapioca Pearls Sticking Together: If your tapioca pearls are sticking together, make sure you are cooking them in plenty of boiling water and stirring them occasionally. Also, transferring them to the sugar syrup immediately after cooking will help prevent them from sticking.
- Dough Too Dry: If your tapioca dough is too dry and crumbly, add a tiny bit of water, a teaspoon at a time, until it comes together.
- Dough Too Sticky: If your tapioca dough is too sticky, add a little more tapioca starch, a teaspoon at a time, until it is easier to handle.
- Prep Time: 30 minutes
- Cook Time: 45 minutes