Whipped shortbread cookies, those melt-in-your-mouth morsels of buttery goodness, are about to become your new favorite holiday tradition! Forget complicated recipes and endless chilling times. This recipe delivers the most delicate, crumbly, and utterly irresistible shortbread you’ve ever tasted, and it’s surprisingly simple to make.
Shortbread itself boasts a rich history, originating in Scotland centuries ago. It was initially a biscuit bread made from leftover dough, sweetened and baked into a hard, dry rusk. Over time, butter replaced yeast, transforming it into the rich, crumbly treat we know and love today. While traditional shortbread is undeniably delicious, these whipped shortbread cookies take the texture to a whole new level.
What makes these cookies so special? It’s all in the technique! Whipping the butter and sugar creates an airy, light batter that bakes into an incredibly tender cookie. People adore these cookies because they offer a delightful combination of textures a delicate crispness on the edges and a soft, almost creamy center. Plus, their subtle sweetness and buttery flavor make them the perfect accompaniment to a cup of tea or coffee. They are also incredibly convenient to make, requiring only a handful of ingredients and minimal effort. Get ready to impress your friends and family with these delightful little bites of heaven!

Ingredients:
- 1 cup (2 sticks) unsalted butter, softened
- 1/2 cup powdered sugar, plus more for dusting
- 1/4 cup cornstarch
- 2 cups all-purpose flour
- 1/4 teaspoon salt
- 1 teaspoon vanilla extract (optional, but recommended)
Preparing the Dough:
- Cream the Butter and Sugar: In a large bowl, using an electric mixer (either a stand mixer or a hand mixer), cream together the softened butter and powdered sugar until light and fluffy. This usually takes about 3-5 minutes. Don’t rush this step; it’s crucial for achieving that melt-in-your-mouth texture. Scrape down the sides of the bowl occasionally to ensure everything is evenly incorporated. You want the mixture to be pale and airy.
- Add Vanilla Extract: If you’re using vanilla extract, add it now and mix until just combined. The vanilla adds a subtle warmth that complements the buttery flavor of the shortbread.
- Combine Dry Ingredients: In a separate medium bowl, whisk together the cornstarch, flour, and salt. Whisking ensures that the cornstarch and salt are evenly distributed throughout the flour, which is important for the texture and flavor of the cookies.
- Gradually Add Dry Ingredients to Wet Ingredients: Gradually add the dry ingredients to the creamed butter and sugar mixture, mixing on low speed. Add the dry ingredients in about three additions, mixing until just combined after each addition. Be careful not to overmix the dough, as this can develop the gluten in the flour and result in tough cookies. The dough should come together into a soft, slightly crumbly ball. If the dough seems too dry, you can add a teaspoon of milk or water at a time until it comes together.
- Chill the Dough (Important!): Wrap the dough in plastic wrap and flatten it into a disc. This helps it chill more evenly. Refrigerate the dough for at least 30 minutes, or up to 2 hours. Chilling the dough is essential because it allows the butter to solidify, which prevents the cookies from spreading too much during baking and helps them retain their shape. It also makes the dough easier to handle.
Shaping and Baking the Cookies:
- Preheat Oven and Prepare Baking Sheets: Preheat your oven to 325°F (160°C). Line two baking sheets with parchment paper. Parchment paper prevents the cookies from sticking to the baking sheets and makes cleanup a breeze.
- Roll Out the Dough (Optional): On a lightly floured surface, roll out the chilled dough to about 1/4-inch thickness. Use cookie cutters to cut out desired shapes. If you prefer, you can skip the rolling and cutting and simply shape the dough into small balls or logs.
- Shape the Cookies (Alternative Method): For a more rustic look, or if you prefer not to roll out the dough, you can scoop out rounded tablespoons of dough and gently roll them into balls. Place the balls on the prepared baking sheets, leaving about 1 inch of space between each cookie. You can also press the balls down slightly with the back of a fork to flatten them.
- Dock the Cookies (Important!): Use a fork to prick the tops of the cookies several times. This is called “docking” and it helps to prevent the cookies from puffing up too much during baking. It also gives them a more even texture.
- Bake the Cookies: Bake the cookies for 12-15 minutes, or until the edges are lightly golden brown. The cookies should be pale in color, not deeply browned. Keep a close eye on them, as they can burn easily.
- Cool the Cookies: Remove the baking sheets from the oven and let the cookies cool on the baking sheets for a few minutes before transferring them to a wire rack to cool completely.
Finishing Touches:
- Dust with Powdered Sugar: Once the cookies are completely cool, dust them generously with powdered sugar. This adds a touch of sweetness and makes them look even more appealing. You can use a sifter or a small strainer to evenly distribute the powdered sugar.
- Optional Glaze: For an extra touch of sweetness and elegance, you can drizzle the cooled cookies with a simple glaze made from powdered sugar and milk or lemon juice. To make the glaze, whisk together 1 cup of powdered sugar with 2-3 tablespoons of milk or lemon juice until smooth. Drizzle the glaze over the cookies and let it set before serving.
- Storage: Store the cooled cookies in an airtight container at room temperature for up to 5 days. They can also be frozen for longer storage. To freeze, place the cookies in a single layer on a baking sheet and freeze until solid. Then, transfer them to a freezer-safe bag or container. Thaw the cookies at room temperature before serving.
Tips for Perfect Whipped Shortbread:
- Use Softened Butter: Make sure the butter is softened to room temperature before creaming it with the sugar. This will ensure that the mixture is light and fluffy.
- Don’t Overmix: Overmixing the dough can develop the gluten in the flour and result in tough cookies. Mix until just combined.
- Chill the Dough: Chilling the dough is essential for preventing the cookies from spreading too much during baking.
- Dock the Cookies: Docking the cookies with a fork helps to prevent them from puffing up too much during baking.
- Bake at a Low Temperature: Baking the cookies at a low temperature ensures that they bake evenly and don’t brown too quickly.
- Cool Completely: Let the cookies cool completely before dusting them with powdered sugar. This will prevent the powdered sugar from melting.
- Experiment with Flavors: Feel free to experiment with different flavors. You can add a pinch of cinnamon, nutmeg, or cardamom to the dough. You can also add chopped nuts, chocolate chips, or dried fruit.
- Adjust Sweetness: If you prefer a less sweet cookie, you can reduce the amount of powdered sugar in the dough.
- Gluten-Free Option: To make gluten-free whipped shortbread, substitute the all-purpose flour with a gluten-free all-purpose flour blend. Make sure the blend contains xanthan gum for binding.
- Vegan Option: To make vegan whipped shortbread, substitute the butter with a vegan butter alternative. Make sure the vegan butter is softened to room temperature before creaming it with the sugar.
Troubleshooting:
- Cookies Spreading Too Much: If your cookies are spreading too much during baking, it could be because the butter was too soft, the dough wasn’t chilled enough, or the oven temperature was too high. Try chilling the dough for a longer period of time, using slightly colder butter, and lowering the oven temperature.
- Cookies Too Dry: If your cookies are too dry, it could be because you added too much flour or overbaked them. Try adding a teaspoon of milk or water to the dough if it seems too dry. Also, be careful not to overbake the cookies.
- Cookies Too Tough: If your cookies are too tough, it could be because you overmixed the dough. Mix until just combined.
- Cookies Burning: If your cookies are burning, it could be because the oven temperature is too high or the cookies are too close to the heating element. Lower the oven temperature and move the baking sheet to a lower rack in the oven.
Variations:
- Lemon Whipped Shortbread: Add the zest of one lemon to the dough for a bright, citrusy flavor.
- Chocolate Chip Whipped Shortbread: Add 1/2 cup of mini chocolate chips to the dough.
- Pecan Whipped Shortbread: Add 1/2 cup of chopped pecans to the dough.
- Cinnamon Whipped Shortbread: Add 1 teaspoon of ground cinnamon to the dough.
- Lavender Whipped Shortbread: Add 1 teaspoon of dried lavender buds to the dough.
Enjoy your delicious homemade whipped shortbread cookies! They are perfect for sharing with friends and family, or for enjoying as a special treat all to yourself.
Conclusion:
This isn’t just another cookie recipe; it’s an invitation to experience melt-in-your-mouth bliss. The delicate, crumbly texture of these whipped shortbread cookies is truly unparalleled, and the subtle sweetness makes them utterly irresistible. Trust me, once you take that first bite, you’ll understand why I’m so passionate about sharing this recipe with you. It’s a classic for a reason, but the whipping technique elevates it to something truly special.
Why is this a must-try? Because it’s simple elegance at its finest. You don’t need fancy ingredients or complicated techniques to create something extraordinary. The recipe relies on the quality of the butter and the patience you invest in the whipping process. The result is a cookie that’s light, airy, and unbelievably tender. It’s the perfect treat for any occasion, from a cozy afternoon tea to a festive holiday gathering. Plus, the satisfaction of making something so delicious from scratch is incredibly rewarding.
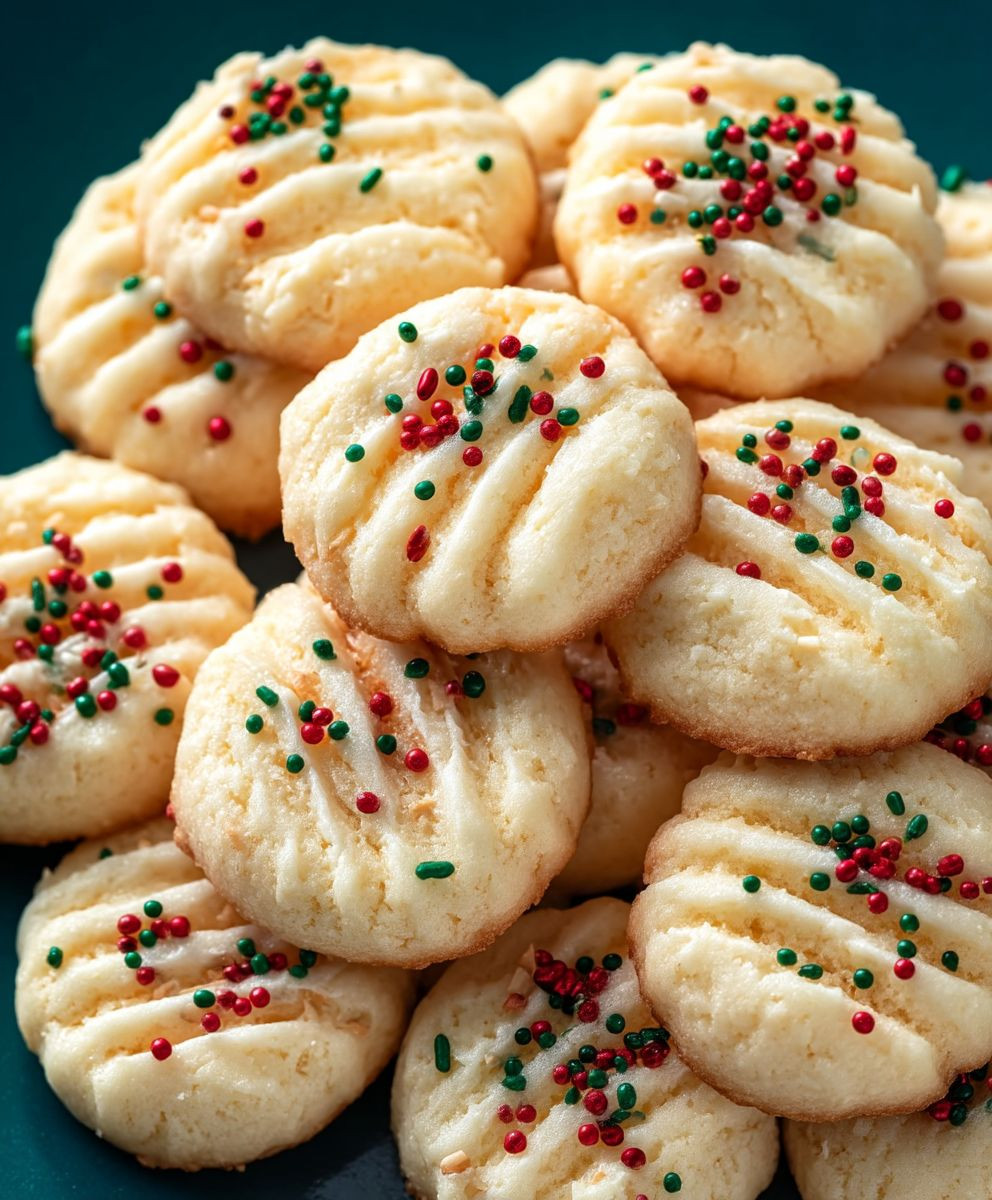
But the best part? The versatility! While the classic recipe is divine on its own, there are so many ways to customize these cookies to your liking. For a festive touch, try adding a sprinkle of colored sugar before baking. Or, for a more sophisticated flavor, incorporate a teaspoon of vanilla extract or almond extract into the dough. You could even dip the cooled cookies in melted chocolate and sprinkle them with chopped nuts or sea salt.
Serving suggestions are endless. These whipped shortbread cookies are delightful on their own with a cup of coffee or tea. They also make a wonderful addition to a dessert platter or a homemade gift basket. Imagine presenting a beautifully wrapped box of these cookies to a friend or loved one it’s a gesture that’s sure to be appreciated. For a truly decadent experience, try crumbling them over ice cream or using them as a base for mini cheesecakes.
And don’t be afraid to experiment! Perhaps you’d like to try adding a hint of citrus zest, like lemon or orange, to brighten the flavor. Or maybe you’re a fan of spices a pinch of cinnamon or nutmeg would add a warm, comforting touch. The possibilities are truly endless, so let your creativity shine!
I truly believe that everyone should have this recipe in their repertoire. It’s a reliable, foolproof way to create a truly memorable treat. So, what are you waiting for? Gather your ingredients, preheat your oven, and get ready to experience the magic of whipped shortbread cookies.
I’m so excited for you to try this recipe and discover the joy of baking these delightful cookies. Once you do, I’d love to hear about your experience! Did you make any variations? What did you think of the texture? What was your favorite way to serve them? Please, share your thoughts and photos in the comments below. Your feedback is invaluable, and it helps me continue to create and share recipes that you’ll love. Happy baking! I can’t wait to hear all about your whipped shortbread cookies adventures!
Whipped Shortbread Cookies: The Ultimate Guide to Baking Perfection
Melt-in-your-mouth whipped shortbread cookies that are light, buttery, and perfect for any occasion. These cookies are easy to make and require just a few simple ingredients.
Ingredients
- 1 cup (2 sticks) unsalted butter, softened
- 1/2 cup powdered sugar, plus more for dusting
- 1/4 cup cornstarch
- 2 cups all-purpose flour
- 1/4 teaspoon salt
- 1 teaspoon vanilla extract (optional, but recommended)
Instructions
- In a large bowl, using an electric mixer (either a stand mixer or a hand mixer), cream together the softened butter and powdered sugar until light and fluffy. This usually takes about 3-5 minutes. Scrape down the sides of the bowl occasionally to ensure everything is evenly incorporated. You want the mixture to be pale and airy.
- If you’re using vanilla extract, add it now and mix until just combined.
- In a separate medium bowl, whisk together the cornstarch, flour, and salt.
- Gradually add the dry ingredients to the creamed butter and sugar mixture, mixing on low speed. Add the dry ingredients in about three additions, mixing until just combined after each addition. Be careful not to overmix the dough. The dough should come together into a soft, slightly crumbly ball. If the dough seems too dry, you can add a teaspoon of milk or water at a time until it comes together.
- Wrap the dough in plastic wrap and flatten it into a disc. Refrigerate the dough for at least 30 minutes, or up to 2 hours.
- Preheat your oven to 325°F (160°C). Line two baking sheets with parchment paper.
- On a lightly floured surface, roll out the chilled dough to about 1/4-inch thickness. Use cookie cutters to cut out desired shapes. If you prefer, you can skip the rolling and cutting and simply shape the dough into small balls or logs.
- For a more rustic look, or if you prefer not to roll out the dough, you can scoop out rounded tablespoons of dough and gently roll them into balls. Place the balls on the prepared baking sheets, leaving about 1 inch of space between each cookie. You can also press the balls down slightly with the back of a fork to flatten them.
- Use a fork to prick the tops of the cookies several times.
- Bake the cookies for 12-15 minutes, or until the edges are lightly golden brown. The cookies should be pale in color, not deeply browned.
- Remove the baking sheets from the oven and let the cookies cool on the baking sheets for a few minutes before transferring them to a wire rack to cool completely.
- Once the cookies are completely cool, dust them generously with powdered sugar.
- For an extra touch of sweetness and elegance, you can drizzle the cooled cookies with a simple glaze made from powdered sugar and milk or lemon juice. To make the glaze, whisk together 1 cup of powdered sugar with 2-3 tablespoons of milk or lemon juice until smooth. Drizzle the glaze over the cookies and let it set before serving.
- Store the cooled cookies in an airtight container at room temperature for up to 5 days. They can also be frozen for longer storage. To freeze, place the cookies in a single layer on a baking sheet and freeze until solid. Then, transfer them to a freezer-safe bag or container. Thaw the cookies at room temperature before serving.
Notes
- Use softened butter for best results.
- Don’t overmix the dough.
- Chilling the dough is essential.
- Dock the cookies to prevent puffing.
- Bake at a low temperature.
- Cool completely before dusting with powdered sugar.
- Experiment with flavors like lemon zest, chocolate chips, or nuts.
- Adjust sweetness to your preference.
- Gluten-free and vegan options are available (see variations in original text).
- Troubleshooting tips are available in the original text for common issues like spreading, dryness, toughness, or burning.